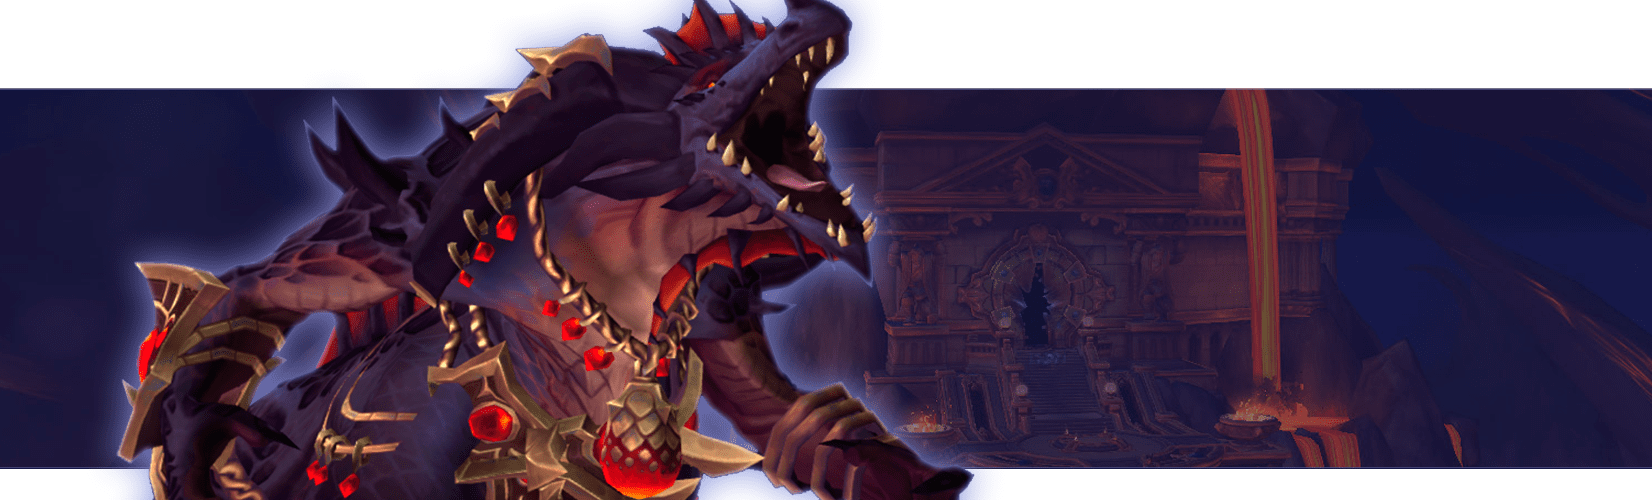
Vault of the Incarnates is the first Dragonflight raid where players will resist Raszageth, the first antagonist of the expansion. This raid also reappeared in the game in Drganoflight Season 4, in order to offer players high-level gear and new challenges in its Awakened version. In our WoW Vault of the Incarnates guide, you can learn all you need to know about Vault of the Incarnates bosses, quick tactics, loot, and all other important details.
 4.9
4.9Vault of the Incarnates Overview
In the past, Vault of the Incarnates was a titan prison where dragon’s friends kept the most dangerous and powerful beings. Now, Raszageth and Primalists breached this place to free proto-dragon siblings and together destroy five dragonflights and titan’s heritage.
WoW Vault of the Incarnates boss order:
- Eranog
- Terros
- The Primal Council (Embar Firepath, Opalfang, Kadros Icewrath, and Dathea Stormlash)
- Sennarth
- Dathea, Ascended
- Kurog Grimtotem
- Broodkeeper Diurna
- Raszageth
Like it was in the previous expansion, completing Vault of the Incarnates week by week allows you to skip almost all bosses. All you need to do is to take Vault of the Incarnates: Break a Few Eggs, complete it by collecting 3 Shard of the Greatstaff from Broodkeeper Diurna, and already on the next week, you can skip the raid except the Eranog, Terros, Broodkeeper Diurna, and Raszageth encounters. Note that for Normal, Heroic, and Mythic difficulties are available their own version of the quest you need to complete.
In Dragonflight Season 4, players will be able to complete the Awakened Vault of the Incarnates. These raids are harder than before, with even more powerful rewards. They also have a special raid affix that makes things even trickier.
Vault of the Incarnates Raid Release Schedule
The Vault of the Incarnates raid opened its doors in all difficulties except Looking for Raid on December 13th or 14th, depending on the region. For the first time, players from the Horde and Alliance could work together to combat the Primalist threat through cross-faction raiding.
However, those aiming for the Mythic Vault of the Incarnates Hall of Fame needed to ensure at least 16 out of their 20 raiders belonged to the same guild and faction.
Fans of Looking for Raid (LFR) had to wait a bit longer. The three wings of LFR Vault of the Incarnates opened in stages:
- Wing 1: Week of December 19th
- Wing 2: Week of January 2nd
- Wing 3: Week of January 16th
When is Vault of the Incarnates Raid Awakened?
Vault of the Incarnates will receive the Awakened Raid buff in weeks 1 and 4 of Season 4. You can also get into the Awakened Vault of the Incarnates from week 7, when all 3 raids will get the affix.
| Week | Raid Schedule |
|---|---|
| Week 1 | Vault of the Incarnates |
| Week 2 | Aberrus, The Shadowed Crucible |
| Week 3 | Amirdrassil, The Dreams Hope |
| Week 4 | Vault of the Incarnates |
| Week 5 | Aberrus, The Shadowed Crucible |
| Week 6 | Amirdrassil, The Dreams Hope |
| Week 7 | All Raids (Open access to all three) |
| Week 8+ | All Raids (Open access to all three) |
Vault of the Incarnates Entrance
You can find the raid entrance in Thaldraszus to the est of Tyrhold at /way 73.14 55.60. You can unlock the flying point right near Vault of the Incarnates, but who cares if you have your personal supersonic Dragonriding mount?

Also, without Dragoriding, it’s just impossible to get to the entrance because the platform is located at a decent height, and no one ground mount can’t help you.
Vault of the Incarnates Tactics
Now, let’s talk about the boss mechanics you will face in the raid. Please, be aware that this overview isn’t a detailed guide but a short cheat sheet you can use for preparation for the first tries. And if you encounter difficulties along the way, with our Single Bosses Kill, you will bypass any boss and be able to continue on your way.
Eranog Strategy
The first Vault of the Incarnates boss fight alternate standard phase with DPS-check intermission.
- During the phase, you should be focused on Flamerift spell that creates lava pools and summons adds you should kite toward the boss and kill. It’s important for all players under Flamerift effect to be in one place to drop pools compactly;
- The target of Molten Cleave should stay away from the raid group. Also, it will be better to spread to minimize damage;
- Healers should dispel Incinerating Roar;
- Tanks should replace each other at 4-8 Burning Wound stacks;
- Run from the marks on the ground, as usual;
- During intermission, all DPS should be focused on one add from the crowd to break the circle and run through it;
- In Heroic, stay away from the Molten Spikes when they appear and explode after;
- In Mythic, during intermission, you will face two circles of adds. First, kill one add in the inner circle, and repeat it with the second circle.
Terros Strategy
During the whole encounter, the boss will stay in the middle of the room, destroying a quarter of the platform every time he gains 100 energy. Interesting moment: you have a chance to loot Terros’s Captive Core you can exchange into Iskaara Trader’s Ottuk mount (also, you will need another item).
- One tank should always be near the boss to prevent Tectonic Barrage;
- For the raid group, it will be better to stack in one place to soak Rock Blast;
- On 100 boss energy, move away from Resonating Annihilation;
- Try to place Awakened Earth in one point to destroy them all with Concussive Slams cast;
- As always, watch the marks on the ground to avoid AoE damage.
Primal Council Strategy

To defeat these bosses, you will use their own abilities. Sounds interesting, right? Also, this encounter is a source of the rare Whispering Incarnate Icon trinket.
- Tanks should keep the bosses in one place while the raid group is spread;
- Stay away from other players when you are under Conductive Mark debuff and use Earthen Pillar to remove it;
- Clear the platform from the Earthen Pillars using Meteor Axes;
- Remove Primal Blizzard stacks running into Scorched Ground;
- You should cleave the bosses and kill them at one time to prevent your group from increasing the boss damage;
- Avoid the marks on the ground.
Dathea Strategy

You can get Eye of the Vengeful Hurricane from this boss, the second and last piece to get Iskaara Trader’s Ottuk mount. Also, during the fight, players should stand against the powers of the storm.
- During the first 80 seconds of the encounter raid group should be spread because of Conductive Mark;
- Track the Raging Tempest and moments when it changes position;
- Stay away from the tornadoes and measure out your trajectory during Cyclone;
- Don’t stay in the melee range during Cyclone;
- When Coalescing Storm spawns the adds, kill them and interrupt casts. Be aware that after death, add explode and push players away;
- In Heroic, there will be more adds.
Sennarth Strategy
The first boss of the raid with tier set tokens in the loot table. The fight will take place on several platforms, and Sennarth will try to push players off them.
- Keep spread to minimize the effect of Breath of Ice and Chilling Blast;
- Avoid tornadoes, move fast through the web, and use spider explosion to remove the web stacks;
- When the boss tries to push your group off the platform with Gossamer Burst, use big rocks to prevent it or stay on the web;
- Don’t stay in front of spider adds;
- Avoid all marks on the ground and track the blue plumes not to be pushed through them.
Kurog Grimtotem Strategy
This boss will change his abilities depending on which part of the platform he stays. Also, we have an intermission when the boss goes to the center.
- Start from the Altar of Storm zone and spread out to soak Lightning Crash;
- You can be in Storm zone until intermission start or move away to the Altar of Flame if you have 25 stacks on the boss;
- In the Flame zone, you should be spread or stay in one stack;
- During intermission, you should be focused on Thundering Ravager and Blazing Fiend after;
- When intermission ends, go to the Altar of Frost. RDD should stay in one stack and run in the middle point between ranged and melee to make Absolute Zero soaking easier;
- At 16-18 stacks on the boss, you should move to the Altar of Earth;
- Be spread to avoid Seismic Rupture;
- Ranged should be 10-20 yards from the boss to have time to deal with Erupting Bedrock;
- During the second intermission, kill the Frozen Destroyer first and Tectonic Crusher after;
- After, you should move to the Altar of Flame;
- In Heroic, moving one zone, you will face Primal Shift cast and debuff, which won’t let you cross the elemental threshold again.
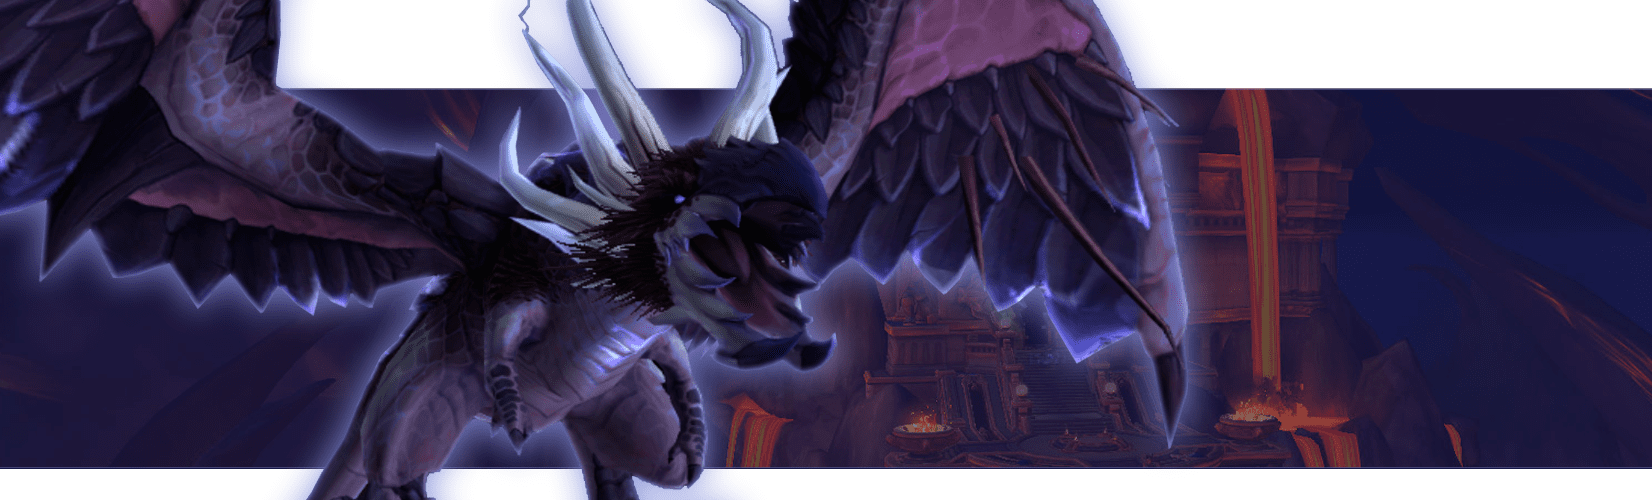
Broodkeeper Diurna Strategy
Raszageth tries to grow the new soldiers from captured dragon eggs, and Broodkeeper Diurna stands guard over them. Using encounter mechanics, players should prevent eggs from hatching, keep fighting with the boss, and adds at the same time.
- During the whole encounter, Diurna will try to hatch the proto-dragons from the eggs using Rapid Incubation ability. But right before the cast, the boss will drop her Greatstaff of the Broodkeeper staff on the ground, and players who move closer to it can use the action button to become a goal of Greatstaff’s Wrath to destroy eggs Diurna tries to hatch. During Phase 2 spell will be replaced by Empowered Greatstaff’s Wrath, aiming at more players. If you don’t destroy eggs, a powerful add will be spawned;
- Note that in Mythic, the staff beam also will create the void zones you should avoid;
- During the whole fight, adds will be spawned, and the second tank should keep them at the 50-yard distance from the boss to prevent buffing for adds. Some melee DD should help the tank to defeat them, and ranged also can position between the boss and adds to damage all of them;
- First, you should kill the Juvenile Frost Proto-Dragon adds because of Chilling Tantrum cast. Your second priority goal is Dragonspawn Flamebender because of Flame Sentry damage. Killing the Drakonid Stormbringer is also important because of Ionizing Charge. Finally, you can interrupt Primalist Mage casts to avoid the damage;
- You can dispel Icy Shroud, or just heal all players under absorb;
- Be spread during Wildfire cast and track the fire puddles;
- During Phase 2, you can position the boss in the middle of the platform. Now adds won’t get buffs staging near the Diurna.
Raszageth the Storm-Eater Strategy
The first Dragonflight big boss. Three phases, two intermissions. Thundering rage, Primalist, and proto-dragons, here we go.
- Avoid Lightning Breath frontal cast;
- Track Lightning Strikes to avoid them;
- Avoid Lightning Devastation areas;
- Players marked with Static Charge should run away from the raid and each other. One of the debuffs should be dropped right behind the raid group, and others near the edges of the platform;
- In Normal, all players can use Static Field to protect themselves from the Hurricane Wing effect. In other modes, they should use personal skills or consumables;
- Players should be spread to avoid Volatile Current. To avoid appearing adds, just interrupt them;
- Tanks should use the taunt swap after Electrified Jaws cast;
- During Phase 2, avoid the Hurricane Wing waves;
- Players under Fulminating Charge should stay away from the others, and other players should run away;
- During Stormsurge, players should destroy Raszagethh shield in 25 seconds. Also, you need to create two camps for the players with Positive or Negative Charges. Staging near the players with the same charge, you will get a damage buff;
- During Phase 3, players should kill the boss until Raging Storm destroys the platform;
- The tanks should use taunt swap after every Thunderous Blast cast during the third phase;
- During both intermission just focus on adds.
Awakened Vault of the Incarnates Drop
Vault of the Incarnates, when Awakened, offers max ilvl gear in Dragonflight Season 4. The higher the raid difficulty, the more valuable loot you will receive:
| Raid Difficulty | Item Level |
|---|---|
| Raid Finder | 480-489 |
| Normal | 493-502 |
| Heroic | 506-515 |
| Mythic | 519-528 |
And if you want to quickly get all the Awakened Raids Full Gear, then the Overgear team is ready to help you with this.
Awakened Vault of the Incarnates Tier Sets
| Class | Tier Set |
|---|---|
| Death Knight | Risen Nightmare’s Gravemantle |
| Demon Hunter | Screaming Torchfiend’s Brutality |
| Druid | Strands of the Autumn Blaze |
| Evoker | Scales of the Awakened |
| Hunter | Stormwing Harrier’s Camouflage |
| Mage | Wayward Chronomancer’s Clockwork |
| Monk | Wrappings of the Waking Fist |
| Paladin | Heartfire Sentinel’s Authority |
| Priest | The Furnace Seraph’s Verdict |
| Rogue | Lurking Specter’s Shadeweave |
| Shaman | Vision of the Greatwolf Outcast |
| Warlock | Sinister Savant’s Cursethreads |
| Warrior | Irons of the Onyx Crucible |
Awakened Vault of the Incarnates Rewards
You can receive many valuable rewards from the Awakened Vault of the Incarnates. Let’s look at what these rewards are and how you can get them:
- Normal Difficulty: Defeat all bosses in the three Awakened raids to earn the Awakening the Dragonflight Raids achievement and a cool flying mount called the Voyaging Wilderling’s Harness, perfect for exploring the vast lands of Azeroth.
- Heroic Difficulty: Beat the Awakened raids on Heroic difficulty to get the Heroic: Awakening the Dragonflight Raids achievement and a Awakened Hero title.
- Mythic Difficulty: Conquer the Mythic difficulty raids and earn the Mythic: Awakening the Dragonflight Raids achievement. This unlocks special teleports Path of the Primal Prison, Path of the Bitter Legacy, Path of the Scorching Dream, for each raid entrance, making it easier to jump right into the action.
Awakened Vault of the Incarnates Achievements
- Awakened Storms: Defeat all bosses on Normal difficulty while Vault of the Incarnates is an Awakened raid.
- Heroic: Awakened Storms: Defeat all bosses on Heroic difficulty while Vault of the Incarnates is an Awakened raid.
- Mythic: Awakened Storms: Defeat all bosses on Mythic difficulty while Vault of the Incarnates is an Awakened raid.
Vault of the Incarnates Drop
First of all, you should know that the WoW Vault of the Incarnates ilvl within raid difficulty mode became more flexible in Dragonflight. If, in the previous expansion, players could get higher level items only from the last bosses, now drop ilvl increases more often.
Also, now several bosses have unique drops of higher item levels. You can get rare rings from Eranog and Diurna, an Omni Trinket from the Primal Council, and a special bow from Raszageth (all items will have +6/+7 ilvl depending on basic ilvl on this difficulty).
| Boss | Normal | Heroic | Mythic | Rare Items |
|---|---|---|---|---|
| Eranog | 389 | 402 | 415 | 395/ 408/ 421 |
| Terros | 389 | 402 | 415 | |
| The Primal Council | 389 | 402 | 415 | 395/ 408/ 421 |
| Sennarth | 389 | 402 | 415 | |
| Dathea, Ascended | 395 | 408 | 421 | |
| Kurog Grimtotem | 395 | 408 | 421 | |
| Broodkeeper Diurna | 398 | 411 | 424 | 405/ 418/ 430 |
| Raszageth | 398 | 411 | 424 | 405/ 418/ 430 |
Vault of the Incarnates BoE Farming
Blizzard planned a new BoE farming system as another novelty but has not had time to implement it. And it’s good news because this novelty would mean the end of BoE farming in Dragonflight. After releasing a new system, players wouldn’t have a chance to loot valuable BoE items from thrash to sell at the auction or send to the alt. The only option is to loot BoE from mini-bosses called Lieutenants and only once per week, the same as with usual bosses.
At the same time, the BoE items pool should expand, so players can loot legs or bracers, for example, and even weapons or trinkets. Also, chances to get some BoE should be scaled with group size like regular bosses. So it is almost impossible not to see any BoE during the raid run.
But in Vault of the Incarnates, players can farm trash to get BoE items. And there is all possible loot.
| Slot | Item | Type |
|---|---|---|
| Chest | Brawler’s Earthen Cuirass | Leather Armor |
| Ring | Emissary’s Flamewrought Seal | Accessories |
| Shoulder | Frozen Claw Mantle | Mail Armor |
| Feet | Galvanic Gaiters | Leather Armor |
| Head | Greathelm of Horned Fury | Plate Armor |
| Waist | Lavamancer’s Ceremonial Waistguard | Mail Armor |
| Legs | Primal Seeker’s Leggings | Cloth Armor |
| Wrist | Primalist Warden’s Bracers | Plate Armor |
| Wrist | Woven Stone Bracelets | Cloth Armor |
Vault of the Incarnates Tier Set
Like it was in the last patches of Shadowlands, in Vault of the Incarnates, players can receive new class tier sets called Primalist. You can get powerful bonuses for your specialization by collecting 2 or 4 tier set pieces. There is the full list of sets for all classes:
- Death Knight: Haunted Frostbrood Remains
- Demon Hunter: Skybound Avenger’s Flightwear
- Druid: Lost Landcaller’s Vesture
- Evoker: Scales of the Awakened
- Hunter: Stormwing Harrier’s Camouflage
- Mage: Bindings of the Crystal Scholar
- Monk: Wrappings of the Waking Fist
- Paladin: Virtuous Silver Cataphract
- Priest: Draconic Hierophant’s Finery
- Rogue: Vault Delver’s Toolkit
- Shaman: Elements of Infused Earth
- Warlock: Scalesworn Cultist’s Habit
- Warrior: Stones of the Walking Mountain
You can get them through Great Vault and Catalyst (from the second half of January 2023), but raiding is still an easier way to obtain a set.
As always, to get these powerful items, you should collect tokens from bosses you can transform into pieces of gear. Various classes have various tokens:
- Dreadful: Death Knight, Demon Hunter, Warlock
- Mystic: Druid, Hunter, Mage
- Venerated: Paladin, Priest, Shaman
- Zenith: Evoker, Monk, Rogue, Warrior
Depending on the slot, they will be dropped from specific bosses, so you won’t need to complete all encounters to get, for example, the last fourth token. The list of bosses:
- Helm: Raszageth the Storm-Eater
- Shoulders: Broodkeeper Diurna
- Chest: Kurog Grimtotem
- Hands: Dathea, Ascended
- Legs: Sennarath, the Cold Breath
If you want to learn more about the sets and bonuses they provide, check our Dragonflight Tier Sets Guide.
Vault of the Incarnates Loot Table
For your convenience, we have made tables depending on the type of armor and slot, so you can easily find all suitable gear pieces for your character.
Vault of the Incarnates Cloth Armor
| Slot | Item | Boss |
|---|---|---|
| Chest | Compressed Cultist’s Frock | Terros |
| Feet | Sandals of the Wild Sovereign | Raszageth the Storm-Eater |
| Hands | Eggtender’s Safety Mitts | Broodkeeper Diurna |
| Head | Councilor’s Terrormask | The Primal Council |
| Legs | Flametender’s Legwraps | Eranog |
| Legs | Primal Seeker’s Leggings | Trash BoE |
| Shoulder | Ascended Squallspires | Dathea, Ascended |
| Waist | Magatha’s Spiritual Sash | Kurog Grimtotem |
| Wrist | Chilled Silken Restraints | Sennarath, the Cold Breath |
Vault of the Incarnates Leather Armor
| Slot | Item | Boss |
|---|---|---|
| Chest | Brawler’s Earthen Cuirass | Trash BoE |
| Chest | Valdrakken Protector’s Turncoat | Eranog |
| Feet | Galvanic Gaiters | Trash BoE |
| Feet | Ice-Climber’s Cleats | Sennarath, the Cold Breath |
| Hands | Treacherous Totem Wraps | Kurog Grimtotem |
| Head | Windborne Hatsuburi | Dathea, Ascended |
| Legs | Loathsome Thunderhosen | Raszageth the Storm-Eater |
| Shoulder | Twisted Loam Spaulders | The Primal Council |
| Waist | Fused Shale Waistband | Terros |
| Wrist | Loyal Flametender’s Bracers | Broodkeeper Diurna |
Vault of the Incarnates Mail Armor
| Slot | Item | Boss |
|---|---|---|
| Chest | Embar’s Ashen Hauberk | The Primal Council |
| Feet | Daring Chasm-Leapers | Dathea, Ascended |
| Hands | Calamitous Shockguards | Raszageth the Storm-Eater |
| Head | Eranog’s Adorned Sallet | Eranog |
| Legs | Tassets of the Tarasek Legion | Broodkeeper Diurna |
| Shoulder | Faultline Mantle | Terros |
| Shoulder | Frozen Claw Mantle | Trash BoE |
| Waist | Lavamancer’s Ceremonial Waistguard | Trash BoE |
| Waist | Unnatural Dripstone Cinch | Sennarath, the Cold Breath |
| Wrist | Surging-Song Conductors | Kurog Grimtotem |
Vault of the Incarnates Plate Armor
| Slot | Item | Boss |
|---|---|---|
| Chest | Dathea’s Cyclonic Cage | Dathea, Ascended |
| Feet | Kurog’s Thunderhooves | Kurog Grimtotem |
| Hands | Diamond-Etched Gauntlets | Sennarath, the Cold Breath |
| Head | Gaze of the Living Quarry | Terros |
| Head | Greathelm of Horned Fury | Trash BoE |
| Legs | Opalfang’s Earthbound Legguards | The Primal Council |
| Shoulder | Scaldrons of Molten Might | Eranog |
| Waist | Matriarch’s Opulent Girdle | Broodkeeper Diurna |
| Wrist | Primalist Warden’s Bracers | Trash BoE |
| Wrist | Shackles of Titanic Failure | Raszageth the Storm-Eater |
Vault of the Incarnates One-Handed Weapon
| Type | Stat | Item | Boss |
|---|---|---|---|
| Dagger | Agility | Enduring Shard of Terros | Terros |
| Dagger | Agility | Ornamental Drakonid Claw | Broodkeeper Diurna |
| Dagger | Intellect | Stormlash’s Last Resort | Raszageth the Storm-Eater |
| Fist Weapon | Agility | Fist of the Grand Summoner | Kurog Grimtotem |
| Mace | Agility | Frostbreath Thumper | Sennarath, the Cold Breath |
| Mace | Strength | Maul of the Earthshaper | The Primal Council |
| Mace | Intellect | Scepter of Drastic Measures | Dathea, Ascended |
| Sword | Strength | Caustic Coldsteel Slicer | Sennarath, the Cold Breath |
| Warglaives | Agility | Infused Stormglaives | Dathea, Ascended |
Vault of the Incarnates Two-Handed Weapon
| Type | Stat | Item | Boss |
|---|---|---|---|
| Axe | Strength | Incarnate Sky-Splitter | Raszageth the Storm-Eater |
| Mace | Strength | Imbued Qalashi Crusher | The Primal Council |
| Polearm | Agility | Awak’mani, Grimtotem’s Legacy | Kurog Grimtotem |
| Staff | Agility | Awakened Planar Pillar | Terros |
| Staff | Intellect | Kharnalex, The First Light (for Evoker) | Broodkeeper Diurna |
| Staff | Intellect | Quake-Detecting Seismostaff | Terros |
Vault of the Incarnates Ranged Weapon
| Type | Stat | Item | Boss |
|---|---|---|---|
| Bow | Agility | Neltharax, Enemy of the Sky (Rare) | Raszageth the Storm-Eater |
| Crossbow | Agility | Searing Blazecaster | Eranog |
Vault of the Incarnates Off-Hand and Shield
| Type | Stat | Item | Boss |
|---|---|---|---|
| Off-hand | Intellect | Icewrath’s Channeling Conduit | The Primal Council |
| Off-hand | Intellect | Scripture of Primal Devotion | Kurog Grimtotem |
| Shield | Strength/ | Broodsworn Legionnaire’s Pavise | Broodkeeper Diurna |
| Shield | Strength/ | Flame Marshal’s Bulwark | Eranog |
Vault of the Incarnates Accessories
| Slot | Item | Boss |
|---|---|---|
| Back | Acid-Proof Webbing | Sennarath, the Cold Breath |
| Back | Decorated Commander’s Cindercloak | Eranog |
| Neck | Eye of the Vengeful Hurricane | Dathea, Ascended |
| Neck | Terros’s Captive Core | Terros |
| Ring | Emissary’s Flamewrought Seal | Trash BoE |
| Ring | Seal of Diurna’s Chosen (Rare) | Eranog |
| Ring | Seal of Filial Duty (Rare) | Broodkeeper Diurna |
Vault of the Incarnates Trinkets
| Stats | Item | Boss |
|---|---|---|
| Agility or Strength | All-Totem of the Master | Kurog Grimtotem |
| Intellect | Broodkeeper’s Promise | Broodkeeper Diurna |
| Intellect | Conjured Chillglobe | The Primal Council |
| Agility | Controlled Current Technique | Kurog Grimtotem |
| Agility or Strength | Decoration of Flame | Eranog |
| Intellect | Desperate Invoker’s Codex | Raszageth the Storm-Eater |
| Intellect | Iceblood Deathsnare | Sennarath, the Cold Breath |
| Agility or Strength | Manic Grieftorch | Broodkeeper Diurna |
| Strength | Rumbling Ruby | Terros |
| Agility or Strength or Intellect | Spiteful Storm | Raszageth the Storm-Eater |
| Agility or Strength | Storm-Eater’s Boon | Dathea, Ascended |
| Agility or Strength or Intellect | Whispering Incarnate Icon (Rare) | The Primal Council |
4.9So, it’s all we can tell you about VotI raid. Please, rate this guide if our article was helpful to you, and good luck in the Vault of the Incarnates.