In this The War Within Nerub’ar Palace guide, we’ll take a closer look at the details of this Season 1 raid. Nerub-ar Palace, starting September 10th, will bring WoW players new raid modifier buff, new bosses, and valuable rewards. Raid release date, location of main events, tactics for all bosses, top-tier loot, new tier sets for each class, and much more — all of it you can find in our comprehensive guide.
 4.9
4.9Nerub’ar Palace Overview

In the deep dark kingdom of Azj-Kahet, a mysterious and ominous place is hidden — The Nerub’ar Palace. Laying in the depths of the kingdom, it serves as the lair and throne hall for Ansurek, the spider demon Queen of the arachnid race. This is the very place, where you, champion, will find your first victory in The War Within Inaugural Raid.
To complete the Endgame Raid in Season 1 you need to defeat 8 Raid Bosses, each offering harder challenges and mechanics. But it is worth trying, as the Nerub’ar Ancient Palace is a place full of appealing rewards and elite achievements.
Nerub’ar Palace Difficulty Modifier Buff
In Season 1 The War Within, we will not only receive a chance to defeat the Nerubian Bosses, but also try Severed Strands buff, but what for? Let’s figure out.
Severed Strands serves as a soft nerf for the 1 Raid Tier in Season 1. The usage of this buff grants you damage and healing increase inside Nerub-ar Palace by 3%. This effect is expected to be stack up to 15 times, meaning the +45% damage and healing buff in its “final shape”, but for now max amount of stacks is 8, which equals to 18% bonus.
To use Severed Strands, you need to pick up The Finer Things quest and start collecting Nerub-ar Finery currency from Raid bosses. Total cap per week is 8.
While this buff may seem unnecessary for experiences players, they might be very helpful for newbies. Sometimes, WoW challenging Raids are overwhelming, so it’s nice to catch the lore without the need to tryhard.
Nerub’ar Palace Raid Release Schedule
Blizzard has officially announced the Nerub’ar Palace Raid release date — September 10th, 2024, when Season 1 starts.
So get ready to jump right in! On this day, the Raid will open its doors for the first time, but only a limited amount of content will be available. Let’s have a look at the detailed breakdown of the Raid launch:
| Date | Available Raid Content |
|---|---|
| September 10th | Heroic, Normal, Raid Finder Wing 1 |
| September 17th | Mythic, Raid Finder Wing 2, Story Difficulty |
| September 24th | Raid Finder Wing 3 |
How to Find Nerub’ar Palace
The Nerub’ar Palace location is at /way 73.14 55.60, in the City of Threads in Azj-Kahet.
Nerub’ar Palace Entrance
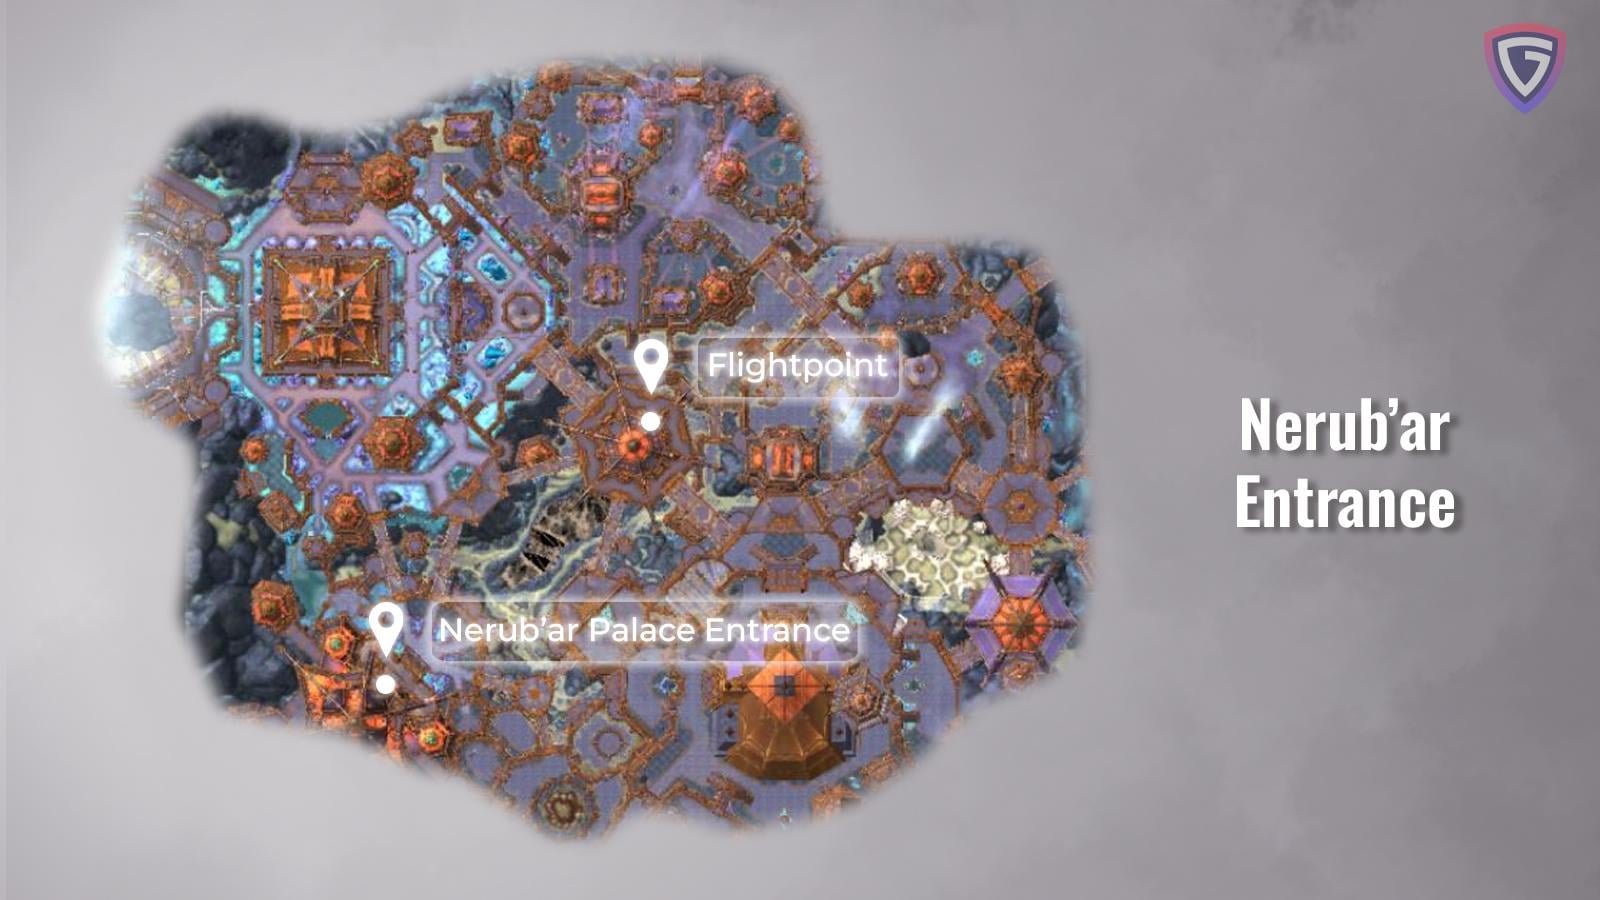
In the center of the city, you can find a flightpoint, so there should be no problem getting to the Raid location. We remind you, that with Warbands, you only need to unlock a flightpoint for one of your characters and the rest will be able to use it, which is convenient for raiding on alts. Have a look at our detailed schemes.

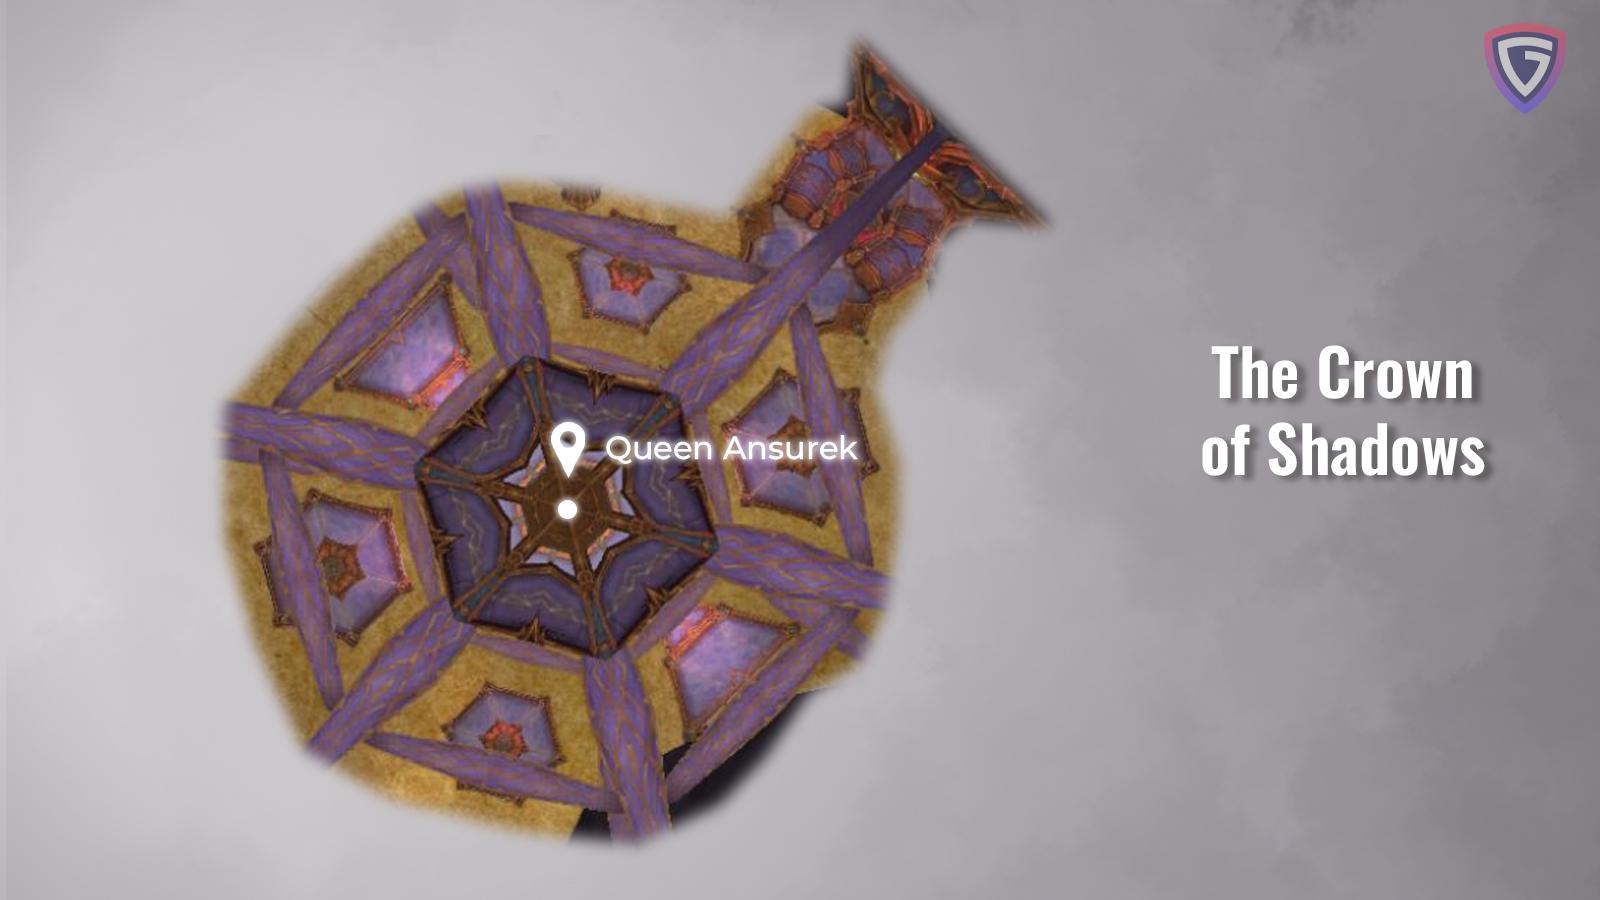
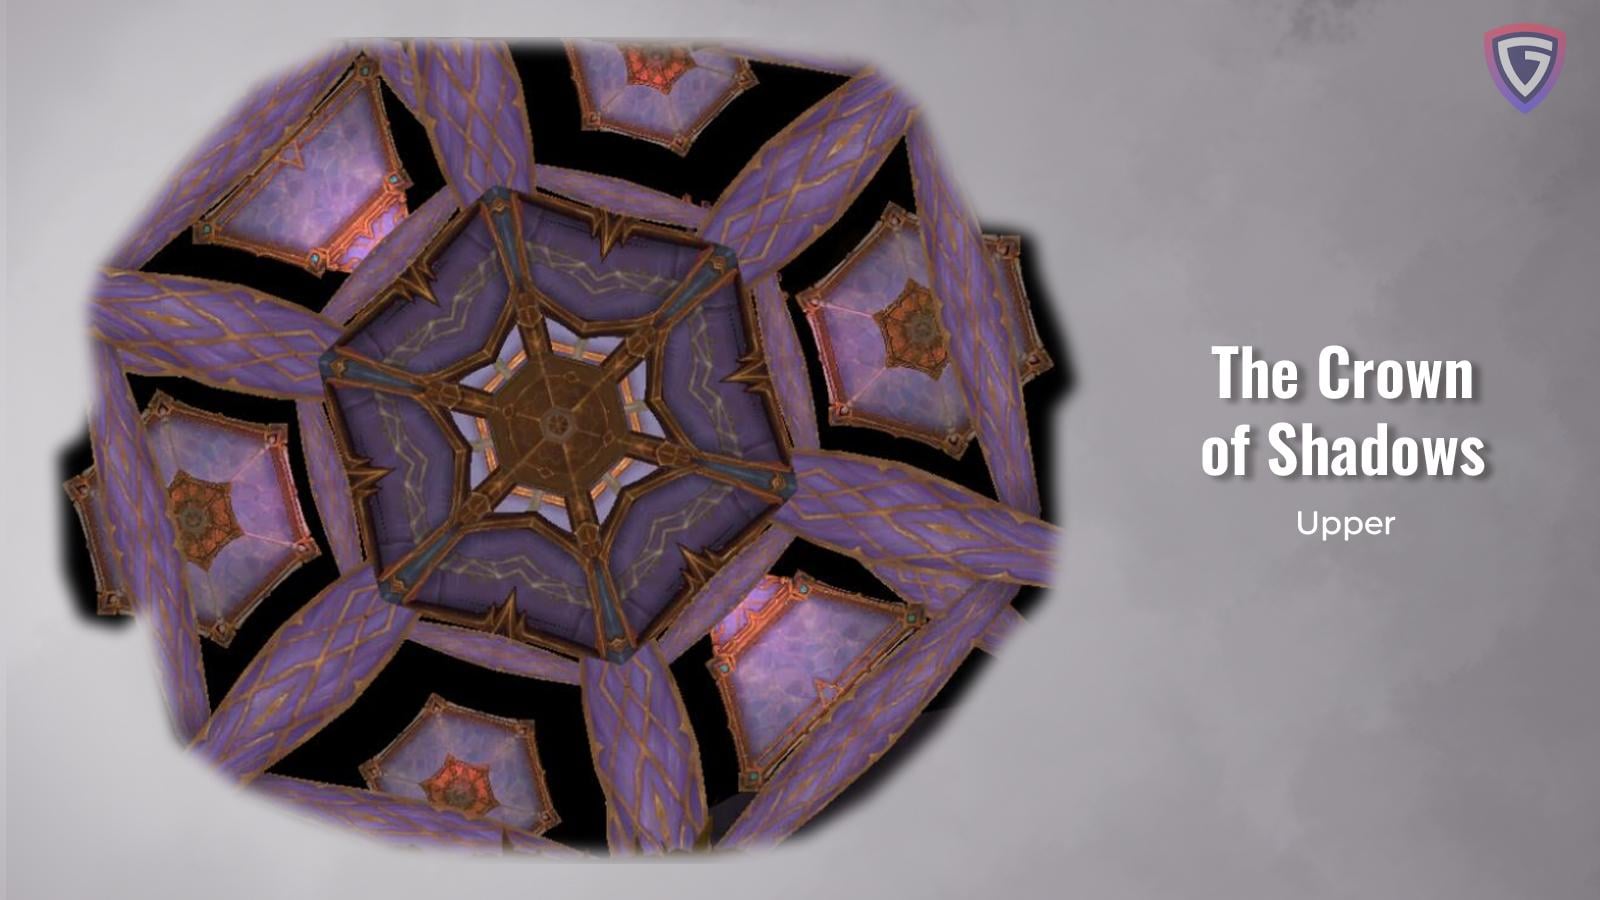
The Nerub’ar Palace Raid itself has six floors to explore and on each floor you’ll find 1-3 bosses. This Raid is full of mysterious secrets, so we want to share its plan with you.
Nerub-ar Palace Map Explained:
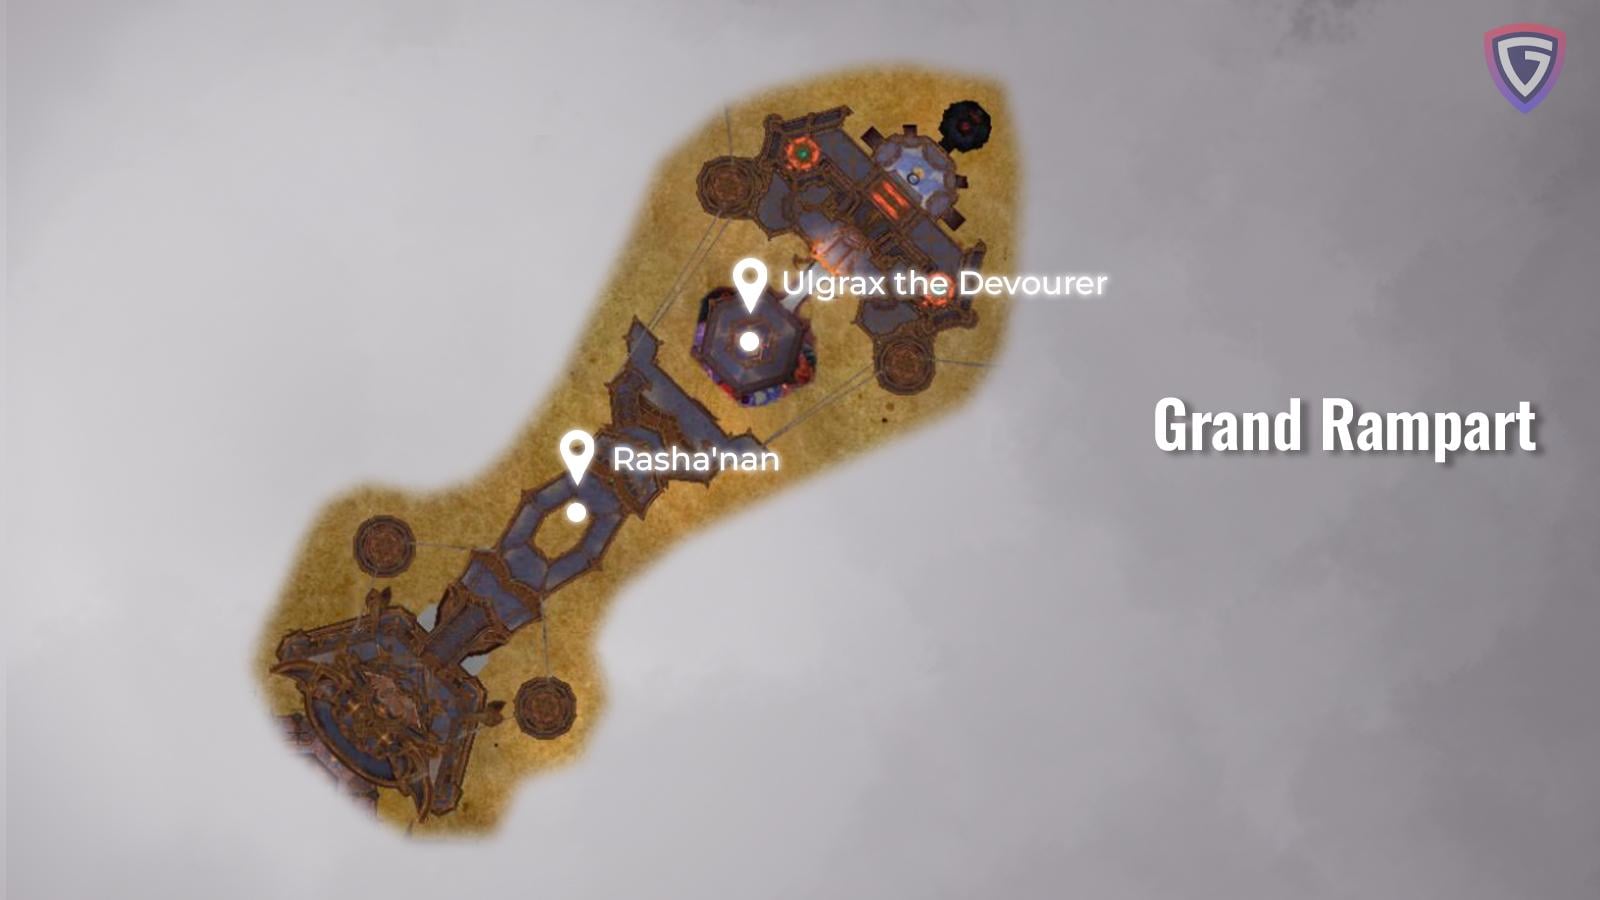
| Floor | Bosses |
|---|---|
| Grand Rampart | Ulgrax, The Devourer Rasha’nan |
| The Pulsing Pit | The Bloodbound Horror |
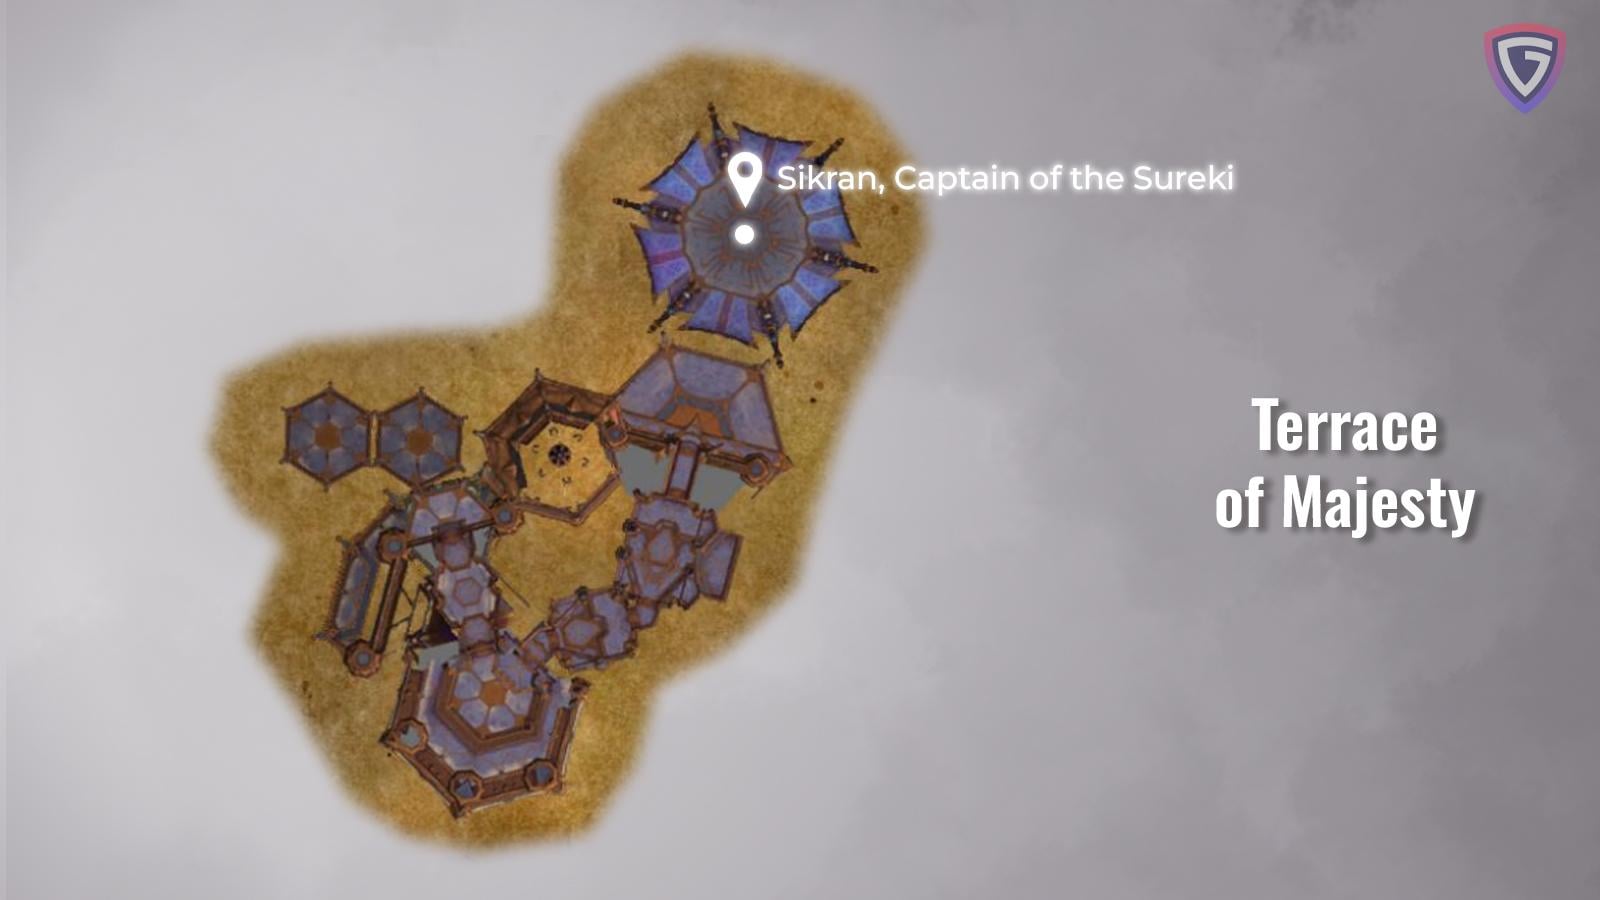
| Terrace of Majesty | Sikran, Captain of the Sureki |
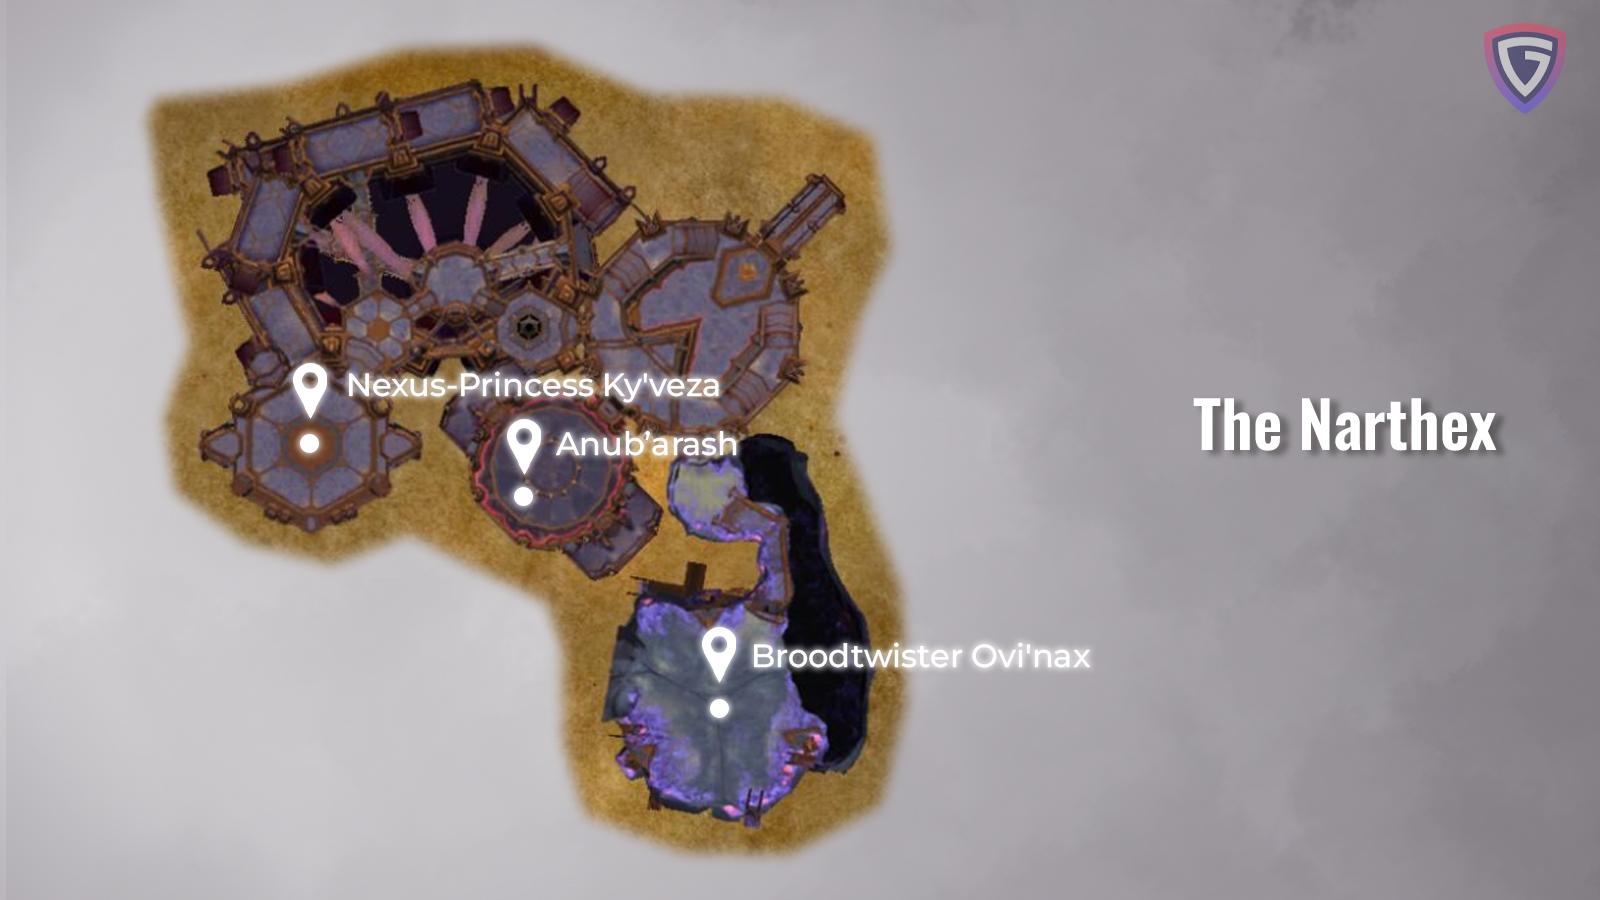
| The Narthex | Nexus-Princess Ky’veza The Silken Court: Anub’arash and Skeinspinner Takazj Bloodtwister Ovi’nax |
| The Crown of Shadows | Queen Ansurek |
| The Crow of Shadows: Upper Floor | — |
Nerub’ar Palace Loot Item Level
Like most raids, the quality of the rewards from Nerub’ar Palace is directly proportional to the raid difficulty setting you choose:
- Raid Finder: offers baseline 584-593 ilvl gear suitable for those just getting their feet wet.
- Normal: offers an upgrade, introducing you to the core mechanics and granting 597-606 ilvl gear.
- Heroic: increases the stakes and the rewards, e.g. 610-619 ilvl gear, challenging even seasoned raiders.
- Mythic: the pinnacle of difficulty, offering the highest item level gear (623-632 ilvl) and exclusive aesthetics.
The higher the raid difficulty, the better raid parties should perform. If you are afraid that the pugs in your raid will fail, ask our pro players to help you with Nerub’ar Palace Heroic completion.
In the table below, we have gathered all the gear tiers and ilvls. Before you start examining the table, have a look at the item level tiers and bosses. So, there are four item level tiers in Nerub-ar Palace.
- Bosses 1-2: Ulgrax, The Bloodbound Horror
- Bosses 3-4: Sikran, Rasha’nan
- Bosses 5-6: Broodtwister Ovi’nax (or Eggtender Ovi’nax), Nexus-Princess Ky’veza
- Bosses 7-8: The Silken Court, Queen Ansurek
| Difficulty | Type | Bosses 1-2 | Bosses 3-4 | Bosses 5-6 | Bosses 7-8 |
|---|---|---|---|---|---|
| LFR | Regular | 584 | 587 | 590 | 593 |
| Very Rare | — | 600 | 600 | 600 | |
| Normal | Regular | 597 | 600 | 603 | 606 |
| Very Rare | — | 613 | 613 | 613 | |
| Heroic | Regular | 610 | 613 | 616 | 619 |
| Very Rare | — | 626 | 626 | 626 | |
| Mythic | Regular | 623 | 626 | 629 | 632 |
| Very Rare | — | 639 | 639 | 639 |
Nerub’ar Palace Raid Tier Sets
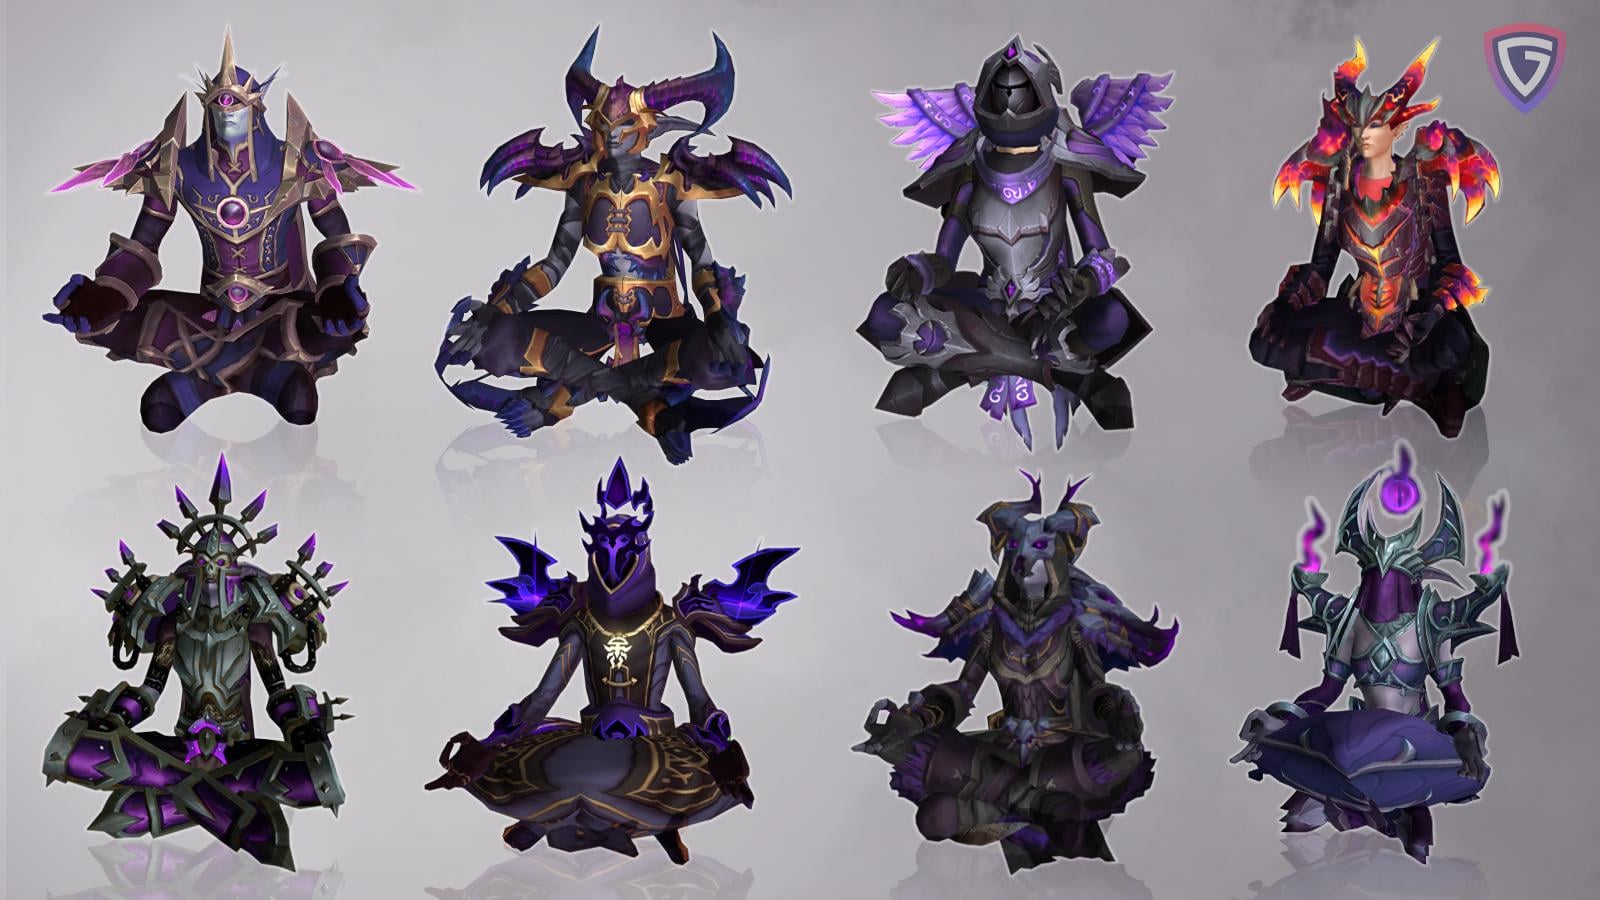
Nerub’ar Palace Raid is the best place to obtain Tier Set gear. In Season 1, each class receives new tier set bonuses and set appearances. Below, you can find a detailed overview of the Tier Set items. Click the spoiler and choose the class to examine.
Nerub’ar Palace Death Knight Tier Set — Exhumed Centurion’s Relics.
Nerub-ar Palace Death Knight Tier Set
| Slot | Item | Boss |
|---|---|---|
| Shoulders | Exhumed Centurion’s Spikes | Rasha’nan |
| Legs | Exhumed Centurion’s Chausses | Nexus-Princess Ky’veza |
| Head | Exhumed Centurion’s Galea | The Silken Court |
| Hands | Exhumed Centurion’s Gauntlets | Sikran, Captain of the Sureki |
| Chest | Exhumed Centurion’s Breastplate | Broodtwister Ovi’nax |
Nerub’ar Palace Demon Hunter Tier Set — Husk of the Hypogeal Nemesis.
Nerub-ar Palace Demon Hunter Tier Set
| Slot | Item | Boss |
|---|---|---|
| Shoulders | War-Mantle of the Hypogeal Nemesis | Rasha’nan |
| Legs | Pantaloons of the Hypogeal Nemesis | Nexus-Princess Ky’veza |
| Head | Impalers of the Hypogeal Nemesis | The Silken Court |
| Hands | Claws of the Hypogeal Nemesis | Sikran, Captain of the Sureki |
| Chest | Chestguard of the Hypogeal Nemesis | Broodtwister Ovi’nax |
Nerub’ar Palace Druid Tier Set — Mane of the Greatlynx.
Nerub-ar Palace Druid Tier Set
| Slot | Item | Boss |
|---|---|---|
| Shoulders | Maw of the Greatlynx | Rasha’nan |
| Legs | Leggings of the Greatlynx | Nexus-Princess Ky’veza |
| Head | Mask of the Greatlynx | The Silken Court |
| Hands | Eviscerators of the Greatlynx | Sikran, Captain of the Sureki |
| Chest | Hide of the Greatlynx | Broodtwister Ovi’nax |
Nerub’ar Palace Evoker Tier Set — Destroyer’s Scarred Wards.
Nerub-ar Palace Evoker Tier Set
| Slot | Item | Boss |
|---|---|---|
| Shoulders | Fumaroles of the Destroyer | Rasha’nan |
| Legs | Legguards of the Destroyer | Nexus-Princess Ky’veza |
| Head | Horns of the Destroyer | The Silken Court |
| Hands | Rippers of the Destroyer | Sikran, Captain of the Sureki |
| Chest | Scales of the Destroyer | Broodtwister Ovi’nax |
Nerub’ar Palace Hunter Tier Set — Lightless Scavenger’s Necessities.
Nerub-ar Palace Hunter Tier Set
| Slot | Item | Boss |
|---|---|---|
| Shoulders | Lightless Scavenger’s Taxidermy | Rasha’nan |
| Legs | Lightless Scavenger’s Stalkings | Nexus-Princess Ky’veza |
| Head | Lightless Scavenger’s Skull | The Silken Court |
| Hands | Lightless Scavenger’s Mitts | Sikran, Captain of the Sureki |
| Chest | Lightless Scavenger’s Tunic | Broodtwister Ovi’nax |
Nerub’ar Palace Mage Tier Set — Sparks of Violet Rebirth.
Nerub-ar Palace Mage Tier Set
| Slot | Item | Boss |
|---|---|---|
| Shoulders | Beacons of Violet Rebirth | Rasha’nan |
| Legs | Coattails of Violet Rebirth | Nexus-Princess Ky’veza |
| Head | Hood of Violet Rebirth | The Silken Court |
| Hands | Jeweled Gauntlets of Violet Rebirth | Sikran, Captain of the Sureki |
| Chest | Slippers of Violet Rebirth | Broodtwister Ovi’nax |
Nerub’ar Palace Monk Tier Set — Gatecrasher’s Fortitude.
Nerub-ar Palace Monk Tier Set
| Slot | Item | Boss |
|---|---|---|
| Shoulders | Gatecrasher’s Enduring Effigy | Rasha’nan |
| Legs | Coattails of Violet Rebirth | Nexus-Princess Ky’veza |
| Head | Hood of Violet Rebirth | The Silken Court |
| Hands | Jeweled Gauntlets of Violet Rebirth | Sikran, Captain of the Sureki |
| Chest | Slippers of Violet Rebirth | Broodtwister Ovi’nax |
Nerub’ar Palace Paladin Tier Set — Entombed Seraph’s Radiance.
Nerub-ar Palace Paladin Tier Set
| Slot | Item | Boss |
|---|---|---|
| Shoulders | Entombed Seraph’s Plumes | Rasha’nan |
| Legs | Entombed Seraph’s Greaves | Nexus-Princess Ky’veza |
| Head | Entombed Seraph’s Casque | The Silken Court |
| Hands | Entombed Seraph’s Castigation | Sikran, Captain of the Sureki |
| Chest | Entombed Seraph’s Breastplate | Broodtwister Ovi’nax |
Nerub’ar Palace Priest Tier Set — Shards of Living Luster.
Nerub-ar Palace Priest Tier Set
| Slot | Item | Boss |
|---|---|---|
| Shoulders | Living Luster’s Dominion | Rasha’nan |
| Legs | Living Luster’s Trousers | Nexus-Princess Ky’veza |
| Head | Living Luster’s Semblance | The Silken Court |
| Hands | Living Luster’s Touch | Sikran, Captain of the Sureki |
| Chest | Living Luster’s Raiment | Broodtwister Ovi’nax |
Nerub’ar Palace Rogue Tier Set — K’areshi Phantom’s Bindings.
Nerub-ar Palace Rogue Tier Set
| Slot | Item | Boss |
|---|---|---|
| Shoulders | K’areshi Phantom’s Shoulderpads | Rasha’nan |
| Legs | K’areshi Phantom’s Leggings | Nexus-Princess Ky’veza |
| Head | K’areshi Phantom’s Emptiness | The Silken Court |
| Hands | K’areshi Phantom’s Grips | Sikran, Captain of the Sureki |
| Chest | K’areshi Phantom’s Nexus Wraps | Broodtwister Ovi’nax |
Nerub’ar Palace Shaman Tier Set — Waves of the Forgotten Reservoir.
Nerub-ar Palace Shaman Tier Set
| Slot | Item | Boss |
|---|---|---|
| Shoulders | Hexflame Coven’s Altar | Rasha’nan |
| Legs | Hexflame Coven’s Leggings | Nexus-Princess Ky’veza |
| Head | Hexflame Coven’s All-Seeing Eye | The Silken Court |
| Hands | Hexflame Coven’s Sleeves | Sikran, Captain of the Sureki |
| Chest | Hexflame Coven’s Ritual Harness | Broodtwister Ovi’nax |
Nerub’ar Palace Warlock Tier Set — Rites of the Hexflame Coven.
Nerub-ar Palace Warlock Tier Set
| Slot | Item | Boss |
|---|---|---|
| Shoulders | Hexflame Coven’s Altar | Rasha’nan |
| Legs | Hexflame Coven’s Leggings | Nexus-Princess Ky’veza |
| Head | Hexflame Coven’s All-Seeing Eye | The Silken Court |
| Hands | Hexflame Coven’s Sleeves | Sikran, Captain of the Sureki |
| Chest | Hexflame Coven’s Ritual Harness | Broodtwister Ovi’nax |
Nerub’ar Palace Warrior Tier Set — Warsculptor’s Masterwork.
Nerub-ar Palace Warrior Tier Set
| Slot | Item | Boss |
|---|---|---|
| Shoulders | Warsculptor’s Horned Spaulders | Rasha’nan |
| Legs | Warsculptor’s Cuisses | Nexus-Princess Ky’veza |
| Head | Warsculptor’s Barbute | The Silken Court |
| Hands | Warsculptor’s Crushers | Sikran, Captain of the Sureki |
| Chest | Warsculptor’s Furred Plastron | Broodtwister Ovi’nax |
For the purpose of sharing more details about these tier sets and their bonuses, we have prepared a comprehensive The War Within Tier Sets Guide, where you’ll find all the needed information.
Nerub’ar Palace Raid Loot Table
Nerub’ar Palace Raid offers high-level loot drops. You can get Raid gear depending on the difficulty level and boss, or Tier Set Tokens which can drop from Sikran, Captain of the Sureki, Rasha’nan, Broodtwister Ovi’nax, Nexus-Princess Ky’veza, and The Silken Court. But, let’s look at the Nerub’ar Palace loot options.
Raid Gear is not only good looking, but also grants Tier Set bonuses and can often be found in BiS gear lists. Thus, obtaining full gear from the raid is a primary objection. You can ask our team for the Nerub’ar Palace Full Gear, as our trained professionals know all the tactics and prepared for any encounter.
Accessories Drops
| Slot | Item | Boss |
|---|---|---|
| Back | Royal Emblem of Nerub-ar | Ulgrax the Devourer |
| Back | Wings of Shattered Sorrow | Rasha’nan |
| Finger | Key to the Unseeming | The Bloodbound Horror |
| Finger | Writhing Ringworm | Broodtwister Ovi’nax |
| Finger | Seal of the Poisoned Pact | Rasha’nan |
| Neck | Sureki Zealot’s Insignia | Sikran, Captain of the Sureki |
| Neck | Locket of Broken Memories | Rasha’nan |
| Neck | Silken Advisor’s Favor | The Silken Court |
Cloth Drops
| Slot | Item | Boss |
|---|---|---|
| Head | Devotee’s Discarded Headdress | Rasha’nan |
| Shoulder | Beacons of the False Dawn | The Bloodbound Horror |
| Chest | Bile-Soaked Harness | Ulgrax the Devourer |
| Wrist | Crunchy Intruder’s Wristband | Ulgrax the Devourer |
| Wrist | Skeinspinner’s Duplicitous Cuffs | The Silken Court |
| Hands | Bindings of the Starless Night | Nexus-Princess Ky’veza |
| Waist | Shattered Eye Cincture | The Bloodbound Horror |
| Waist | Acrid Ascendant’s Sash | Queen Ansurek |
| Legs | Voidspoken Sarong | Queen Ansurek |
| Feet | Cosmic-Tinged Treads | Sikran, Captain of the Sureki |
| Feet | Assimilated Eggshell Slippers | Broodtwister Ovi’nax |
Leather Drops
| Slot | Item | Boss |
|---|---|---|
| Helm | Beyond’s Dark Visage | The Bloodbound Horror |
| Shoulder | Frame of Felled Insurgents | Queen Ansurek |
| Chest | Omnivore’s Venomous Camouflage | Queen Ansurek |
| Wrist | Polluted Spectre’s Wraps | The Bloodbound Horror |
| Wrist | Sanguine Experiment’s Bandages | Broodtwister Ovi’nax |
| Hands | Thousand-Scar Impalers | The Silken Court |
| Waist | Devourer’s Taut Innards | Ulgrax the Devourer |
| Waist | Behemoth’s Eroded Cinch | Rasha’nan |
| Legs | Rebel’s Drained Marrowslacks | Ulgrax the Devourer |
| Feet | Chitin-Spiked Jackboots | Sikran, Captain of the Sureki |
| Feet | Fleeting Massacre Footpads | Nexus-Princess Ky’veza |
Mail Drops
| Slot | Item | Boss |
|---|---|---|
| Head | Final Meal’s Horns | Ulgrax the Devourer |
| Shoulder | Whispering Voidlight Spaulders | The Silken Court |
| Chest | Goresplattered Membrane | The Bloodbound Horror |
| Wrist | Throne Defender’s Bangles | Sikran, Captain of the Sureki |
| Wrist | Ky’veza’s Covert Clasps | Nexus-Princess Ky’veza |
| Hands | Clutches of Paranoia | Queen Ansurek |
| Waist | Lost Watcher’s Remains | The Bloodbound Horror |
| Waist | Accelerated Ascension Coil | Broodtwister Ovi’nax |
| Legs | Liquified Defector’s Leggings | Queen Ansurek |
| Feet | Undermoth-Lined Footpads | Ulgrax the Devourer |
| Feet | Rasha’nan’s Grotesque Talons | Rasha’nan |
Plate Drops
| Slot | Item | Boss |
|---|---|---|
| Head | Visor of the Evolved Captain | Sikran, Captain of the Sureki |
| Shoulder | Seasoned Earthen Boulderplates | Ulgrax the Devourer |
| Chest | Queenguards’s Carapace | Queen Ansurek |
| Wrist | Ravaged Lamplighter’s Manacles | Rasha’nan |
| Wrist | Devoted Offering’s Irons | Queen Ansurek |
| Hands | Black Blood Injectors | Broodtwister Ovi’nax |
| Waist | Greatbelt of the Hungerer | Ulgrax the Devourer |
| Waist | Nether Bounty’s Greatbelt | Nexus-Princess Ky’veza |
| Legs | Bloodbound Horror’s Legplates | The Bloodbound Horror |
| Feet | Boots of the Black Bulwark | The Bloodbound Horror |
| Feet | Shattershell Greaves | The Silken Court |
Trinket Drops
| Stats | Item | Boss |
|---|---|---|
| Primary Stat/ | Ovinax’s Mercurial Egg | Broodtwister Ovi’nax |
| Strength | Skyterror’s Corrosive Organ | Rasha’nan |
| Agility | Void Reaper’s Contract | Nexus-Princess Ky’veza |
| Agility/ | Foul Behemoth’s Chelicera | Ulgrax the Devourer |
| Agility/ | Sikran’s Endless Arsenal | Sikran, Captain of the Sureki |
| Haste | Treacherous Transmitter | Nexus-Princess Ky’veza |
| Intellect (Healing) | Creeping Coagulum | The Bloodbound Horror |
| Intellect | Aberrant Spellforge | The Bloodbound Horror |
| Critical Strike (Healing) | Gruesome Syringe | Broodtwister Ovi’nax |
| Agility/ | Swarmlord’s Authority | The Silken Court |
| Mastery | Spymaster’s Web | The Silken Court |
| Critical Strike | Mad Queen’s Mandate | Queen Ansurek |
Weapon Drops
Among the Nerub’ar Palace rewards you can find a variety of weapons, and here you can check whatever type you need.
One-Handed
| Type | Stat | Item | Boss |
|---|---|---|---|
| Axe | Strength | Ansurek’s Final Judgment | Queen Ansurek |
| Dagger | Agility | Blood-Kissed Kukri | The Bloodbound Horror |
| Dagger | Agility | Regicide | Nexus-Princess Ky’veza |
| Dagger | Intellect | Sovereign’s Disdain | Queen Ansurek |
| Fist Weapon | Agility | Venom-Etched Claw | Ulgrax the Devourer |
| Fist Weapon | Agility | Void Reaper’s Warp Blade | Nexus-Princess Ky’veza |
| Mace | Intellect | Scepter of Manifested Miasma | The Bloodbound Horror |
| Mace | Agility | Bludgeons of Blistering Wind | Rasha’nan |
| Sword | Strength | Duelist’s Dancing Steel | Sikran, Captain of the Sureki |
| Sword | Intellect | Flawless Phase Blade | Sikran, Captain of the Sureki |
| Warglaives | Agility | Predator’s Feasthooks | Rasha’nan |
Ranged
| Type | Stat | Item | Boss |
|---|---|---|---|
| Bow | Agility | Splintershot Silkbow | Sikran, Captain of the Sureki |
| Crossbow | Agility | Shade-Touched Silencer | Nexus-Princess Ky’veza |
Off-Hand and Shield
| Type | Stat | Item | Boss |
|---|---|---|---|
| Off-Hand | Intellect | Broodtwister’s Grim Catalyst | Broodtwister Ovi’nax |
| Shield | Strength/ | Husk of Swallowing Darkness | Ulgrax the Devourer |
| Shield | Strength/ | Crest of the Caustic Despot | Queen Ansurek |
Two-Handed
| Type | Stat | Item | Boss |
|---|---|---|---|
| Axe | Strength | Anub’arash’s Colossal Mandible | The Silken Court |
| Mace | Strength | Ulgrax’s Morsel-Masher | Ulgrax the Devourer |
| Polearm | Agility | Honored Executioner’s Perforator | Sikran, Captain of the Sureki |
| Staff | Agility | Spire of Transfused Horrors | Broodtwister Ovi’nax |
| Staff | Intellect | Takazj’s Entropic Edict | The Silken Court |
Rare Drops
Very Rare Raid Drops are what every player dreams of. These items usually have higher ilvl, and their owner receives an advantage over the others.
| Slot | Item | Boss |
|---|---|---|
| Necklace | Sureki Zealot’s Insignia | Sikran, Captain of the Sureki |
| Back | Wings of Shattered Sorrow | Rasha’nan |
| One-Handed Weapon | Void Reaper’s Warp Blade | Nexus-Princess Ky’veza |
| Finger | Seal of the Poisoned Pact | Queen Ansurek |
If you loot Sureki Zealot’s Insignia, you are the lucky one. This necklace is a special-effect item:
Receiving healing from allies has a high chance to restore 6250 mana to your ally and grant you both 279 Versatility for 10 sec.
Wings of Shattered Sorrow is another item with special effect, that can be equipped by ant role. The effect is:
Taking damage greater than 25% of your health grants you 1802 Avoidance and increases healing taken by 10% for 10 sec. This effect may only occur every 90 sec. Falling damage reduced. (1.5m cooldown)
Nerub’ar Palace Rewards
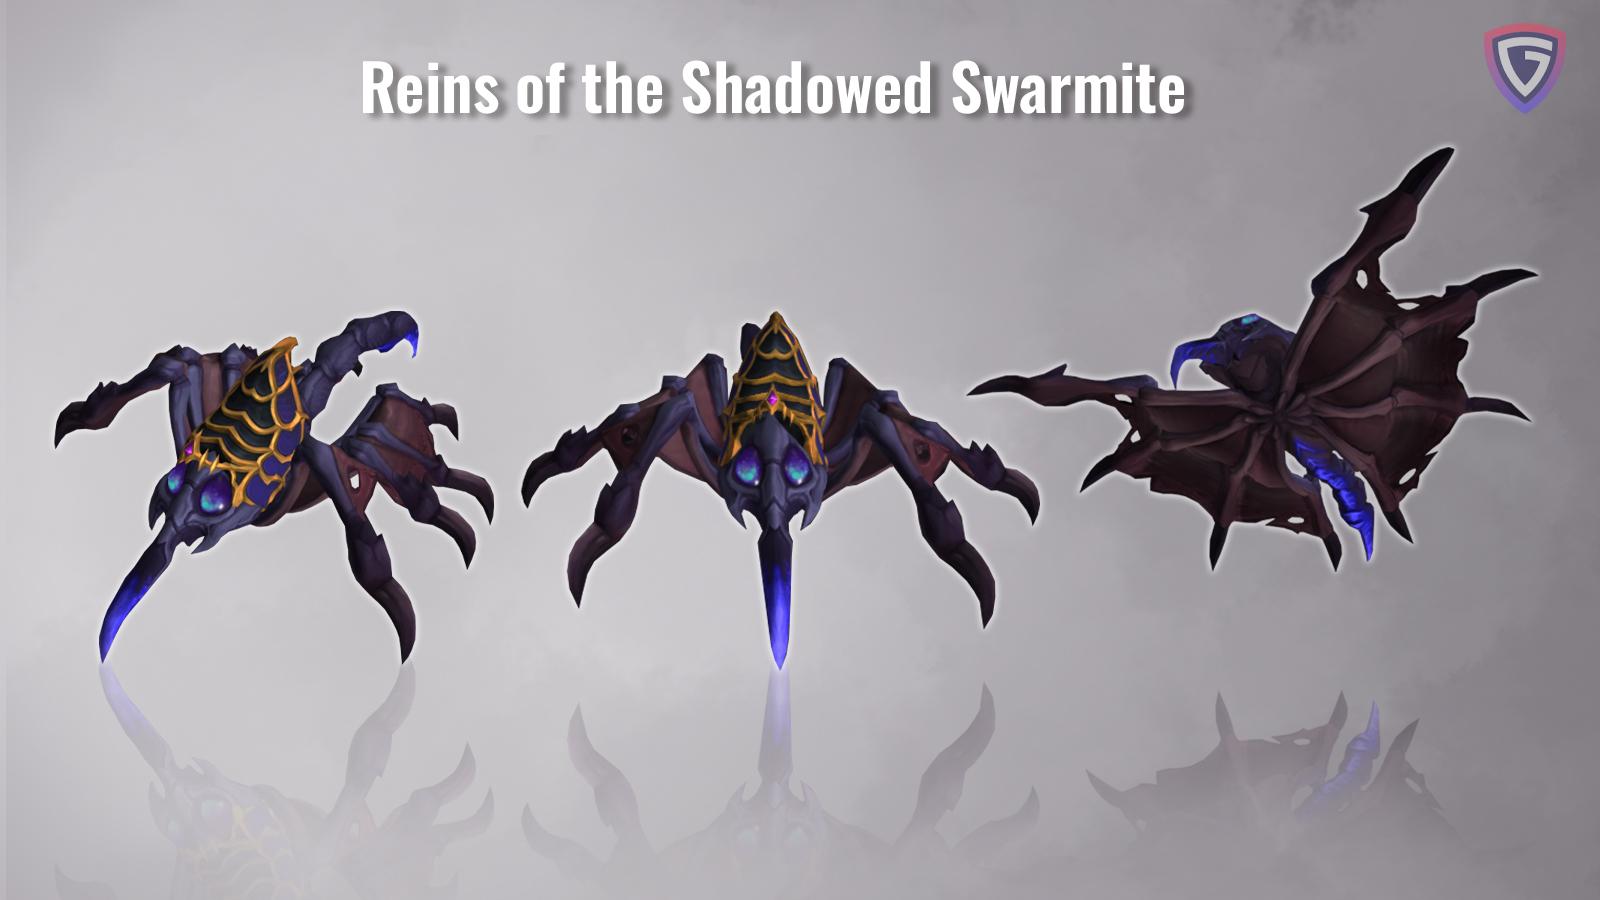
For completing all the raid challenges, you will be granted Glory of the Nerub-ar Raider meta-achievement. You need to go all the long way to get it, but the rewards is amazing — Reins of the Shadowed Swarmite mount.
This achievement is worth fighting for, yet you need to dedicate your time to inspecting the requirements and completing all the tasks. While you may find this idea boring, our team likes the challenges, and can do everything needed to get you Glory of the Nerub’ar Palace Raider.
Glory of the Nerub-ar Raider Requirements:
And here’s a list of the achievements, that need to be done beforehand:
- Slimy Yet Satisfying — Defeat Ulgrax The Devourer while keeping the Spider Silk Grub alive in Nerub-ar Palace on Normal difficulty or higher.
- You Can’t See Me — Defeat The Bloodbound Horror after all players are Slimed! and then defeat a Volatile Ooze in Nerub-ar Palace on Normal difficulty or higher.
- Sik Parry Bro — Defeat Sikran after all players are affected by Riposte in Nerub-ar Palace on Normal difficulty or higher.
- Cowabunga — Defeat Rasha’nan after all players ride a single wave per cast of Rolling Acid in Nerub-ar Palace on Normal difficulty or higher.
- Would You Still /
love Me if I Was a Worm… — Defeat Broodtwister Ovi’nax after everyone proves their / love to a Disheartened Worm in Nerub-ar Palace on Normal difficulty or higher. - Kill Streak — Defeat Nexus-Princess Ky’veza while she has an active Kill Streak in Nerub-ar Palace on Normal difficulty or higher.
- Love is in the Lair — Defeat the Silken Court after Anub’arash and Takazj have gained the Bond of Friendship in Nerub-ar Palace on Normal difficulty or higher.
- Missed ‘Em by That Much — Defeat Queen Ansurek after all players use Abyssal Conduits to travel underneath her during Frothing Gluttony in Nerub-ar Palace on Normal difficulty or higher.
Nerub’ar Palace Achievements
In addition to the aforementioned meta-achievement, you can also get some Nerub’ar Palace Completion Achievements:
Nerub’ar Palace Feats of Strength
For the best champions of Nerub’ar Palace in Season 1, there are special rewards, which show your skill and temper. First of all, there are well-known achievements, that many players crave to obtain ahead of others:
- Ahead of the Curve: Queen Ansurek — Defeat Queen Ansurek in Nerub-ar Palace on Heroic difficulty or higher, before the release of the next raid tier;
- Cutting Edge: Queen Ansurek — Defeat Queen Ansurek in Nerub-ar Palace on Mythic difficulty, before the release of the next raid tier. The Cutting Edge Achievement can be obtained with the help of our Raid Team, who know the tactics and constantly improve their knowledge, and killing a bunch of bosses is no big deal for them;
- Hall of Fame: Queen Ansurek — Among the first two hundred guilds worldwide to defeat Queen Ansurek on Mythic difficulty. Rewards: Famed Slayer Title (TBD).
Then, defeating Queen Ansurek on Heroic or Mythic difficulty, will bring you closer to obtaining the following achievement — The War Within Season 1: Spelunker Supreme. What needs to be done:
- 1600+ Rated PvP Rating;
- Attained 2000+ Mythic Plus rating;
- Defeated Queen Ansurek on Heroic or Mythic difficulty.
The reward will be Mark of the Spelunker Supreme, which can be exchanges for the best equipment at Ab’xal or Ip’xal near The Cobwebs in Nerub’ar. In fact, obtaining the Mark is time-consuming, and you need to be really skilled to do it quickly and easily. However, our team meets all the requirements and can supply you with the Mark of The Spelunker Supreme, so you don’t have to worry about spending days and night in the game.
And last but not least, for taking down Ansurek on Mythic difficulty, you’ll make a step closer to the Web-Wrapped in the Finest Silks achievement. For this, you need to complete one of the following achievements or feats of strength:
As a reward, you’ll get new visual effect for Nerub’ar Palace class set appearances — Luminous Nerubian Catalyst Stone.
Nerub’ar Palace Raid Tactics
When entering Nerub’ar Palace Raid, you must be prepared for the boss’s complex mechanics and know the tactics to allow a smooth run and avoid unnecessary wipes. Here, you can find an overview of the challenges. We are going to keep this section updated when the latest tactics will arise.
All of the raid bosses need a special approach, planned tactics and personal skills. Sometimes it happens so, that the raid is stuck at a particular boss for weeks just because the boss fight doesn’t go as planned or the abilities are too tough to get used to. In this case, you can ask for Nerub’ar Palace Single Bosses take downs and deal with unnoying monsters.
For now, let’s have a look at the Raid Boss Encounter Journal:
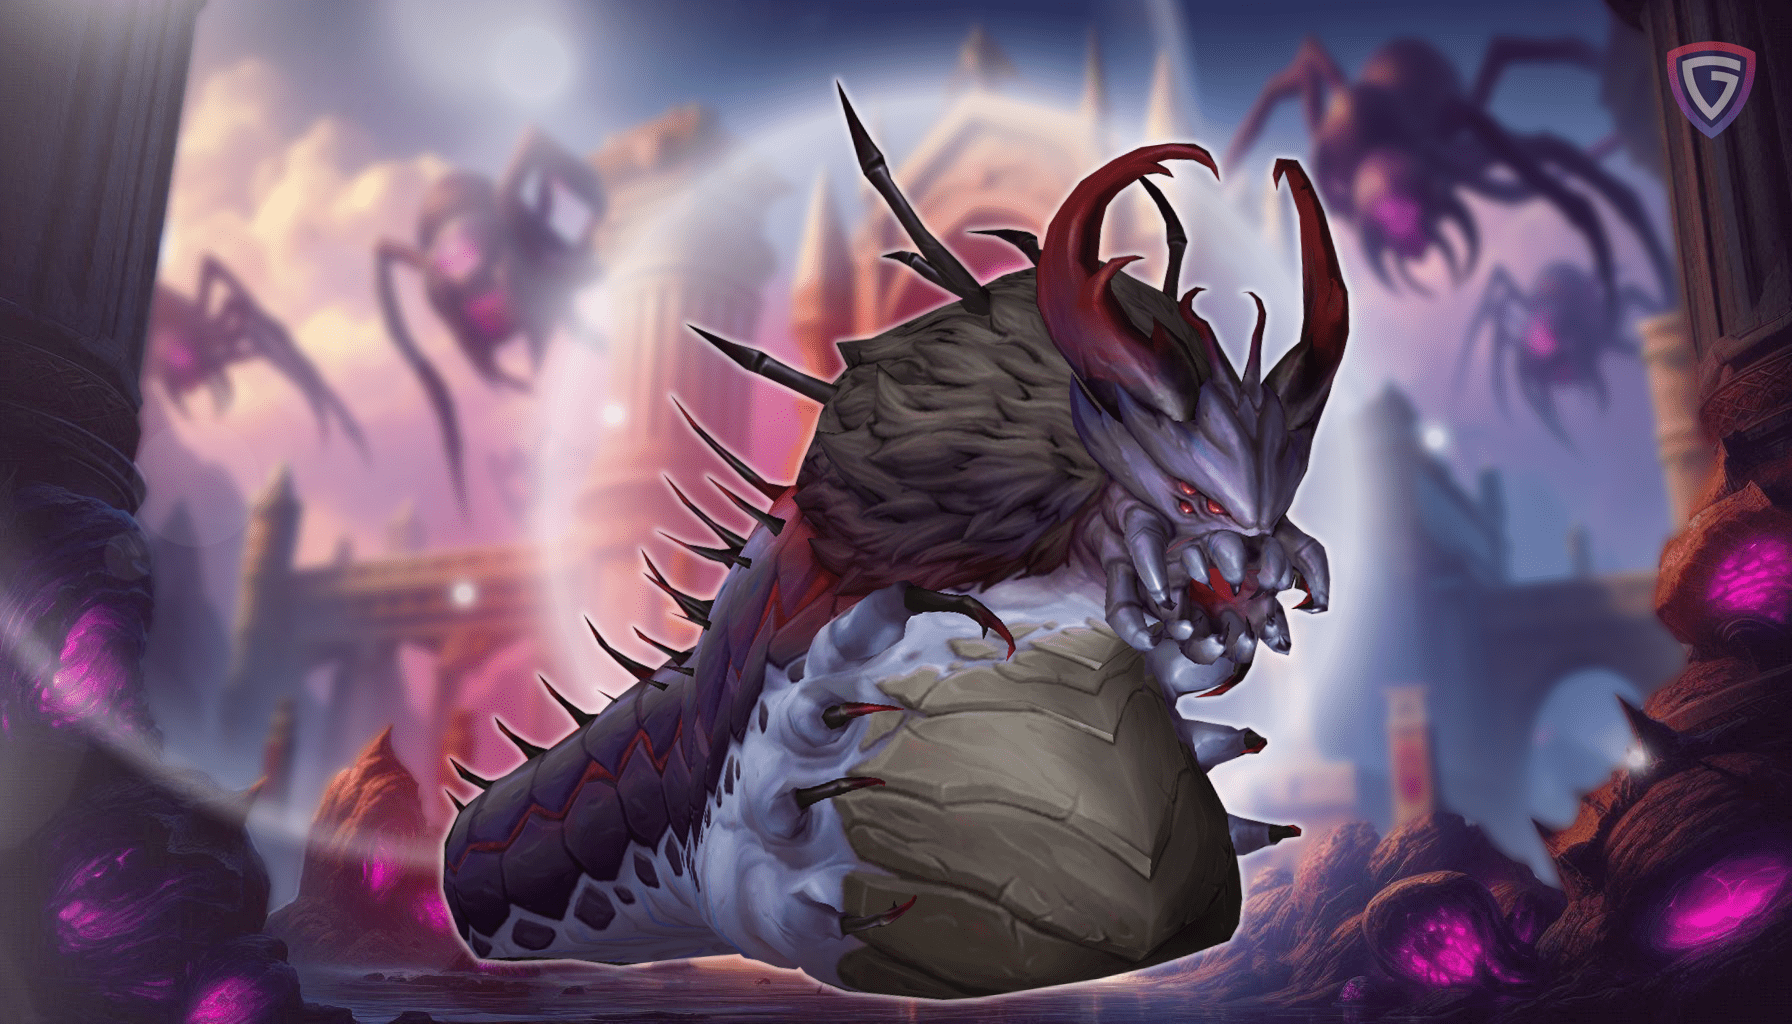
Ulgrax the Devourer
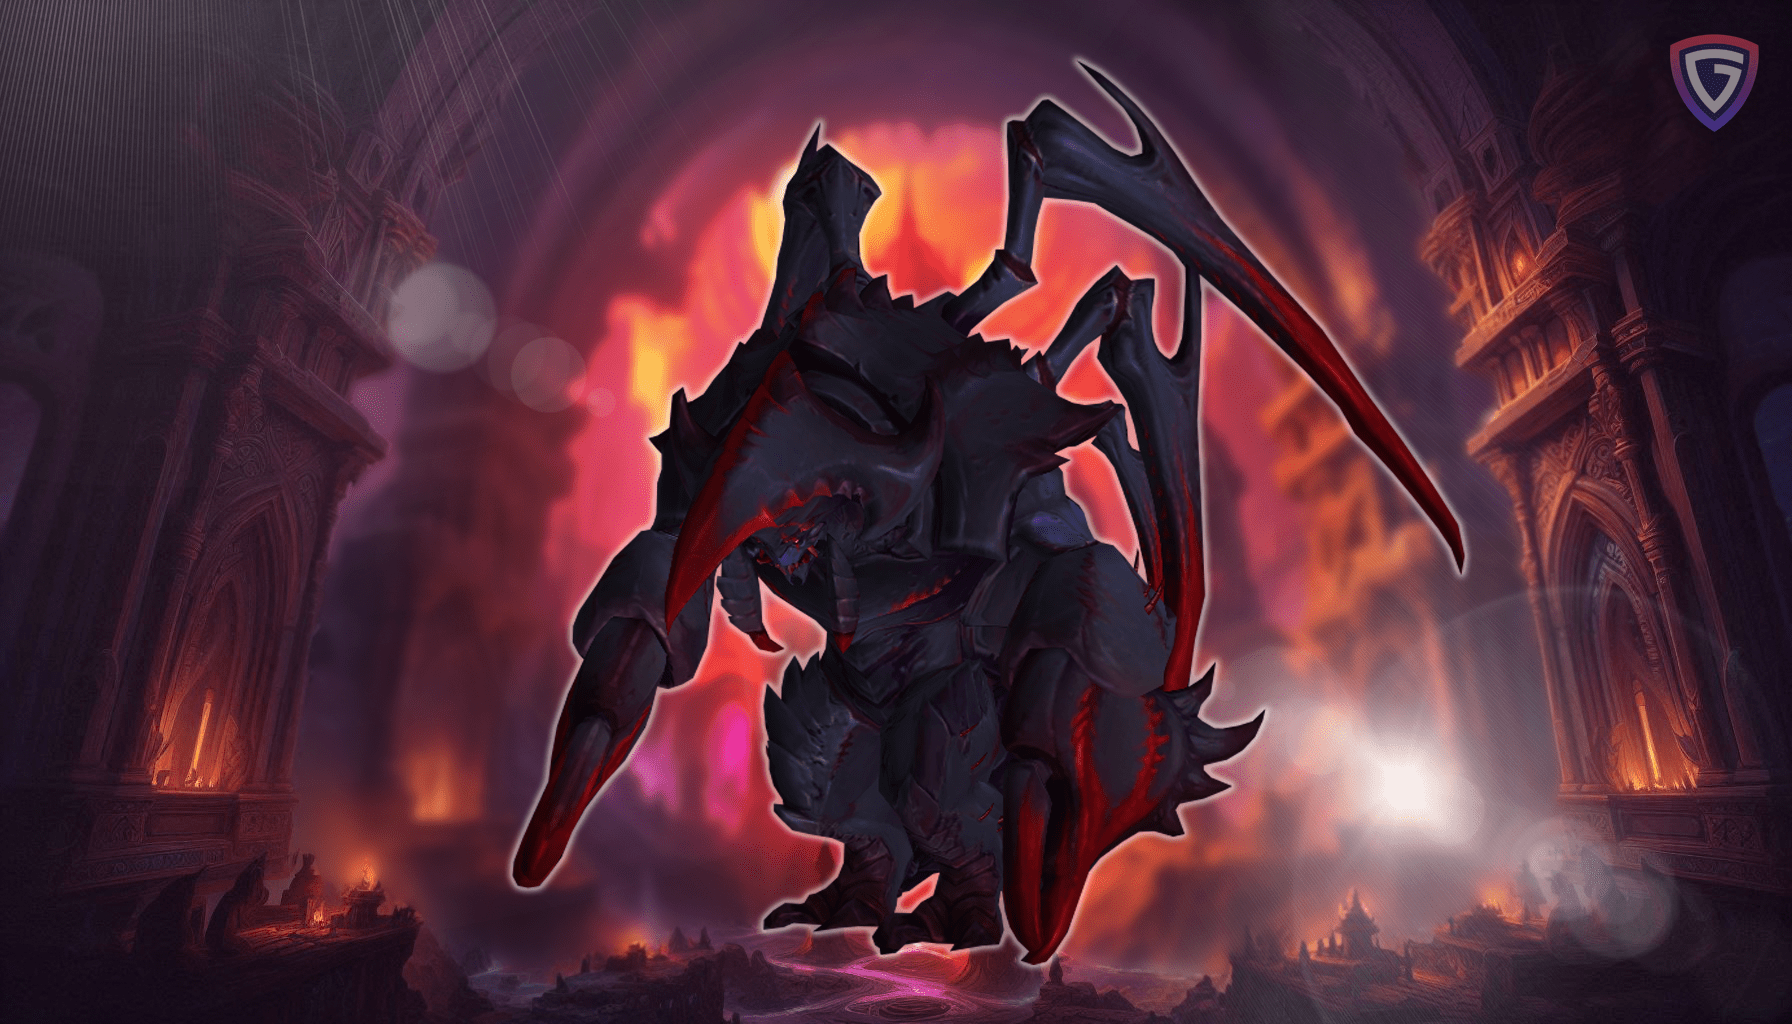
Ulgrax the Devourer – Queen Ansurek’s evolutionary experimentation created a number of monstrous guardians for her throne, none more voracious than Ulgrax the Devourer. Driven by endless hunger, Ulgrax is now the ravenous protector of Queen Ansurek’s court.
Overview: Ul’grax attempts to devour players with Voracious Hunger and uses Viscous Slobber to place pools of Syrupy Drool throughout the arena. At zero energy, Ul’grax goes mad with hunger and continually gains applications of Insatiable Rage until returned to 100 energy.
- Damage Dealers:
While a player is within Syrupy Drool they are rooted.
Ravenous Spawn continually place applications of Disembowe on a player. - Healers:
Digestive Venom inflicts significant damage to nearby allies when removed.
Each application of Instiable Rage increases Ul’grax’s damage. - Tanks:
Ravenous Spawn continually place applications of Disembowel on a player.
Coordinate with another player to manage applications of Tenderized.
The Bloodbound Horror
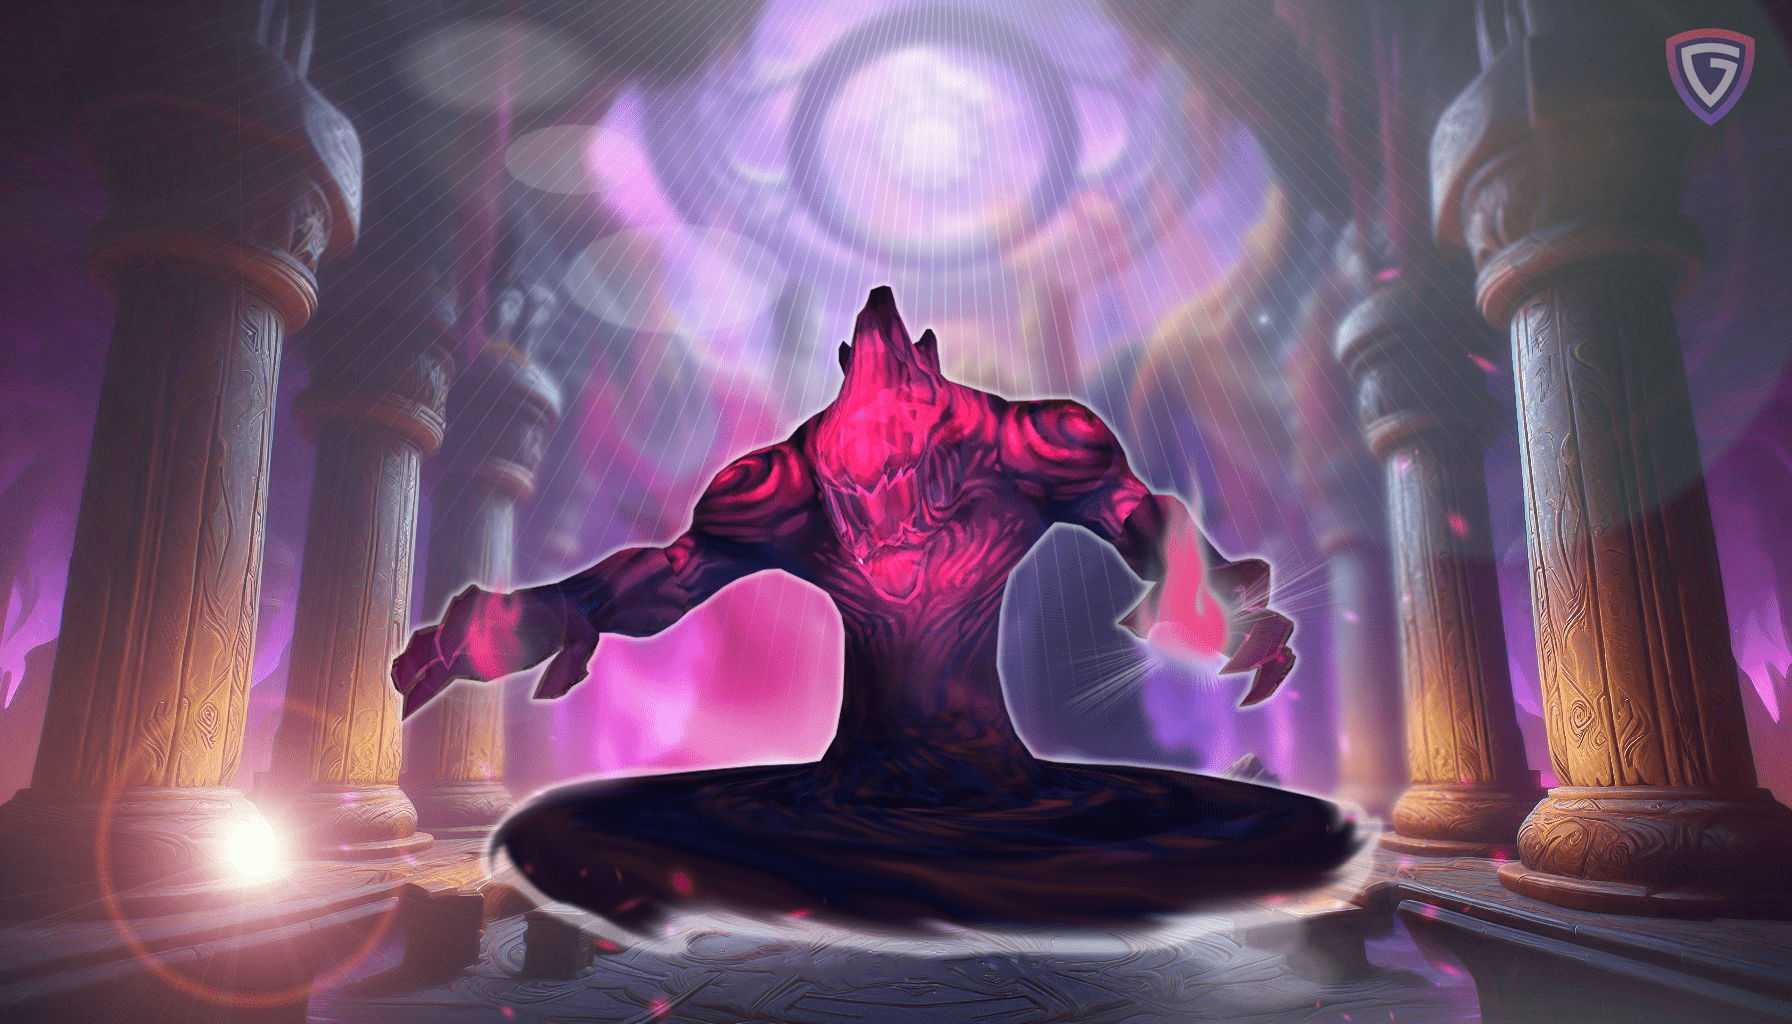
The Bloodbound Horror – In the dark pits below Nerub-ar Palace, the blood of the Old Gods congeals in foul, black pools. The Bloodbound Horror rises from this vile ooze – drawing everything in its path into The Unseeming.
Overview: The Bloodbound Horror periodically manifests creatures into The Unseeming to aid its assault. When splattered by Gruesome Disgorge players enter The Unseeming and can attack the creatures directly. Upon reaching 100 energy, The Bloodbound Horror assails players with Goresplatter, inflicting deadly damage to those caught within.
- Damage Dealers:
Gruesome Disgorge sends players in front of The Bloodbound Horror into The Unseeming.
Forgotten Harbingers Manifest Horrors until defeated.
Grasp From Beyond forms underneath random players. - Tanks:
Gruesome Disgorge sends players in front of The Bloodbound Horror into The Unseeming.
Lost Watcher’s Spectral Slam inflicts heavy Physical damage. - Healers:
Gruesome Disgorge sends players in front of The Bloodbound Horror into The Unseeming.
Crimson Rain absorbs a large amount of healing.
Goresplatter inflicts heavy magical damage over time.
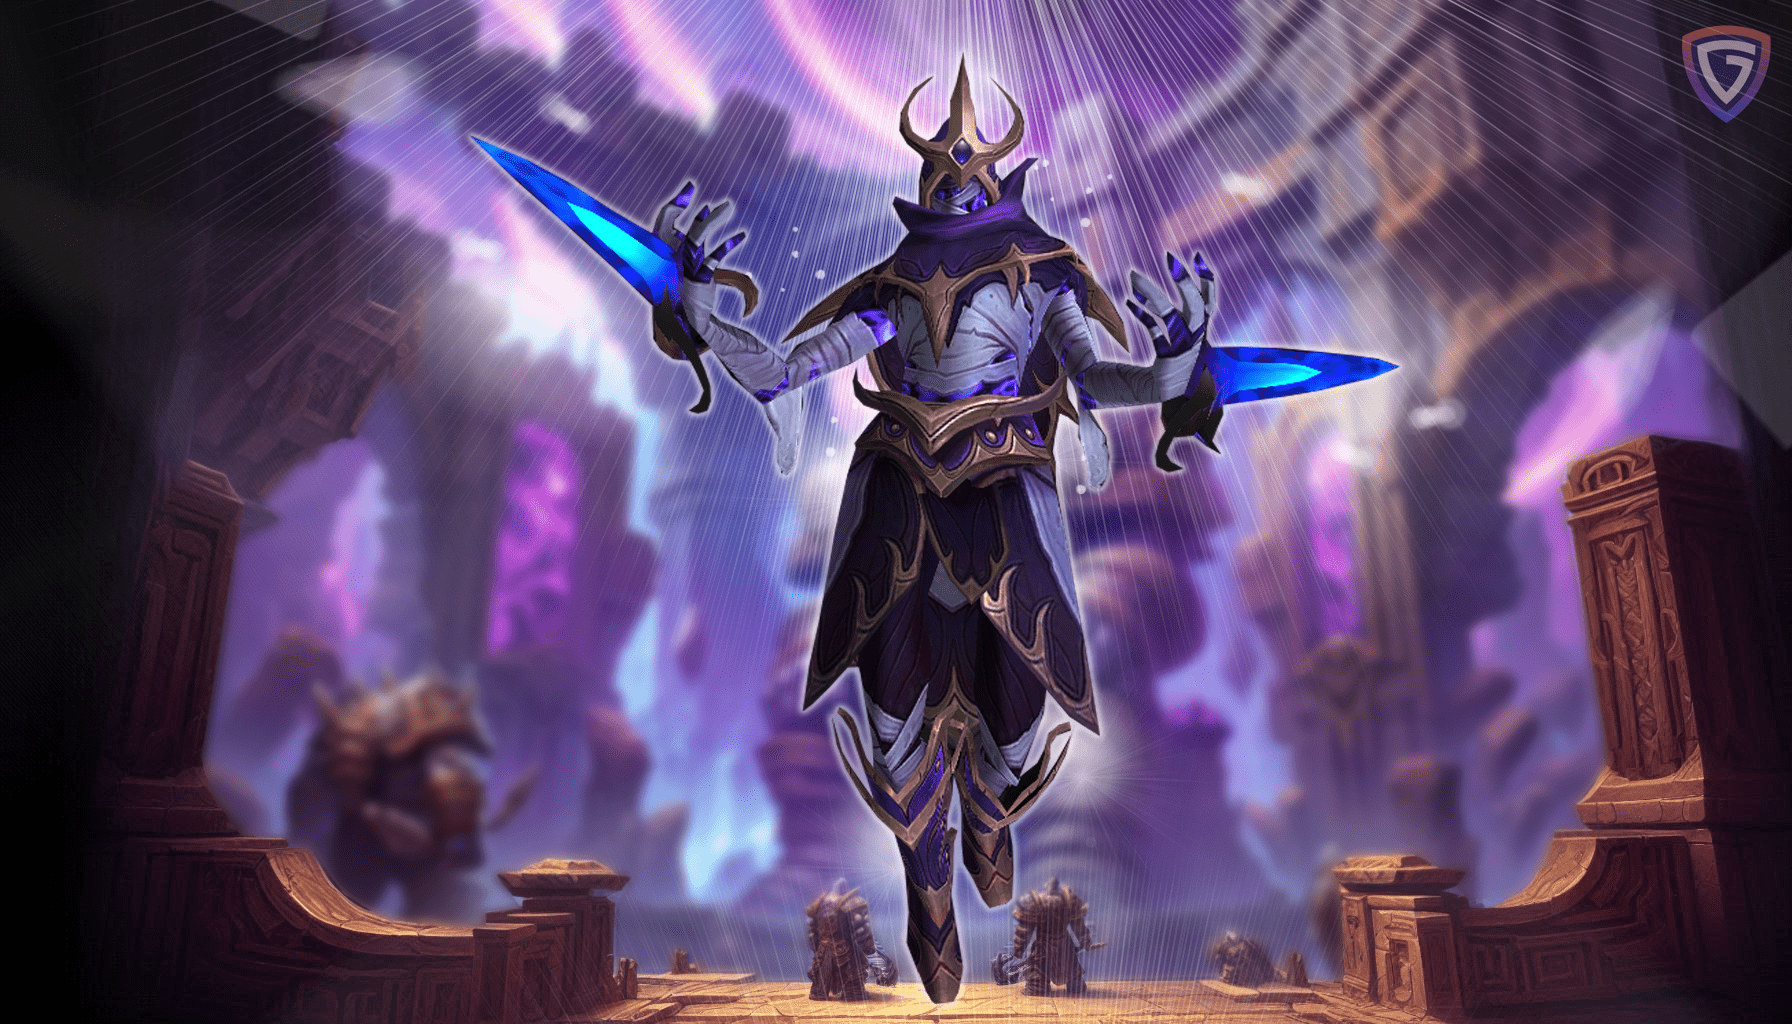
Sikran, Captain of the Sureki
Sikran, Captain of the Sureki – Sikran established himself as an arrogant duelist within Queen Ansurek’s court. Never knowing the cut of an enemy’s blade, Sikran dispatched his rivals one-by-one and was proclaimed Captain of the Sureki by the queen herself. This indomitable fighter now ensures that any who threaten his queen fall before the throne’s might.
Overview: Sikran’s Phase Blade rips through the cosmos, and leaves behind a Cosmic Simulacrum which can then be destroyed by Decimate. Upon reaching 100 energy, Sikran casts Shattering Sweep, destroying all remaining Cosmic Simulacrums.
- Healers:
Cosmic Simulacrums inflict light damage to all players while active.
Upon destruction, Cosmic Simulacrums apply Cosmic Shards to all players.
Phase Blades inflicts heavy damage over time to all players hit and reduces healing taken. - Damage Dealers:
Phase Blades leave behind Cosmic Simulacrums for every player hit.
Cosmic Simulacrums are destroyed after being hit by Decimate and Shattering Sweep. - Tanks:
Captain’s Flourish inflicts light damage with Expose then finishes with Phase Lunge.
Phase Lunge inflcts heavy Physical and Shadow damage, and increases damage taken by Phase Lunge.
Decimate expels cosmic spears from the boss location and breaks all Cosmic Simulacrums hit.
Rasha’nan
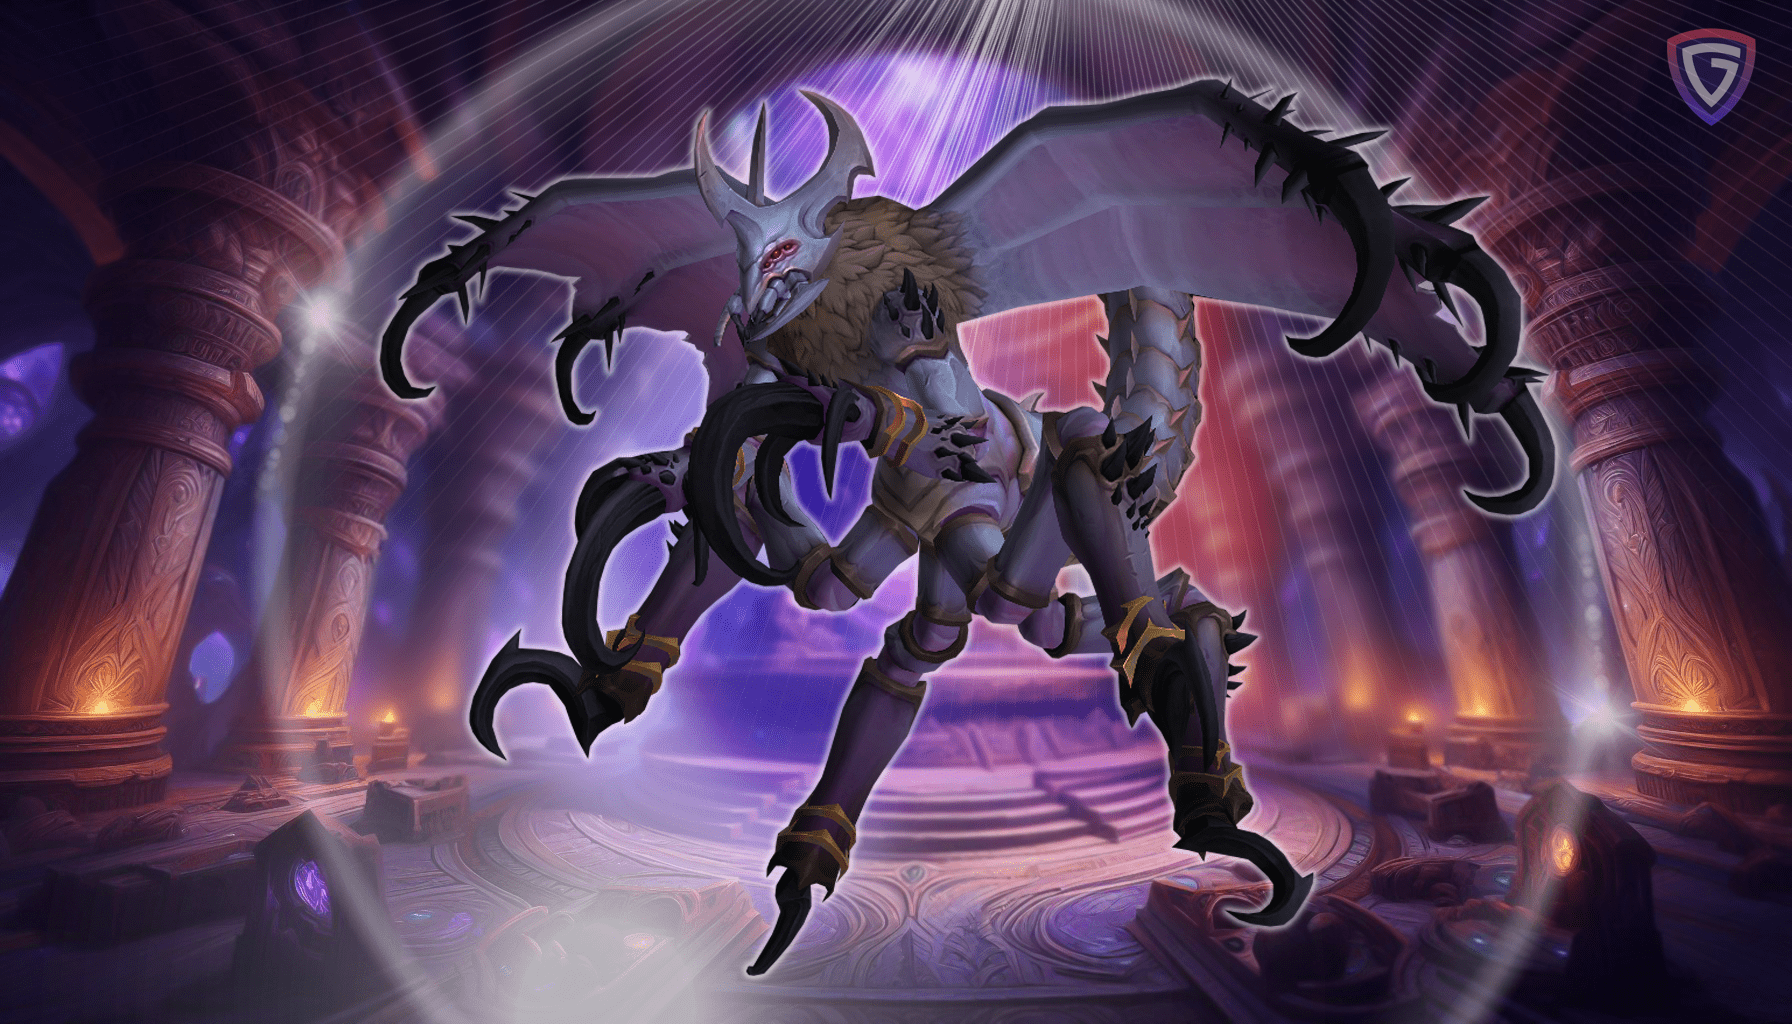
Rasha’nan – Twisted by Queen Ansurek’s experiments, Rasha’nan was transformed from a proud nerubian into a monstrous, winged horror. Trapped within her new form, shattered memories of her former self drive Rasha’nan into an unquenchable rage.
Overview: Rasha’nan sinks her claws into The Dawnbreaker as Nightfall Bombers hurl Arathi Bomb aboard the airship. After suffering enough damage from the bombs’ explosions, Rasha’nan takes flight across Hallowfall and begins to cast Acidic Eruption until interrupted.
- Healers:
Spinneret’s Strands inflict party-wide damage when snapped.
Waves of Rolling Acid move in the targeted direction and corrode any Sticky Webs into Acid Pools.
Radiant Light allows skyriding and mounting in combat. - Tanks:
Arathi Bombs inflict substantial damage to Rasha’nan.
Waves of Rolling Acid move in the targeted direction and corrode any Sticky Webs into Acid Pools.
Radiant Light allows skyriding and mounting in combat. - Damage Dealers:
Arathi Bombs inflict substantial damage to Rasha’nan.
Waves of Rolling Acid move in the targeted direction and corrode any Sticky Webs into Acid Pools.
Radiant Light allows skyriding and mounting in combat.
Broodtwister Ovi’nax
Broodtwister Ovi’nax – Deep within the bowels of the queen’s palace, Broodtwister Ovi’nax conducts abominable experiments with the black blood found in Azj-kahet. This corpulent horror lumbers through the palace’s cavernous depths, regurgitating inky sludge onto hatchlings to observe its gruesome effects.
Overview: Broodtwister Ovi’nax injects players with Experimental Dosage which causes nearby eggs to hatch upon expiration, unleashing the horrors within. Upon reaching 100 energy, Broodtwister Ovi’nax will Ingest Black Blood, growing in power and causing the room to slowly fill with Sanguine Overflow.
- Tanks:
Volatile Concoction inflicts damage to all players based on how much health the target is missing when it is removed.
Sanguine Overflow mutates any creatures it comes into contact with.
Colossal Spiders inflict increasing damage with Vicious Bite. - Damage Dealers:
Experimental Dosage causes nearby eggs to hatch, unleashing the horrific experiments incubating within.
Sticky Web immobilizes nearby players when removed.
Blood Parasites Infest their target upon reaching them. - Healers:
Experimental Dosage causes nearby eggs to hatch, unleashing the horrific experiments incubating within.
Broodtwister Ovi’nax inflicts increasing Shadow damage and healing absorbs as he receives more Unstable Infusions.
Volatile Concoction inflicts damage to all players based on how much health the target is missing when it is removed.
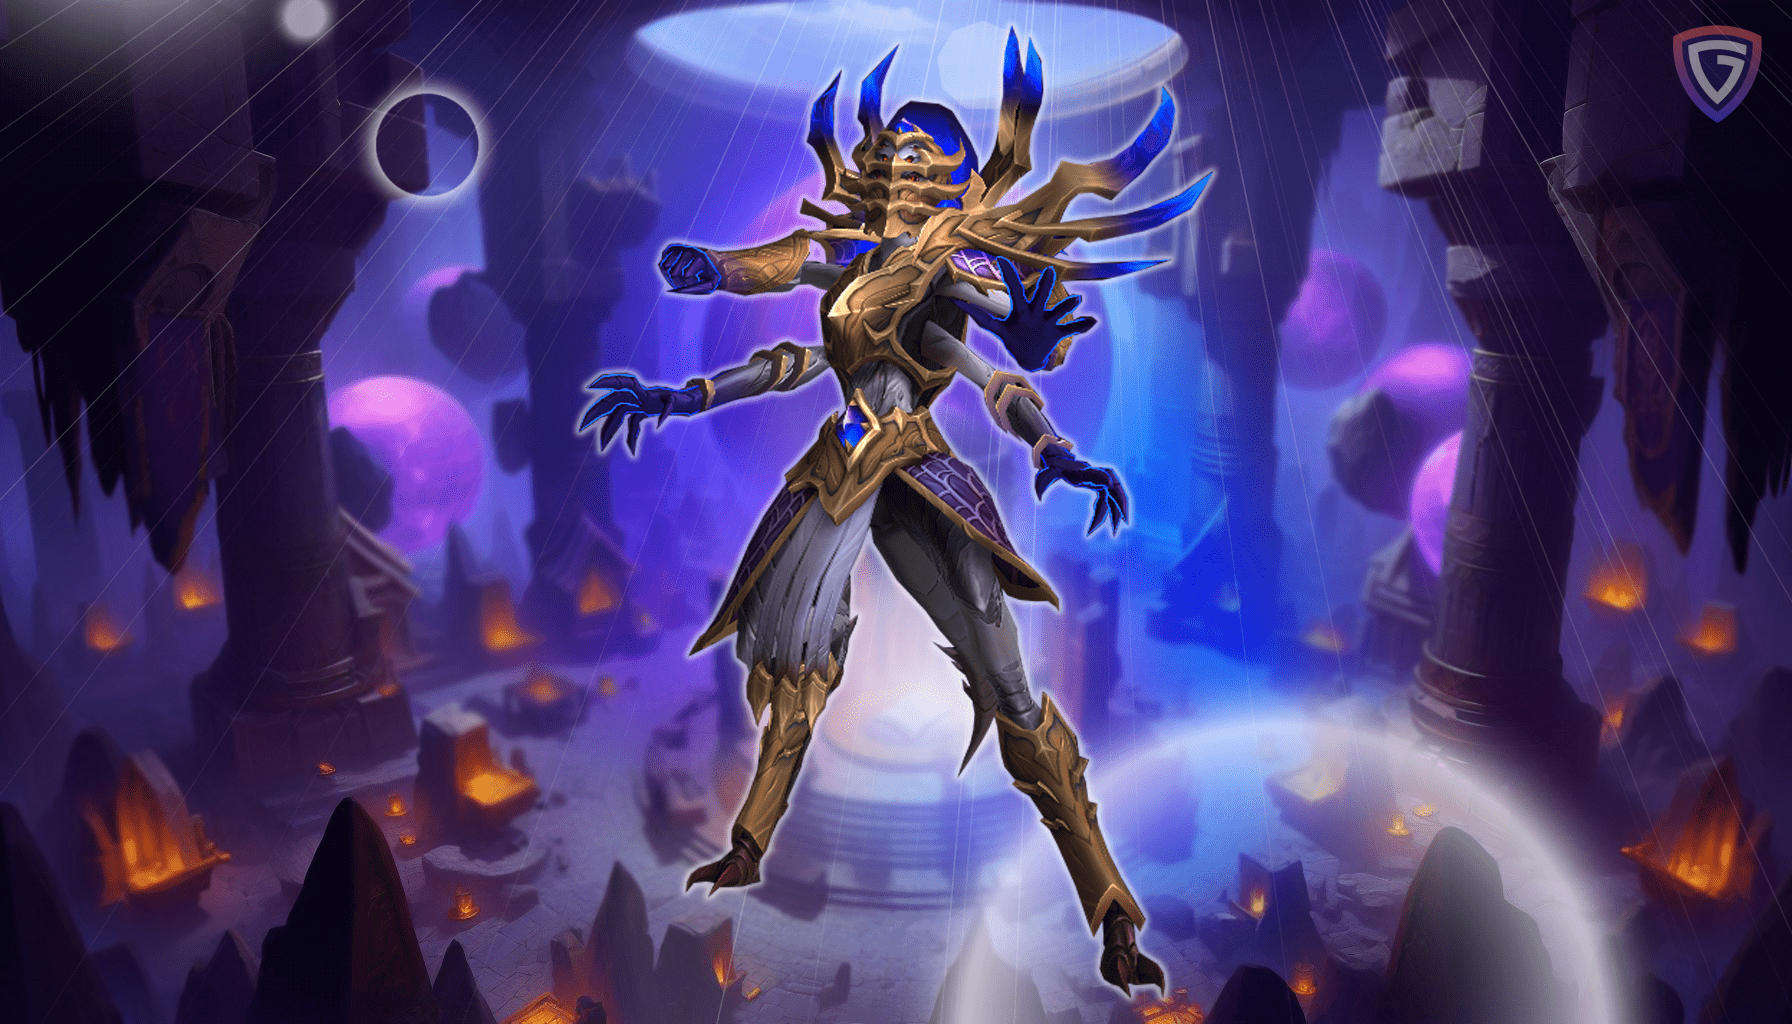
Nexus-Princess Ky’veza
Nexus-Princess Ky’veza – Nexus-Princess Ky’veza arrived at Nerub-ar Palace only recently, quickly establishing herself as a confidante of Queen Ansurek. However, rumors abound within the inner court that she may harbor a dark and deadly secret. If discovered, the princess is prepared to dispatch all witnesses without mercy…
Overview: Ky’veza marks targets for their Assassination while haunting Nether Phantoms emerge from her shadow to mirror the massacre.
Upon reaching 100 energy, Ky’veza invokes a Starless Night as phantoms slaughter her enemies in the darkness.
- Tanks:
Chasmal Gash increases damage taken from each strike of Void Shredders.
Players pulled into a Nether Rift become Atomized.
Reaper attemps to execute players that are low health. - Damage Dealers:
Assassination creates Nether Phantoms that mirror some of Ky’veza’s abilities.
Players pulled into a Nether Rift become Atomized.
Reaper attemps to execute players that are low health. - Healers:
Reaper attemps to execute players that are low health.
Starless Night and Regicide inflict heavy damage across the raid.
Players pulled into a Nether Rift become Atomized.
The Silken Court — Lord Anub’arash and Skeinspinner Takazj
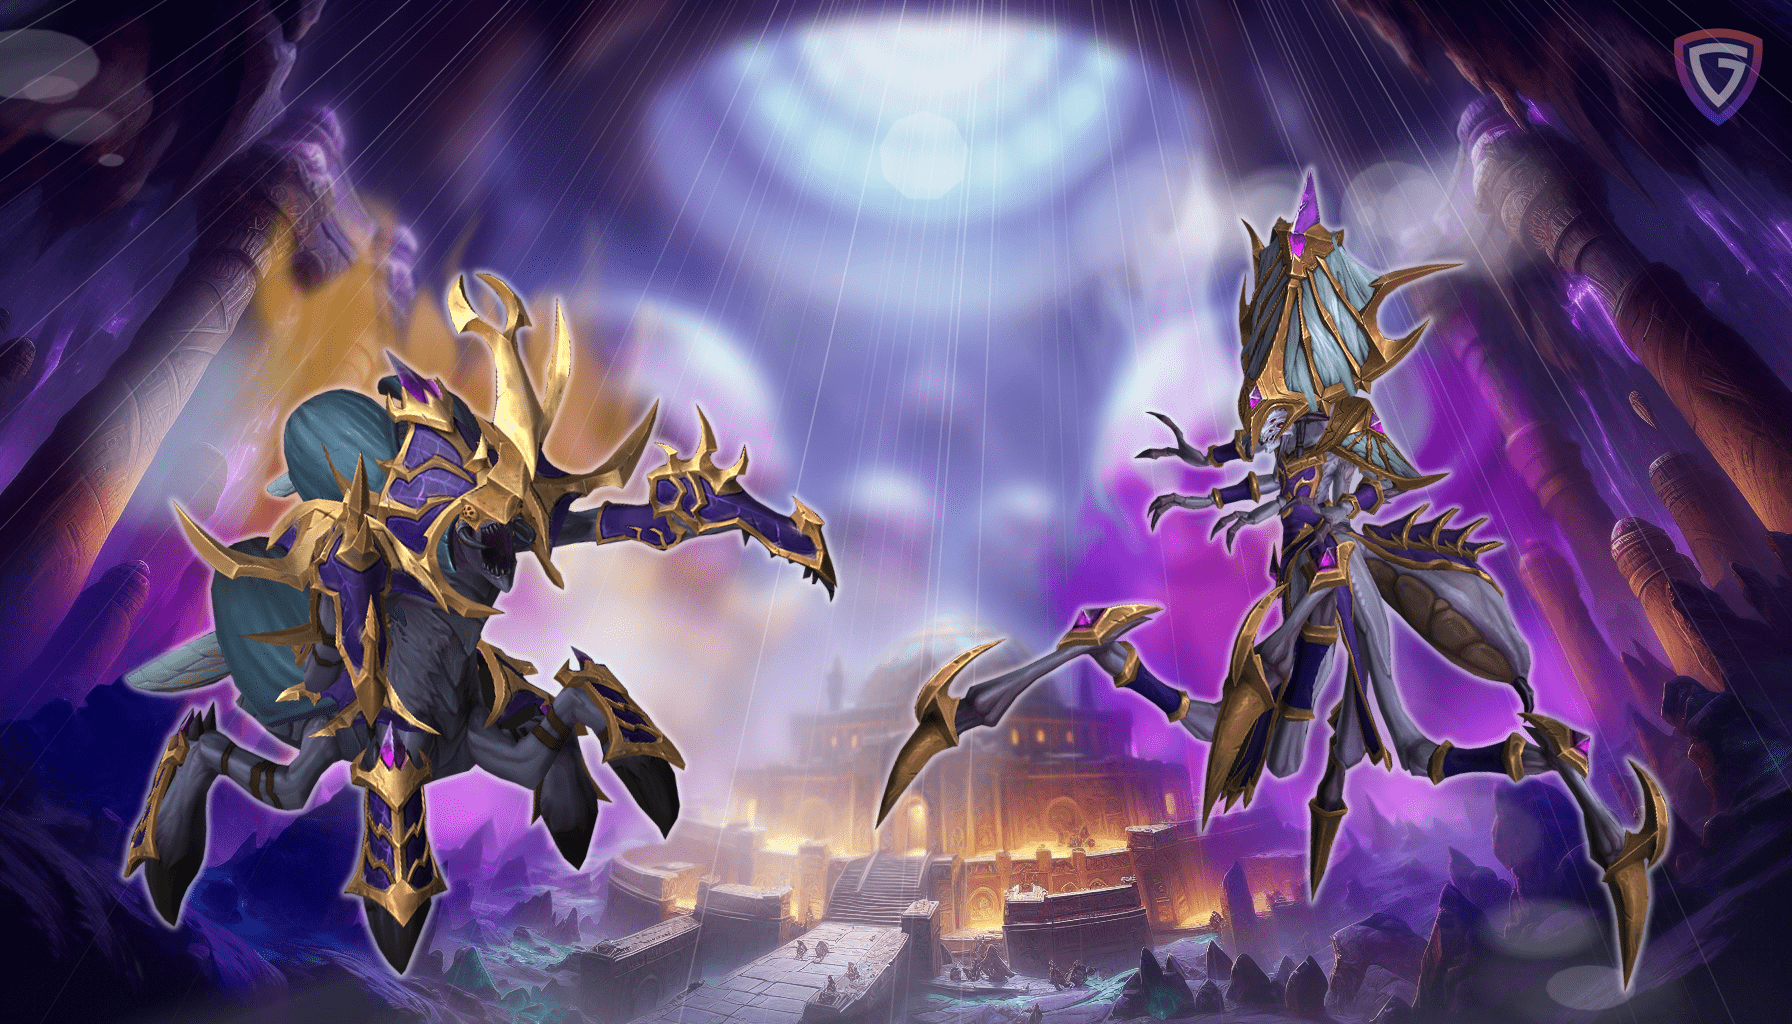
The Silken Court – Scarab Lord Anub’arash and Skeinspinner Takazj are Queen Ansurek’s most trusted advisors, yet these two powerful nerubians harbor a hatred for each other even more powerful than their loyalty to the throne. While unleashing their considerable strength onto their enemies, each also fights to ensure their counterpart doesn’t survive.
Overview: The lords of the Silken Court fight as rivals for the queen’s favor, alternatingly assaulting their enemies with Web Bomb and Reckless Charge.
Upon reaching 100 void energy, Takazj ascends into void form and begins to Shatter Existence.
After rejoining the battle, Anub’arash begins to summon Stinging Swarms as Takazj evokes Cataclysmic Entropy. Upon reaching 100 anger, Anub’arash enters a raging fury and unleashes a Spike Storm. Now with both members of the court at their full power, Anub’arash storms across the chamber with Reckless Charge as Takazj conjures Cataclysmic Entropy.
- Damage Dealers:
Shatter Existence and Spike Storm apply heavy absorb shields to their casters.
Players who are Impaled are stunned until their impaling spike is destroyed.
Anub’arash summons scarabs into the chamber with Call of the Swarm. - Healers:
Stinging Swarm transfers to the nearest player or Takazj upon removal.
Anub’arash becomes Entangled if he charges through Binding Webs.
Burrowing Eruption and Unleashed Swarm inflict heavy raid damage. - Tanks:
Anub’arash’s Piercing Strike inflicts heavy Physical damage.
Takazj moves throughout the chamber using Skittering Leap and Void Step.
The fates of Anub’arash and Skeinspinner Takazj are linked through Queen’s Proclamation.
Queen Ansurek
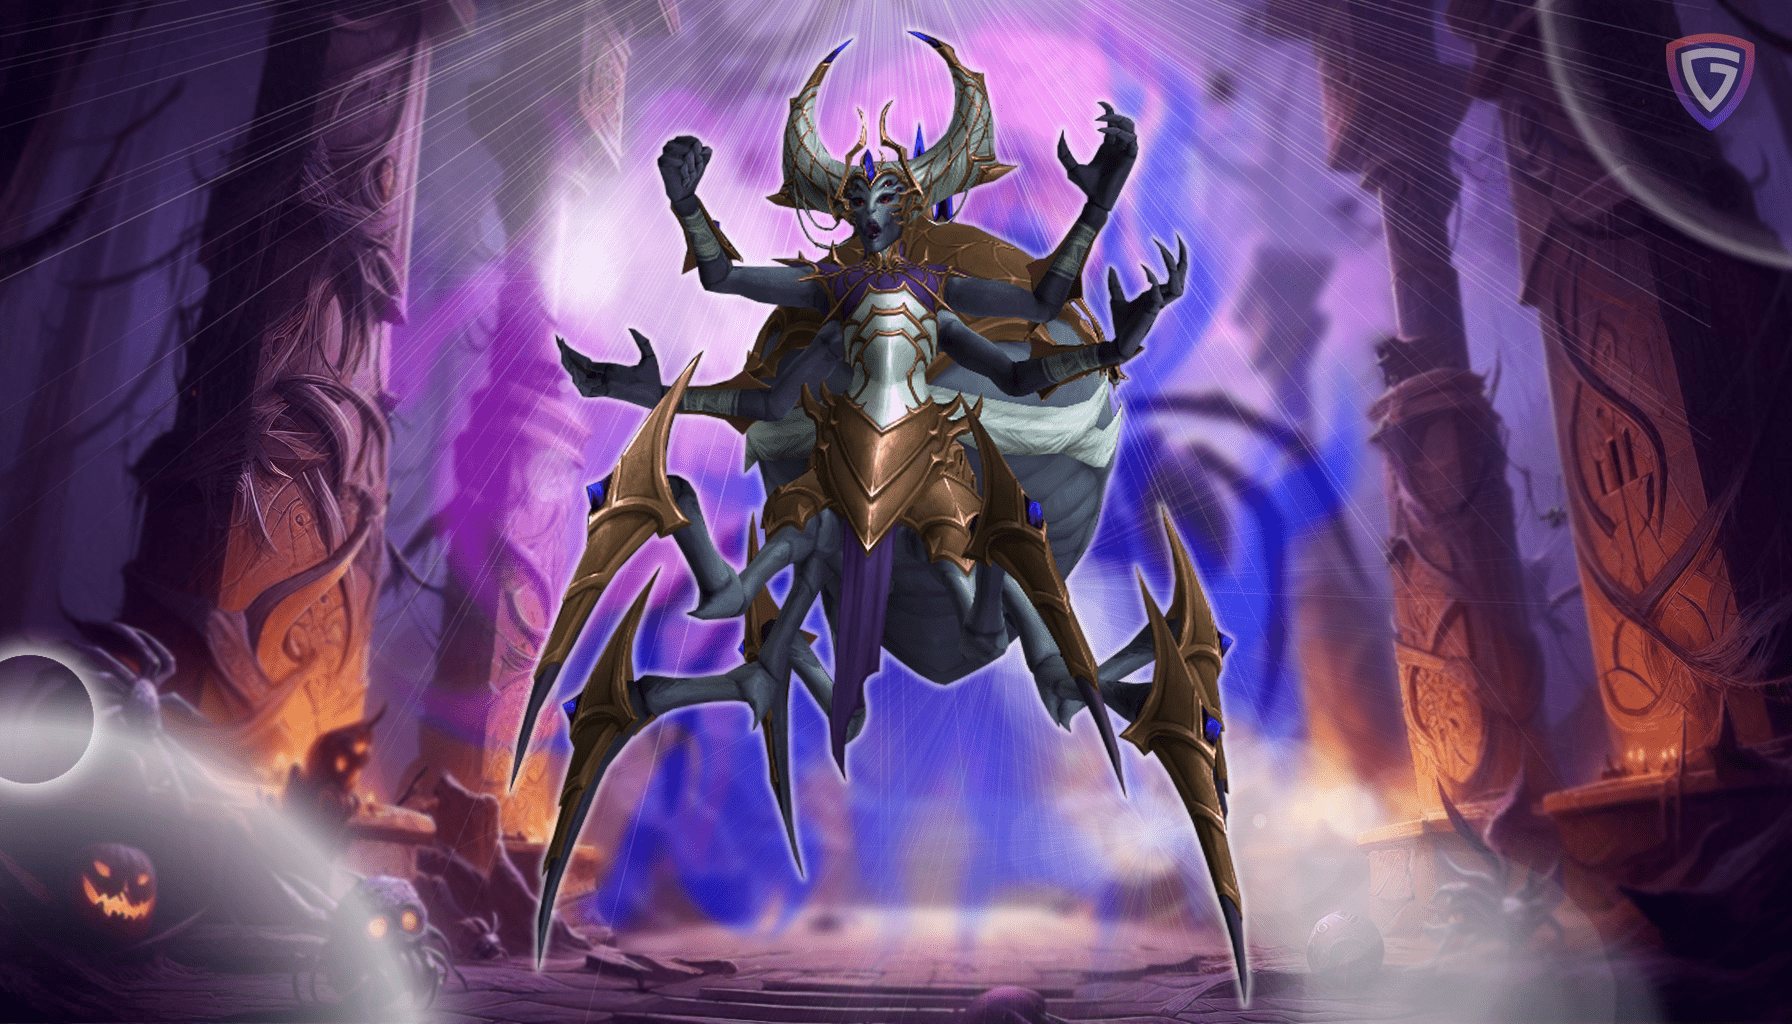
Queen Ansurek – After a revelation of traitors in her court, Queen Ansurek decides she must eradicate the palace’s invaders herself. However, paranoia over whom she can trust gnaws at her psyche. With her allies dwindling, Queen Ansurek may delve into dark powers to attain victory, even if that means her most loyal soldiers become her next meal…
Though Ansurek is the toughest boss, it’s a piece of cake for our team. Our trained professionals can deal with Queen Ansurek on Mythic difficulty fast and easily.
Overview: As the battle begins, Ansurek ejects Reactive Froth and then unleashes Venom Nova. Eventually, Ansurek tries to feed on her weakened enemies with Predation.
After players break her web shield, Ansurek begins ascending to her private chamber and calls reinforcements. They prepare to unleash Cosmic Apocalypse while Ansurek attacks players from afar.
When players breach her private chamber, Ansurek stops casting Acidic Apocalypse and initiates Aphotic Communion. Using heightened cosmic power, Ansurek intends to consume Acolyte’s Essence with Frothing Gluttony.
- Damage Dealers:
Devoted Worshippers cast Cosmic Apocalypse if not defeated.
Gloom Hatchlings cause lethal damage if they reach Ansurek.
Froth Vapor occurs if Frothing Gluttony absorbs Acolyte’s Essence.
Reation Vapor occurs if Venom Nova detonates Reactive Froth. - Healers:
Feast absorbs significant healing.
Gloom Touch inflicts significant damage unless dispelled.
Paralyzing Venom increases damage from Wrest.
Royal Condemnation inflicts significant damage to all players. - Tanks:
Liquefied players are highly vulnerable to Feast.
Feast absorbs a signficant amount of healing.
Infest creates Gloom Hatchlings that cause lethal damage if they reach Ansurek.
Gorge causes several bursts of damage to all players that mitigation reduces.
4.9This guide covered everything you need to know to defeat each of the powerful bosses of The War Within Nerub’ar Palace Raid, as well as the rewards and achievements that you get for completing it. We will update this guide as new information becomes available after the raid launches.