The Deep Stone Crypt raid first announced in the Beyond Light DLC, offers Guardians to go on a space journey and then back to Europa. The raid is not new, but the opportunities it gives players in the Lightfall expansion and in Season of The Wish in particular are extremely attractive to those who want to get better weapons and one of the most beautiful armor sets in Destiny 2.
 4.9
4.9Deep Stone Crypt Loot Table

Season 19 gave us a lot of nice bonuses from this raid, namely the ability to craft weapons and moreover, new perks. That’s why this raid is now so popular and worth a visit.
Weapons from Deep Stone Crypt have never been more desirable. All the legendary weapons have been updated for Origin Trait. With the release of the Witch Queen expansion, every new weapon now comes with Origin Trait, which is in a sense a passive perk. Origin Traits are intended as an addition to powerful weapon perks and do not require complex activation. Weapons with Origin Trait are undoubtedly more attractive than the old and non-revamped ones. So the popularity of DSC raid is quietly gaining momentum and hitting the meta.
| Trait | Source | Effects | |
|---|---|---|---|
 | Bray Inheritance | Deep Stone Crypt Raid | Dealing damage regenerates a small amount of ability energy. |
Deep Stone Crypt weapons come with new perks, and almost all of them, except for the Eyes of Tomorrow, can be crafted, which means you can get enhanced perks. And the Legacy of the Oath armor sets are some of the most beautiful in the game.
Besides the completing encounters rewards, the raid also provides us two hidden chests and a new cache system called the Cache of the Crypt, which uses Spoils of Conquest.
And also you can get rare Descendant Title and Rock Bottom triumph completed.
How to prepare for the raid
Due to the fact that the raid is quite old, the minimum power level criterion for successful completion of Season of Defiance was 1300. But now any player with a minimum power level can easily go to conquer this raid. Weapons also have no specific requirements. Choose something with which you feel comfortable and confident or use our recommendations below.
In Deep Stone Crypt you will not meet serious opponents and enemies, it is more about puzzles and mechanics. But to fight the final boss Taniks, for not too experienced teams it’s better to have Titan and Warlock, their abilities will be very useful.
There are a total of five raid encounters, where you will have to fight two bosses – Atraks-1, Fallen Exo and Tankis, Reborn, the final boss.
What should I bring to the Deep Stone Crypt?
A high DPS explosive or non-precision shotgun, such as The Fourth Horseman, Falling Guillotine, One Thousand Voices, or Xenophage with a Void special, is effective for the first encounter. Using the mod that allows grenades to disrupt Overload champions is beneficial for Solar or Stasis classes, as well as for the third encounter.
The Lament is the most effective choice for the second encounter. It would be more beneficial to add a Truthteller, Deafening Whisper, or a Sniper to your loadout.
In the third encounter, it is important to have effective weaponry such as swords, LMGs, and Grenade Launchers to deal with Overload Champions. Additionally, it can be helpful to have a way to handle add clear.
For the last encounter, we recommend to have Anarchy, a slug shotgun, and possibly a sniper, although the sniper may not be necessary. And one of you should use Divinity.
First encounter Sparrows
The task of the first encounter is to find the entrance to the Crypt. Clearing enemies in Eventide Ruins, Guardians must find the hatch leading down the tunnel, where they will see a red bubble. Moving through the storm on their sparrows (or the pikes provided) from one red bubble to another, the team must be very careful and not waste time. There will be mines along the way that slow the sparrows down, and cliffs that will make you jump off the sparrow. Between red bubbles players can get a Frostbite debuff, when the debuff stack reaches 10, the Guardian will die. Also, in some bubbles there may be enemies that you will have to clean up.
If your team proves difficult to overcome this path, you can use a clever tactic. Send one player forward to the next bubble, if they die, their ghost will return to the previous bubble, where the raid team can quickly revive them and you won’t have to wait for a long time to revive.
On the last bubble you will see an image of the Brig, which will signify the end of the encounter, and there will definitely be enemies there.
To get to the next encounter, all you have to do is go through the nearby door. The first DSC secret chest will be just beyond the Brig bubble in the branch on the right.
Below is a map of the safe path, kindly provided by player Jruss1976.

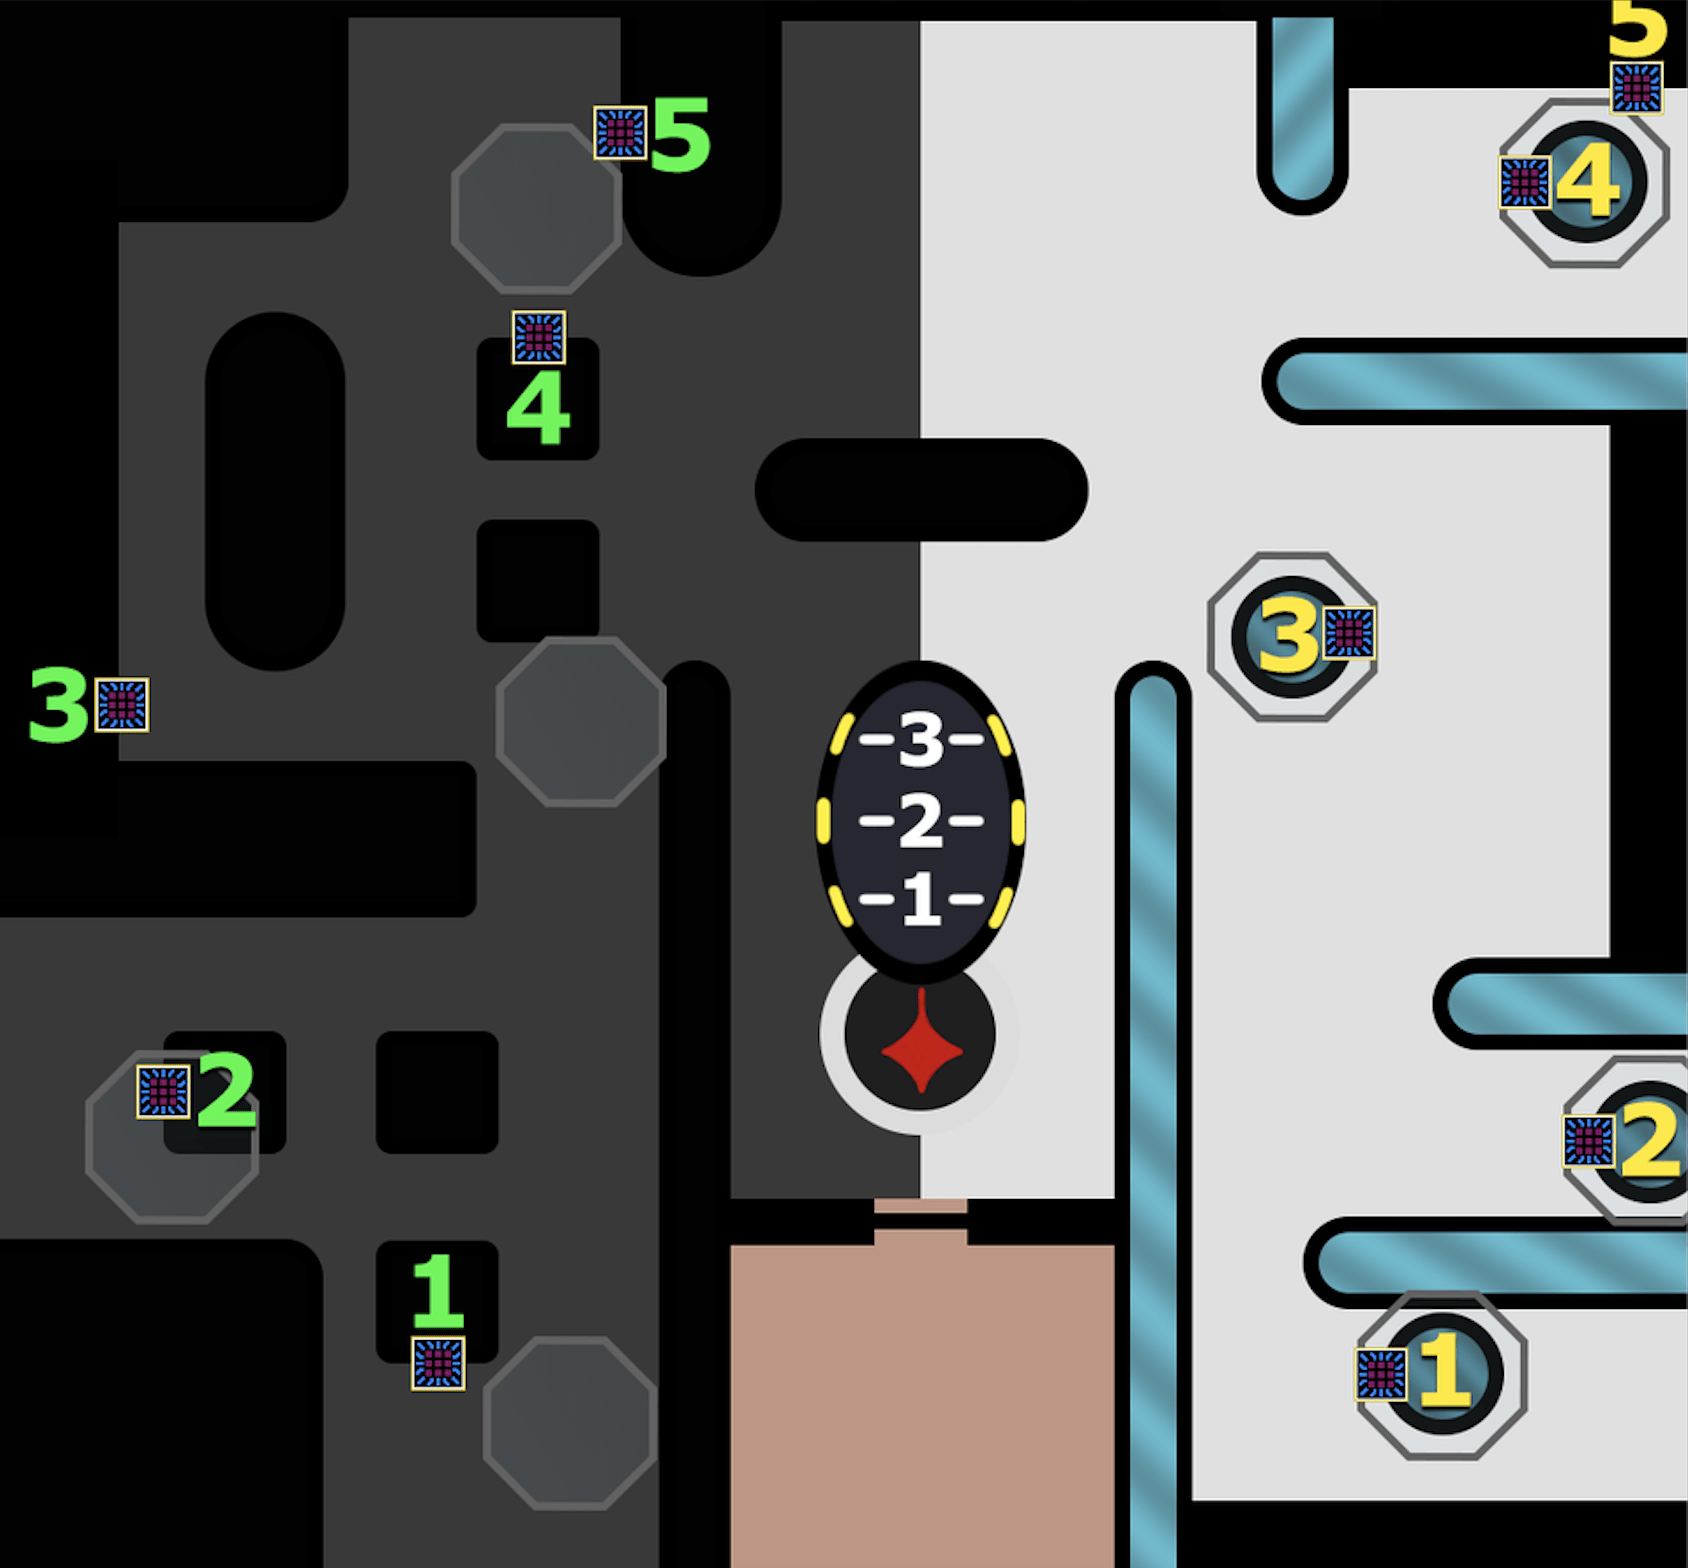
Second Encounter Crypt Security
The goal of the second Encounter is to disable the Crypt Security. To do this, you must shoot three large fuses located upstairs in the correct order. Here it becomes clear that the arena is divided into two parts: the upstairs and the basement, which in turn are divided into light side and dark side.
Before the encounter begins, the team must divide into two parts upstairs, three players on the dark side and three players on the light side. You will need to communicate with each other clearly, because the door between the halves of the arena will close. To begin the encounter, one player from each side must pick up the red buff called Operator, which is located near the augment terminal. As soon as the encounter begins, enemies will spawn, one of which will be with a yellow buff – Scanner, hovering over their head. Kill him first and pick up the buff.
On the upper floor there are windows in the floor through which you can see the dark and light sides of the basement, respectively. On each side, five keypads are located on pillars or walls. The Guardian with the Scanner should look through the glass floor and name those keypads that are glowing and call them out.
Having finished on their side, the player with the Scanner Buff must pass it to the other side using the augment terminal, where it will be picked up by another player. Now you must find the glowing keypad in the window on the other side and call it out.
Once one side is ready, the player with the Operator Buff can go down to the basement by shooting the keypad on the door leading down. There their task will be to shoot the keypads that were called out. Before going down, make sure that at least one Scanner has called out the keypad, because once the player is down in the basement, they cannot get out of there without passing the Operator buff via augment terminal to the new Operator to open the door for them. Once down in the basement, a countdown will begin, at the end of which the player below will be burned alive.
Once this is done, the Operator should put their Buff into the augment terminal in front of the basement door, which should be picked up by someone upstairs. The player with the Scanner Buff at this time must pass their Buff down through the augment terminal. The basement player now has the role of the Scanner.
On both sides of the pillar are three fuses, which displays three fuses on top. Thanks to the Scanner Buff, the player can see which one is glowing and report upstairs so that the players upstairs can shoot the correct fuse.
If you don’t finish the encounter in one phase, the Operator has to pass their buff upstairs to be released and reset the countdown time before the flame is triggered.
And don’t forget that there will be enemies spawning on both floors the entire time, so teammates without buffs should clear the area in time.
4.9Third Encounter Atraks-1, Fallen Exo
In the third encounter you will face the first boss, Atraks-1, Fallen Exo.
As in the previous encounter, the arena is divided into two parts: the top floor and the bottom floor, where the team will be at the beginning of the encounter. To get to the top floor, the team will use the space pods at the back of the room. The Operator interaction keypads are located in the airlock chambers on each side of the room.
Before the start of the encounter, the team again must divide into two groups of three players in each. Three will stay at the bottom and three will go to the top. Prior to that one of them must kill the enemy with the Operator’s buff and pick it up. That player will remain at the top for all the duration of the encounter.
At the top, one of the remaining players has to find the enemy with the Scanner Buff and kill him.
To start the damage phase on the boss, the Guardians on both floors must kill at about the same time the Servitors. They will spawn after picking up the Scanner buff.
Atraks-1 will launch an attack, creating multiple copies of himself on both floors. But first they will appear at the top, where one of you have picked up the Scanner buff. The player with the Scanner must find a correct Atraks-1 copy that is glowing yellow and call out to the others. All players must defeat it by dealing as much damage to that copy as possible.
The purple orb that is left of the defeated Atraks-1 clone must be picked up by any player who is not an Operator. This orb is the Atraks-1 Replication debuff, which will begin the countdown as soon as it is picked up. To avoid wiping the team at the end of the timer, the Operator must open one of the airlocks in the upper arena so that the Atraks-1 Replication debuff holder can enter and shoot the orb to remove the debuff. Atraks-1’s soul will float into space and the player can exit the airlock.
Meanwhile, since the DPS phase is over, the player with the Scanner should pass it to the team at the bottom floor so they can repeat all these actions. Someone at the bottom will pick up the Scanner from the augment terminal, find a copy glowing yellow, and their teammates will kill it, dealing maximum damage. After that the player with the purple orb debuff will go up using the space pods. There the Operator will pass them into the airlock chamber and there the soul of Atraks-1 will float into space.
The final phase will begin when the eight pieces of the soul of Atraks-1 are sent into space. The entire team must gather at the top in space. Whoever has the Scanner buff once more must find a glowing yellow copy and call it out, so the others from the space team can deal damage and defeat it.
It seems easy enough, but there are certain nuances. First, the time to deal damage to the boss is very limited. The countdown starts after the first shot, so you shouldn’t rush if you’re not all ready to deal maximum damage. Otherwise, Atraks-1 will disappear without leaving an orb behind.
Second, if you don’t pick up the Atraks-1 Replication debuff in time, it will wipe the entire team after 40 seconds.
Third, the Operator should make sure to send space pods down as often as possible, so that players from the bottom floor with Atraks-1 Replication debuff could get rid of it the fastest they can. But there is some good news here. The Operator can shoot the debuff off a player if they don’t make it to the chamber in time. It nullifies the debuff countdown. And besides, two players can use the same open airlock, because it’s not possible to open two airlocks in one damage phase. The Operator only needs to call out the open airlock by checking which one of the keypads is glowing.
Fourth Encounter Taniks, Reborn
After the third encounter, the team will enjoy a jumping puzzle that will lead them to a cockpit-like location. Walk around the outside of the station and then go back inside. There is a secret chest on a platform along the left.
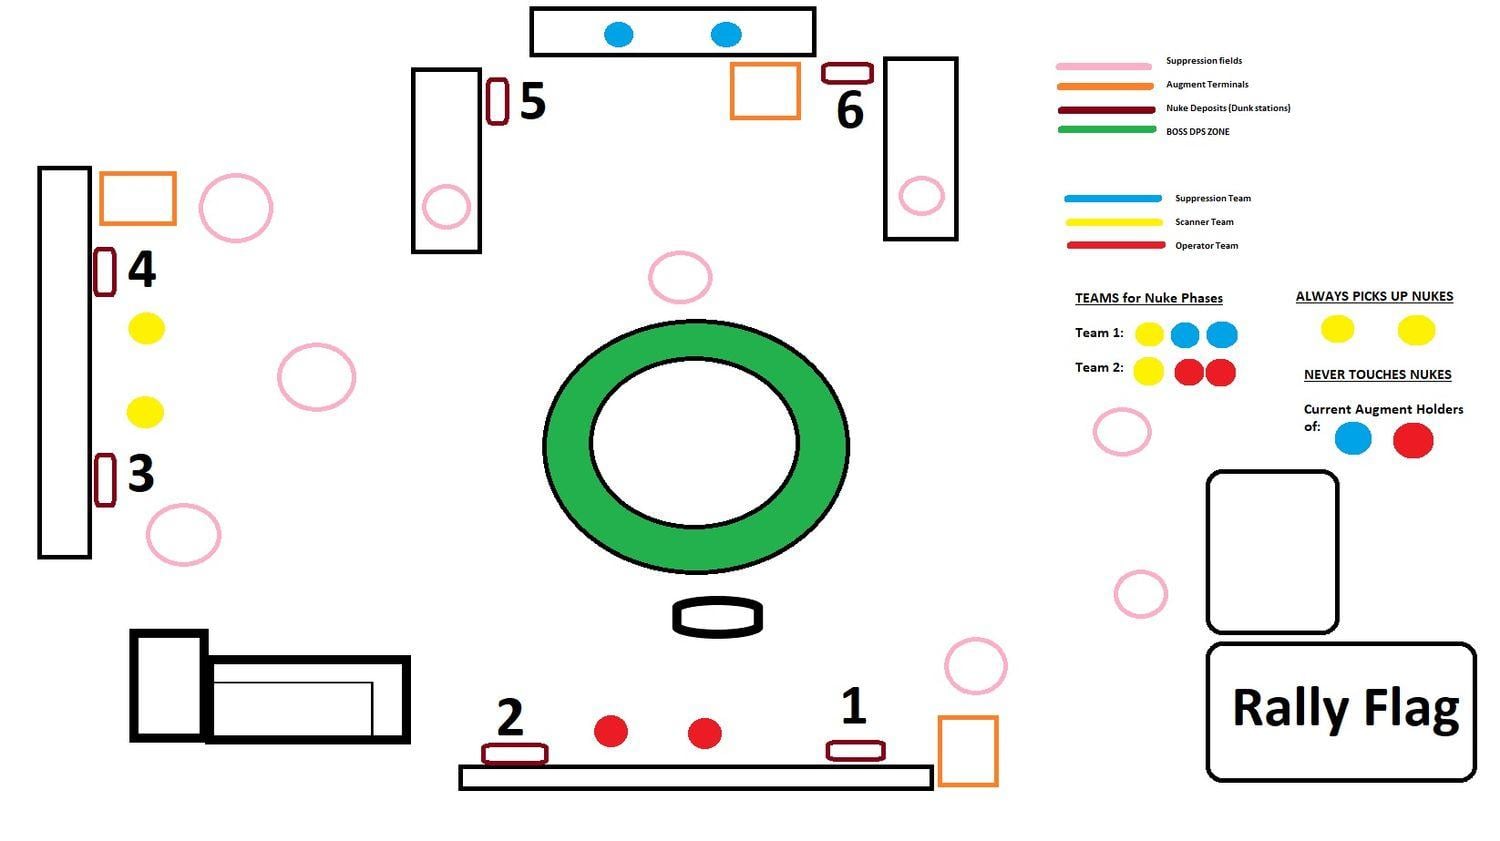
To start the encounter, the main task of which is to suppress Taniks while depositing the nuclear cores, you simply have to approach him. He will be standing in front of the arena by the window. There is no way to kill the boss at this stage. So the main goal of this encounter is to place the nuclear cores from the machines in the room in the correct terminals in front of Taniks.
The already familiar roles of Operator and Scanner will be joined by the role of Suppressor. So this time the team will have to split into three parts with two players per role, each with a different task. The roles will be determined after the first wave of enemies spawn. One of the pair of players will be the buff carrier, and the second will be the backup.
The Operator’s job is to shoot the glowing keypad when the alarm sounds. The two keypads are located in the center on the metal walkway and at the far end of the room. This will allow other players to take the nuclear cores from the terminal. Operators have the least busy role, so they should be actively assisting teammates and clearing enemies.
During the alarm sounds, the Scanner should call out the two glowing terminals in front of Taniks. There are four in all. Guardians with 4 nuclear cores have to put them in these terminals. Both Operators and Scanners, unlike Suppressors, can deposit the nuclear cores. The Scanners will find it much easier because they can see exactly which terminals to place them in.
The task of the Suppressor is to shoot at Taniks. There are three white balls hovering in the room: one in front of the Taniks, one to the left, and one to the right just a little bit higher from the walkway. When one of them glows, the Suppressor has to stand under it and shoot at the boss in order to stun him. You’ll have to repeat these actions three times, obviously. After you stunned Taniks three times, one of the buff holders will receive a debuff called Deactivated Augment. In this case, they must pass their buff to their partner through any augment terminals in the room.
Players without active roles will also have a hard time. They have to clear out enemies, deposit nuclear cores, and keep a close eye on their partner to pick up their role if they receive a Deactivated Augment debuff. On the carriers of the nuclear cores themselves the Radiation debuff will fall, which will kill the player when he reaches a stack of 10. To avoid this wipe mechanic you need to pass the cores and rest for a while before taking them again.
After you have deposited enough cores, the floor between the depositing terminals will open. The entire team should jump down and run through the hallway as quickly as possible, because the vessel will begin to crash.
Final Encounter: Taniks, The Abomination
We finally got to the final boss fight. The area where the final battle will take place is located outside of the arena where the team found themselves at the entrance to the Crypt. This part is quite challenging, but you can always take advantage of our Taniks Abomination last boss kills to get the coveted Eyes of Tomorrow.
The mechanics are quite simple, but not obvious at first glance. The objective of the encounter is to kill Taniks by shooting him in the body. This will release the nuclear cores. Deposit them in the terminals, and begin dealing damage to him during the special DPS phase. Sounds creepy, but it’s not hard if you do it right with our help.
The roles are the same as in the fourth encounter, so you can stay the same pairs. You can get the buffs at the first enemy spawn. The Deactivated Augment debuff will also come back from the fourth encounter. It will appear after the Suppressors stun Taniks for the third time, so don’t forget to pass your buffs through the augment terminals. At the same time, the tasks of the buff holders will change slightly.
When the Guardians pick up the nuclear cores, they can get trapped in a purple bubble, which will kill them. Only Operators can free them by shooting the bubble, so Operators should never be the ones carrying the cores.
Scanners will communicate which terminal to put the nuclear core in. They can also deposit the cores themselves.
The task of the Suppressors is the same as in the previous encounter. They must get under the glowing white ball and shoot at Taniks to stun him. You can deposite the cores when all three white balls are glowed and Taniks is stunned three times. Before the third time, the Suppressor should take his time and wait until two players are detained, so the Operator doesn’t accidentally lose his role by getting a Deactivated Augment debuff.
And this time the arena is divided into three parts: spawn, area with blue light, and with orange light. Each with two terminals for depositing nuclear cores. Taniks will rotate through these three zones and launch a purple blast over the ground, which the Guardians need to dodge. During this phase, three white orbs will appear around Taniks. The Suppressor should stand under them, shoot at Taniks, and stun him. This mechanic is familiar to us from the previous encounter.
When Taniks rotates, players must shoot the boosters located on his body. After this, two nuclear cores will drop out, which must be deposited in the correct terminals. Don’t forget that the cores carriers get a Radiation debuff. So don’t lose support for them and swap cores in time. Also, during this phase the Guardians carrying cores can get trapped in purple bubbles, which will kill them if they are not rescued in time. To free them the Operator must shoot them. In this way, you must deposit four cores to start the damage phase.
When he is low enough and the damage phase is over, he will teleport away. After that, the only thing left is to finish him off and the encounter is over.
The best part is left — the Deep Stone Crypt rewards.
Deep Stone Crypt Weapons
In this table you can see all the characteristics and merits of weapons from the raid. All these weapons are craftable, except Eyes of Tomorrow Exotic. Collecting all DSC Weapon Patterns might be challenging and take weeks, but we can collect five red-bordered weapon copies and unlock craft and patterns for you.
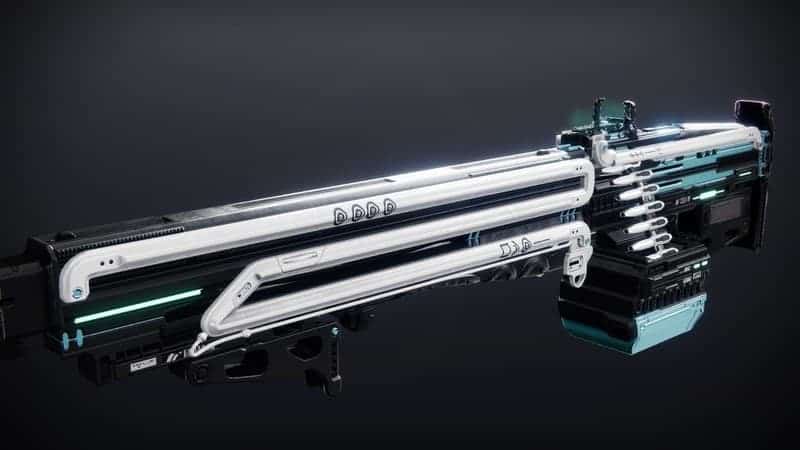
Commemoration

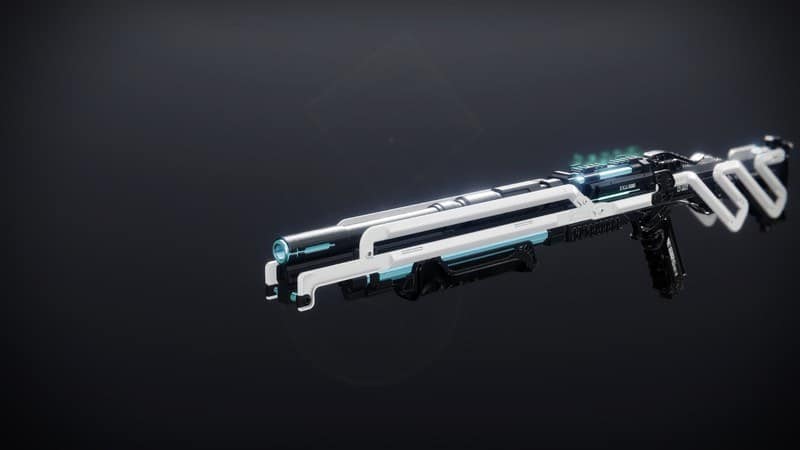
Succession
Heritage

Eyes of Tomorrow
Posterity
Trustee
Bequest
| Weapon | Type | Ammo | Element | |
|---|---|---|---|---|
 | Commemoration | Machine Gun | Heavy | Void |
 | Succession | Sniper Rifle | Special | Kinetic |
 | Heritage | Shotgun | Special | Kinetic |
 | Eyes of Tomorrow | Rocket Launcher | Heavy | Solar |
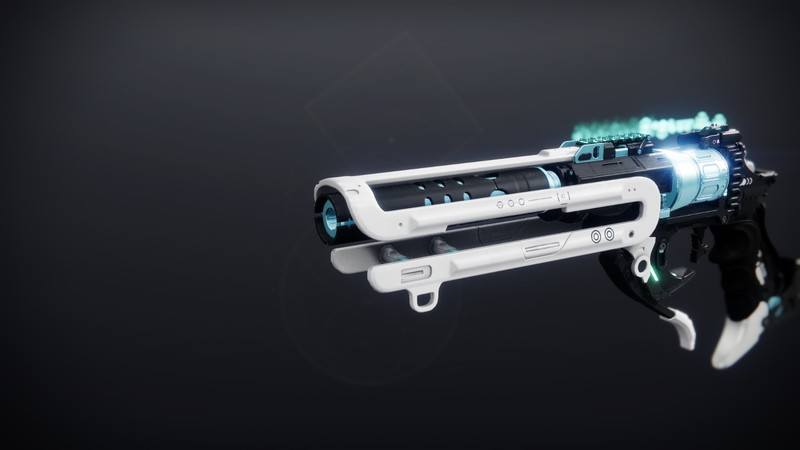
 | Posterity | Hand Cannon | Primary | Arc |
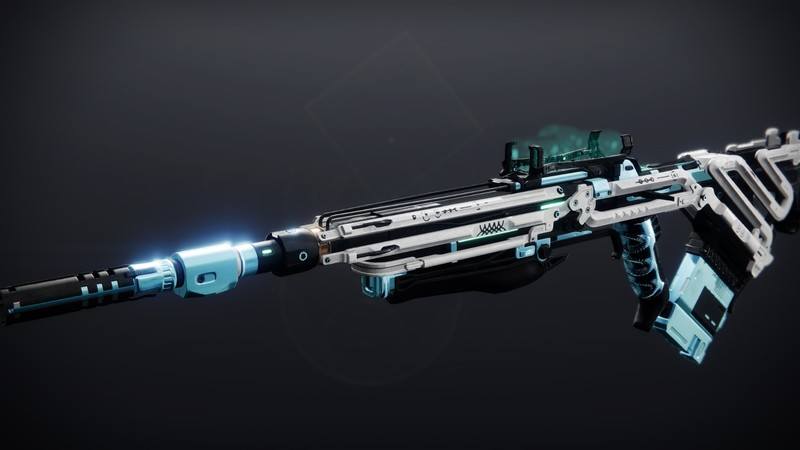
 | Trustee | Scout Rifle | Primary | Solar |
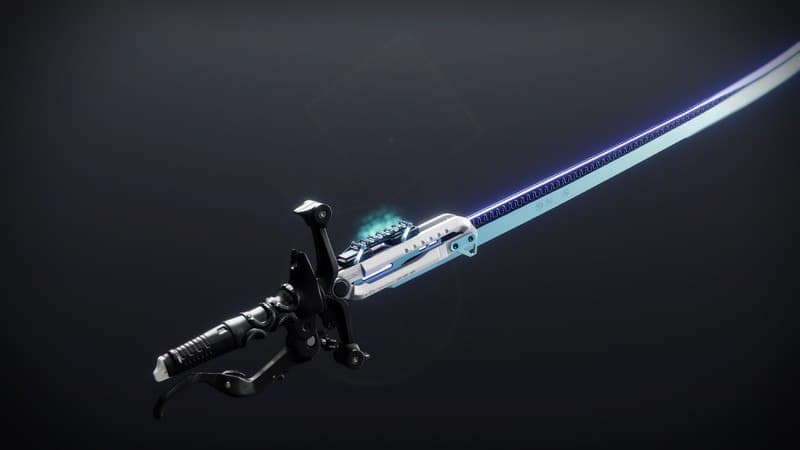
 | Bequest | Adaptive Sword | Heavy | Power |
Commemoration is a Void Adaptive Machine gun, good both for PvE and PvP, that can roll with the following perks:
- Perk 1: Well-Rounded, Fourth Time’s the Charm, Adaptive Munitions, Surplus, Reconstruction, Dragonfly, Subsistence
- Perk 2: Redirection, Unrelenting, Repulsor Brace, Focused Fury, Rampage, Firing Line, Killing Tally
Most wanted PvE Commemoration rolls:
- Perk 1: Dragonfly (also good: Reconstruction)
- Perk 2: Killing Tally
Most wanted PvP Commemoration rolls:
- Perk 1: Dynamic Sway Reduction
- Perk 2: Under Pressure
Succession is a Kinetic Aggressive Sniper rifle, good for PvE, that can roll with the following perks:
- Perk 1: Reconstruction, Shot Swap, No Distractions, Moving Target, Demolitionist, Lead from Gold, Firmly Planted
- Perk 2: Firing Line, Snapshot Sights, Focused Fury, Recombination, Vorpal Weapon, Box Breathing, Osmosis
Most wanted PvE Succession rolls:
- Perk 1: Reconstruction
- Perk 2: Vorpal Weapon (also good: Firing Line)
Heritage is a Kinetic Pinpoint Slug Shotgun, good for PvE, that can roll with the following perks:
- Perk 1: Auto-Loading Holster, Demolitionist, Hip-Fire Grip, Slideshot, Pugilist, Reconstruction, Threat Detector
- Perk 2: Snapshot Sights, Moving Target, Offhand Strike, Killing Wind, Swashbuckler, Recombination, Focused Fury
Most wanted PvE Heritage rolls:
- Perk 1: Reconstruction
- Perk 2: Recombination (also good: Auto-Loading Holster)
The Eyes of Tomorrow Exotic Rocket launcher, good for PvP and Gambit, features the following Exotic perks:
- Eyes on All: This weapon is capable of tracking and firing at multiple targets simultaneously.
- Adaptive Ordnance: Killing four or more combatants in a single volley increases the damage of the next volley.
Posterity is an Arc Precision Hand cannon, good for PvE, that can roll with the following perks:
- Perk 1: Killing Wind, Wellspring, Surplus, Rapid Hit, Perfect Float, Voltshot, Reconstruction
- Perk 2: Gutshot Straight, Pugilist, Opening Shot, Redirection, Frenzy, Focused Fury, Rampage
Most wanted PvE Posterity rolls:
- Perk 1: Voltshot
- Perk 2: Rampage (also good: Frenzy)
Trustee is a Solar Rapid-fire Scout rifle, good for PvE, that can roll with the following perks:
- Perk 1: Under Pressure, Pugilist, Killing Wind, Surplus, Recombination, Perpetual Motion, Rapid Hit
- Perk 2: High-Impact Reserves, Redirection, Swashbuckler, Opening Shot, Wellspring, Focused Fury, Incandescent
Most wanted PvE Trustee rolls:
- Perk 1: Reconstruction (also good: Rapid Hit)
- Perk 2: Incandescent
Bequest is an Arc Adaptive Sword that can roll with the following perks:
- Perk 1: Thresh, Energy Transfer, Wellspring, Relentless Strikes, Duelist’s Trance, Tireless Blade, Unrelenting
- Perk 2: Surrounded, Assassin’s Blade, En Garde, Demolitionist, Vorpal Weapon, Chain Reaction, One For All
Most wanted PvE Bequest rolls:
- Perk 1: Unrelenting
- Perk 2: Surrounded
Deep Stone Crypt Armor
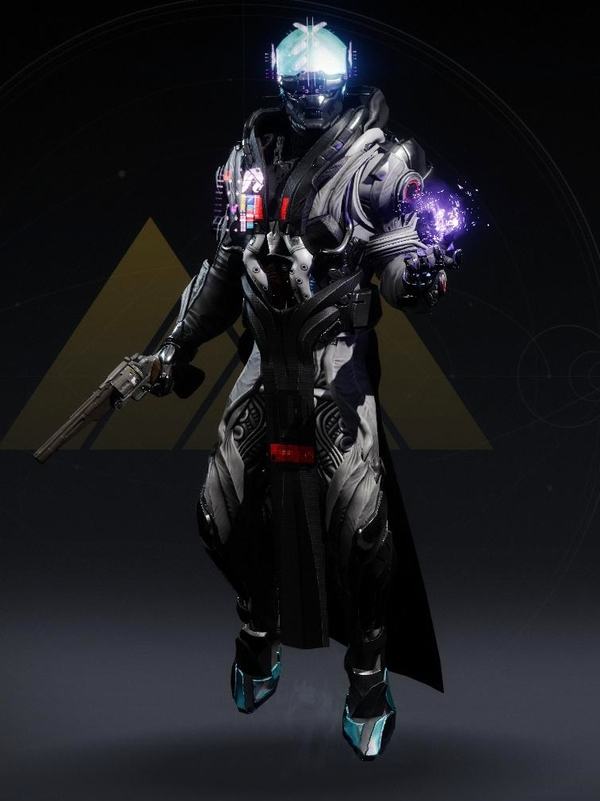
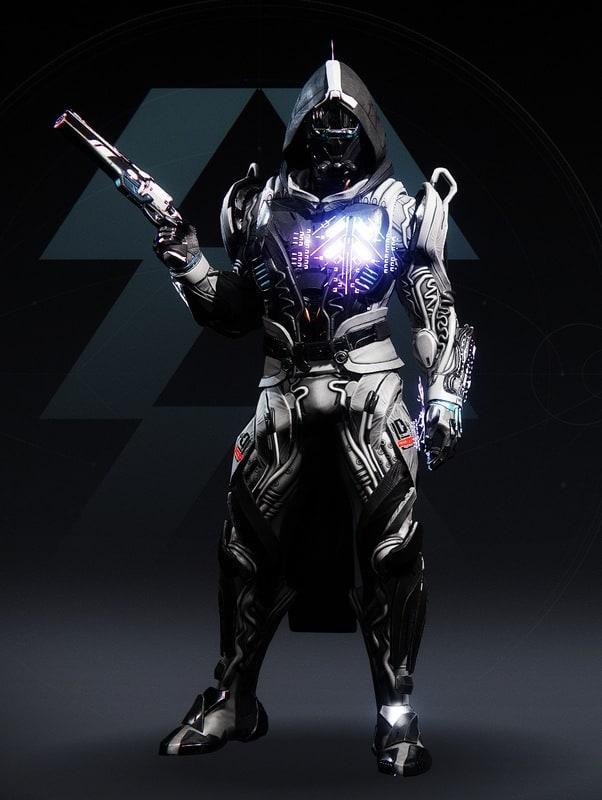
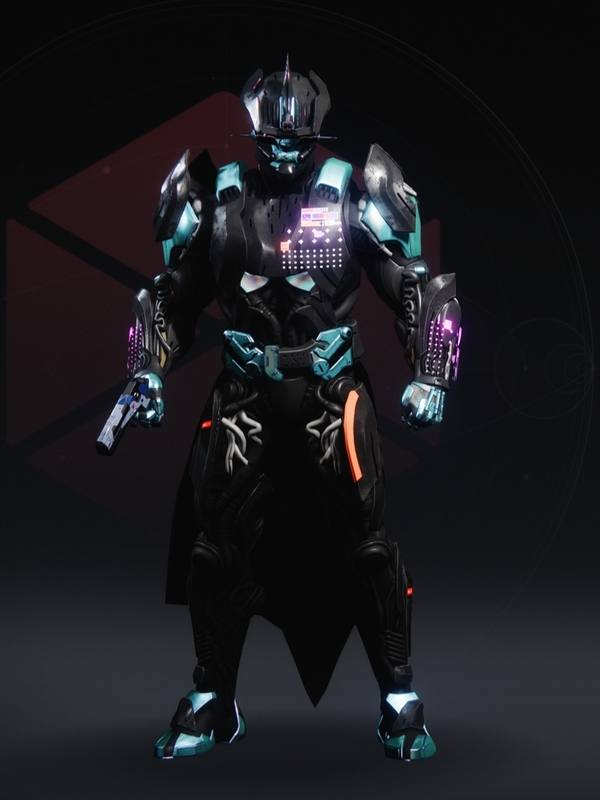
In Destiny 2, like other raids, DSC provides an armor set for each class known as Legacy of the Oath, which is highly regarded for its visually appealing design.
Head: Legacy’s Oath Helm
Arms: Legacy’s Oath Gauntlets
Chest: Legacy’s Oath Plate
Legs: Legacy’s Oath Greaves
Class Item: Legacy’s Oath Mark
4.9That’s all, now you can successfully complete the Destiny 2 Deep Stone Crypt raid and get DSC loot. And if you can’t or need company, Overgear.com is always happy to help.
