Icecrown Citadel is one of the best raids in the entire game. If you need the best PvE gear in the game, you can’t miss out this raid, because they are concentrated in WotLK ICC drops. Plus, it’s incredibly interesting! In this Icecrown Citadel guide we’ll tell you everything about the bosses, raid tactics, best drops and more.
 4.9
4.9What is Icecrown Citadel in WotLK Classic
Icecrown Citadel is a raid dungeon in the World of Warcraft: Wrath of the Lich King (WotLK) expansion. It is a massive fortress located in the Icecrown zone, in the northern part of Northrend. It serves as the final raid of the expansion, featuring multiple wings and a challenging final confrontation with the Lich King, Arthas Menethil.
The raid consists of multiple wings, each with its own unique themes and bosses. The four main wings are The Lower Spire, The Plagueworks, The Crimson Hall, and The Frostwing Halls. Each wing requires a certain gear level and progression to access.
The raid can be done in Heroic or Normal mode. Heroic mode changes several strategies and, as expected, loot. Heroic is much better than normal but can be done only by experienced players with perfectly learned tactics and almost perfect gear.
WotLK Icecrown Citadel Release Date 2023
The biggest question you might have when you take a quick look at this raid is when will it release on the servers? Icecrown Citadel in WoW WotLK Classic was released on October 12, 2023. Prepare tactics, gems, potions, elixirs and everything you need to defeat the Lich King!
Icecrown Citadel Location

It’s located in the Icecrown zone, which is in the northernmost region of Northrend. To reach Icecrown Citadel, you need to follow these steps:
- Level up: Start by reaching the appropriate level to venture into Northrend. In WotLK Classic, the recommended level range for Icecrown Citadel is 80, so make sure you have reached that level. But if you haven’t reached 80 level yet, you shouldn’t even think about ICC or any raid. Your itemlevel is too low to even try to beat the trash on the start of the raid. If you want to skip that boring process just use our Wotlk Level Boost;
- Travel to Northrend: Go to a capital city in Azeroth (such as Stormwind for Alliance or Orgrimmar for Horde) and find the relevant flight path. Take a flight to Menethil Harbor (Alliance) or Undercity (Horde).
- Reach Icecrown: From Menethil Harbor, take a boat to Valgarde in the Howling Fjord. From Undercity, take a Zeppelin to Vengeance Landing in the same zone. Once you reach the Howling Fjord, travel northeast to reach the zone of Icecrown.
- Finding the Citadel: As you enter Icecrown, head to its central area. Icecrown Citadel will be prominently visible, looming in the distance. You can either directly make your way towards the citadel or follow the main road that leads to its entrance.
- Entering Icecrown Citadel: There are two entrances to Icecrown Citadel: one at the upper level and the other at the lower level. The upper-level entrance provides access to the raid instance. To reach the upper-level entrance, follow the path that leads uphill, surrounded by ice walls, until you find a bridge leading into the Citadel.
- Entering the Raid: Once you cross the bridge and enter Icecrown Citadel, you will be inside the raid instance. From there, you can proceed to form or join a raid group to begin battling the bosses within.
Also, there are two very useful tips on how to reach ICC very quickly:
- Find a mage who can make you a portal to Dalaran. With a little gold, you will receive a portal to Dalaran, from which you can easily reach the Citadel of the Icecrown on a flying mount. And if you are feeling sad to spend your hard-earned gold for such a trifle, you can use our WotLK Gold service;
- Ask to use the Meeting Stone. Oddly enough, this kind of method is pretty much common among players, as it only requires two people near the stone. Just two people can summon an entire raid! Be sure to use it! Also, the Ritual of Summoning can be used by a warlock inside a raid, saving you a lot of time.
How to Leave Icecrown Citadel
To leave Icecrown Citadel (ICC) after completing the raid, you can exit the instance. Once you are done with looting and distributing items, your time to leave has come. To do this, you can either use the in-game teleporter or manually walk out:
- Using the teleporter: In Icecrown Citadel, there is a teleporter located near the entrance of the instance, on the upper level. Interact with the teleporter to be teleported back to the entrance of Icecrown Citadel. From there, you can simply walk outside.
- Walking out: If you prefer to walk out manually, make your way back through the corridors and rooms of the Citadel until you reach the entrance. Once outside, you can start heading back to your desired location, whether it’s a nearby respawn point, a nearby flight path, or a desired zone or city.
- Hearthing or using portals: If you have an available Hearthstone, you can set your Hearthstone to a preferred location before entering ICC. Using your Hearthstone will teleport you directly to that location, saving you the hassle of traveling back through Northrend.
- Additionally, certain classes or abilities allow alternative ways of transportation, such as Mages’ portals or Warlocks’ summoning stones. Utilize these abilities if available to expedite your journey back to your desired location.
What is the order of the Icecrown Citadel?
Icecrown Citadel is divided into several distinct locations or wings. Each location has its own theme and houses specific bosses. Here are the main areas within the Citadel:
The Lower Spire
- The entrance to Icecrown Citadel, where players face the first set of challenges.
- Contains bosses like Lord Marrowgar, an undead monstrosity, and Lady Deathwhisper, a powerful necromancer.
The Plagueworks
- A wing dedicated to the most vile and pestilent experiments of the Scourge.
- Bosses in this area include Festergut, a bloated abomination, and Rotface, a defiled abomination.
- The final boss of this wing is Professor Putricide, a mad scientist conducting horrific experiments.
The Crimson Hall
- The blood-soaked wing of Icecrown Citadel.
- Players confront the Blood Prince Council, a trio of vampire princes, and Blood-Queen Lana’thel, the leader of the San’layn.
The Frostwing Halls
- The icy lair of the Frostwing dragonflight.
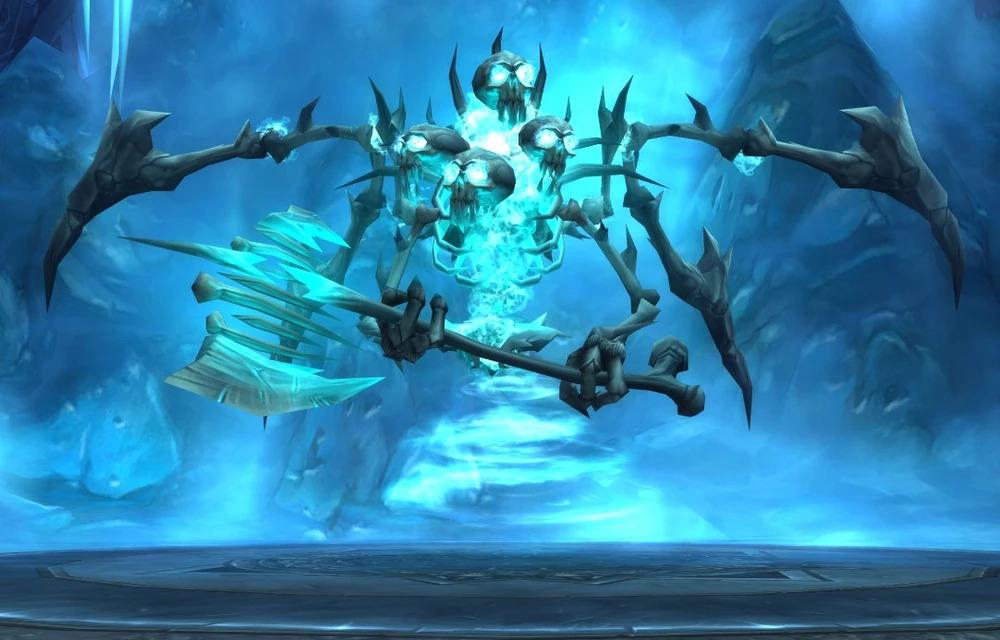
- The first encounter in this wing is with Sindragosa, a powerful frost wyrm.
- The final boss of Icecrown Citadel is the legendary Lich King, Arthas Menethil. This epic encounter pushes players to their limits.
These locations make up the main areas within Icecrown Citadel. Each location has its own set of unique challenges, environments, and bosses that players must overcome in their quest to defeat the Lich King and bring an end to his reign of terror.
Icecrown Citadel Boss List
In the Icecrown Citadel raid in World of Warcraft: Wrath of the Lich King , there are a total of eleven bosses. Here is a description of each boss fight:
- Lord Marrowgar: The first boss is an undead behemoth, Lord Marrowgar. The fight revolves around avoiding his Bone Spike mechanic while managing adds and correctly positioning your raid to deal with the Bone Storm ability.
- Lady Deathwhisper: This fight features a high elf necromancer, Lady Deathwhisper. Players need to interrupt her powerful spells and manage the adds that she summons. The fight transitions from phase 1 to phase 2, where she becomes invulnerable, and the raid members needs to destroy her Mana Barrier to resume damaging her.
- Gunship Battle: This is a unique encounter where players engage in a battle on an airborne gunship. The raid splits into two groups, fighting against a rival faction’s ship. Players need to defeat enemy soldiers, cannons, and boarding parties until both enemy captains are dead.
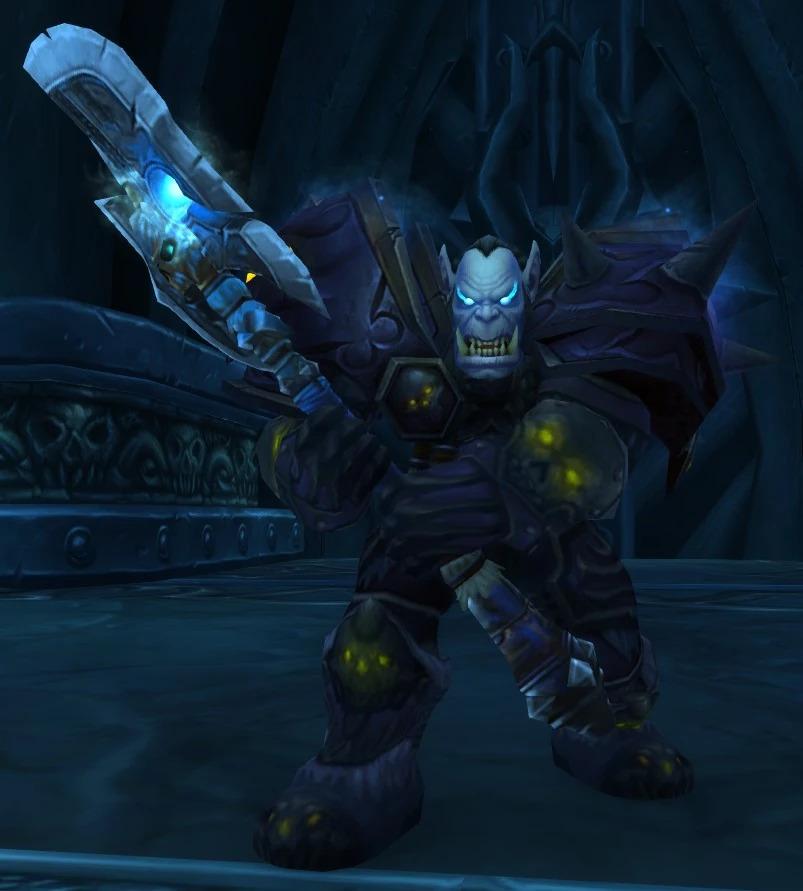
- Deathbringer Saurfang: This boss is a fierce orc death knight. The fight revolves around managing his Blood Power mechanic while avoiding and killing Blood Beasts and Blood Nova explosions. Deathbringer Saurfang’s power increases over time, making it a race against the clock.
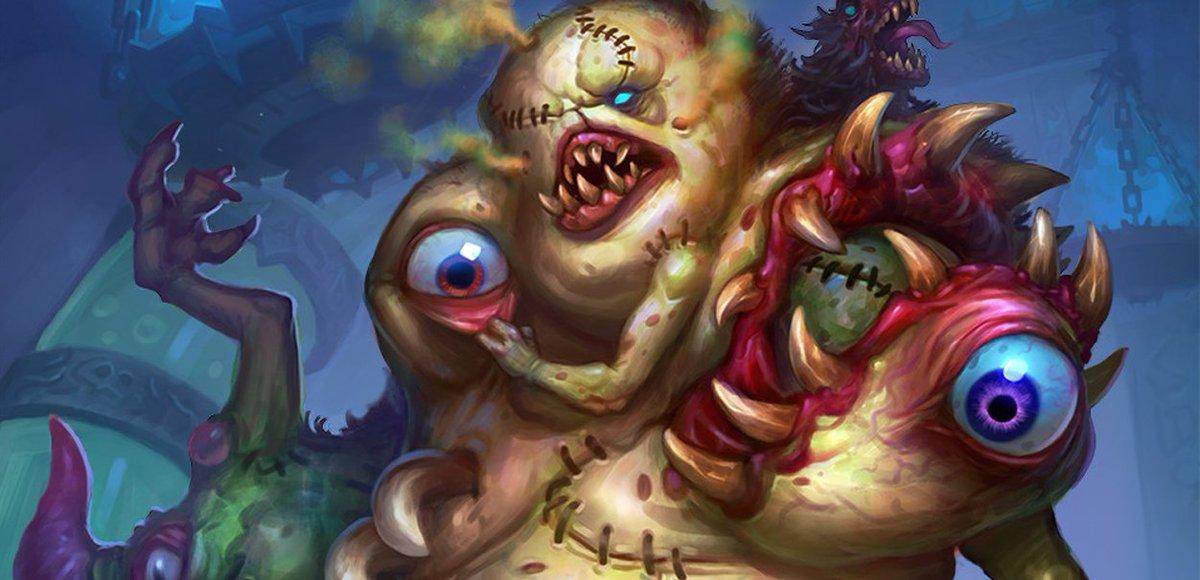
- Festergut: An abomination boss, Festergut deals heavy damage to the whole raid. Players must manage a stacking debuff on the tank and avoid standing behind other players to prevent infection. The boss also periodically releases Gas Spores that need to be kited and detonated.
- Rotface: Another abomination, Rotface infects players with Mutated Infection. The raid needs to effectively position and manage the ooze spawns while avoiding damaging the boss during ooze merge phases. Interrupting his spellcasting abilities is also crucial.
- Professor Putricide: A gnome alchemist turned abomination, Professor Putricide utilizes various mechanics. Players must manage goo puddles, defilements on the ground, avoid being hit by Malleable Goo, and deal with his mutating abilities. The fight progresses through multiple phases.
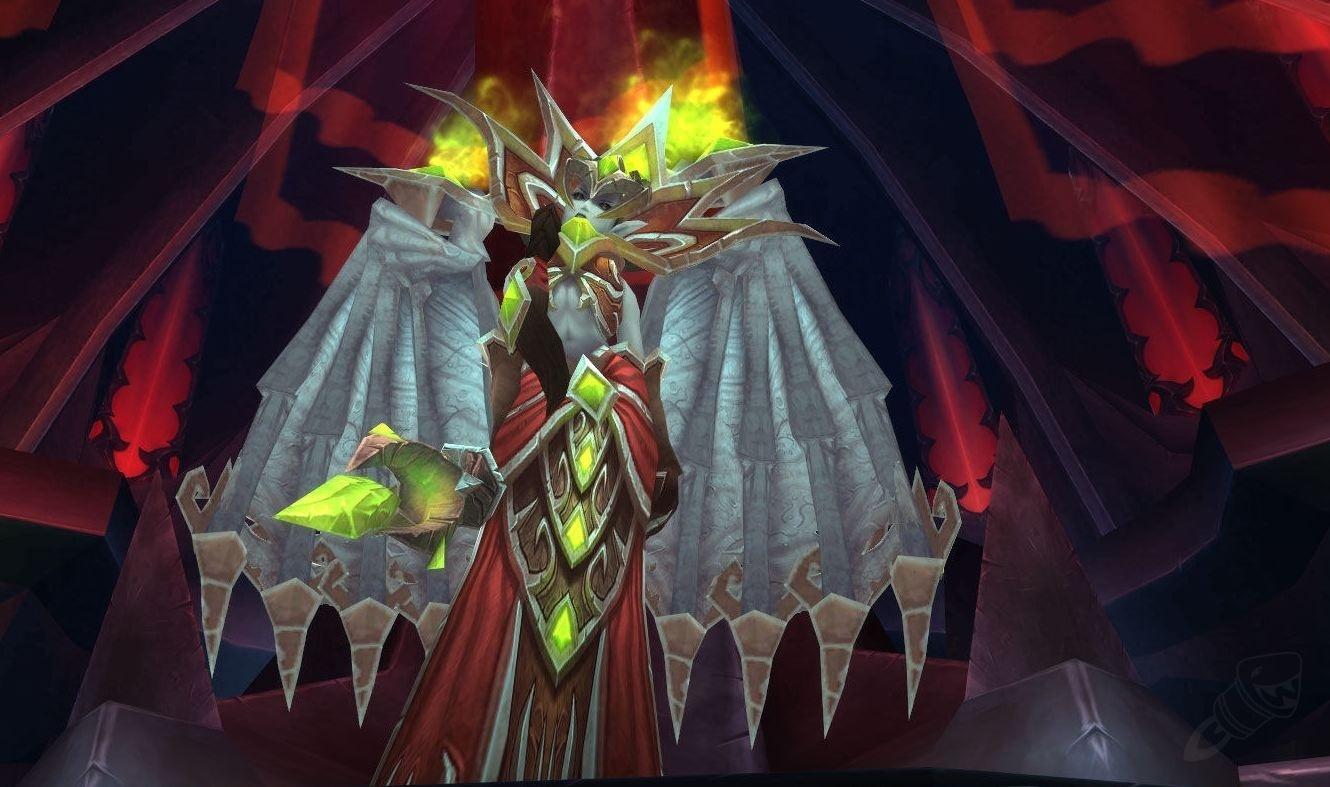
- Blood Prince Council: This boss fight features three blood elf princes (Prince Valanar, Prince Keleseth, Prince Taldaram), who all have different abilities and must be killed simultaneously. Players need to continuously switch targets and handle unique mechanics based on each prince’s abilities to be successful.
- Blood Queen Lana’thel: A vampire-like boss, Blood Queen Lana’thel, players must manage her Blood Mirror ability, which redirects incoming healing. Players also periodically get a debuff that needs to be dispelled promptly. The fight involves complex positioning and coordination.
- Valithria Dreamwalker: A green dragon boss, Valithria Dreamwalker, needs to be healed rather than damaged. Players must keep her alive while dealing with waves of adds and the boss herself. Damage done to Valithria transfers to her Nightmare Corruption, which needs to be cleansed.
- Sindragosa: The penultimate boss, Sindragosa is a fearsome frost wyrm. Players must manage Frost Breath and Ice Tomb abilities while avoiding the Unchained Magic debuff. The fight also includes air phase transitions and requires careful positioning.
- The Lich King: The final boss, Arthas Menethil, confronts the raid. The fight has various phases with unique mechanics, including defiling the ground, summoning Valkyries, dealing with adds, and managing healing debuffs. Players must survive until the final phase and defeat Arthas to conclude the raid.
Strategy for Icecrown Citadel Bosses
The key secret to success in defeating bosses is the chemistry between players in the raid and a full understanding of what exactly each role needs to do on each boss. To make it easier for you to adapt in an unfamiliar situation, we have made a small guide to all bosses in ICC WotLK Classic.
Lord Marrowgar
Abilities:
- Bone Spike: Impales a player, lifting them into the air. It needs to be quickly broken by other players to prevent severe damage to the impaled player.
- Coldflame: Creates a line of fire on the ground, dealing damage to anyone standing in it. Players should move out of it to avoid taking damage.
- Bone Storm: Lord Marrowgar spins rapidly, causing damage to all players within range. Make sure to heal through the damage and avoid standing in the Bonestorm.
Normal: Assign a dedicated tank for Marrowgar while DPS focuses on the spiked bone adds. Tanks should move out of the way when Marrowgar casts Bone Storm.
Heroic: Be ready to quickly break out players affected by Bone Spikes using single-target abilities or assigned DPS. Spread out to minimize damage from Coldflame.
Lady Deathwhisper
Abilities:
- Death and Decay: Creates an area of dark energy, dealing damage over time to anyone standing within it. Move out of it to avoid damage.
- Dominate Mind: Takes control of a player, forcing them to attack their allies. These players need to be interrupted or dispelled to regain control.
- Frostbolt: Casts a frost spell on a player, dealing damage. Interrupt or dispel the Frostbolts to reduce incoming damage.
- Mana Barrier: Powerful barrier that continually replenishes any lost health, at the expense of the mana.
Normal: Assign interrupts for Deathwhisper’s Frostbolt Volley to minimize raid-wide damage. Keep a designated group to handle adds and prioritize killing the Cult Adherents to disable their shields.
Heroic: Deathwhisper’s mana drain is more severe, so mana management becomes crucial. Casters should be mindful of silencing abilities used by the Deformed Fanatics and Empowered Adherents.
Gunship Battle

Abilities:
- Powering Up: Periodically, the gunship crew powers up the cannons, dealing heavy damage to anyone standing in front of them. Move out of the way to avoid it.
- Battle-Mage’s Wrath: The enemy battle-mages channel a damaging ability. Interrupt their channel to minimize incoming damage.
- Wounding Strike: The enemy melee attackers will occasionally perform a heavy strike, which needs to be mitigated or healed quickly.
Normal/Heroic: Have a balanced group of ranged and melee DPS to quickly dispatch enemy NPCs on the opposing ship. Use cannons and grappling hooks to maneuver and interact with the enemy ship effectively.
Deathbringer Saurfang
Abilities:
- Blood Nova: Deals damage to all players in the raid, with the damage increasing based on the number of Blood Beasts alive at the time. Kill the Blood Beasts quickly to minimize raid damage.
- Mark of the Fallen Champion: Afflicts a player, causing them to damage themselves and requiring the raid to heal them to remove the debuff.
- Rune of Blood: Increases Saurfang’s damage and healing done. It needs to be dispelled or spellstolen whenever possible.
- Boiling Blood: Inflicts 5000 Physical damage every 3 sec for 15 sec.
- Call Blood Beast: Saurfang calls for blood beasts to help him in the fight.
- Frenzy: Increases Saurfang’s attack speed by 30%
- Scent of Blood: Reduces all nearby enemies movement speed by 80% and increasing their damage by 300% for 10 sec.
Normal: Tank swap when Saurfang reaches 3 Blood Power to avoid excessive damage due to Rune of Blood. Healers should be ready to quickly heal the target affected by Mark of the Fallen Champion.
Heroic: The frequency of Blood Power gains is increased, so tank swaps need to be precise. Raid members marked by Mark of the Fallen Champion should spread out to minimize collision damage.
Festergut
Abilities:
- Gastric Bloat: Inflicts damage to a random player and applies a stacking debuff. Players affected need to move away from the raid to minimize damage when it expires.
- Gas Spore: Spawns a volatile gas spore that will explode and deal raid-wide damage when it reaches players. Players need to stack together to share the damage and prevent excessive damage to the raid.
- Pungent Blight: Creates a cloud of toxic gas that spreads over time, dealing damage. Players need to manage their positioning to avoid taking excessive damage.
Normal: Assign players to spread around the room to minimize the spread of Gastric Bloat. Move out of the raid when affected by Vile Gas to avoid spreading it.
Heroic: Gastric Bloat inflicts more damage, so dispels and healing become more crucial. Ranged DPS players should quickly move out of Pungent Blight to minimize raid-wide damage.
Rotface
Abilities:
- Mutated Infection: Infects a random player, causing them to spread the infection to nearby players and spawn a slime when it expires. Infected players need to move away from the raid to avoid spreading the infection.
- Slime Spray: Shoots a stream of slime at a random player, dealing damage to anyone caught in its path. Affected players need to move out of the way to avoid taking damage.
- Ooze Flood: Oozes periodically spawn and move slowly across the room, leaving pools of damaging slime in their wake. Players need to avoid standing in the slime.
Normal: Tanks should position Rotface away from the raid while melee DPS handles the Abomination adds. Players affected by Mutated Infection should run into the slime pools to remove the debuff.
Heroic: Abominations explode with damage and DoT effects upon death, so DPS should kill them away from the raid. Players with Mutated Infection must be isolated from the raid and receive constant healing.
Professor Putricide

Abilities:
- Mutated Plague: Infects a player, causing them to leave a trail of green slime that damages anyone standing on it. Infected players need to kite and avoid others to prevent spreading the slime.
- Unstable Experiment: Summons an unstable abomination that will explode upon death, causing raid-wide damage. The abomination should be killed away from the raid and players need to move away from it when it dies.
Normal: Avoid standing in Malleable Goo as it reduces movement speed. Unstable Experiment adds need to be interrupted. Dispel Unbound Plague on selected players by moving near them.
Heroic: Unbound Plague deals increasing damage over time, so consistent dispels and coordination are necessary. The Abomination, created by consuming a Choking Gas Bomb, should be tanked away from the raid.
Blood Prince Council
Abilities:
- Fel Flames: Targets a random player, creating a line of fire that deals damage to anyone standing in it. Move out of it to avoid taking damage.
- Kinetic Bomb: Attaches a bomb to a player, which needs to be passed to another player to prevent excessive damage when it explodes.
- Glittering Sparks: Summons sparks that travel randomly and explode, dealing damage to anyone caught in the blast. Avoid the sparks to minimize damage.
Normal: Split the raid into two groups, each assigned to a specific Prince. DPS should quickly switch to Kinetic Bombs to prevent massive AoE damage. Avoid Empowered Flames.
Heroic: Healers should dispel Prince Keleseth’s Empowered Shadow Lance from multiple players immediately. Tanks need to swap positions during Empowered Flame to avoid excessive damage.
Blood-Queen Lana’thel
Abilities:
- Essence of the Blood Queen: Causes players to periodically deal damage to themselves and nearby players. Players need to stay spread out to avoid excessive damage.
- Pact of the Darkfallen: Links two players, causing them to share all damage taken for a short duration. Healers need to be ready to heal both players during this time.
- Swarming Shadows: Damaging shadows swirl around the room, dealing damage to anyone standing in them. Avoid standing in the shadows to minimize damage.
Normal: Bite targets will be sent to an alternate realm, where they should DPS the Blood Mirror and consume the Essence of the Blood Queen to heal. The DPS group should rotate to manage Bite debuff.
Heroic: Coordinate DPS rotations between regular and bite groups to control the number of players affected by Bite. Healing cooldowns need to be used wisely to counter increased damage.
Valithria Dreamwalker

Abilities:
- Emerald Vigor: Increases Valithria’s healing done. It needs to be dispelled or spellstolen whenever possible.
- Mana Void: Periodically drains Valithria’s mana, reducing her healing output. Interrupt or kill the Mana Void quickly to prevent this.
- Summon Portal: Calls portals that spawn enemies. These portals need to be killed quickly to prevent additional enemies from overwhelming the raid.
Normal: Assign a dedicated healing team to focus on healing Valithria while others deal with waves of adds. Use portals to enter the Emerald Dream, kill Nightmare Guardians for buffs, and maximize damage on Valithria.
Heroic: Healing requirements are intensified, and the number of portals is reduced to two. Efficient healing cooldown usage and precise timing for portal rotations become crucial.
Sindragosa
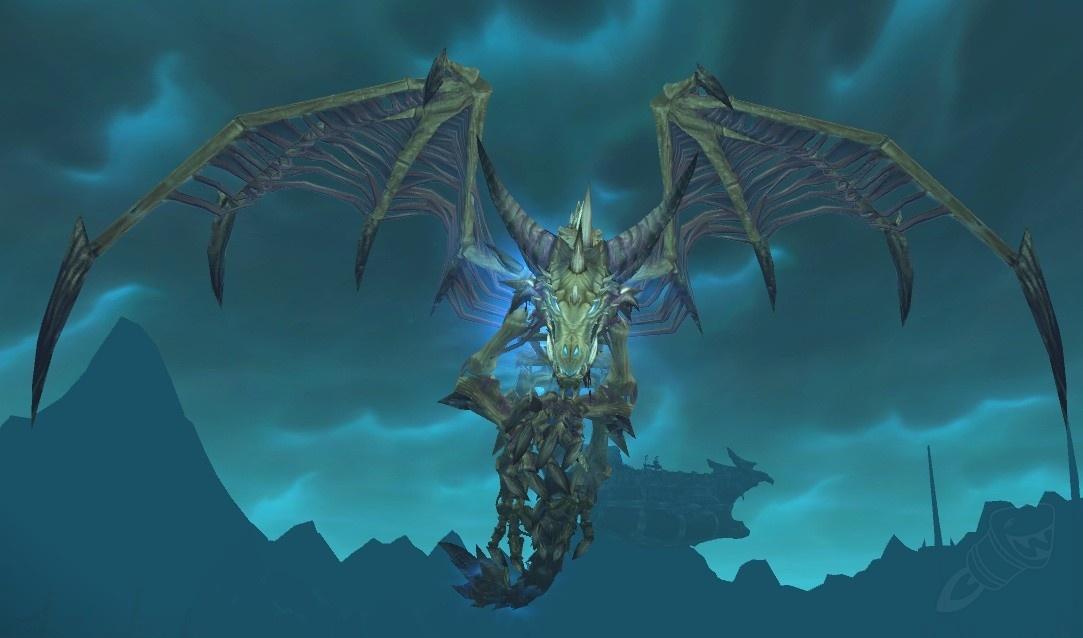
Abilities:
- Frost Breath: A chilled breath attack that deals heavy damage to players in front of Sindragosa. Avoid standing directly in front of her to minimize damage.
- Blistering Cold: Applies a stacking debuff that increases damage taken from Frost Breath. It should be dispelled or spellstealed as soon as possible.
- Unchained Magic: Afflicts a player, causing them to explode and deal damage to nearby players if they cast a spell. Players need to refrain from casting spells when afflicted.
Normal: Position players around the room to reduce the spread of Unchained Magic. Spread out to minimize damage from Frost Bombs, and quickly break out players trapped in Ice Tombs.
Heroic: Dispelling Unchained Magic should be immediate to prevent the debuff from spreading. Ice Tombs affect more players, so clean them quickly to minimize disruption.
The Lich King
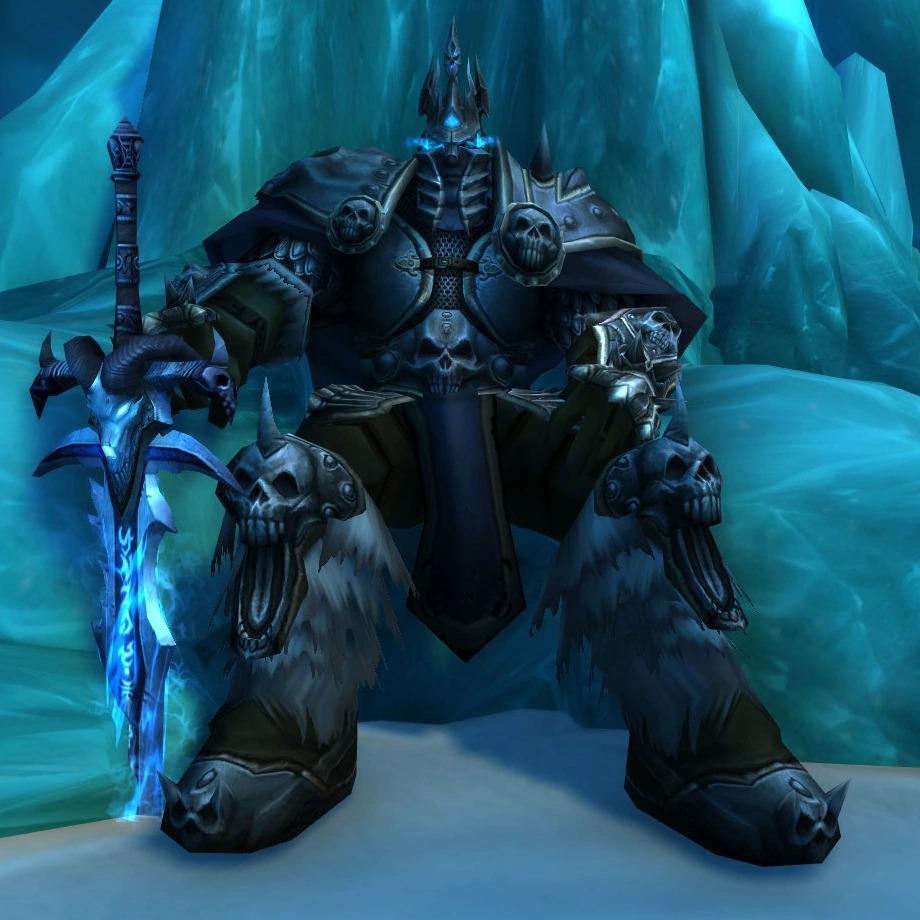
Abilities:
- Infest: Deals damage to all players and leaves a debuff that causes increasing damage over time. The debuff needs to be dispelled or tranquilized quickly.
- Remorseless Winter: Creates a swirling storm of cold that progresses across the platform, dealing damage. Players need to avoid standing in the storm.
- Harvest Soul: Targets a player, slowly dragging them towards the Lich King. Players need to break the chains to prevent the targeted player from being killed.
- Defile: Defiles the area under a random target. Any enemies within this area will be dealt shadow damage and cause the area to grow. You need to instantly get out of this as you see it.
Normal: Tanks should manage Defile placements to prevent it from covering important areas. Tanks and DPS should quickly break players out of Ice Tombs. Spread out during Infest to mitigate damage.
Heroic: Defile covers a larger area, making precise positioning vital. Infest deals more damage and requires coordinated healing cooldowns. Transitioning between phases efficiently is critical to manage mechanics effectively.
4.9The Lich King Strategy

The Lich King, the final boss of the Wrath of the Lich King expansion in World of Warcraft, is a complex encounter that requires coordination, preparation, and excellent execution from the raid team. Here is a detailed strategy for defeating the Lich King in WotLK Classic.
The Lich King (Phase 1)
- The fight begins with the raid engaging the Lich King on his Frozen Throne. The Lich King will alternate between using physical attacks and casting spells.
- Tanks should position the Lich King facing away from the raid and tank swap whenever Infest is cast, as it applies a stacking debuff that increases damage taken by the target.
- Throughout the phase, the Lich King will summon Shambling Horrors that should be picked up and killed by the off-tank or off-dps as quickly as possible.
- The Lich King will periodically cast Remorseless Winter, stunning everyone in the raid and dealing damage. Players should spread out to mitigate the AoE damage and avoid overlapping.
- Additionally, the Lich King will cast Necrotic Plague on a random player, which spreads to nearby players after a short duration. Afflicted players should move away from others to prevent the disease from affecting the raid.
- Ranged DPS should focus on dealing damage to the Lich King, while melee DPS should prioritize damaging the Shambling Horrors.
Quake (Transition Phase)
- After a set time, the Lich King will cast Quake, stunning the raid and causing the floor to crumble. Players must quickly move onto the raised platforms to avoid falling into a pit and taking massive damage.
- During the transition, the Lich King will cast Harvest Soul, pulling a player towards him. Other players should intercept and break the chain to prevent the targeted player from being killed.
- Ranged DPS should focus on interrupting and damaging the Lich King’s Soul Reapers to mitigate raid damage.
The Valkyrs (Phase 2)
- After the transition phase, the raid will be split into two groups to deal with the Lich King’s Valkyrs.
- One group will handle the Soul Reaper adds, while the other focuses on damaging the Lich King.
- The Valkyrs will periodically grab players and carry them to the edge of the platform. Players should quickly DPS the Valkyr to force it to drop the player, preventing them from being thrown off.
- While dealing with the Valkyrs, players must also continue damaging the Lich King and dealing with Shambling Horrors as they spawn.
Harvest Soul (Transition Phase)
- Similar to the first transition, the Lich King will cast Harvest Soul, pulling a player towards him. Players should intercept and break the chain while dealing with the Valkyrs.
- Ranged DPS should interrupt and damage the Lich King’s Soul Reapers.
Defile and Remorseless Winter (Phase 3)
- The fight returns to the initial platform, with the addition of two new mechanics: Defile and Remorseless Winter.
- Defile is a void zone that spawns under a random player and grows in size over time. Affected players must move out of it quickly to avoid taking damage and prevent the Defile from covering too much of the platform.
- Remorseless Winter will also be cast periodically, staggering and damaging players and summoning Shambling Horrors. Players should spread out and focus on positioning to minimize damage taken during this ability.
Defeat the Lich King (Phase 4)
- As the fight progresses, the Lich King’s abilities become more frequent and dangerous.
- Tanks should continue to manage their debuff stacks and tank swap when necessary.
- Players should maintain their assigned roles, dealing with Shambling Horrors, interrupting Soul Reapers, and avoiding Defile.
- The DPS should prioritize damaging the Lich King while still handling the mechanics.
- Healers should pay attention to the raid’s health and dispel harmful effects when possible.
- The final phase requires intense focus and coordination as the Lich King becomes increasingly more aggressive.
- Eventually, the Lich King will cast Fury of Frostmourne, stunning and damaging the entire raid. Healers should be prepared to quickly top off the raid to survive the ability.
- With proper execution and perseverance, the raid can whittle down the Lich King’s health until he is defeated, bringing an end to the encounter and completing the WotLK Classic expansion.
This strategy is a basic outline and each raid group may have their variations or additional tactics depending on their composition and playstyle. Communication, teamwork, and adaptability are key to successfully defeating the Lich King.
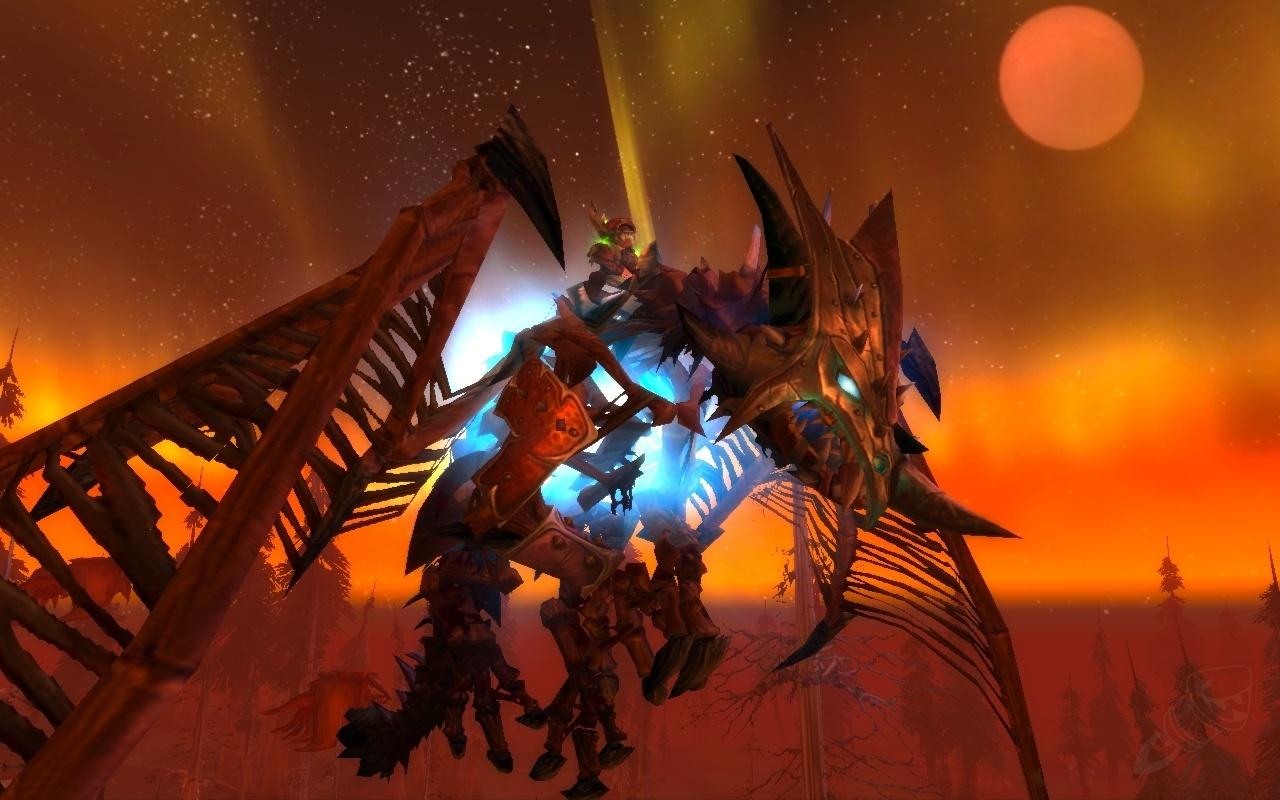
ICC Mounts
In Icecrown Citadel players have the opportunity to earn a couple of related mounts.
- Icebound Frostbrood Vanquisher: This mount is rewarded for completing the “Glory of the Icecrown Raider” achievement. To earn this achievement, you need to complete a series of specific tasks and meet certain criteria in Icecrown Citadel raid encounters. These tasks typically involve defeating bosses under specific conditions or completing certain challenges within the raid. Once you earn the achievement, you will receive the Icebound Frostbrood Vanquisher mount as a reward.
- Invincible: This is a rare drop mount that comes from defeating the Lich King, the final boss of Icecrown Citadel. The mount, called Invincible’s Reins, has an extremely low drop rate, making it a highly sought-after and prestigious mount to obtain. How do you farm invincible mount? You have a chance to receive it when defeating the Lich King in both Heroic and Normal difficulties, although the drop rate is slightly higher in Heroic. Keep in mind that the mount does not drop guaranteed, so it may take multiple tries or even multiple raid lockouts to obtain it. But you have a solid option to get this mount with our Wotlk Invincible Mount.
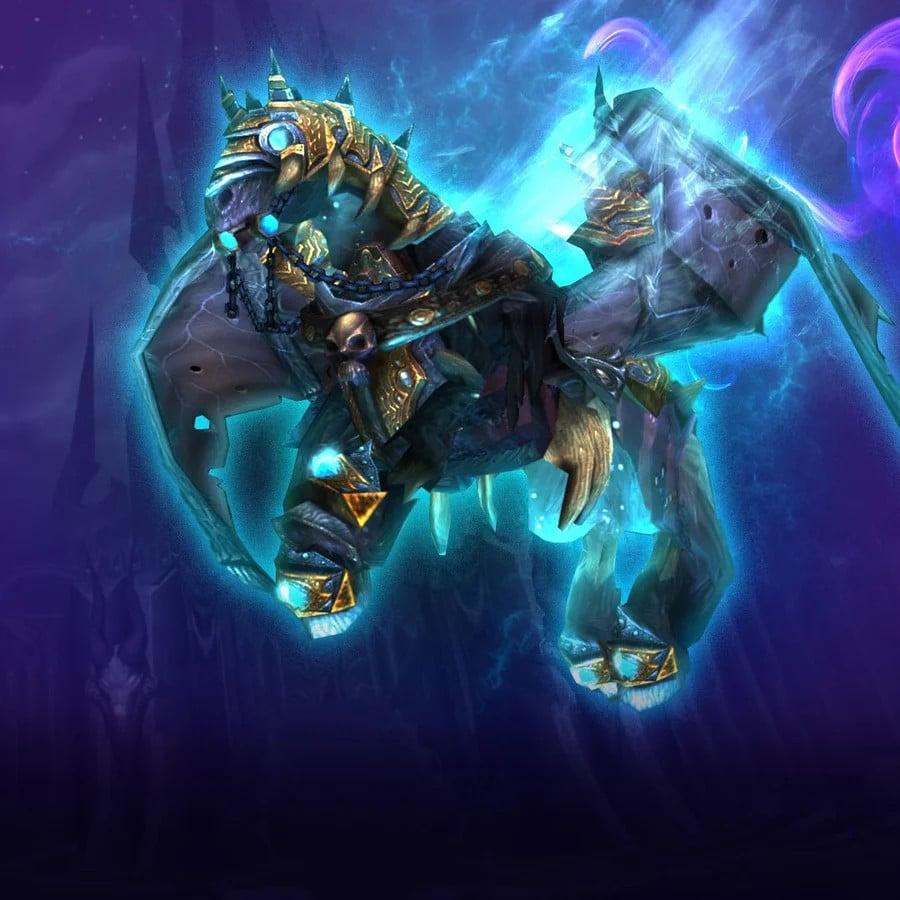
Both of these mounts are highly coveted due to their rarity and connection to the Icecrown Citadel raid. They serve as a status symbol and a testament to a player’s skill and dedication in tackling challenging raid content.
Difference Between Normal and Heroic Mode in ICC
The differences between various modes of the Icecrown Citadel (ICC) raid in World of Warcraft are as follows:
- Normal ICC on 10 players: This mode is designed for a smaller group of players. The dungeon encounters are tuned for 10-player teams, with slightly fewer mechanics, health, and damage compared to heroic mode. The rewards, such as gear and achievements, are also tailored to this mode.
- Normal ICC on 25 players: This mode is similar to normal ICC on 10 players, but it is adjusted for a larger group size. The encounters are generally more difficult, with increased health pools, damage output, and mechanics. However, the rewards are also better in terms of item level compared to the 10-player version.
- Heroic ICC on 10 players: Heroic mode is considerably more challenging than normal difficulty. The 10-player version of heroic ICC features significantly harder encounters. Bosses have increased health pools, damage, and the mechanics are much more punishing. Heroic dungeons often require precise coordination and higher skill levels to succeed. The rewards in terms of gear are of higher item level than those dropped in normal mode.
- Heroic ICC on 25 players: It has the same increased difficulty and mechanics complexity as its 10-player counterpart. The significant difference is that it is designed for a larger raid group. The coordination required to defeat bosses and overcome mechanics is greater in this mode. The gear dropped in heroic 25-player mode is generally the most powerful available in the raid.
ICC Heroic Mode
In Heroic mode (25-Player) of Icecrown Citadel in World of Warcraft: Wrath of the Lich King Classic, several boss mechanics are altered to provide a greater challenge. Here are the changes on heroic difficulty specific to each boss encounter:
Lord Marrowgar
- Coldflame: Inflicts more damage and leaves a larger area of effect.
- Bone Spike Graveyard: Additional bone spikes are present, increasing the number of players affected.
- Impaled: This ability damages the entire raid and not just the targeted player.
Lady Deathwhisper
- Death and Decay: Inflicts higher damage.
- Adds: More cult fanatics and adherents spawn during the encounter.
- Touch of Insignificance: This debuff reduces the affected player’s threat generation by even more.
Gunship Battle
- The encounter now features a second ship called the “Frostwing,” manned by enemy forces that require additional attention from players.
- Adds and cannons on both ships deal more damage.
- Mage-Lord Incineration: Fires an incineration round that deals increased damage.
Deathbringer Saurfang
- Blood Nova: Deals increased damage to the raid.
- Blood Power: Saurfang gains stacks of this buff faster, empowering his abilities sooner.
- Mark of the Fallen Champion: Inflicts higher damage when transferred to a player.
Festergut
- Gas Spore: Inflicts more damage to the raid when it explodes.
- Vile Gas: The damage dealt by this mechanic is increased.
- Inhale Blight: Festergut inhales blight more frequently, releasing more gas spores.
Rotface
- Mutated Infection: Deals more damage and spreads faster.
- Slime Spray: A significant increase in damage output.
- Pungent Blight: This ability deals more damage and has a wider area of effect.
Professor Putricide
- Tear Gas: A higher damage amount is inflicted on affected players.
- Ooze Decay: The slimes created in phase transitions expire more quickly, requiring better coordination.
- Unstable Experiment: The green ooze will be launched into the air more frequently.
Blood Prince Council
- Shadow Prison: Inflicts more damage to players trapped inside.
- Shock Vortex: Deals increased damage and has a larger area of effect.
- Empowered Flame Orb: The spawned flame orbs have increased speed and damage.
Blood-Queen Lana’thel
- Incite Terror: The fear effect lasts longer.
- Essence of the Blood Queen: Players gain stacks faster, increasing the difficulty of managing debuffs.
- Swarming Shadows: Shadow orbs from this ability travel faster.
Valithria Dreamwalker
- Mana Void: Deals more damage and drains more mana from the healers.
- Gluttonous Miasma: This debuff reduces healing received by a larger percentage.
- Emerald Vigor: Valithria gains more healing from this ability.
Sindragosa
- Blistering Cold: Inflicts higher damage and has a larger radius.
- Unchained Magic: This debuff detonates at lower stacks, making it more challenging to manage.
- Frost Beacon: The raid gains stacks of this debuff faster.
The Lich King
- Defile: This ability covers a larger area and deals more damage.
- Infest: The damage inflicted by this debuff is increased.
- Harvest Soul: Deals higher damage, requiring faster breaks of the affected player’s ice block.
Icecrown Citadel Drops
While reading this guide you may have wondered: Is it worth it to prepare so thoroughly, to learn tactics, to look for a party to run such a raid?
In addition to the fun, because this is the most interesting and elaborate raid in the game, you will get a lot of rewards from both trash and bosses drops. Below we have made special tables for you that will demonstrate all BIS items.
Wrist slot
| Item | Slot | Boss |
| Bloodsunder’s Bracers | Wrist | Rotface |
| Bracers of Dark Reckoning | Wrist | Lord Marrowgar |
| Bracers of Eternal Dreaming | Wrist | Valithiria Dreamwalker |
| Crypt Keeper’s Bracers | Wrist | Blood Princes |
| Death Surgeon’s Sleeves | Wrist | Rotface |
| Polar Bear Claw Bracers | Wrist | Gunship Battle |
| Scourge Hunter’s Vambraces | Wrist | Gunship Battle |
| The Lady’s Brittle Bracers | Wrist | Lady Deathwhisper |
| Toskk’s Maximized Wristguards | Wrist | Deathbringer Saurfang |
Waist slot
| Item | Slot | Boss |
| Astrylian’s Sutured Cinch | Waist | Professor Putricide |
| Belt of Broken Bones | Waist | Festergut |
| Belt of the Blood Nova | Waist | Deathbringer Saurfang |
| Coldwraith Links | Waist | Valithiria Dreamwalker |
| Crushing Coldwraith Belt | Waist | Lord Marrowgar |
| Lingering Illness | Waist | Festergut |
| Nerub’ar Stalker’s Cord | Waist | Festergut |
| Professor’s Bloodied Smock | Waist | Professor Putricide |
| Waistband of Righteous Fury | Waist | Gunship Battle |
Two-hand slot
| Item | Slot | Boss |
| Bloodfall | Two-Hand | Blood-Queen Lana’thel |
| Bryntroll, the Bone Arbiter | Two-Hand | Lord Marrowgar |
| Cryptmaker | Two-Hand | Blood Princes |
| Distant Land | Two-Hand | Festergut |
| Dying Light | Two-Hand | Blood-Queen Lana’thel |
| Nibelung | Two-Hand | Lady Deathwhisper |
Trinket slot
| Item | Slot | Boss |
| Althor’s Abacus | Trinket | Gunship Battle |
| Bauble of True Blood | Trinket | Blood-Queen Lana’thel |
| Corpse Tongue Coin | Trinket | Gunship Battle |
| Deathbringer’s Will | Trinket | Deathbringer Saurfang |
| Dislodged Foreign Object | Trinket | Rotface |
| Phylactery of the Nameless Lich | Trinket | Sindragosa |
| Sindragosa’s Flawless Fang | Trinket | Sindragosa |
| Tiny Abomination in a Jar | Trinket | Professor Putricide |
Shoulder slot
| Item | Slot | Boss |
| Boneguard Commander’s Pauldrons | Shoulder | Gunship Battle |
| Cultist’s Bloodsoaked Spaulders | Shoulder | Lady Deathwhisper |
| Dual-Bladed Pauldrons | Shoulder | Rotface |
| Horrific Flesh Epaulets | Shoulder | Festergut |
| Raging Behemoth’s Shoulderplates | Shoulder | Rotface |
| Rusted Bonespike Pauldrons | Shoulder | Lord Marrowgar |
| Shoulders of Frost-Tipped Thorns | Shoulder | Blood Princes |
| Shoulders of Mercy Killing | Shoulder | Lady Deathwhisper |
Ranged slot
| Item | Slot | Boss |
| Corpse-Impaling Spike | Ranged | Rotface |
| Nightmare Ender | Ranged | Valithiria Dreamwalker |
| Zod’s Repeating Longbow | Ranged | Lady Deathwhisper |
One-hand slot
| Item | Slot | Boss |
| Bloodvenom Blade | One-Hand | Deathbringer Saurfang |
| Heartpierce | One-Hand | Lady Deathwhisper |
| Last Word | One-Hand | Professor Putricide |
| Lungbreaker | One-Hand | Valithiria Dreamwalker |
| Rib Spreader | One-Hand | Rotface |
| Scourgeborne Waraxe | One-Hand | Gunship Battle |
Off-hand slot
| Item | Slot | Boss |
| Bulwark of Smouldering Steel | Off Hand | Lord Marrowgar |
| Icecrown Glacial Wall | Off Hand | Blood-Queen Lana’thel |
| Keleseth’s Seducer | Off Hand | Blood Princes |
| Shadow Silk Spindle | Off Hand | Blood Princes |
| Sundial of Eternal Dusk | Off Hand | Sindragosa |
Neck slot
| Item | Slot | Boss |
| Ahn’kahar Onyx Neckguard | Neck | Lady Deathwhisper |
| Amulet of the Silent Eulogy | Neck | Gunship Battle |
| Bile-Encrusted Medallion | Neck | Rotface |
| Blood Queen’s Crimson Choker | Neck | Blood-Queen Lana’thel |
| Bone Sentinel’s Amulet | Neck | Lord Marrowgar |
| Holiday’s Grace | Neck | Festergut |
| Lana’thel’s Chain of Flagellation | Neck | Blood-Queen Lana’thel |
| Noose of Malachite | Neck | Valithiria Dreamwalker |
| Sindragosa’s Cruel Claw | Neck | Sindragosa |
Main Hand slot
| Item | Slot | Boss |
| Black Bruise | Main Hand | Festergut |
| Frozen Bonespike | Main Hand | Lord Marrowgar |
| Rigormortis | Main Hand | Professor Putricide |
| Trauma | Main Hand | Rotface |
Legs slot
| Item | Slot | Boss |
| Gangrenous Leggings | Legs | Festergut |
| Leather of Stitched Scourge Parts | Legs | Festergut |
| Leggings of Dying Candles | Legs | Valithiria Dreamwalker |
| Leggings of Northern Lights | Legs | Lady Deathwhisper |
| Legguards of Lost Hope | Legs | Lord Marrowgar |
| Plaguebringer’s Stained Pants | Legs | Festergut |
| Scourge Reaver’s Legplates | Legs | Valithiria Dreamwalker |
Head slot
| Item | Slot | Boss |
| Broken Ram Skull Helm | Head | Lady Deathwhisper |
| Faceplate of the Forgotten | Head | Festergut |
| Geistlord’s Punishment Sack | Head | Blood Princes |
| Helm of the Elder Moon | Head | Rotface |
| Landsoul’s Horned Greathelm | Head | Blood Princes |
| Snowserpent Mail Helm | Head | Lord Marrowgar |
| Snowstorm Helm | Head | Valithiria Dreamwalker |
Hands slot
| Item | Slot | Boss |
| Aldriana’s Gloves of Secrecy | Hands | Rotface |
| Anub’ar Stalker’s Gloves | Hands | Valithiria Dreamwalker |
| Fallen Lord’s Handguards | Hands | Lady Deathwhisper |
| Fleshrending Gauntlets | Hands | Festergut |
| Gunship Captain’s Mittens | Hands | Gunship Battle |
| Handguards of Winter’s Respite | Hands | Lord Marrowgar |
| San’layn Ritualist Gloves | Hands | Blood Princes |
| Taldaram’s Plated Fists | Hands | Blood Princes |
| Unclean Surgical Gloves | Hands | Festergut |
Finger slot
| Item | Slot | Boss |
| Band of the Bone Colossus | Finger | Lord Marrowgar |
| Devium’s Eternally Cold Ring | Finger | Valithiria Dreamwalker |
| Frostbrood Sapphire Ring | Finger | Valithiria Dreamwalker |
| Incarnadine Band of Mending | Finger | Blood Princes |
| Juggernaut Band | Finger | Lady Deathwhisper |
| Loop of the Endless Labyrinth | Finger | Lord Marrowgar |
| Marrowgar’s Frigid Eye | Finger | Lord Marrowgar |
| Memory of Malygos | Finger | Sindragosa |
| Might of Blight | Finger | Festergut |
| Ring of Maddening Whispers | Finger | Lady Deathwhisper |
| Ring of Rapid Ascent | Finger | Gunship Battle |
| Seal of Many Mouths | Finger | Rotface |
| Skeleton Lord’s Circle | Finger | Gunship Battle |
| Valanar’s Other Signet Ring | Finger | Blood Princes |
Feet slot
| Item | Slot | Boss |
| Blood-Soaked Saronite Stompers | Feet | Lady Deathwhisper |
| Boots of the Funeral March | Feet | Valithiria Dreamwalker |
| Boots of Unnatural Growth | Feet | Gunship Battle |
| Frostbitten Fur Boots | Feet | Lord Marrowgar |
| Grinning Skull Greatboots | Feet | Valithiria Dreamwalker |
| Necrophotic Greaves | Feet | Lady Deathwhisper |
| Plague Scientist’s Boots | Feet | Festergut |
| Treads of the Wasteland | Feet | Blood Princes |
Chest slot
| Item | Slot | Boss |
| Blightborne Warplate | Chest | Rotface |
| Carapace of Forgotten Kings | Chest | Festergut |
| Deathwhisper Raiment | Chest | Lady Deathwhisper |
| Gendarme’s Cuirass | Chest | Lord Marrowgar |
| Ikfirus’s Sack of Wonder | Chest | Gunship Battle |
| Mail of Crimson Coins | Chest | Blood Princes |
| Robe of the Waking Nightmare | Chest | Valithiria Dreamwalker |
| Rot-Resistant Breastplate | Chest | Rotface |
| Sanguine Silk Robes | Chest | Blood Princes |
Back slot
| Item | Slot | Boss |
| Frostbinder’s Shredded Cape | Back | Valithiria Dreamwalker |
| Greatcloak of the Turned Champion | Back | Deathbringer Saurfang |
| Royal Crimson Cloak | Back | Blood Princes |
| Shadowvault Slayer’s Cloak | Back | Gunship Battle |
| Winding Sheet | Back | Rotface |
Best addons for Icecrown Citadel
Addons are an incredibly important part of gameplay in any part of World of Warcraft. Without them we are helpless, and WotLK: Classic is no exception. Let’s take a look at the addons we highly recommend you install now for a successful walkthrough (or preparation for a walkthrough) of ICC:
- AtlasLoot Enhanced: This addon allows players to browse loot tables, showing the drops from various bosses, dungeons, and raids. It helps players plan their gear acquisition strategy and learn about possible item upgrades.
- Details! Damage Meter: a comprehensive damage meter that provides detailed information about damage done, healing done, and other combat metrics. It helps players analyze their performance, compare with others in the group, and make improvements.
- Recount: Similar to Details!, Recount is another popular damage meter addon. It tracks and displays detailed statistics on damage, healing, and other combat-related metrics. It helps players evaluate their performance and optimize their gameplay.
- TellMeWhen: an addon that allows players to create customizable icons or timers for various game events. It helps to track buffs, debuffs, cooldowns, and other important abilities, ensuring players are always aware of their key abilities’ status.
- Quartz: a casting bar replacement addon that provides a more visually appealing and customizable casting bar. It enhances the default casting bar by adding features like latency display, target casting bar, and customizable appearance.
- Deadly Boss Mods (DBM): an essential addon for raiders. It provides timers, warnings, and notifications for boss abilities and encounters. It helps players anticipate and react to important mechanics during raids and dungeons, improving overall group coordination.
How to farm The Ashen Verdict reputation in ICC WotLK
The best way to level up reputation is by farming trash at the beginning of ICC. To find a party, read the chat, the message looks like this: “for AV rep farm 2 healers 1 tank 5 DPS”. It will be a small group of people, not even up to 10 people in the raid, and you can be geared quite modestly, the main thing is how much you heal and how much damage you deal. If you don’t want to waste your time, but want to unlock access to new patterns and high-level epic ring, use our Wotlk The Ashen Verdict Boost.
So what is all of this for? Thanks to The Ashen Verdict’s reputation, you’ll be able to buy some of the best rings early in the game. These rings will last you a long time. Many raids you won’t have to think about rings, which is a huge plus, you can focus on getting Ice Emblems and other loot.
The tactic itself is remarkably simple:
- The whole group stands to the side so as not to aggro additional trash, while the tank aggroes packs of mobs by 1-2 pieces.
- After promptly clearing these mobs, the group goes as close as possible to the side wall (right or left, it does not matter) and finishes the remaining mobs.
- It is important not to aggro large skeletons that sleep in the middle of the room. They have strong abilites and a lot of HP.
4.9In this guide, we have collected absolutely all the data that you need in relation to ICC, we hope this has been helpful to you and you won’t be lazy to share this guide with your friends.