In our Division 2 Best Builds in 2026, you will find the strongest loadouts for the current Red Horizon season. We cover the best PvE, PvP, solo, farming, Legendary, raid, and Incursion builds. Each setup includes its weapons, gear, attributes, skills, and recommended activities. This guide will help you choose the best overall build in Division 2 for your playstyle.
The Division 2 Best Builds Key Takeaways:
- The best overall build in Division 2 is St. Elmo’s Striker due to its sustained PvE damage.
- The Division 2 best PvE build remains Striker, while Core Strength offers a safer solo alternative.
- System Corruption is one of the best Division 2 PvP builds during the early Red Horizon meta.
- Core Strength with Memento is the best Division 2 solo build for balanced damage and survivability.
- Iron Will Hotshot is the best Division 2 farming build for long-range XP and SHD farming.
- Hunter’s Fury with Ouroboros is the best Division 2 SMG build for close-range activities.
- Refactor with Capacitor remains one of the best Division 2 skill builds for Legendary missions.
- Iron Will Hotshot is the best Division 2 sniper build after the Determined talent changes.
- Future Initiative remains the best Division 2 healer build for raids and Incursions.
- Ember Engine with Fafnir is the best new Division 2 status effect build in Red Horizon.
- Negotiator’s Dilemma is the best multi-target build for clearing packed enemy groups.
- Prototype Gear can improve most Division 2 meta builds, but its rules change between activities.
 4.9
4.9What Is a Division 2 Builds
In The Division 2, a build is the full setup you use on your agent. It combines weapons, gear, skills, talents, and stats into one playstyle. Players use builds to hit harder, survive longer, heal teammates, or control fights better. That is why the Division 2 meta builds always revolve around a clear role and purpose.
A good build is not just random strong gear thrown together. The best Division 2 builds are built around synergy, so your gear, talents, and skills all work toward the same result. One setup might be perfect for PvE farming, while another feels much better in raids, Legendary missions, or the Dark Zone.
Most Division 2 builds are made from a few core parts. These parts decide how your character performs in combat and what kind of content the build is meant for. Once you understand them, reading any build guide gets much easier.
- Weapons — your main damage source and talent base.
- Gear — brand sets, gear sets, Exotic items, and armor pieces.
- Skills — tools for damage, defense, healing, or crowd control.
- Attributes and Stats — Weapon Damage, Armor, Skill Tier, Crit, Haste, and more.
- Talents and Mods — extra effects that shape how the build plays.
- Specialization — a bonus layer that adds weapons, perks, and utility.
When these parts match well, the build feels smooth and strong in actual gameplay. When they do not, even high-end gear can feel weak. So before chasing new loot, it helps to understand what your Division 2 build is trying to do first.
The Division 2 Best Builds for Any Activities

The Division 2 builds listed below strike a balance between high DPS, survivability, and utility. They work across Countdown, The Summit, Control Points, Missions, and even Legendary content. Whether you prefer assault rifles or LMGs, there’s a setup here that fits your playstyle. Here is the full list of the best builds in The Division 2 for any content in 2026:
| Best For | Build | Why It Works |
|---|---|---|
| Best Overall Division 2 Build | St. Elmo’s Striker Build | High sustained AR damage with a simple stacking loop. |
| Best Division 2 PvE Build | Striker Equalizer Build | Strong direct damage for Heroic and endgame group content. |
| Best Division 2 PvP Build | System Corruption AR Build | Combines instant bonus armor, concealment, and crit pressure. |
| Best Division 2 Solo Build | Core Strength Memento Build | Provides damage, armor, Skill Tier value, and recovery. |
| Best Division 2 Farming Build | Iron Will Hotshot Build | Converts body shots into headshots every two seconds. |
| Best Division 2 SMG Build | Hunter’s Fury Ouroboros Build | Delivers fast close-range kills and armor recovery. |
| Best Division 2 Skill Build | Refactor Drone and Turret Build | Deals safe and consistent damage from cover. |
| Best Division 2 Sniper Build | Iron Will Hotshot Build | Offers forgiving headshot damage after the Determined changes. |
| Best Division 2 Legendary Build | Refactor Skill Build | Provides safe damage against dangerous Legendary enemies. |
| Best Division 2 Raid Build | Striker Equalizer Build | Delivers reliable boss damage and strong stack uptime. |
| Best Division 2 Healer Build | Future Initiative Build | Provides steady healing and group damage support. |
| Best Division 2 Status Build | Ember Engine Fafnir Build | Applies repeated Burn effects and scales with Status Effects. |
| Best Division 2 Support Build | Ongoing Directive Build | Supplies Hollow-Point Ammo and Bleed damage. |
| Best Division 2 Crowd-Control Build | Eclipse Protocol Foam Build | Locks groups down and spreads status effects. |
| Best Division 2 LMG Build | Tipping Scales LMG Build | Rewards sustained fire and critical hits. |
Note: Guide updated for Red Horizon season.
If you’re looking for loadouts that can handle everything in The Division 2 throws at you — from solo open-world missions to Legendary Strongholds and group raids — this section is where you start. These are the most versatile The Division 2 builds for 2026, designed to carry you through any activity without constant gear swapping.
Division 2 Builds Tier List 2026
Below is our current Division 2 Builds Tier List based on damage potential, survivability, and overall usefulness in PvE and PvP activities. These rankings reflect the current Division 2 Red Horizon meta and the most commonly used builds in endgame content:
| Tier | PvE Builds | PvP Builds |
|---|---|---|
| S | St. Elmo’s Striker, Core Strength Memento, Iron Will Hotshot, Ember Engine Fafnir, Negotiator’s Dilemma, Refactor Skill Build | System Corruption AR, High-End AR Crit, Bighorn Armor Regen |
| A | Heartbreaker, Hunter’s Fury Ouroboros, Ongoing Directive, Aces & Eights Iron Will, Tipping Scales, Eclipse Protocol, Future Initiative, Ortiz: Reficere | Core Strength Hybrid, Capacitor NinjaBike, Ouroboros Striker, Hunter’s Fury SMG, Heartbreaker PvP |
| B | Armor Regen, One-Shot Regulus, True Patriot Support, Foundry Bulwark Tank, Kingbreaker Spotter, Pestilence LMG | Ravenous Rifle, Iron Lung Pressure, Chatterbox Striker, Defensive Foundry Bulwark |
Types of Builds in Division 2
Since Division 2 is not only a looter-shooter but also combines elements of ARPGs and MMOs, build types play a significant role. There are plenty of powerful Division 2 builds recommended by professional players, but not all of them will suit you. That’s why it’s important to understand which playstyle, combat style, role, or activity type each build is best suited for. So, below, we list various Division 2 build types and explain what each one is used for:
- PvE Builds — Used specifically in PvE activities (Countdown, Strongholds, Summit, Missions, etc.);
- PvP Builds — Used in PvP activities (Dark Zone and Conflict matches);
- Raid Builds — Builds designed to use in raids for any role;
- Solo Builds — Used for solo players without a team. These builds are powerful, with better survivability and great damage output;
- Group Builds — Used for different roles within a group, in both PvE and PvP;
- Legendary Builds — Used for top-tier PvE challenges in The Division 2, only available in The Summit and some Strongholds;
- Farming Builds — Used for fast leveling and maximum XP gain, whether playing solo or in a group.
- DPS Builds — Designed to maximize damage for players who prefer the damage-dealing role.
- Tank Builds — Designed for drawing aggro and ensuring max survivability through high regeneration and damage resistance;
- Support Builds — Used for support or healer roles in a group or solo play, but also can be used for crowd control. In other words, for those who heal, apply buffs, and support the team.
- Incursion Builds — cover damage, healing, and mechanic jobs in Paradise Lost or Broken Rain.
- Prototype Builds — improve an existing loadout with higher attributes and Augments.
Some of them have differences that seem minor at first glance, but it’s precisely those differences that define a specific build type. Some of these build categories are based on activity type, some on role, and some serve a specific purpose. Below, we provide the best builds for each build type in Division 2 for 2026.
Division 2 Prototype Builds
Prototype Gear in Division 2 sits above High-End, Named, and Gear Set quality. It can roll attributes above the old maximum and carries one Augment. Prototype pieces strengthen existing Division 2 meta builds instead of creating a separate playstyle. Good Division 2 Augment choices depend on the build’s main combat loop:
- Echo and Paradox support weapon damage and magazine uptime.
- Anomaly lets damaging skills repair your armor.
- Synesthesia turns weapon hits into shorter skill cooldowns.
- Trapper extends applied status effects.
- Quantum gives defensive builds a chance to ignore incoming damage.
Do not convert the first usable item you find. Prototype pieces cannot be recalibrated after conversion, so prepare the correct talent and attributes first. Exotics still cannot receive the Prototype upgrade.
Prototype rules also change between activities. Raids and Incursions reduce Prototype stats and disable Augments. Blackout Dark Zone allows full Prototype base stats, while Augments use their PvP values. Keep regular versions of important raid pieces if their Prototype bonuses offer little value there.
How Prototype Gear Works in Division 2 Raids
Prototype Gear does not provide its full outside-raid power inside raids or Incursions. Prototype attributes become normalized when the activity begins. Augment effects are also disabled for every player. Do not create a Division 2 raid build around Echo, Quantum, Anomaly, or another Augment. The build must remain functional without that effect. Regular High-End or Gear Set pieces may provide the same raid performance.
Prototype pieces can still work when their normalized attributes and talents fit the loadout. Keep regular versions of important Striker, healer, and tank pieces. This makes it easier to compare their actual raid values.
Striker remains the best Division 2 raid DPS build for most encounters. Future Initiative provides the most reliable healing, while Foundry Bulwark handles shield-based mechanics. Negotiator’s Dilemma and Ongoing Directive support add-heavy phases. Foam and Ortiz remain situational choices for control and Hazard Protection.
The Division 2 Best Farming Builds
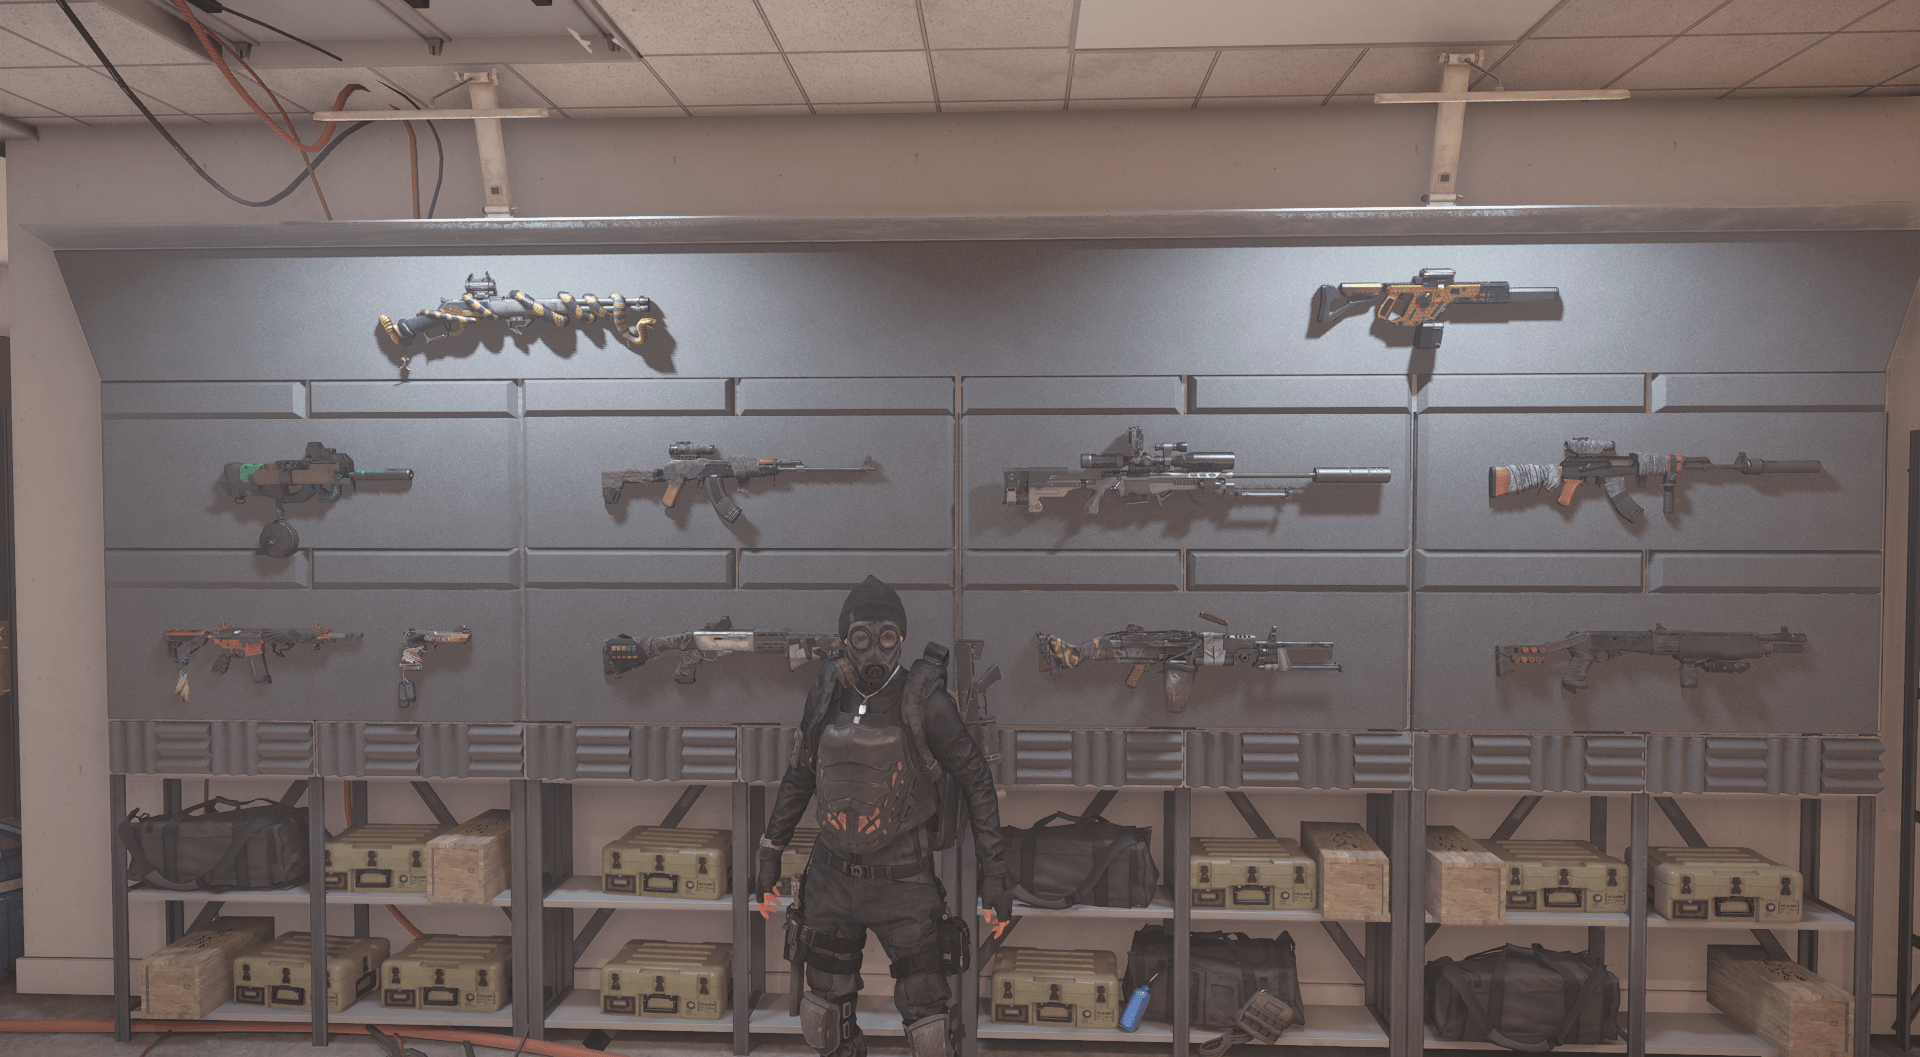
Need to grind out SHD levels fast or clear your seasonal pass before it resets? These The Division 2 Best Builds for Farming are designed for speed, survivability, and maximum XP gain. The builds below are perfect for speed-leveling thanks to their one-shot potential, AoE damage, and high efficiency against elite mobs and named enemies. The best SHD & XP Farming Builds in The Division 2 in 2026 are:
- Iron Will Hotshot Build
- Hunter’s Fury Ouroboros Build
- Core Strength Memento Build
- Model 700 Headhunter Hotshot Red Build
- Model 700 Headhunter Hotshot Hybrid Build
- Headhunter’s Fury Determined Build
- Eclipse Protocol Status Build
Division 2 Iron Will Hotshot Farming Build
Iron Will Hotshot is the easiest Division 2 sniper farming build after the Determined changes. Its Resolved talent treats your next body shot as a headshot every two seconds in PvE. It does not require a headshot kill before the first activation.
| Slot | Item | Description |
|---|---|---|
| Main Weapon | Prima Donna | Provides high MMR damage and strong stack-based bonuses. |
| Secondary Weapon | Model 700 or SR-1 | Use Ranger or another direct damage talent. |
| Specialization | Sharpshooter | Adds MMR damage, stability, and headshot support. |
| Mask | Hotshot | Red core with Headshot Damage. |
| Backpack | Melon Baller or Airaldi with Vigilance | Adds Total Weapon Damage after headshots. |
| Chest | Iron Will | Converts your next body shot into a headshot every two seconds. |
| Gloves | Hotshot | Red core with Headshot Damage. |
| Holster | Hotshot | Red core with Headshot Damage. |
| Kneepads | Hotshot | Completes the four-piece Gear Set bonus. |
| Gear Mods | Headshot Damage | Increases damage from real and converted headshots. |
| Skills | Decoy and Reviver Hive | Distracts enemies and protects the farming run. |
Tip: Use Iron Will when you want a more forgiving alternative to Model 700 Headhunter. The two-second cooldown prevents constant body-shot kills. Land normal headshots while Resolved remains unavailable.
Division 2 Hunter’s Fury Ouroboros Farming Build
Hunter’s Fury with Ouroboros is the best Division 2 SMG build for close-range farming. It combines high fire rate, armor recovery, and crowd disruption. This setup performs well in Control Points, Summit floors, and short Heroic missions.
| Slot | Item | Description |
|---|---|---|
| Main Weapon | Ouroboros | Provides very high close-range burst damage. |
| Secondary Weapon | Scorpio or M870 | Controls armored rushers and dangerous close targets. |
| Specialization | Gunner | Adds armor on kill, ammunition, and Banshee Pulse. |
| Mask | Hunter’s Fury | Crit roll with a red or blue core. |
| Backpack | Memento | Provides trophies, bonus armor, damage, and regeneration. |
| Chest | Sokolov or Grupo with Intimidate | Rewards fighting near enemies while bonus armor remains active. |
| Gloves | Hunter’s Fury | Crit Chance or Crit Damage. |
| Holster | Hunter’s Fury | Crit Chance or Crit Damage. |
| Kneepads | Hunter’s Fury | Completes the four-piece Gear Set bonus. |
| Gear Mods | Crit Chance and Crit Damage | Reach the crit cap before stacking Crit Damage. |
| Skills | Crusader Shield and Banshee Pulse | Supports aggressive pushes and interrupts nearby enemies. |
Tip: Aim for roughly 50–55% Critical Hit Chance before adding more Critical Hit Damage. Keep two blue cores if your shield breaks too quickly. A third blue core helps during Heroic runs with several directives.
Division 2 Core Strength Memento Farming Build
Core Strength with Memento is the best Division 2 solo farming build for balanced gameplay. It combines weapon damage, armor, Skill Tier value, and trophy bonuses. The setup lacks Striker’s peak damage but requires fewer combat stacks.
| Slot | Item | Description |
|---|---|---|
| Main Weapon | Capacitor or St. Elmo’s Engine | Choose hybrid skill scaling or direct AR damage. |
| Secondary Weapon | Scorpio | Controls dangerous enemies at close range. |
| Specialization | Technician | Provides one Skill Tier and stronger hybrid skills. |
| Mask | Core Strength | Red core with Crit Chance or Crit Damage. |
| Backpack | Memento | Adds three cores and powerful trophy bonuses. |
| Chest | Core Strength | Increases the set’s cross-core bonuses. |
| Gloves | Core Strength | Red or blue core with crit attributes. |
| Holster | Picaro’s Holster | Adds Weapon Damage and another flexible core. |
| Kneepads | Core Strength | Completes the four-piece Gear Set bonus. |
| Gear Mods | Crit Chance and Crit Damage | Balance these stats around your selected weapon. |
| Skills | Crusader Shield and Striker Drone | Both skills benefit from the mixed cores. |
Tip: Use Capacitor when you want stronger Drone and Shield scaling. St. Elmo’s Engine provides easier weapon damage without managing Capacitor stacks. Collect Memento trophies between waves to maintain armor and regeneration.
Division 2 Model 700 Headhunter Hotshot Red Build
The Model 700 Headhunter Hotshot Red build remains one of the best Division 2 farming builds. It offers faster sniper clears than Iron Will when the player consistently lands real headshots. Full red cores, Hotshot, and Perfect Headhunter give this setup a very high damage ceiling.
| Slot | Item | Description |
|---|---|---|
| Main Weapon | Model 700 with Determined | A real headshot kill prepares one converted headshot. |
| Alternative Talent | Ranger or another damage talent | Provides higher damage when you consistently land headshots. |
| Secondary Weapon | Nemesis or SR-1 | Adds boss damage or a faster backup sniper option. |
| Specialization | Sharpshooter | Provides MMR damage, stability, and headshot bonuses. |
| Mask | Hotshot | Red core with Headshot Damage. |
| Backpack | Airaldi with Vigilance or Melon Baller | Adds Total Weapon Damage and headshot bonuses. |
| Chest | Chainkiller | Perfect Headhunter provides the main damage scaling. |
| Gloves | Hotshot | Red core with Headshot Damage. |
| Holster | Hotshot | Red core with Headshot Damage. |
| Kneepads | Hotshot | Completes the four-piece Gear Set bonus. |
| Gear Mods | Headshot Damage | Use Headshot Damage in every available mod slot. |
| Skills | Decoy and Reviver Hive | Creates safe shooting windows and protects farming runs. |
⚠️ FIXED: Determined no longer creates an endless body-shot chain. A real headshot kill prepares one converted headshot. Killing an enemy with that converted shot does not activate Determined again.
Players must land another real headshot before receiving the next converted shot. Chainkiller and Hotshot still provide enough damage for fast Heroic farming. The build now rewards accuracy instead of automatically chaining kills through body shots.
Division 2 Model 700 Headhunter Hotshot Hybrid Build
The Model 700 Headhunter Hotshot Hybrid build trades some damage for armor and safer solo farming. It keeps Chainkiller, Determined, and four Hotshot pieces. Several blue cores allow the player to survive mistakes during Heroic activities with directives.
| Slot | Item | Description |
|---|---|---|
| Main Weapon | Model 700 with Determined | Provides one converted headshot after a real headshot kill. |
| Secondary Weapon | Nemesis or SR-1 | Adds boss damage and long-range flexibility. |
| Specialization | Sharpshooter | Improves MMR damage, handling, and stability. |
| Mask | Hotshot with Blue Core | Adds armor while keeping Headshot Damage. |
| Backpack | Palisade with Bloodsucker | Provides bonus armor after each kill. |
| Chest | Chainkiller with Red Core | Perfect Headhunter keeps the build’s damage high. |
| Gloves | Hotshot with Blue Core | Adds another defensive core and Headshot Damage. |
| Holster | Hotshot with Red Core | Supports the build’s weapon damage. |
| Kneepads | Hotshot with Red or Blue Core | Completes the four-piece Gear Set bonus. |
| Gear Mods | Headshot Damage | Maintains enough damage despite the blue cores. |
| Skills | Decoy and Reviver Hive | Creates safe angles and provides a second chance. |
Tip: Start with three blue cores when building this loadout. Replace one with a red core if Heroic enemies survive your Headhunter shots. The correct balance depends on your SHD level and weapon upgrades.
Division 2 Headhunter’s Fury Determined Build
Headhunter’s Fury remains a strong Division 2 farming build for close and mid-range headshot gameplay. It combines the 1886 Rifle, Chainkiller, Memento, and Hunter’s Fury. The set provides armor recovery and extra damage against nearby enemies.
| Slot | Item | Description |
|---|---|---|
| Main Weapon | 1886 Rifle with Determined | Prepares one converted headshot after a real headshot kill. |
| Secondary Weapon | Nemesis | Provides a long-range option against bosses and armored enemies. |
| Specialization | Sharpshooter | Adds headshot damage and weapon handling. |
| Mask | Hunter’s Fury | Red or blue core with Headshot Damage. |
| Backpack | Memento | Provides damage, bonus armor, and regeneration through trophies. |
| Chest | Chainkiller | Perfect Headhunter supplies the main damage multiplier. |
| Gloves | Hunter’s Fury | Headshot Damage with a red or blue core. |
| Holster | Hunter’s Fury | Adds another set piece and defensive flexibility. |
| Kneepads | Hunter’s Fury | Completes the four-piece Gear Set bonus. |
| Gear Mods | Headshot Damage | Increases damage from real and converted headshots. |
| Skills | Crusader Shield and Reviver Hive | Supports close pushes and protects against mistakes. |
Tip: Use two or three blue cores for solo Heroic farming. Hunter’s Fury works best within its close-range damage window. Avoid long sightlines where Hotshot provides better bonuses.
Don’t waste time chasing perfect rolls — we’ve already got the headshot meta locked in. Step into The Division 2 with a ready-to-go Headhunter Build Setup that hits like a truck. With the right gear, weapon synergy, and roll priority, this build turns you into a walking one-shot machine. Head into missions or PvP already prepped for peak performance.
Division 2 Eclipse Protocol Status Build
Eclipse Protocol remains one of the best Division 2 status effect builds for farming packed enemy waves. Killing a status-affected enemy spreads that effect to nearby targets. The build can clear entire spawn groups without shooting every enemy.
| Slot | Item | Description |
|---|---|---|
| Main Weapon | Scorpio | Applies several status effects and controls close enemies. |
| Secondary Weapon | Test Subject | Provides weapon and skill damage through Perfectly In Sync. |
| Specialization | Firewall | Improves Burn duration and provides useful fire bonuses. |
| Mask | Vile | Adds another damage-over-time effect to applied statuses. |
| Backpack | Eclipse Protocol | Increases damage against status-affected targets. |
| Chest | Eclipse Protocol | Improves status spread range and refresh strength. |
| Gloves | Eclipse Protocol | Roll Status Effects. |
| Holster | Electrique or Golan Gear | Adds Status Effects and Skill Haste. |
| Kneepads | Eclipse Protocol | Completes the four-piece Gear Set bonus. |
| Gear Mods | Skill Haste | Reduces downtime between status skills. |
| Skills | Firestarter Chem Launcher and Stinger Hive | Combines Burn, Bleed, and area control. |
Tip: Use the Eclipse chest and backpack when you want the strongest status spreading. Replace Firestarter with Riot Foam during group farming. Foam creates safer damage windows but deals less direct damage.
Shut down enemy squads with brutal status effects and non-stop crowd control. This Division 2 Eclipse Protocol Build is perfect for clearing missions solo or in teams — all while your enemies burn, bleed, and panic. Simple to run, deadly in action, and built for anyone who wants to watch the battlefield melt.
Division 2 Best Legendary Builds in 2026
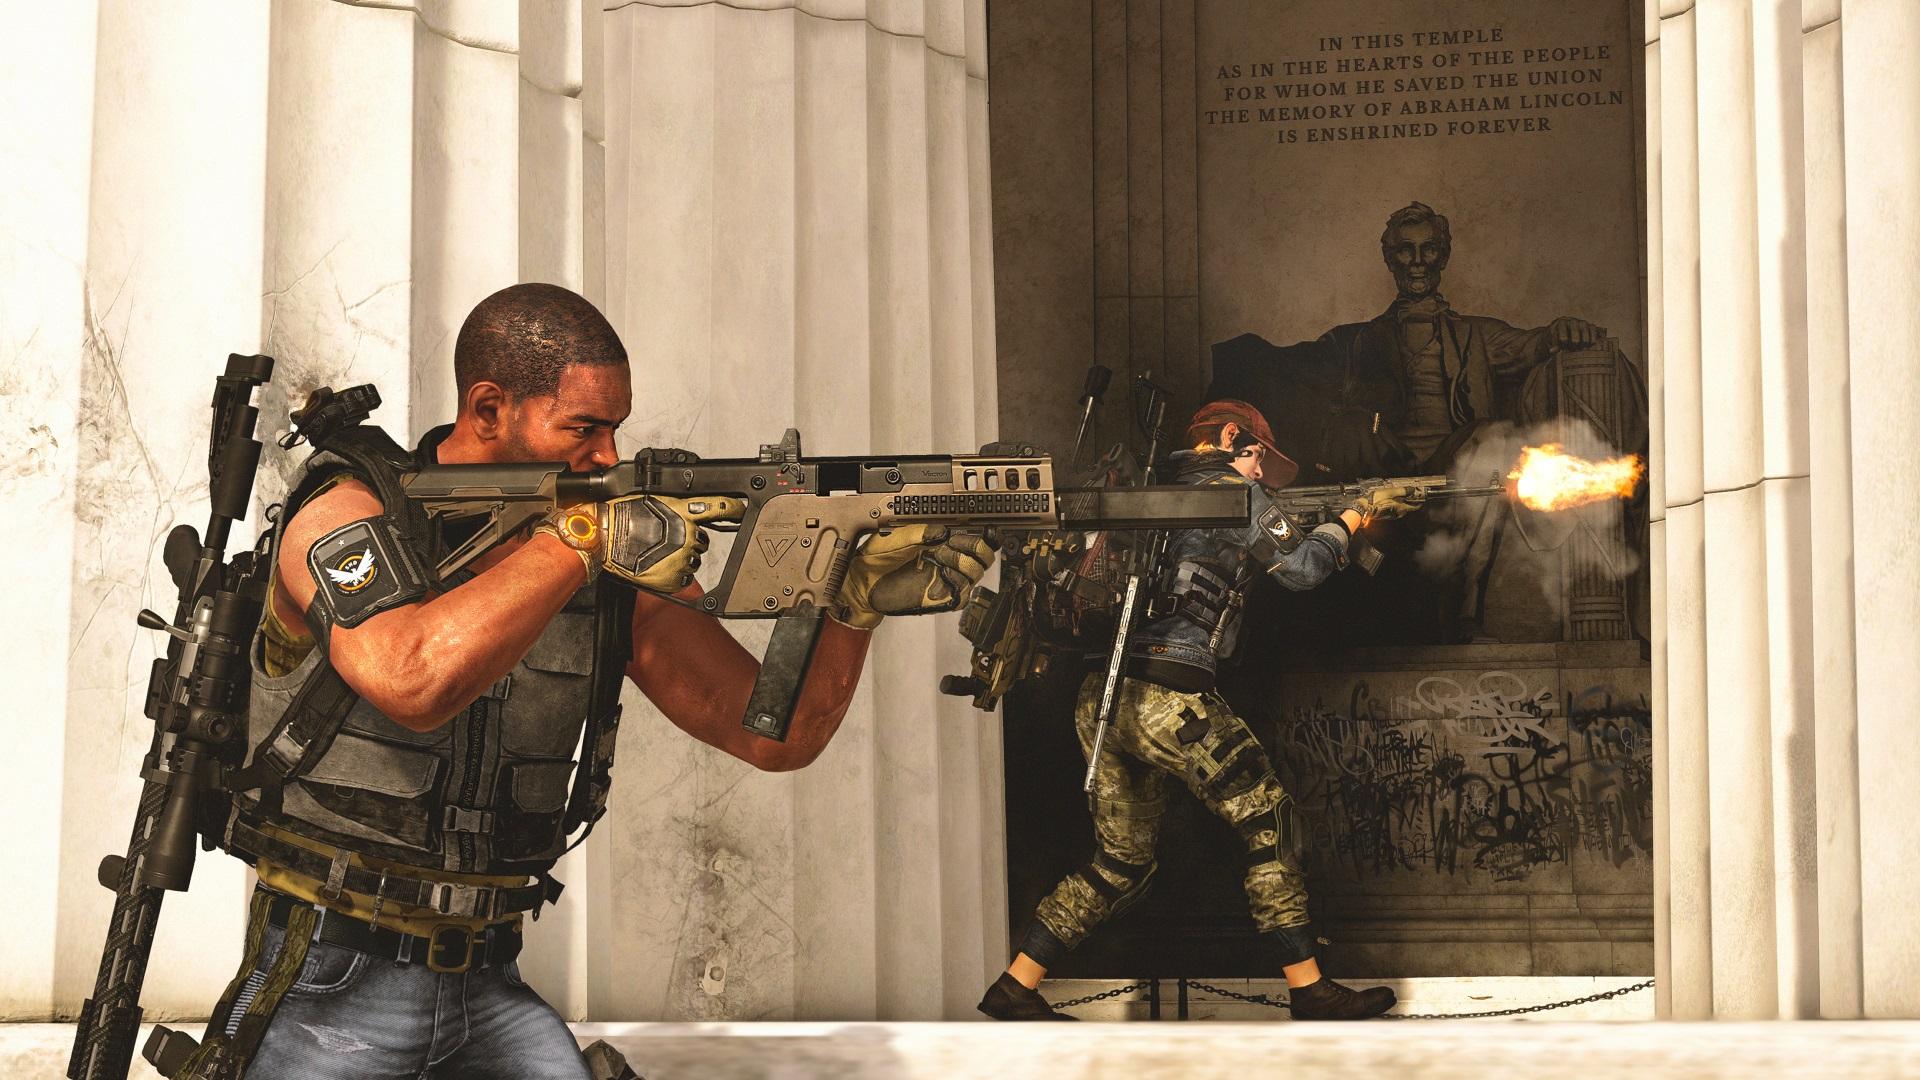
Legendary difficulty is no joke. It’s the top-tier PvE challenge in The Division 2, only available in The Summit and select Strongholds. Enemies hit harder, have more health, and come equipped with advanced AI and skills. White Tusk elites don’t play fair — and that’s exactly why your build needs to be flawless. Here are the best builds for Legendary difficulty in Division 2 as of 2026:
- Iron Will Hotshot Build
- Ortiz: Reficere Healer Build
- Future Initiative Healer Build
- Legendary Striker Build
- Negotiator’s Pestilence Build
- Negotiator’s Dilemma Focused Build
- Refactor Force Multiplier Skill Build
- Foam Status Effect Support Build
Division 2 Iron Will Hotshot Legendary Build
Iron Will Hotshot is one of the best new Division 2 Legendary sniper builds. Iron Will treats the next body shot as a headshot every two seconds in PvE. This provides a forgiving damage loop without requiring Determined on the weapon.
| Slot | Item | Description |
|---|---|---|
| Main Weapon | Prima Donna | Provides high single-shot MMR damage. |
| Secondary Weapon | Model 700 or SR-1 | Use Ranger or another direct damage talent. |
| Specialization | Sharpshooter | Adds MMR damage, stability, and headshot bonuses. |
| Mask | Hotshot | Red core with Headshot Damage. |
| Backpack | Melon Baller or Airaldi with Vigilance | Adds Total Weapon Damage through headshots. |
| Chest | Iron Will | Converts the next body shot into a headshot every two seconds. |
| Gloves | Hotshot | Red core with Headshot Damage. |
| Holster | Hotshot | Red core with Headshot Damage. |
| Kneepads | Hotshot | Completes the four-piece Gear Set bonus. |
| Gear Mods | Headshot Damage | Increases damage from real and converted headshots. |
| Skills | Decoy and Reviver Hive | Creates shooting space and provides a second chance. |
Tip: Use real headshots between Iron Will activations. The Resolved talent has a two-second PvE cooldown. Avoid wasting the converted shot on weak enemies when an Elite target remains available.
Division 2 Ortiz Reficere Healer Build
Ortiz: Reficere is one of the best Division 2 Legendary healer builds for status-heavy rooms. It provides powerful burst healing and temporary Hazard Protection. This protection helps against Burn, Bleed, Shock, and other dangerous effects. The set backpack reduces its healing range and duration penalties. Its chest increases the burst healing bonus. Nurse’s Kneepads give nearby teammates additional Hazard Protection.
| Slot | Item | Description |
|---|---|---|
| Main Weapon | Caduceus | Critical hits repair you and nearby teammates. |
| Secondary Weapon | Scorpio | Adds status control and team damage support. |
| Specialization | Survivalist | Provides healing and group status damage bonuses. |
| Mask | Edelweiss GPz | Repair Skills and Skill Haste. |
| Backpack | Ortiz: Reficere | Reduces the set’s duration and range penalties. |
| Chest | Ortiz: Reficere | Increases the set’s burst healing bonus. |
| Gloves | Ortiz: Reficere | Repair Skills roll. |
| Holster | Ortiz: Reficere | Completes the four-piece Gear Set bonus. |
| Kneepads | Nurse’s Kneepads | Grants Hazard Protection to nearby teammates. |
| Gear Mods | Repair Skills | Increases each healing burst. |
| Skills | Restorer Hive and Reinforcer Chem Launcher | Covers steady healing and emergency repairs. |
Division 2 Future Initiative Legendary Healer Build
Future Initiative remains the best Division 2 healer build for general Legendary missions. It provides reliable repairs and increases group damage while teammates remain at full armor. Unlike Ortiz, it works well when players spread across a large room.
| Slot | Item | Description |
|---|---|---|
| Main Weapon | Scorpio or Designated Hitter | Adds control or improves healing after headshots. |
| Secondary Weapon | Lefty | Applies Sledgehammer for additional team damage. |
| Specialization | Survivalist | Improves healing and team damage against status-affected enemies. |
| Mask | Future Initiative | Repair Skills roll. |
| Backpack | Alps Summit with Opportunistic | Increases damage dealt to marked enemies. |
| Chest | Future Initiative | Improves the Gear Set’s healing and group damage bonuses. |
| Gloves | BTSU Datagloves | Supports Restorer Hive charges and group skill resets. |
| Holster | Future Initiative | Repair Skills roll. |
| Kneepads | Future Initiative | Completes the four-piece Gear Set bonus. |
| Gear Mods | Repair Skills | Increases healing from both equipped skills. |
| Skills | Restorer Hive and Reinforcer Chem Launcher | Provides steady healing and emergency repairs. |
Tip: Keep teammates near full armor to maintain Future Initiative’s damage bonus. Use Reinforcer Chem Launcher for players outside the Hive radius. Destroy or overcharge the Hive when the group needs an emergency skill reset.
Division 2 Legendary Striker Build
The Legendary Striker build is the best Division 2 Legendary build for direct weapon damage. St. Elmo’s Engine builds Striker stacks quickly and maintains strong damage during longer fights. This setup works best in coordinated groups that can protect their main DPS player.
| Slot | Item | Description |
|---|---|---|
| Main Weapon | St. Elmo’s Engine | Builds Striker stacks quickly with its large magazine. |
| Secondary Weapon | GR9 or MK46 with Frenzy | Provides sustained fire and rapid stack generation. |
| Specialization | Gunner | Adds ammunition, armor on kill, and rate-of-fire bonuses. |
| Mask | Striker | Red core with Crit Chance or Crit Damage. |
| Backpack | Striker | Increases the weapon damage gained from each stack. |
| Chest | Equalizer | Perfect Obliterate grants Total Weapon Damage through critical hits. |
| Gloves | Contractor’s Gloves | Adds Damage to Armor against protected enemies. |
| Holster | Striker | Red core with crit attributes. |
| Kneepads | Striker | Completes the four-piece Gear Set bonus. |
| Gear Mods | Crit Chance and Crit Damage | Reach the crit cap before stacking Crit Damage. |
| Skills | Crusader Shield and Reviver Hive | Provides temporary protection and a second chance. |
Tip: Use the Striker chest during long boss fights with reliable stack generation. Equalizer performs better during regular rooms where stacks frequently drop. Overdogs can replace Contractor’s Gloves when its conditional talent remains active.
The Memento Backpack is one of the most versatile items in The Division 2, fitting perfectly into almost every endgame build. Equip it once, and feel the difference in every encounter. No more grinding for hours, just to keep up focus on the fun parts of the game instead.
Division 2 Negotiator’s Pestilence Legendary Build
The Negotiator’s Pestilence build remains a strong Division 2 Legendary build for sustained multi-target pressure. Critical bullet hits mark enemies and distribute damage between those marks. Pestilence adds a separate Plague effect that continues damaging enemies after you return to cover.
| Slot | Item | Description |
|---|---|---|
| Main Weapon | Pestilence | Applies Plague stacks through direct weapon hits. |
| Secondary Weapon | High-RPM AR or LMG | Provides faster marking when Pestilence becomes difficult to control. |
| Specialization | Gunner | Adds LMG bonuses, ammunition, and armor on kill. |
| Mask | Negotiator’s Dilemma | Red core with Crit Chance or Crit Damage. |
| Backpack | Negotiator’s Dilemma | Increases damage transferred between marked enemies. |
| Chest | Ceska or Grupo with Obliterate | Adds direct damage through repeated critical hits. |
| Gloves | Contractor’s Gloves | Provides LMG Damage and Damage to Armor. |
| Holster | Negotiator’s Dilemma | Red core with crit attributes. |
| Kneepads | Negotiator’s Dilemma | Completes the four-piece Gear Set bonus. |
| Gear Mods | Crit Chance and Crit Damage | Supports the Gear Set’s marking mechanic. |
| Skills | Decoy and Reviver Hive | Creates safe firing windows and protects the run. |
⚠️ FIXED: Pestilence Plague ticks do not crit or transfer through Negotiator’s Dilemma marks. The weapon and Gear Set create two separate damage sources. Direct bullet critical hits activate Negotiator’s Dilemma, while Plague provides additional damage over time.
Negotiator’s Dilemma Focused Build
The Negotiator’s Dilemma Focused build is one of the best Division 2 Legendary builds for ranged damage. It combines multi-target marking with Perfect Focus and an 8x scope. Players can remain behind cover while distributing critical damage across several enemies.
| Slot | Item | Description |
|---|---|---|
| Main Weapon | Police M4, FAMAS, or Carbine 7 with 8x Scope | Applies marks quickly while activating Perfect Focus. |
| Weapon Talent | Fast Hands or Ranger | Provides faster reloads or higher ranged damage. |
| Secondary Weapon | Rifle with 8x Scope | Handles distant targets with accurate follow-up shots. |
| Specialization | Gunner or Sharpshooter | Choose sustained fire or stronger ranged handling. |
| Mask | Negotiator’s Dilemma | Red core with crit attributes. |
| Backpack | Negotiator’s Dilemma | Increases shared damage between marked enemies. |
| Chest | Pristine Example | Perfect Focus rewards remaining scoped during combat. |
| Gloves | Contractor’s Gloves | Adds Damage to Armor. |
| Holster | Negotiator’s Dilemma | Red core with Crit Chance or Crit Damage. |
| Kneepads | Negotiator’s Dilemma | Completes the four-piece Gear Set bonus. |
| Gear Mods | Crit Chance and Crit Damage | Reach 60% Crit Chance before adding Crit Damage. |
| Skills | Decoy and Reviver Hive | Distracts enemies and protects against mistakes. |
Tip: Mark three to five enemies before focusing on the strongest visible target. Negotiator’s Dilemma will distribute your critical damage across those marks. Red Horizon’s faster Critical Hit Damage stacking improves the build during long rooms.
Division 2 Refactor Force Multiplier Skill Build
Refactor with Capacitor is the safest Division 2 Legendary skill build for solo and group content. The Assault Turret and Striker Drone deal damage while you remain behind cover. Refactor also restores armor through damage dealt by your skills. This build has lower burst damage than Striker. It performs better when direct weapon exposure becomes dangerous. Force Multiplier and Capacitor still reward short weapon attacks between skill damage windows.
| Slot | Item | Description |
|---|---|---|
| Main Weapon | Capacitor | Increases skill damage through repeated weapon hits. |
| Secondary Weapon | Harmony or weapon with In Sync | Provides additional weapon and skill damage. |
| Specialization | Technician | Grants one Skill Tier and EMP utility. |
| Mask | Refactor | Skill Damage with a red or yellow core. |
| Backpack | Force Multiplier | Perfect Combined Arms increases skill damage after weapon hits. |
| Chest | Wyvern with Kinetic Momentum | Provides steady skill damage during long encounters. |
| Gloves | Refactor | Skill Damage roll. |
| Holster | Refactor | Skill Damage roll. |
| Kneepads | Refactor | Completes the four-piece Gear Set bonus. |
| Gear Mods | Skill Haste or Skill Duration | Choose faster cooldowns or longer deployments. |
| Skills | Striker Drone and Assault Turret | Deals safe and consistent autonomous damage. |
Tip: Use Technician to insert a red core for weapon damage while still running 6 skill tiers. It works on any item.
Division 2 Foam Status Effect Support Build
The Foam Status Effect setup is one of the best Division 2 Legendary support builds. It locks dangerous enemies in place and creates safe damage windows for the group. The build works especially well against rushers, medics, drone operators, and enemy electronics. Eclipse Protocol spreads Foam after a status-affected target dies. Creeping Death applies the first status to nearby enemies immediately. Scorpio and Lefty provide additional control and team damage support.
| Slot | Item | Description |
|---|---|---|
| Main Weapon | Scorpio | Applies several status effects and a team damage debuff. |
| Secondary Weapon | Lefty | Applies Sledgehammer after hitting an enemy with a grenade. |
| Specialization | Survivalist | Increases group damage against status-affected enemies. |
| Mask | Eclipse Protocol | Status Effects roll. |
| Backpack | Electrique with Creeping Death | Spreads the first applied status to nearby enemies. |
| Chest | Eclipse Protocol | Increases Eclipse Protocol’s status spread range. |
| Gloves | Eclipse Protocol | Status Effects roll. |
| Holster | Golan Gear | Adds Status Effects and Skill Haste. |
| Kneepads | Eclipse Protocol | Completes the four-piece Gear Set bonus. |
| Gear Mods | Skill Haste | Reduces Riot Foam and Jammer Pulse downtime. |
| Skills | Riot Foam and Jammer Pulse | Controls enemies and disables electronics. |
Tip: Foam dangerous Elite enemies before weaker targets. Damage players can remove the controlled enemies without taking unnecessary pressure. Save Jammer Pulse for drones, robotics, or dangerous skill waves.
The Division 2 PvP Builds

The Division 2 best PvP builds combine burst damage, bonus armor, recovery, and skill disruption. System Corruption and High-End AR builds provide the safest early Red Horizon templates. Older Ravenous, Iron Lung, Chatterbox, and Heartbreaker setups remain viable for their preferred engagement ranges.
Dark Zone rules now have a larger effect on every Division 2 PvP build. Blackout enables SHD levels, Expertise upgrades, and full Prototype base attributes. Global PvP balance and PvP Augment values remain active inside Blackout. Here are the Division 2 Best PvP Builds in 2026:
- System Corruption AR Build
- High-End AR Crit Build
- Capacitor NinjaBike PvP Build
- Core Strength Capacitor PvP Build
- Bighorn Striker PvP Build
- Iron Lung PvP Build
- Ravenous PvP Build
- Chatterbox Striker PvP Build
- Heartbreaker PvP Build
- Hunter’s Fury SMG PvP Build
Division 2 System Corruption Build
System Corruption is one of the best Division 2 PvP builds for aggressive Dark Zone gameplay. Hackstep Protocol grants instant bonus armor without consuming a normal armor kit. It also hides your nameplate during its active window. This creates useful opportunities for pushing, retreating, or surviving enemy burst damage. Run three or four blue cores before adding more weapon damage. Crit attributes help St. Elmo’s Engine maintain steady pressure during longer trades.
| Slot | Item | Description |
|---|---|---|
| Main Weapon | St. Elmo’s Engine | Provides stable AR pressure and a large magazine. |
| Secondary Weapon | Ouroboros or M870 | Covers close-range pushes and finishing attacks. |
| Specialization | Firewall | Supports aggressive movement and Striker Shield gameplay. |
| Mask | Catharsis | Adds defensive value during extended damage trades. |
| Backpack | System Corruption | Blue core with Crit Chance or Crit Damage. |
| Chest | Ceska, Grupo, or Unit Alloys with Unbreakable | Provides another armor bar during a duel. |
| Gloves | System Corruption | Blue or red core with crit attributes. |
| Holster | System Corruption | Blue core with Crit Chance or Crit Damage. |
| Kneepads | System Corruption | Completes the four-piece Gear Set bonus. |
| Gear Mods | Crit Chance and Crit Damage | Balance these stats around your selected weapon. |
| Skills | Decoy and Jammer Pulse | Creates false angles and disrupts enemy skills. |
Division 2 High-End AR Crit PvP Build
The High-End AR setup is one of the best Division 2 PvP builds for consistent weapon damage. It does not require Gear Set stacks or complicated activation conditions. Every armor piece can provide two minor attributes and a useful Brand bonus. Start with three or four blue cores for general Dark Zone gameplay. Add more red cores when the build already survives regular damage trades. Blackout also rewards Expertise upgrades and strong Prototype attributes.
| Slot | Item | Description |
|---|---|---|
| Main Weapon | Lexington, FAMAS, or Police M4 | Use Killer, Measured, Optimist, or another PvP talent. |
| Secondary Weapon | Ouroboros, Vector, or M870 | Covers close-range fights and finishing attacks. |
| Specialization | Firewall | Provides the Striker Shield and close-range bonuses. |
| Mask | Catharsis or Coyote’s Mask | Choose survivability or additional crit support. |
| Backpack | Matador or High-End piece with Adrenaline Rush | Grants bonus armor when enemies move nearby. |
| Chest | Equalizer or chest with Unbreakable | Choose higher damage or another defensive reset. |
| Gloves | Contractor’s Gloves | Adds Damage to Armor. |
| Holster | Picaro’s Holster or Salvo | Provides mixed cores or additional weapon damage. |
| Kneepads | Fox’s Prayer | Adds Damage to Targets Out of Cover. |
| Gear Mods | Crit Chance and Crit Damage | Reach consistent Crit Chance before stacking damage. |
| Skills | Jammer Pulse and Decoy | Counters enemy skills and creates misleading angles. |
Division 2 Capacitor Ninja PvP Build
The Capacitor NinjaBike setup remains a flexible Division 2 hybrid PvP build. Capacitor gains weapon damage from Skill Tiers while supporting offensive skills. NinjaBike Messenger Bag activates extra bonuses from several Brand Sets.
This build requires a careful mix of red, blue, and yellow cores. Too many yellow cores will leave the player vulnerable during weapon trades. Start with armor and crit before adding more Skill Damage.
| Slot | Item | Description |
|---|---|---|
| Main Weapon | Capacitor | Scales weapon damage through Skill Tiers and combat stacks. |
| Secondary Weapon | Shotgun or High-RPM SMG | Provides close-range burst damage. |
| Specialization | Technician | Grants one Skill Tier and EMP utility. |
| Mask | Unit Alloys or Ceska | Adds Crit Chance and Crit Damage. |
| Backpack | NinjaBike Messenger Bag | Provides all three cores and extra Brand counts. |
| Chest | Fenris or Ceska with Unbreakable | Adds AR damage and a defensive reset. |
| Gloves | Brazos or Wyvern Wear | Supports Skill Tier or Skill Damage scaling. |
| Holster | Picaro’s Holster | Adds Weapon Damage and a flexible core. |
| Kneepads | Grupo or another defensive Brand | Adds crit damage or armor value. |
| Gear Mods | Crit Chance and Crit Damage | Maintains reliable Capacitor weapon pressure. |
| Skills | Jammer Pulse and Stinger Hive | Disrupts enemy skills and protects close space. |
⚠️ FIXED: Waveform is no longer required for this PvP setup. Its alternating skill bonus provides limited value during short player engagements. Picaro’s Holster and defensive Brands produce more reliable results.
Division 2 Core Strength Capacitor PvP Build
Core Strength Capacitor is one of the best new Division 2 hybrid PvP builds. Core Strength converts red, blue, and yellow cores into additional cross-core bonuses. Capacitor benefits from this mixture through weapon and Skill Tier scaling. The Core Strength chest raises its cross-core conversion from 40% to 75%. NinjaBike provides one core of each type and completes the Gear Set count. Picaro’s Holster adds another useful source of Weapon Damage.
| Slot | Item | Description |
|---|---|---|
| Main Weapon | Capacitor | Scales through Skill Tiers and red weapon cores. |
| Secondary Weapon | Shotgun or High-RPM SMG | Covers close-range pressure. |
| Specialization | Technician | Grants one Skill Tier and EMP tools. |
| Mask | Unit Alloys | Crit Chance and Crit Damage. |
| Backpack | NinjaBike Messenger Bag | Adds three cores and extra Gear Set counts. |
| Chest | Core Strength | Increases the set’s cross-core bonuses. |
| Gloves | Core Strength | Red or blue core with crit attributes. |
| Holster | Picaro’s Holster | Adds Weapon Damage and a flexible core. |
| Kneepads | Core Strength | Completes the set through NinjaBike. |
| Gear Mods | Crit Chance and Crit Damage | Supports direct Capacitor damage. |
| Skills | Jammer Pulse and Stinger Hive | Disrupts skills and controls close positions. |
Division 2 Striker Bighorn PvP Build
The Bighorn Striker setup is one of the best Division 2 PvP builds for mid-range headshot pressure. Bighorn switches to a powerful semi-automatic mode while scoped. Accurate headshots make it dangerous against players who expose themselves from cover. Striker provides additional weapon damage after repeated hits. The set chest increases its maximum stack potential. Matador supplies bonus armor when enemies move into close range.
| Slot | Item | Description |
|---|---|---|
| Main Weapon | The Bighorn | Provides scoped headshot pressure and automatic fire when unscoped. |
| Secondary Weapon | Vector or another High-RPM SMG | Covers close-range engagements. |
| Specialization | Firewall | Supports aggressive movement and shield pressure. |
| Mask | Striker | Red or blue core with crit attributes. |
| Backpack | Matador | Perfect Adrenaline Rush provides nearby bonus armor. |
| Chest | Striker | Increases the maximum value of Striker stacks. |
| Gloves | Striker | Red or blue core with crit attributes. |
| Holster | Striker | Completes the four-piece Gear Set bonus. |
| Kneepads | Fox’s Prayer | Adds Damage to Targets Out of Cover. |
| Gear Mods | Crit Damage or Headshot Damage | Choose based on your scoped accuracy. |
| Skills | Striker Shield and Jammer Pulse | Supports pushes and disables enemy skills. |
The Bighorn is one of the top-tier PvP weapons in The Division 2. It shines in rifle builds that demand precision and power, especially when combined with the Striker gear set. If you don’t feel like farming it yourself, we can help you get it fast and hassle-free. Dominate the Dark Zone and Conflict with deadly burst and headshot damage.
Division 2 Iron Lung PvP Build
The Iron Lung PvP build remains a strong pressure option for Dark Zone and Conflict. Sustained fire builds weapon heat and can apply Burn to enemy players. The Burn effect disrupts movement and creates opportunities for teammates to push. Iron Lung requires more exposure than an assault rifle. Armor Regen, Unbreakable, and bonus armor help during extended firing windows. Contractor’s Gloves provide direct value for the Exotic LMG.
| Slot | Item | Description |
|---|---|---|
| Main Weapon | Iron Lung | Builds heat and applies Burn through sustained fire. |
| Secondary Weapon | Dark Winter or another High-RPM SMG | Finishes damaged targets at close range. |
| Specialization | Gunner | Adds LMG bonuses, ammunition, and armor on kill. |
| Mask | Catharsis | Provides defensive value during longer trades. |
| Backpack | Walker or Gila with Adrenaline Rush | Grants bonus armor near enemy players. |
| Chest | Fenris, Golan, or Belstone with Unbreakable | Provides another armor bar during a duel. |
| Gloves | Contractor’s Gloves | Adds LMG Damage and Damage to Armor. |
| Holster | Belstone Armory | Provides Armor Regen and defensive value. |
| Kneepads | Emperor’s Guard | Adds passive Armor Regen. |
| Gear Mods | Crit Chance and Crit Damage | Supports direct LMG pressure. |
| Skills | Defender Drone and Jammer Pulse | Reduces incoming damage and disrupts enemy skills. |
⚠️ FIXED: Iron Lung does not gain its value from tighter hipfire or automatic stabilization. Its main PvP strength comes from sustained fire and Burn pressure. Positioning remains necessary because LMG users move slowly while aiming.
Division 2 Ravenous PvP Build
The Ravenous PvP build remains a dangerous option for controlled mid-range fights. Alternating shoulder shots apply offensive and defensive primers. Detonating these primers provides burst damage or defensive value. This mechanic requires more preparation than a standard assault rifle. Ravenous becomes strongest when the player controls cover and engagement distance. Several blue cores provide enough time to complete the primer sequence.
| Slot | Item | Description |
|---|---|---|
| Main Weapon | Ravenous | Applies offensive and defensive primers through alternating shots. |
| Secondary Weapon | FAMAS, FAL, or High-RPM SMG | Provides faster damage when primer setup becomes unsafe. |
| Specialization | Firewall or Survivalist | Choose close pressure or defensive utility. |
| Mask | Catharsis or Coyote’s Mask | Adds survivability or crit support. |
| Backpack | Walker with Adrenaline Rush | Provides bonus armor near enemy players. |
| Chest | Ceska or Grupo with Unbreakable | Adds a defensive reset during aggressive trades. |
| Gloves | Contractor’s Gloves | Adds Damage to Armor. |
| Holster | Picaro’s Holster | Provides Weapon Damage and a flexible core. |
| Kneepads | Fox’s Prayer | Adds Damage to Targets Out of Cover. |
| Gear Mods | Crit Chance and Crit Damage | Supports direct rifle damage. |
| Skills | Decoy and Jammer Pulse | Creates false angles and disables enemy skills. |
⚠️ FIXED: Ravenous does not apply simple armor shred through every alternating shot. Its strength comes from correctly building and detonating primers. Random shoulder switching will reduce its damage.
The Ravenous is known for its brutal armor-shredding potential — perfect for PvP and tank-busting builds in The Division 2. If grinding raids aren’t your thing, reach out to us. We’ll handle the tricky part so you can jump straight into the action with one of the strongest rifles in the game.
Division 2 Chatterbox Striker PvP Build
Chatterbox Striker remains a fast Division 2 PvP build for close-range group fights. Reloading near enemies increases Chatterbox’s rate of fire. Kills also return ammunition and help maintain pressure between targets. The build depends on nearby enemies and kill confirmation. It performs better during group fights than isolated duels. Striker adds weapon damage after repeated SMG hits.
| Slot | Item | Description |
|---|---|---|
| Main Weapon | Chatterbox | Gains rate of fire after reloading near enemies. |
| Secondary Weapon | Vector or MPX | Provides consistent damage without Chatterbox conditions. |
| Specialization | Firewall | Adds Striker Shield and close-range bonuses. |
| Mask | Striker | Red or blue core with crit attributes. |
| Backpack | Striker | Increases the damage gained from Striker stacks. |
| Chest | Sokolov with Unbreakable | Adds SMG Damage and another defensive armor bar. |
| Gloves | Striker | Crit Chance or Crit Damage. |
| Holster | Striker | Crit Chance or Crit Damage. |
| Kneepads | Grupo or Fox’s Prayer | Adds Crit Damage or out-of-cover damage. |
| Gear Mods | Crit Chance and Crit Damage | Supports close-range SMG pressure. |
| Skills | Striker Shield and Jammer Pulse | Supports pushes and counters enemy skills. |
⚠️ FIXED: The build now uses four Striker pieces instead of five. The fifth piece previously provided no additional Gear Set bonus. A High-End kneepad adds more consistent damage.
Division 2 Heartbreaker PvP Build
Heartbreaker remains one of the best Division 2 PvP builds for aggressive mid-range pressure. Shooting pulsed enemies builds weapon damage and bonus armor. This allows the player to survive longer than a full red Striker setup. The Technician Linked Laser Pointer activates Flatline without requiring a Pulse skill. An ACS-12 can build Heartbreaker stacks before switching to the assault rifle. Several blue cores improve the set’s frontline durability.
| Slot | Item | Description |
|---|---|---|
| Main Weapon | Police M4, Carbine 7, or FAMAS with Flatline | Deals amplified damage to pulsed targets. |
| Secondary Weapon | ACS-12 with Flatline | Builds Heartbreaker stacks quickly at close range. |
| Specialization | Technician | Provides the Linked Laser Pointer and one Skill Tier. |
| Mask | Catharsis | Adds survivability during extended trades. |
| Backpack | Heartbreaker | Increases bonus armor gained through the Gear Set. |
| Chest | Heartbreaker | Raises the maximum Heartbreaker stack value. |
| Gloves | Heartbreaker | Blue or red core with crit attributes. |
| Holster | Heartbreaker | Completes the four-piece Gear Set bonus. |
| Kneepads | Fox’s Prayer | Adds Damage to Targets Out of Cover. |
| Gear Mods | Crit Chance and Crit Damage | Maintains reliable assault rifle pressure. |
| Skills | Jammer Pulse and Decoy | Disrupts enemy builds and creates false angles. |
Tip: Use the ACS-12 only when the enemy enters a safe stacking range. Switching weapons in the open can leave you vulnerable. Build some Heartbreaker stacks before committing to a full push.
Division 2 SMG PvP Build
Hunter’s Fury is one of the best Division 2 SMG builds for close-range PvP fights. It rewards aggressive positioning and applies extra pressure against nearby enemies. The build performs well on tight Conflict maps and enclosed Dark Zone landmarks. Ouroboros provides the highest close-range burst, while a Vector offers more talent flexibility. Use several blue cores before stacking additional weapon damage. Adrenaline Rush and Unbreakable help during direct SMG trades.
| Slot | Item | Description |
|---|---|---|
| Main Weapon | Ouroboros or Vector | Provides strong close-range burst damage. |
| Secondary Weapon | M870 or another SMG | Covers finishing attacks and weapon swaps. |
| Specialization | Firewall | Adds close-range bonuses and Striker Shield access. |
| Mask | Hunter’s Fury | Blue or red core with crit attributes. |
| Backpack | Ceska, Grupo, or Sokolov with Adrenaline Rush | Provides bonus armor near enemy players. |
| Chest | Ceska, Grupo, or Sokolov with Unbreakable | Grants another armor bar during close trades. |
| Gloves | Hunter’s Fury | Crit Chance or Crit Damage. |
| Holster | Hunter’s Fury | Crit Chance or Crit Damage. |
| Kneepads | Hunter’s Fury | Completes the four-piece Gear Set bonus. |
| Gear Mods | Crit Chance and Crit Damage | Reach consistent Crit Chance before adding damage. |
| Skills | Striker Shield and Jammer Pulse | Supports aggressive pushes and disables enemy skills. |
Division 2 Best PvE Builds
This section breaks down the best PvE builds in The Division 2 for 2026. These loadouts are crafted for consistent performance in every type of PvE activity — Control Points, Open World, The Summit, and more. We’ve hand-picked each one based on damage output, gear synergy, and how easy they are to use in real missions. Here we have a full list of the Best Builds in Division 2:
- Core Strength Memento Build
- Tipping Scales LMG Build
- Ember Engine Fafnir Build
- Ongoing Directive Support Build
- St Elmo’s Striker Build
- Heartbreaker PvE Build
- Assault Rifle PvE Build
- Kingbreaker Spotter Build
- Pestilence LMG Build
- Negotiator’s Pestilence Build
- SMG Build for PvE
- Skill Builds
- One-Shot Pistol Build
- One-Shot Sniper Build
- Armor Regen Build
- Negotiator’s Dilemma Focused Build
- Refactor Force Multiplier Skill Build
Struggling to find a build that fits your PvE style in The Division 2? We’ve got a full loadout of Division 2 Best PvE Builds ready for any type of PvE content, from solo farming to Legendary missions.
Division 2 Core Strength Memento Build
Core Strength with Memento is the best Division 2 solo build for balanced PvE gameplay. It combines weapon damage, armor, Skill Tier value, and trophy bonuses. The setup works across missions, open-world activities, Escalation, and general farming. Each core grants part of the other two core bonuses. The Core Strength chest improves this conversion from 40% to 75%. Memento provides one red, blue, and yellow core.
| Slot | Item | Description |
|---|---|---|
| Main Weapon | Capacitor or St. Elmo’s Engine | Choose hybrid skill scaling or direct AR damage. |
| Secondary Weapon | Scorpio | Controls dangerous enemies at close range. |
| Specialization | Technician | Provides one Skill Tier and stronger hybrid skills. |
| Mask | Core Strength | Red core with crit attributes. |
| Backpack | Memento | Adds three cores and trophy bonuses. |
| Chest | Core Strength | Increases the Gear Set’s cross-core bonuses. |
| Gloves | Core Strength | Red or blue core with crit attributes. |
| Holster | Picaro’s Holster | Adds Weapon Damage and a flexible core. |
| Kneepads | Core Strength | Completes the four-piece Gear Set bonus. |
| Gear Mods | Crit Chance and Crit Damage | Balance around your selected weapon. |
| Skills | Crusader Shield and Striker Drone | Both skills benefit from the mixed cores. |
Division 2 Tipping Scales LMG Build
Tipping Scales is one of the best Division 2 LMG builds for sustained PvE damage. Big Alejandro builds Weapon Damage while firing from cover, matching the Gear Set’s continuous-fire loop. Red Horizon increased Throttle Control to 5% Critical Hit Damage per stack and Snowball to 8%. This setup performs best in Legendary missions, Escalation, and long boss encounters.
| Slot | Item | Description |
|---|---|---|
| Main Weapon | Big Alejandro | Builds up to 100% Weapon Damage while firing from cover. |
| Secondary Weapon | GR9 with Steady Handed or Frenzy | Provides another large magazine for extended firing windows. |
| Specialization | Gunner | Adds ammunition, armor on kill, and LMG support. |
| Mask | Coyote’s Mask | Provides Critical Hit Chance or Critical Hit Damage based on combat distance. |
| Backpack | Tipping Scales | Snowball raises Critical Hit Damage from 5% to 8% per stack. |
| Chest | Tipping Scales | Sustainability increases the maximum stack count from 50 to 75. |
| Gloves | Contractor’s Gloves | Adds LMG Damage and Damage to Armor. |
| Holster | Tipping Scales | Red core with Critical Hit Chance. |
| Kneepads | Tipping Scales | Completes the four-piece Gear Set bonus. |
| Gear Mods | Critical Hit Chance and Critical Hit Damage | Reach reliable Crit Chance before adding more damage. |
| Skills | Decoy and Reviver Hive | Creates safe firing windows and protects against mistakes. |
Division 2 Ember Engine Fafnir Build
Ember Engine with Fafnir is the best new Division 2 status effect build from Red Horizon. It focuses on Burn damage, repeated fire application, and status effect scaling. The setup performs best against packed enemies that survive several Burn ticks. Every applied status has a 40% chance to apply Burn. The Ember Engine chest increases this chance to 60%. Applying Burn first also increases its damage for that effect’s duration.
| Slot | Item | Description |
|---|---|---|
| Main Weapon | Fafnir | Applies Burn and scales weapon damage from Status Effects. |
| Secondary Weapon | Scorpio or Pyromaniac | Adds control or damage against burning targets. |
| Specialization | Firewall | Improves Burn duration and fire-based combat. |
| Mask | Vile | Adds another damage-over-time effect. |
| Backpack | Ember Engine | Extends the set’s Burn damage debuff. |
| Chest | Ember Engine | Raises the extra Burn application chance to 60%. |
| Gloves | Ember Engine | Status Effects roll. |
| Holster | Electrique or Golan Gear | Adds Status Effects and Skill Haste. |
| Kneepads | Ember Engine | Completes the four-piece Gear Set bonus. |
| Gear Mods | Skill Haste | Reduces downtime between fire skills. |
| Skills | Firestarter Chem Launcher and Incinerator Turret | Applies repeated Burn across a wide area. |
Division 2 Ongoing Directive Support Build
Ongoing Directive is one of the best Division 2 support builds for weapon-focused groups. It provides Hollow-Point Ammo and applies Bleed across repeated enemy waves. Red Horizon increased its amplified weapon damage from 20% to 40%. The Ongoing Directive chest raises Hollow-Point amplified damage to 60%. Killing a status-affected enemy refills the active weapon with special ammunition. Group members also receive part of a magazine.
| Slot | Item | Description |
|---|---|---|
| Main Weapon | Carnage or GR9 with Sadist | Gains damage against bleeding enemies. |
| Secondary Weapon | Scorpio | Starts the status loop and applies team debuffs. |
| Specialization | Survivalist | Increases team damage against status-affected enemies. |
| Mask | Ongoing Directive | Red core with Status Effects or crit attributes. |
| Backpack | The Setup or Ongoing Directive | Provides team amplification or stronger Bleed. |
| Chest | Ongoing Directive | Raises Hollow-Point amplified damage to 60%. |
| Gloves | Contractor’s Gloves | Adds LMG Damage and Damage to Armor. |
| Holster | Ongoing Directive | Status Effects or crit attributes. |
| Kneepads | Ongoing Directive | Completes the four-piece Gear Set bonus. |
| Gear Mods | Crit Chance and Crit Damage | Supports direct weapon damage. |
| Skills | Stinger Hive and Riot Foam | Starts status chains without special ammunition. |
Division 2 St Elmo’s Striker Build
This St Elmo’s Striker Build loadout is one of the best damage builds for endgame PvE in Division 2. With St. Elmo’s Engine as the primary weapon and full Striker gear, it delivers incredible burst potential — perfect for Legendary Strongholds, Heroic missions, or The Summit. Fast stack gain, solid survivability via Memento, and strong crit scaling make this a top-tier meta choice.
| Slot | Item | Details |
|---|---|---|
| Main Weapon | St Elmo’s Engine | Synergy with Striker for max uptime |
| Secondary Weapon | GR9 LMG | With “Frenzy” or “Fast Hands” for reload speed or RPM boost |
| Specialization | Gunner | Extra RPM, armor on kill, and ammo regen |
| Mask | Striker Mask | Red Core with Crit Chance or Crit Damage |
| Backpack | Memento | Bonus armor, damage, and regeneration scaling over time |
| Chestpiece | Grupo/Ceska/Fenris | With “Obliterate” + Crit stats |
| Gloves | Striker Gloves | With Crit rolls |
| Holster | Striker Holster | Rolled for Crit Damage or Chance |
| Kneepads | Striker Kneepads | With Crit-focused attributes |
| Gear Mods | Crit Mods | Crit Chance and Crit Damage mods wherever possible |
| Skills | Crusader Shield + Reviver Hive | Shield for face tanking and Hive for a safety net |
Tip: Cap Crit Chance at 60%, then fully stack Crit Damage on gear and mods
Division 2 Heartbreaker PvE Build
Looking to melt enemies in Heroic and Legendary PvE? The Heartbreaker PvE Build in The Division 2 is one of the strongest for Assault Rifle users. It’s designed for pure efficiency in Countdown, Raids, and Summit runs. You’ll rely on the synergy between the Flatline talent and the Heartbreaker gear set, backed up by the Technician’s laser pointer. The shotgun isn’t for killing — it’s there to stack your gear bonuses faster.
| Slot | Item | Description |
|---|---|---|
| Main Weapon | Carbine 7 / Police M4 / FAMAS | With “Flatline” for bonus amplified damage |
| Secondary Weapon | ACS-12 Shotgun | Used to quickly build Heartbreaker stacks with Flatline |
| Specialization | Technician | Grants Linked Laser Pointer for Flatline activation |
| Mask | Heartbreaker (Blue Core) | Rolled with Crit Chance or Crit Damage |
| Backpack | Heartbreaker Backpack | Ideally, with Crit rolls to improve damage |
| Chestpiece | Heartbreaker Chest | Rolled with Crit stats |
| Gloves | Contractor’s Gloves (Blue Core) | Crit-focused, strong synergy with ARs |
| Holster | Heartbreaker Holster | Rolled with Crit Chance or Crit Damage |
| Kneepads | Fox’s Prayer | Essential for damage against armor |
| Gear Mods | Crit Chance / Crit Damage Mods | Focus on both types in all mod slots |
| Skills | Crusader Shield + Reviver Hive | Frontline tanking and recovery safety |
Tip: Get your Crit Chance to 50%, then fully invest in Crit Damage. Use Extended Mag for +20 rounds on AR.
Don’t feel like farming all the pieces? We’ve got you covered. Jump straight into the action with a fully optimized Division 2 Heartbreaker Build — no grind, no stress. Two powerful exotics, full gear synergy, and armor-stacking madness are ready to roll. Spend less time hunting loot and more time dominating content.
Division 2 Assault Rifle PvE Build
The Division 2 AR PvE Build is your go-to for consistency. It works great in Control Points, Heroic missions, and open-world farming. With St. Elmo’s Engine at the center and a mix of red and blue cores, this build offers both damage and survivability. If you want something flexible and effective for solo or group play, this loadout is a solid pick.
| Slot | Item | Description |
|---|---|---|
| Main Weapon | St. Elmo’s Engine | Top-tier exotic AR with versatile perks |
| Secondary Weapon | Any shotgun or rifle | Backup option depending on preference |
| Specialization | Gunner | Increases RPM and provides armor on kill |
| Mask | Coyote’s Mask | Grants crit bonuses based on team distance |
| Backpack | Grupo or Ceska with Vigilance | Boosts total damage dealt |
| Chestpiece | Grupo or Ceska with Obliterate | Stacks crit-based damage |
| Gloves | Contractor’s Gloves | Bonus damage to armor + crit rolls |
| Holster | Palisade | Crit Chance and Crit Damage + Blue Core |
| Kneepads | Fox’s Prayer | Adds damage to targets out of cover |
| Gear Mods | Crit Chance / Crit Damage Mods | Balance both types for full DPS |
| Skills | Crusader Shield + Reviver Hive | Provides a frontline defense and a second chance |
Tip: Hit 50% Crit Chance minimum, then build into Crit Damage. Using 2 blue cores is fine for survivability.
Division 2 Armor Regen Build
The Armor Regen setup is one of the safest Division 2 solo PvE builds. It combines passive recovery, armor cores, and enough crit damage for regular activities. The build performs well during long fights without a dedicated healer. Ouroboros provides high burst damage but does not directly improve Armor Regen. Its fast kills reduce the time spent under enemy fire. NinjaBike activates additional bonuses from several defensive Brands.
| Slot | Item | Description |
|---|---|---|
| Main Weapon | Ouroboros or Bighorn | Choose close-range burst or ranged headshot pressure. |
| Secondary Weapon | Shield Splinterer | Provides a reliable assault rifle alternative. |
| Specialization | Gunner or Survivalist | Choose armor on kill or defensive utility. |
| Mask | Chill Out or Gila Guard | Provides Armor Regen and an additional mod slot. |
| Backpack | NinjaBike Messenger Bag | Activates extra bonuses from several Brands. |
| Chest | Golan or Belstone with Unbreakable | Adds regeneration and a defensive reset. |
| Gloves | Gila Guard | Armor Regen with crit attributes. |
| Holster | Belstone Armory | Provides passive Armor Regen. |
| Kneepads | Emperor’s Guard | Adds another source of Armor Regen. |
| Gear Mods | Crit Chance and Crit Damage | Maintains useful weapon damage. |
| Skills | Decoy and Reviver Hive | Supports safe repositioning and recovery. |
Tip: Get at least 50% Crit Chance, then spec into Crit Damage. Use Chill Out Mask for an extra mod slot if you own it.
Ouroboros is one of the best SMGs for aggressive builds in Division 2. Farm it through Paradise Lost and melt through enemies with explosive synergy and rapid-fire damage.
Division 2 Kingbreaker Spotter Build
The Kingbreaker Spotter setup remains a strong Division 2 PvE build for pulsed-target damage. Kingbreaker uses Perfect Flatline to deal amplified damage against pulsed enemies. Closer adds Perfect Spotter for another direct damage bonus. Heartbreaker provides bonus armor and weapon damage during sustained fights. The ACS-12 builds stacks quickly before Kingbreaker takes over. This setup works well in Countdown, Heroic missions, and group activities.
| Slot | Item | Description |
|---|---|---|
| Main Weapon | Kingbreaker | Pulse targets for Flatline and Spotter synergy |
| Secondary Weapon | ACS-12 Shotgun with Flatline | Quickly builds Heartbreaker stacks |
| Specialization | Technician | Linked Laser Pointer enables Flatline |
| Mask | Heartbreaker Mask (Blue Core) | Crit Chance or Crit Damage rolled |
| Backpack | Heartbreaker Backpack | Preferably rolled for Crit |
| Chestpiece | Closer (Blue Core) | Activates Spotter for amplified damage |
| Gloves | Heartbreaker Gloves (Blue Core) | Crit stat focused |
| Holster | Heartbreaker Holster (Blue Core) | Rolled for DPS stats |
| Kneepads | Fox’s Prayer (Blue Core) | Damage vs. enemies out of cover |
| Gear Mods | Crit Chance / Crit Damage | Tune based on crit cap |
| Skills | Crusader Shield + Reviver Hive | Frontline support and safety net |
Tip: Try to reach 50% Crit Chance, then focus fully on Crit Damage. Spotter keeps bonus damage active all the time.
Division 2 Pestilence LMG Build
The Pestilence LMG build remains a useful Division 2 PvE build for sustained damage over time. Direct hits apply Plague of the Outcasts to the target. The debuff moves to another nearby enemy when its current target dies.
| Slot | Item | Description |
|---|---|---|
| Main Weapon | Pestilence | Applies stacking Plague damage through direct hits. |
| Secondary Weapon | GR9 or MK46 with Frenzy | Provides sustained damage when Pestilence needs reloading. |
| Specialization | Gunner | Adds LMG bonuses, ammunition, and armor on kill. |
| Mask | Coyote’s Mask or Walker | Provides crit support or direct weapon damage. |
| Backpack | Walker or Lengmo with Vigilance | Increases direct weapon and Plague damage. |
| Chest | Grupo or Walker with Obliterate | Adds Total Weapon Damage through critical hits. |
| Gloves | Contractor’s Gloves | Provides LMG Damage and Damage to Armor. |
| Holster | Picaro’s Holster or Lengmo | Adds Weapon Damage or LMG bonuses. |
| Kneepads | Fox’s Prayer | Improves direct damage against exposed enemies. |
| Gear Mods | Crit Chance and Crit Damage | Supports bullet damage rather than Plague ticks. |
| Skills | Decoy and Reviver Hive | Creates shooting time and provides extra safety. |
Division 2 Negotiator’s Pestilence Build
Negotiator’s Pestilence combines multi-target critical damage with a separate Plague effect. Critical bullet hits mark enemies and distribute damage between those marks. Pestilence continues applying damage over time to its current target.
| Slot | Item | Description |
|---|---|---|
| Main Weapon | Pestilence | Applies DoT effect that spreads between enemies |
| Secondary Weapon | Any | Optional – Pestilence carries the build |
| Specialization | Gunner | Boosts LMG stats, armor on kill, RPM |
| Mask | Negotiator’s Mask | Red Core with Crit Chance or Damage |
| Backpack | Grupo or Ceska | “Vigilance” or “Composure” with Crit stats |
| Chestpiece | Grupo or Ceska | “Obliterate” talent for crit scaling |
| Gloves | Negotiator’s Gloves | Rolled with Crit stats |
| Holster | Negotiator’s Holster | Red Core with offensive stats |
| Kneepads | Negotiator’s Kneepads | Rolled for Crit Chance or Damage |
| Gear Mods | Crit Chance / Crit Damage | Cap Chance first, then boost Damage |
| Skills | Defender Drone + Decoy / Reviver Hive | Flex options for survival and control |
⚠️ FIXED: Pestilence Plague ticks do not crit or transfer through Negotiator’s Dilemma marks. The weapon and Gear Set create two independent damage sources. Direct bullet critical hits activate the Gear Set’s shared damage.
Division 2 SMG Build for PvE
This build is one of the best options for speed farming in The Division 2. Centered around the Chatterbox SMG and the Hunter’s Fury gear set, it’s designed for fast-paced, close-range combat. With high burst potential, mobility, and bonus damage from Intimidate and Memento, this setup is ideal for Heroic missions, Control Points, and farming The Summit.
| Slot | Item | Description |
|---|---|---|
| Main Weapon | Chatterbox | SMG with ramping RPM and reload synergy |
| Secondary Weapon | Shield Splinterer | Backup weapon with utility |
| Specialization | Gunner | Extra RPM and armor on kill |
| Mask | Hunter’s Fury Mask | Blue Core with Crit Chance or Damage |
| Backpack | Memento | Synergizes with kills for armor and damage buffs |
| Chestpiece | Palisade with Intimidate | Bonus damage when bonus armor is active |
| Gloves | Hunter’s Fury Gloves | Rolled for offensive stats |
| Holster | Hunter’s Fury Holster | Crit Damage or Crit Chance |
| Kneepads | Hunter’s Fury Kneepads | Boosts close-range burst potential |
| Gear Mods | Crit Chance / Crit Damage | Maximize damage output |
| Skills | Crusader Shield + Reviver Hive | Helps face-rushing and survival |
No time to grind for Hunter’s Fury? Let us take care of it. Get your hands on the ultimate Hunter’s Fury SMG Loadout tailored for fast-paced combat. Perfectly tuned for aggressive players — with all the right pieces, talents, and synergy. Skip the grind and jump straight into melting enemies at close range.
Division 2 One-Shot Pistol Build
The Regulus setup remains one of the best Division 2 PvE builds for precise headshot gameplay. Regulus creates explosions after headshot kills and can clear packed enemies quickly. Chainkiller provides Perfect Headhunter for stronger follow-up shots. Dodge City Gunslinger’s Holster prepares a powerful opening pistol shot. This helps start the Headhunter chain against stronger enemies. The build requires accurate aim and careful target selection.
| Slot | Item | Description |
|---|---|---|
| Primary Weapon | Model 700 or 1886 | Starts Headhunter against distant targets. |
| Sidearm | Regulus | Creates explosions after headshot kills. |
| Specialization | Sharpshooter | Adds Headshot Damage and weapon handling. |
| Mask | Punch Drunk | Provides additional Headshot Damage. |
| Backpack | Airaldi or Providence with Vigilance | Adds direct weapon and headshot damage. |
| Chest | Chainkiller | Perfect Headhunter provides the main damage multiplier. |
| Gloves | Contractor’s Gloves | Adds Damage to Armor. |
| Holster | Dodge City Gunslinger’s Holster | Prepares a powerful opening pistol shot. |
| Kneepads | Fox’s Prayer | Adds Damage to Targets Out of Cover. |
| Gear Mods | Headshot Damage | Increases pistol and Headhunter damage. |
| Skills | Bulwark Shield and Reviver Hive | Protects pistol gameplay and provides a second chance. |
The Regulus turns every shot into a deadly explosion, making it ideal for headshot-focused builds. Perfect for solo players and those who enjoy fast-paced, high-risk play. Get it ready and dominate elite zones with ease.
Division 2 One-Shot Sniper Build
The One-Shot Sniper setup is one of the best Division 2 PvE builds for long sightlines. Nemesis provides high charged-shot damage against bosses and Elite enemies. Model 700 offers faster shots when full Nemesis charging becomes unsafe.
| Slot | Item | Description |
|---|---|---|
| Main Weapon | Nemesis | Exotic sniper with a charge-up mechanic |
| Secondary Weapon | Model 700 / SR1 | Use with “Determined” to boost headshots |
| Specialization | Sharpshooter | More stability, headshot dmg, sniper buffs |
| Mask | Hotshot | Red Core, Headshot Damage |
| Backpack | Airaldi / Habsburg | HSD, Weapon Handling, “Vigilance” |
| Chestpiece | Chainkiller / Habsburg | “Headhunter” for one-shot potential |
| Gloves | Hotshot Gloves | Stacked with Headshot Damage |
| Holster | Hotshot Holster | Rolled for Headshot stats |
| Kneepads | Hotshot Kneepads | Full set completion, HSD scaling |
| Gear Mods | Headshot Damage | Used in every mod slot |
| Skills | Decoy + Defender Drone / Reviver Hive | Distraction and backup defense |
Division 2 Negotiator’s Dilemma Focused Build
The Negotiator’s Dilemma Focused setup is one of the best ranged Division 2 PvE builds. It combines multi-target marking with Perfect Focus and an 8x scope. Players can remain behind cover while distributing damage across several enemies.
| Slot | Item | Description |
|---|---|---|
| Main Weapon | Police M4, FAMAS, or Carbine 7 with 8x Scope | Applies marks quickly while activating Perfect Focus. |
| Weapon Talent | Fast Hands or Ranger | Provides faster reloads or additional ranged damage. |
| Secondary Weapon | Rifle with 8x Scope | Handles distant enemies with accurate follow-up shots. |
| Specialization | Gunner or Sharpshooter | Choose sustained fire or stronger ranged handling. |
| Mask | Negotiator’s Dilemma | Red core with crit attributes. |
| Backpack | Negotiator’s Dilemma | Increases damage shared between marked enemies. |
| Chest | Pristine Example | Perfect Focus rewards remaining scoped. |
| Gloves | Contractor’s Gloves | Adds Damage to Armor. |
| Holster | Negotiator’s Dilemma | Crit Chance or Crit Damage. |
| Kneepads | Negotiator’s Dilemma | Completes the four-piece Gear Set bonus. |
| Gear Mods | Crit Chance and Crit Damage | Reach 60% Crit Chance before adding damage. |
| Skills | Decoy and Reviver Hive | Distracts enemies and protects against mistakes. |
Division 2 Refactor Force Multiplier Skill Build
Refactor with Capacitor is one of the best Division 2 skill builds for difficult PvE content. The Assault Turret and Striker Drone deal damage while you remain behind cover. Refactor also restores armor through damage dealt by your skills.
| Slot | Item | Description |
|---|---|---|
| Main Weapon | Capacitor | Boosts skill damage and fits perfectly into turret and drone builds |
| Secondary Weapon | Rifle or SMG with In Sync | Adds extra weapon and skill damage while your skills are active |
| Specialization | Technician | Gives +1 Skill Tier and supports stronger skill-focused setups |
| Mask | Refactor | Red Core with Skill Damage for extra weapon value without losing skill power |
| Backpack | Force Multiplier | Perfect Combined Arms gives a strong boost to skill damage |
| Chestpiece | Hana-U with Glass Cannon or Kinetic Momentum | Improves skill output and keeps your damage high in long fights |
| Gloves | Refactor | Adds more Skill Damage and supports the 4-piece set bonus |
| Holster | Refactor | Another core set piece for stronger skill synergy |
| Kneepads | Refactor | Completes the set and boosts overall build efficiency |
| Gear Mods | Skill Haste | Lowers cooldowns and keeps your skills active more often |
| Skills | Striker Drone + Assault Turret | Safe and reliable damage tools for Legendary and group PvE |
Division 2 Best Raid Builds
For most raid groups in 2026, the core lineup still looks simple. You bring a Striker DPS Build for reliable damage, a Healer Build to keep the team alive, a Tank Build for safer frontline play, and a Foam Status Effect Support Build when control matters. These are the Division 2 best raid builds if you want a smooth run in Dark Hours, Iron Horse, or other group-focused endgame content.
- Striker DPS Build
- Healer Build
- Tank Build
- Foam Status Effect Support Build
- Negotiator’s Dilemma Add-Clear Build
- Ongoing Directive Raid Support Build
- Ortiz: Reficere Healer Build
Division 2 Striker Raid DPS Build
Striker is the best Division 2 raid build for sustained boss damage. St. Elmo’s Engine builds Striker stacks quickly and maintains reliable assault rifle pressure. Full red cores provide the damage required for raid bosses and priority targets.
| Slot | Item | Description |
|---|---|---|
| Main Weapon | St. Elmo’s Engine | Builds Striker stacks quickly with its large magazine. |
| Secondary Weapon | GR9 or MK46 with Frenzy | Generates stacks and provides sustained boss damage. |
| Specialization | Gunner | Adds ammunition, armor on kill, and rate-of-fire support. |
| Mask | Striker | Red core with Crit Chance or Crit Damage. |
| Backpack | Striker | Increases the damage provided by each Striker stack. |
| Chest | Equalizer or Striker | Choose faster crit scaling or higher maximum stacks. |
| Gloves | Contractor’s Gloves | Adds Damage to Armor. |
| Holster | Striker | Red core with crit attributes. |
| Kneepads | Striker | Completes the four-piece Gear Set bonus. |
| Gear Mods | Crit Chance and Crit Damage | Reach the crit cap before stacking damage. |
| Skills | Reviver Hive and Decoy | Provides a second chance and distracts enemies. |
Division 2 Future Initiative Raid Healer Build
Future Initiative remains the best Division 2 raid healer build for most encounters. It provides steady repairs and increases group damage while teammates remain at full armor. Its large healing range also supports groups spread across an arena.
| Slot | Item | Description |
|---|---|---|
| Main Weapon | Scorpio or Designated Hitter | Provides control or stronger healing after headshots. |
| Secondary Weapon | Lefty | Applies Sledgehammer after a grenade hit. |
| Specialization | Survivalist | Improves healing and team status damage. |
| Mask | Future Initiative | Repair Skills roll. |
| Backpack | Alps Summit with Opportunistic | Increases damage dealt to marked enemies. |
| Chest | Future Initiative | Improves healing and group damage bonuses. |
| Gloves | BTSU Datagloves | Supports Hive charges and group skill resets. |
| Holster | Future Initiative | Repair Skills roll. |
| Kneepads | Future Initiative | Completes the four-piece Gear Set bonus. |
| Gear Mods | Repair Skills | Increases healing from both equipped skills. |
| Skills | Restorer Hive and Reinforcer Chem Launcher | Provides steady healing and emergency repairs. |
Division 2 Foundry Bulwark Raid Tank Build
Foundry Bulwark is the best Division 2 raid tank build for shield-based mechanics. It provides high armor, shield recovery, and strong defensive consistency. Pointman also grants bonus armor to nearby group members.
| Slot | Item | Description |
|---|---|---|
| Primary Weapon | Shotgun or Assault Rifle with Preservation | Provides recovery when the shield is not required. |
| Sidearm | Liberty | Repairs the Bulwark Shield through accurate headshots. |
| Specialization | Technician | Grants one Skill Tier and supports Artificer Hive. |
| Mask | Foundry Bulwark | Blue core with Armor Regen. |
| Backpack | Foundry Bulwark | Improves the Gear Set’s defensive recovery. |
| Chest | Pointman | Perfect Vanguard grants bonus armor to teammates. |
| Gloves | Foundry Bulwark | Blue core with Armor Regen. |
| Holster | Forge | Adds shield health and defensive value. |
| Kneepads | Foundry Bulwark | Completes the four-piece Gear Set bonus. |
| Gear Mods | Protection from Elites or Incoming Repairs | Choose enemy resistance or stronger healing. |
| Skills | Bulwark Shield and Artificer Hive | Provides frontline protection and shield repairs. |
Division 2 Foam Status Effect Raid Support Build
The Foam Status Effect setup is one of the best Division 2 raid support builds. Riot Foam locks enemies in place and creates safe damage windows. This helps during encounters with rushers, medics, and mechanic-focused enemy waves.
| Slot | Item | Description |
|---|---|---|
| Main Weapon | Scorpio | Applies status effects and a team damage debuff. |
| Secondary Weapon | Lefty | Applies Sledgehammer after a grenade hit. |
| Specialization | Survivalist | Increases group damage against status-affected enemies. |
| Mask | Eclipse Protocol | Status Effects roll. |
| Backpack | Electrique with Creeping Death | Spreads the first applied status to nearby enemies. |
| Chest | Eclipse Protocol | Increases Eclipse Protocol’s spread range. |
| Gloves | Eclipse Protocol | Status Effects roll. |
| Holster | Golan Gear | Adds Status Effects and Skill Haste. |
| Kneepads | Eclipse Protocol | Completes the four-piece Gear Set bonus. |
| Gear Mods | Skill Haste | Reduces Riot Foam and Jammer Pulse downtime. |
| Skills | Riot Foam and Jammer Pulse | Controls enemies and disables electronics. |
Division 2 Negotiator’s Dilemma Raid Build
Negotiator’s Dilemma is one of the best Division 2 raid builds for add clearing. Critical hits mark several enemies and distribute damage between those marks. This lets one player pressure multiple targets during crowded encounter phases.
| Slot | Item | Description |
|---|---|---|
| Main Weapon | St. Elmo’s Engine or High-RPM AR | Applies critical marks quickly. |
| Secondary Weapon | GR9 or MK46 | Marks distant enemies and provides sustained fire. |
| Specialization | Gunner | Adds ammunition and weapon handling. |
| Mask | Negotiator’s Dilemma | Red core with crit attributes. |
| Backpack | Negotiator’s Dilemma | Increases damage shared between marked enemies. |
| Chest | Equalizer or Ceska with Obliterate | Adds Total Weapon Damage through critical hits. |
| Gloves | Contractor’s Gloves | Adds Damage to Armor. |
| Holster | Negotiator’s Dilemma | Crit Chance or Crit Damage. |
| Kneepads | Negotiator’s Dilemma | Completes the four-piece Gear Set bonus. |
| Gear Mods | Crit Chance and Crit Damage | Reach 60% Crit Chance before adding damage. |
| Skills | Reviver Hive and Decoy | Protects the player and distracts enemy waves. |
Division 2 Ongoing Directive Raid Support Build
Ongoing Directive is one of the best Division 2 raid support builds for weapon-focused groups. It supplies Hollow-Point Ammo and applies Bleed to enemies. Red Horizon increased its amplified weapon damage from 20% to 40%.
| Slot | Item | Description |
|---|---|---|
| Main Weapon | Carnage or GR9 with Sadist | Gains damage against bleeding enemies. |
| Secondary Weapon | Scorpio | Starts status chains and applies team debuffs. |
| Specialization | Survivalist | Increases group damage against status-affected enemies. |
| Mask | Ongoing Directive | Red core with Status Effects or crit attributes. |
| Backpack | The Setup | Perfectly Opportunistic increases team damage. |
| Chest | Ongoing Directive | Raises Hollow-Point amplified damage to 60%. |
| Gloves | Contractor’s Gloves | Adds LMG Damage and Damage to Armor. |
| Holster | Ongoing Directive | Status Effects or crit attributes. |
| Kneepads | Ongoing Directive | Completes the four-piece Gear Set bonus. |
| Gear Mods | Crit Chance and Crit Damage | Supports direct weapon damage. |
| Skills | Stinger Hive and Riot Foam | Starts the first status chain. |
Division 2 Ortiz Reficere Raid Healer Build
Ortiz: Reficere is a situational Division 2 raid healer build for status-heavy encounters. It provides large healing bursts and temporary Hazard Protection. This helps against Burn, Bleed, Shock, and other dangerous effects.
| Slot | Item | Description |
|---|---|---|
| Main Weapon | Caduceus | Critical hits repair you and nearby teammates. |
| Secondary Weapon | Scorpio | Provides status control and team damage support. |
| Specialization | Survivalist | Adds healing and team status damage. |
| Mask | Edelweiss GPz | Repair Skills and Skill Haste. |
| Backpack | Ortiz: Reficere | Reduces the set’s range and duration penalties. |
| Chest | Ortiz: Reficere | Increases the set’s burst healing bonus. |
| Gloves | Ortiz: Reficere | Repair Skills roll. |
| Holster | Ortiz: Reficere | Completes the four-piece Gear Set bonus. |
| Kneepads | Nurse’s Kneepads | Grants Hazard Protection to nearby teammates. |
| Gear Mods | Repair Skills | Increases each healing burst. |
| Skills | Restorer Hive and Reinforcer Chem Launcher | Provides steady healing and emergency repairs. |
Division 2 Best Builds FAQ
Choosing the right build in The Division 2 can make a huge difference in how easily you clear missions, farm gear, or survive PvP encounters. Below you will find answers to the most common questions about The Division 2 best builds, including PvE, PvP, farming setups, and gear choices used in the current meta.
What Is the Best Overall Build in Division 2?
St. Elmo’s Striker is the best overall build in Division 2 for general PvE gameplay. It provides high sustained damage across missions, Countdown, raids, Incursions, and Escalation.
What Is the Best DPS Build in Division 2?
The best Division 2 DPS build uses St. Elmo’s Engine with four Striker pieces. Use the Striker backpack and Equalizer chest for strong general damage.
What Is the Best PvE Build in The Division 2?
St. Elmo’s Striker is the best Division 2 PvE build for direct weapon damage. Core Strength provides a safer alternative for solo players who need more armor.
What Is the Best Farming Build in The Division 2?
Model 700 Headhunter Hotshot Red is the best Division 2 farming build for accurate sniper players. Iron Will Hotshot provides an easier alternative for body-shot farming.
Is Model 700 Hotshot Still Good After Red Horizon?
Yes, Model 700 Hotshot remains one of the best Division 2 sniper builds. Players must now land real headshots between converted Determined shots.
Is Determined Still Good in The Division 2?
Determined remains useful, but it can no longer maintain an endless body-shot chain. A converted headshot kill does not activate another guaranteed headshot.
What Is the Difference Between Determined and Iron Will?
Determined requires a real headshot kill before converting the next shot. Iron Will converts one body shot every two seconds without requiring a previous headshot kill.
What Is the Best Sniper Build in The Division 2?
Model 700 Headhunter Hotshot Red is the best Division 2 sniper build for experienced players. Iron Will Hotshot is easier but has a two-second PvE cooldown.
What is the Best Build for Solo Division 2?
Core Strength with Memento is the best Division 2 solo build for balanced gameplay. It combines weapon damage, armor, Skill Tier value, and trophy bonuses.
What Is the Best PvP Build in The Division 2?
System Corruption is one of the best Division 2 PvP builds during early Red Horizon. High-End AR builds provide more flexibility across different Dark Zone rulesets.
What Is the Best PvP Weapon in The Division 2?
St. Elmo’s Engine remains a reliable PvP assault rifle with a large magazine. Bighorn, Ouroboros, and Capacitor perform better in specialized PvP builds.
What Is the Best Gear Set in The Division 2?
Striker’s Battlegear remains the best general damage Gear Set in The Division 2. Hotshot, Negotiator’s Dilemma, and Core Strength lead other specialized roles.
What Is the Best SMG Build in The Division 2?
Hunter’s Fury with Ouroboros is the best Division 2 SMG build for close-range PvE farming. Memento and several blue cores improve its solo survivability.
What Is the Best Skill Build in The Division 2?
Refactor with Capacitor is one of the best Division 2 skill builds. Assault Turret and Striker Drone provide safe damage while Refactor restores armor.
What Is the Best Legendary Build in The Division 2?
Striker is the best Division 2 Legendary build for coordinated group damage. Refactor provides a safer option for solo Legendary missions and patient teams.
What Is the Best Raid Build in The Division 2?
Striker is the best Division 2 raid build for direct boss damage. Raid groups also need Future Initiative healers and specialized support builds for some encounters.
What Is the Best Healer Build in The Division 2?
Future Initiative is the best Division 2 healer build for raids and Legendary missions. Ortiz: Reficere performs better during grouped encounters with dangerous status effects.
What Is the Best Tank Build in The Division 2?
Foundry Bulwark is the best Division 2 tank build for shield-based raid mechanics. Pointman and Artificer Hive provide bonus armor and shield recovery.
What Is the Best Status Effect Build in The Division 2?
Ember Engine with Fafnir is the best Burn-focused Division 2 status effect build. Eclipse Protocol remains better for spreading several status effects after kills.
What Is the Best Crowd-Control Build in The Division 2?
Eclipse Protocol with Riot Foam is the best Division 2 crowd-control build. It locks dangerous enemies down and spreads Foam after status-affected kills.
What Is the Best Support Build in The Division 2?
Ongoing Directive is one of the best Division 2 support builds for weapon-focused groups. It supplies Hollow-Point Ammo and maintains Bleed across repeated waves.
Is Heartbreaker Still Good in The Division 2?
Yes, Heartbreaker remains a strong PvE and PvP Gear Set. It provides weapon damage and bonus armor while attacking pulsed enemies.
Is Pestilence Still Good in The Division 2?
Pestilence remains useful for sustained PvE damage and long enemy waves. Its Plague ticks cannot critically hit or transfer through Negotiator’s Dilemma marks.
Does Prototype Gear Work in Raids and Incursions?
Prototype Gear works with normalized attributes inside raids and Incursions. Its Augment effects remain disabled during these activities.
Does Prototype Gear Work in Blackout Dark Zone?
Prototype Gear uses its full base attributes inside Blackout Dark Zone. Augments still use their PvP-balanced values during player combat.
How Do You Choose the Best Build in The Division 2?
Choose your activity, combat range, and role before selecting a build. Every weapon, talent, skill, and attribute should support the same combat loop.
4.9In our Division 2 Best Builds guide, you discovered the strongest builds for 2026 and the current Red Horizon season. We covered the top setups for open world, farming, raids, Legendary content, and PvP. With these Division 2 builds, you were fully prepared to face the challenges. Good luck in Dark Zone Raids!
