Wraithtide Vault is the third capstone dungeon you’ll encounter in the game. If you manage to time it, you will progress to the Paragon League. Learning to adapt to dungeon mechanics and bosses themselves is more important than ever, as this will be the most difficult dungeon for Champion League players thus far. In this guide, we will cover the optimal route, boss strategies, and mechanics you’ll need to master Wraithtide Vault and stay on track toward advancing deeper into the Paragon League!
Fellowship Wraithtide Vault Key Takeaways:
- Wraithtide Vault is the third and most challenging capstone dungeon for Champion League players.
- Clearing it successfully grants access to the Paragon League.
- The dungeon rewards Champion League-tier loot, including pieces from the Torment of Bael’Aurum tier set that boost your main stat and provide a survival heal effect.
 4.9
4.9Fellowship Wraithtide Vault Overview
Wraithtide Vault is the third capstone dungeon in Fellowship and the main challenge for Champion League players. It tests your and your team’s ability to handle mechanics, coordinate, and stay consistent through long fights. Completing it on time will advance you into the Paragon League.
In this dungeon, interrupts and crowd control are just as important as raw damage. Many trash mobs and bosses cast abilities that can quickly overwhelm your group if they are not stopped. You have to make sure that your group is good at coordinating interrupts to avoid heavy damage, stacking debuffs, or even wipes.
Wraithtide Vault has three main bosses — First Mate Marrow, Bael’Aurum, and Deathless Katrine. Each boss will test your group’s ability to manage space, control adds, and handle mechanics. Completing Wraithtide Vault will earn you access to the Paragon League as well.
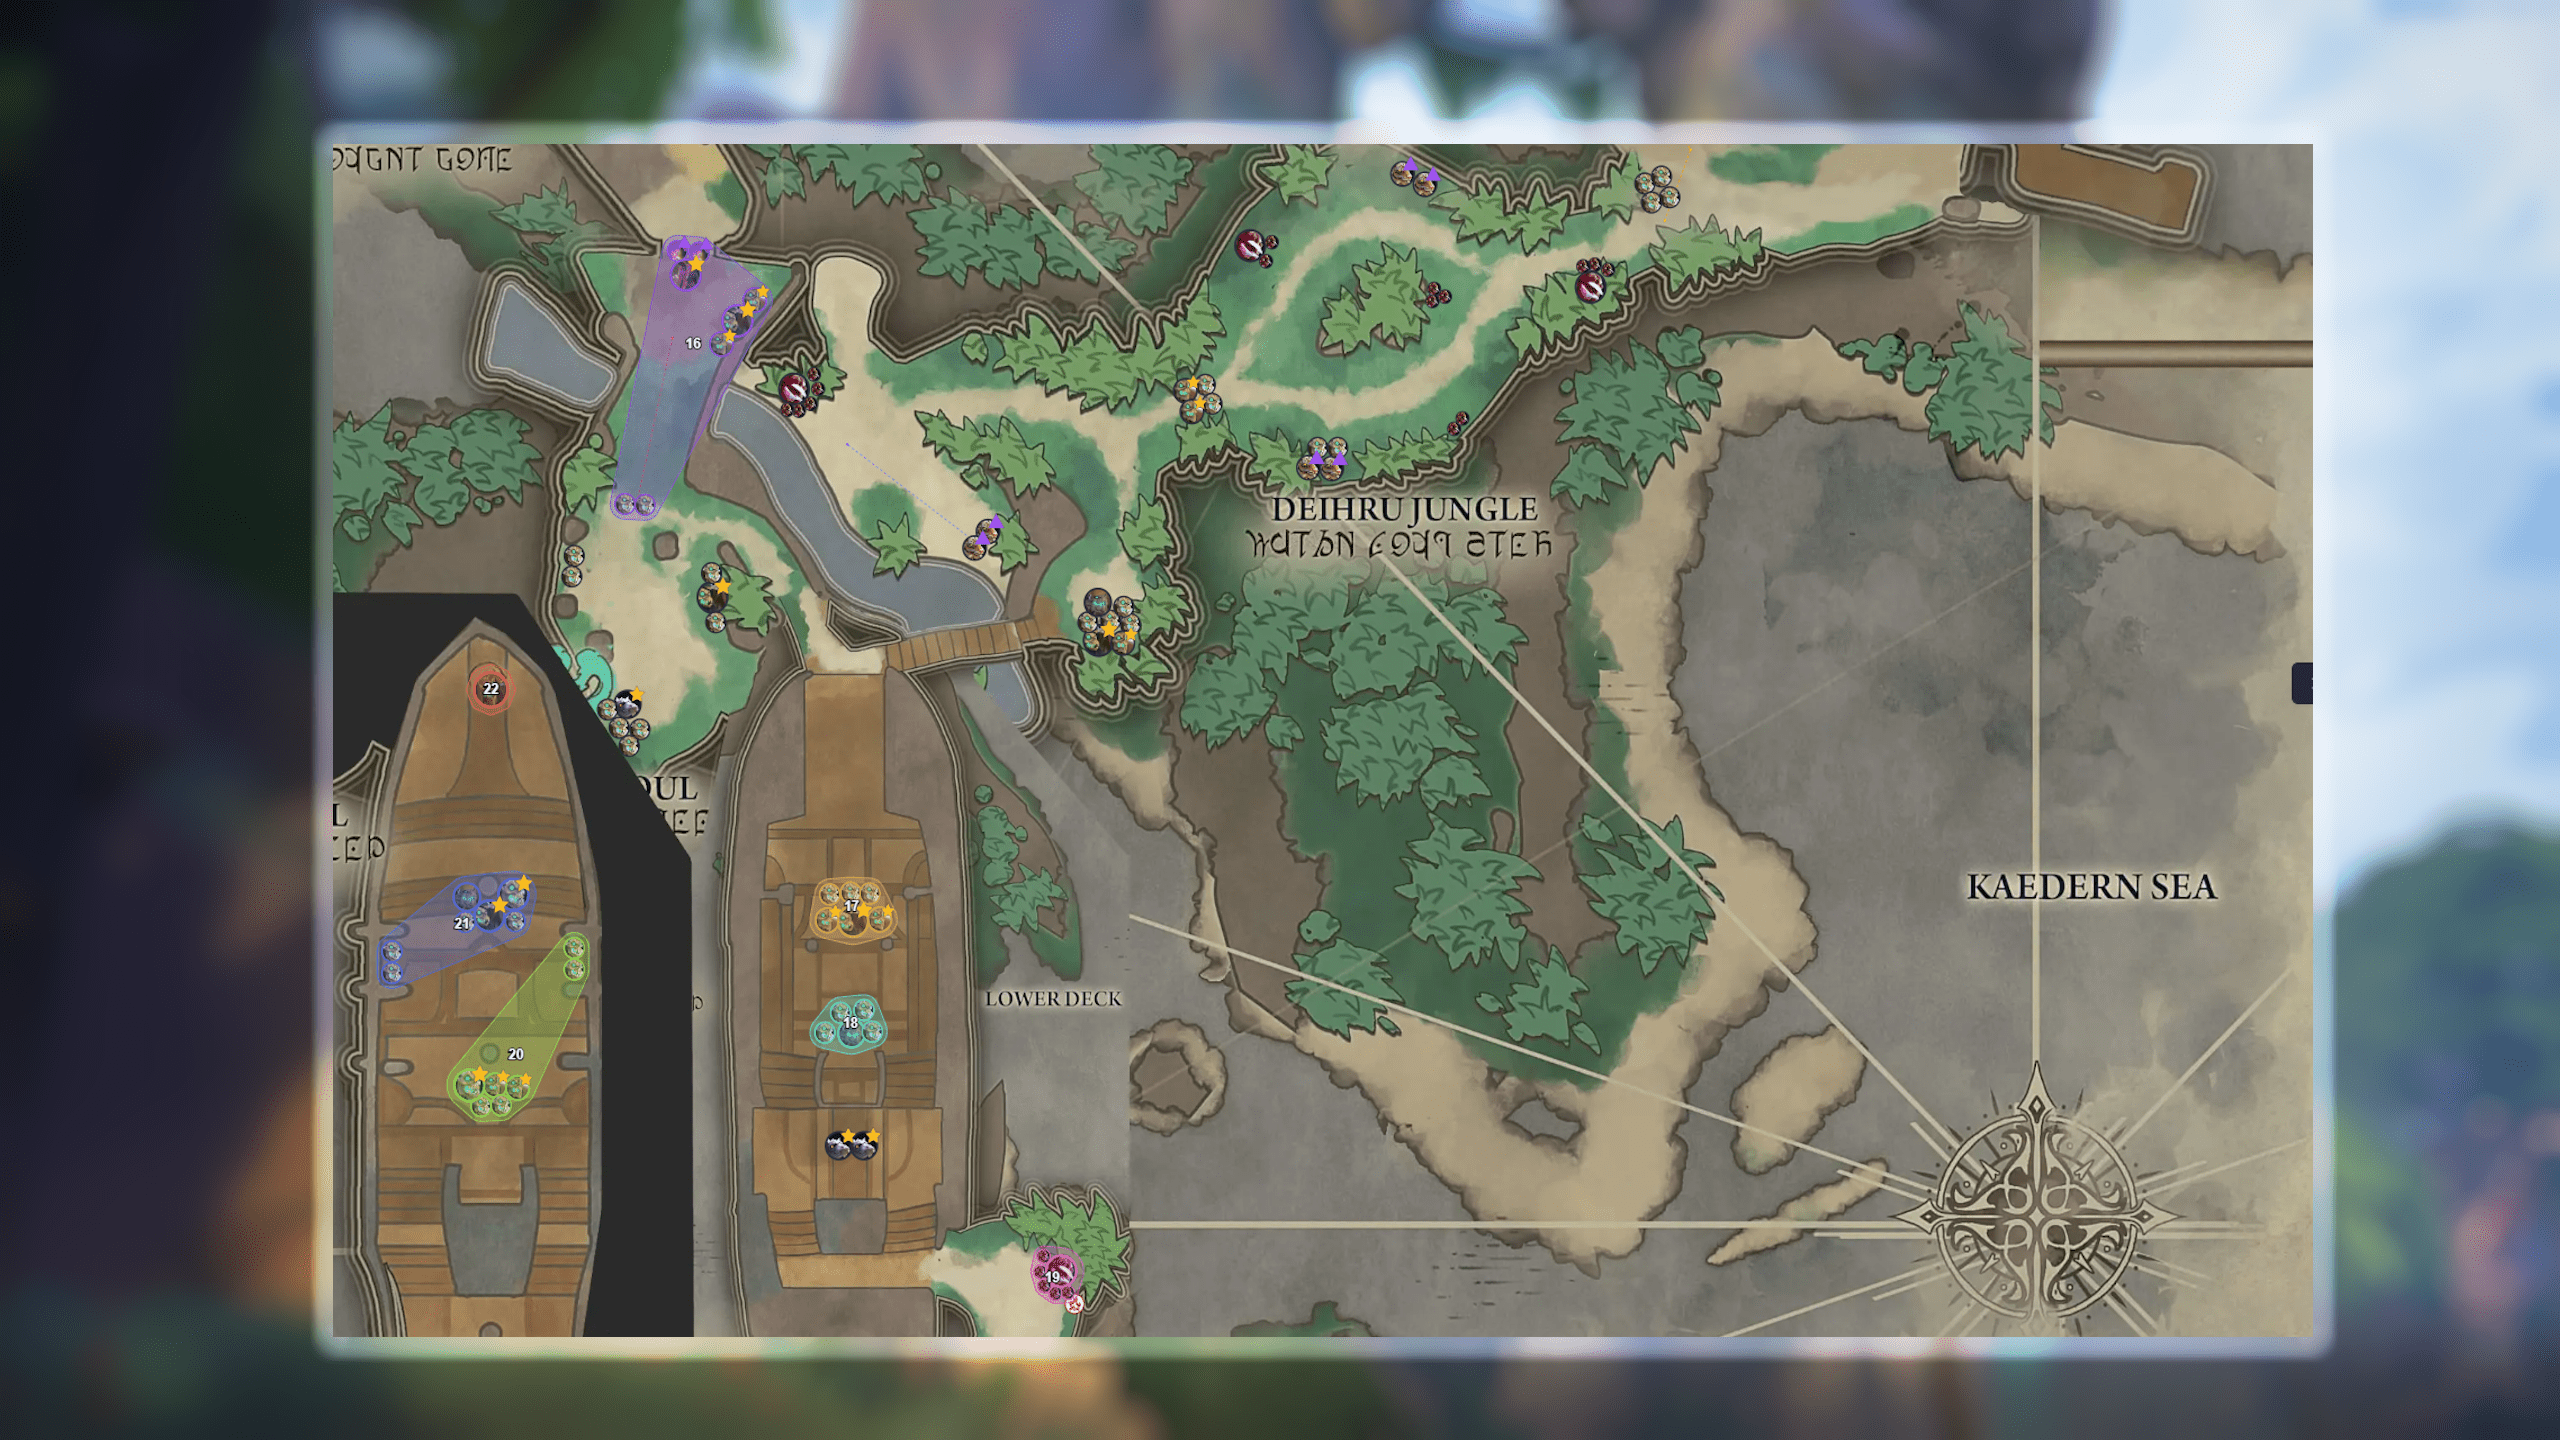
Fellowship Wraithtide Vault Map
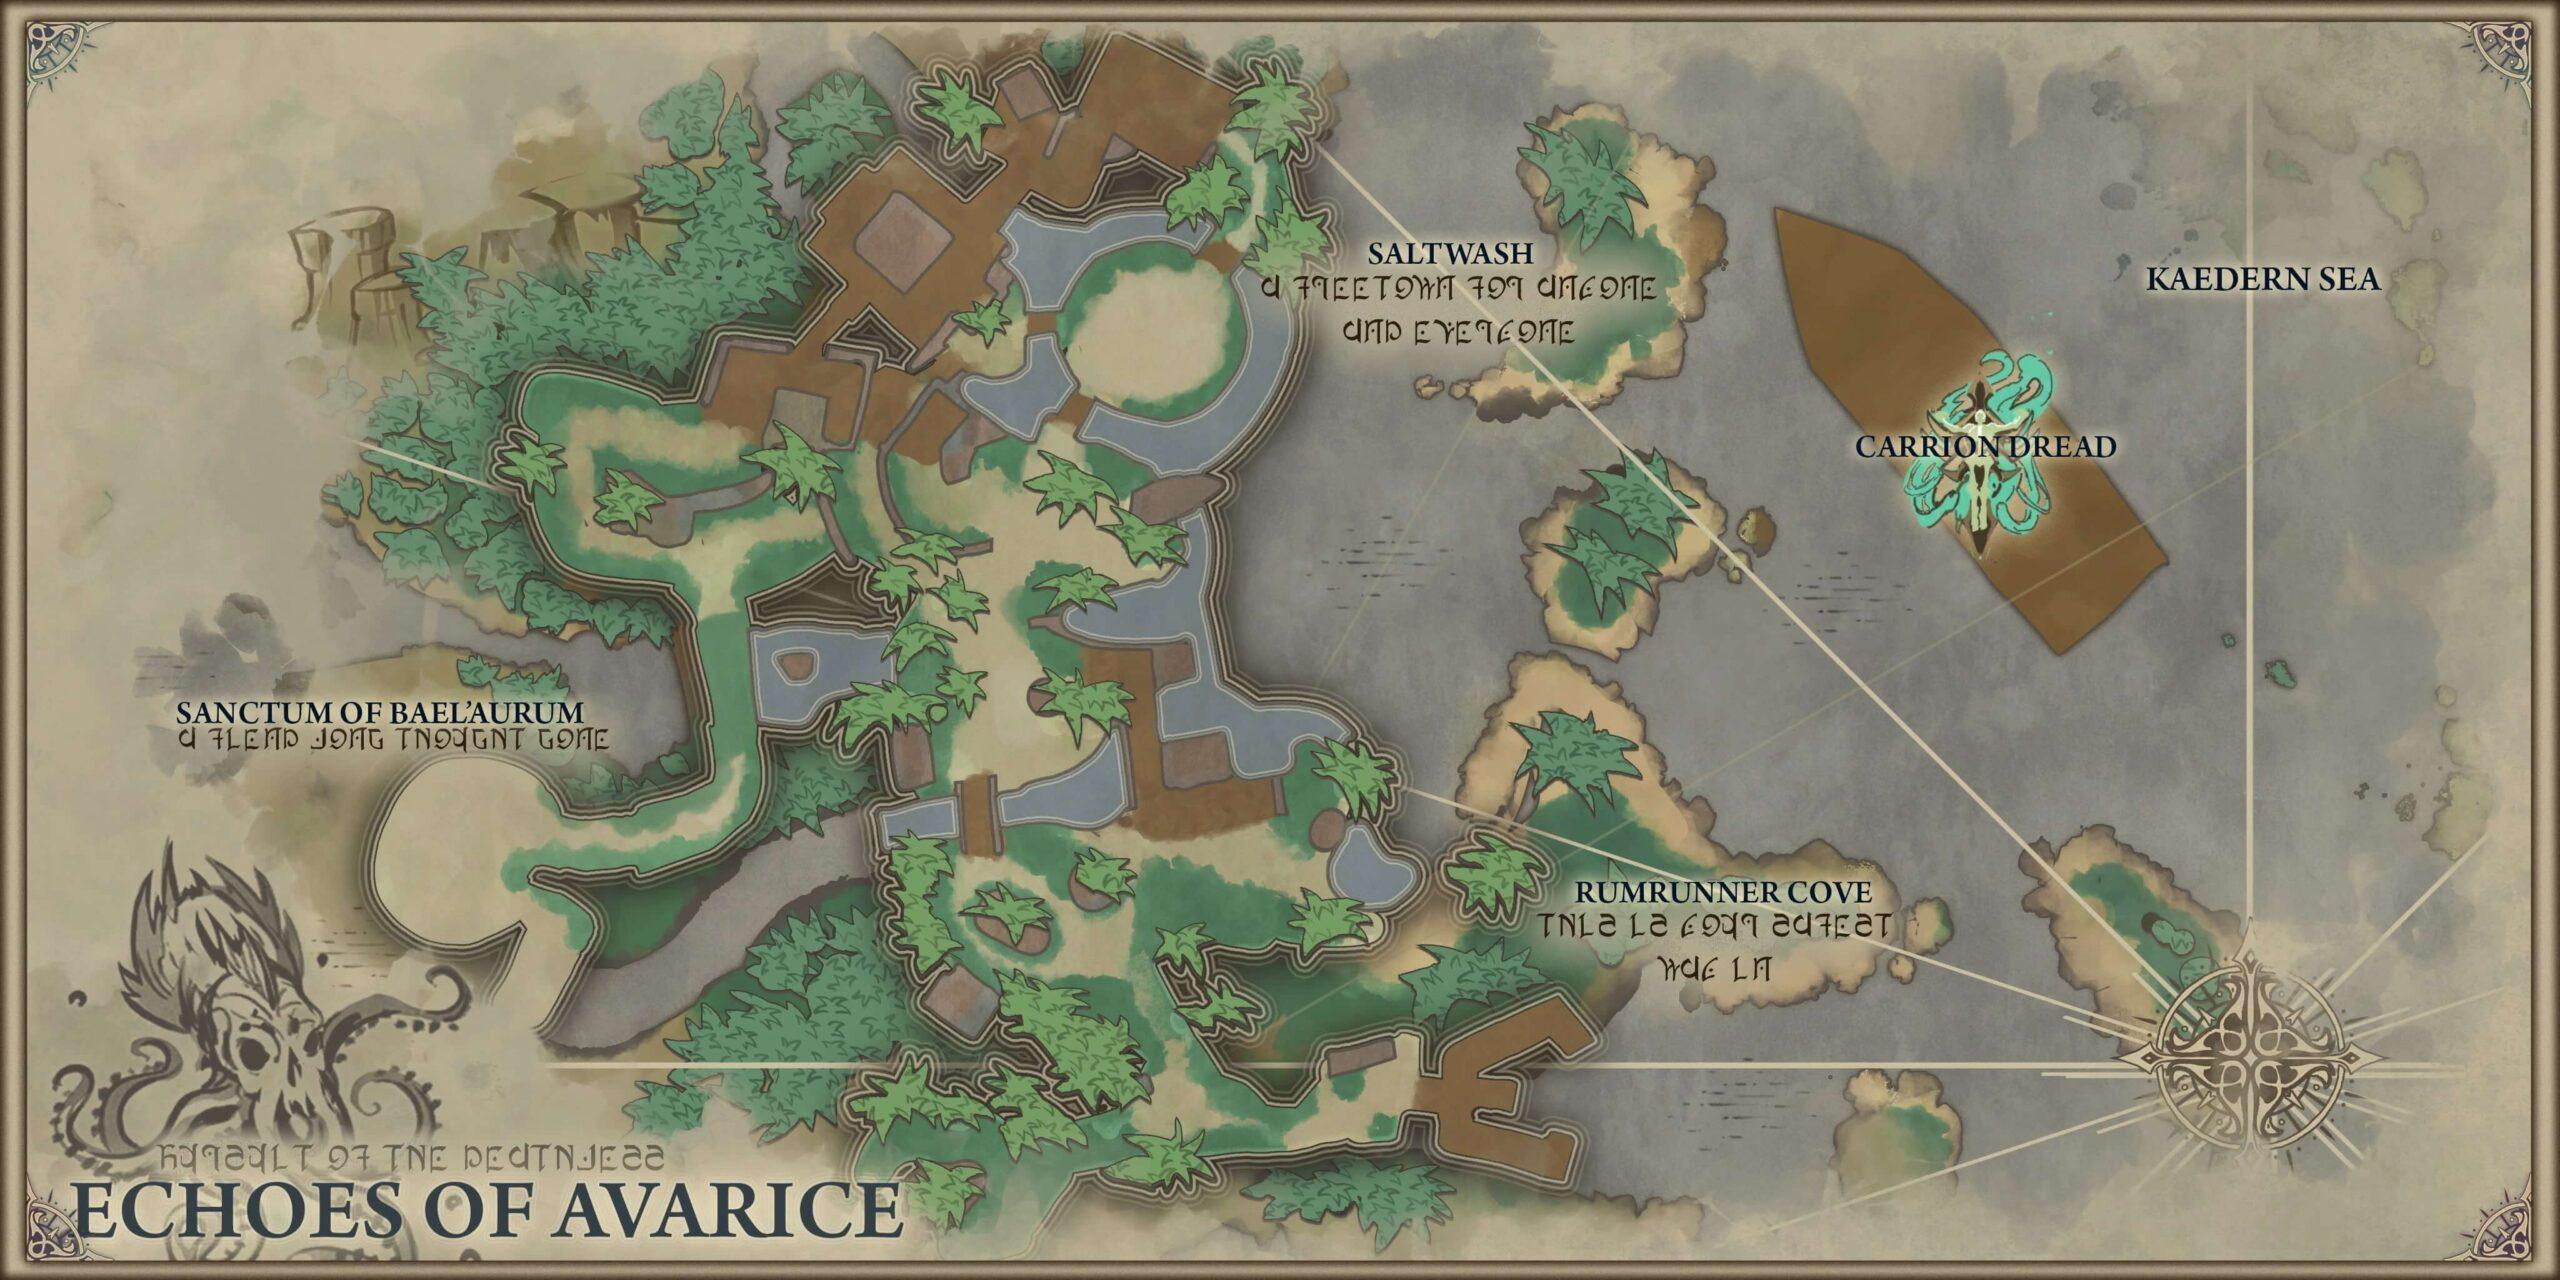
Dungeon Entrance
Path to Bael'Aurum
Path to Deathless Katrine
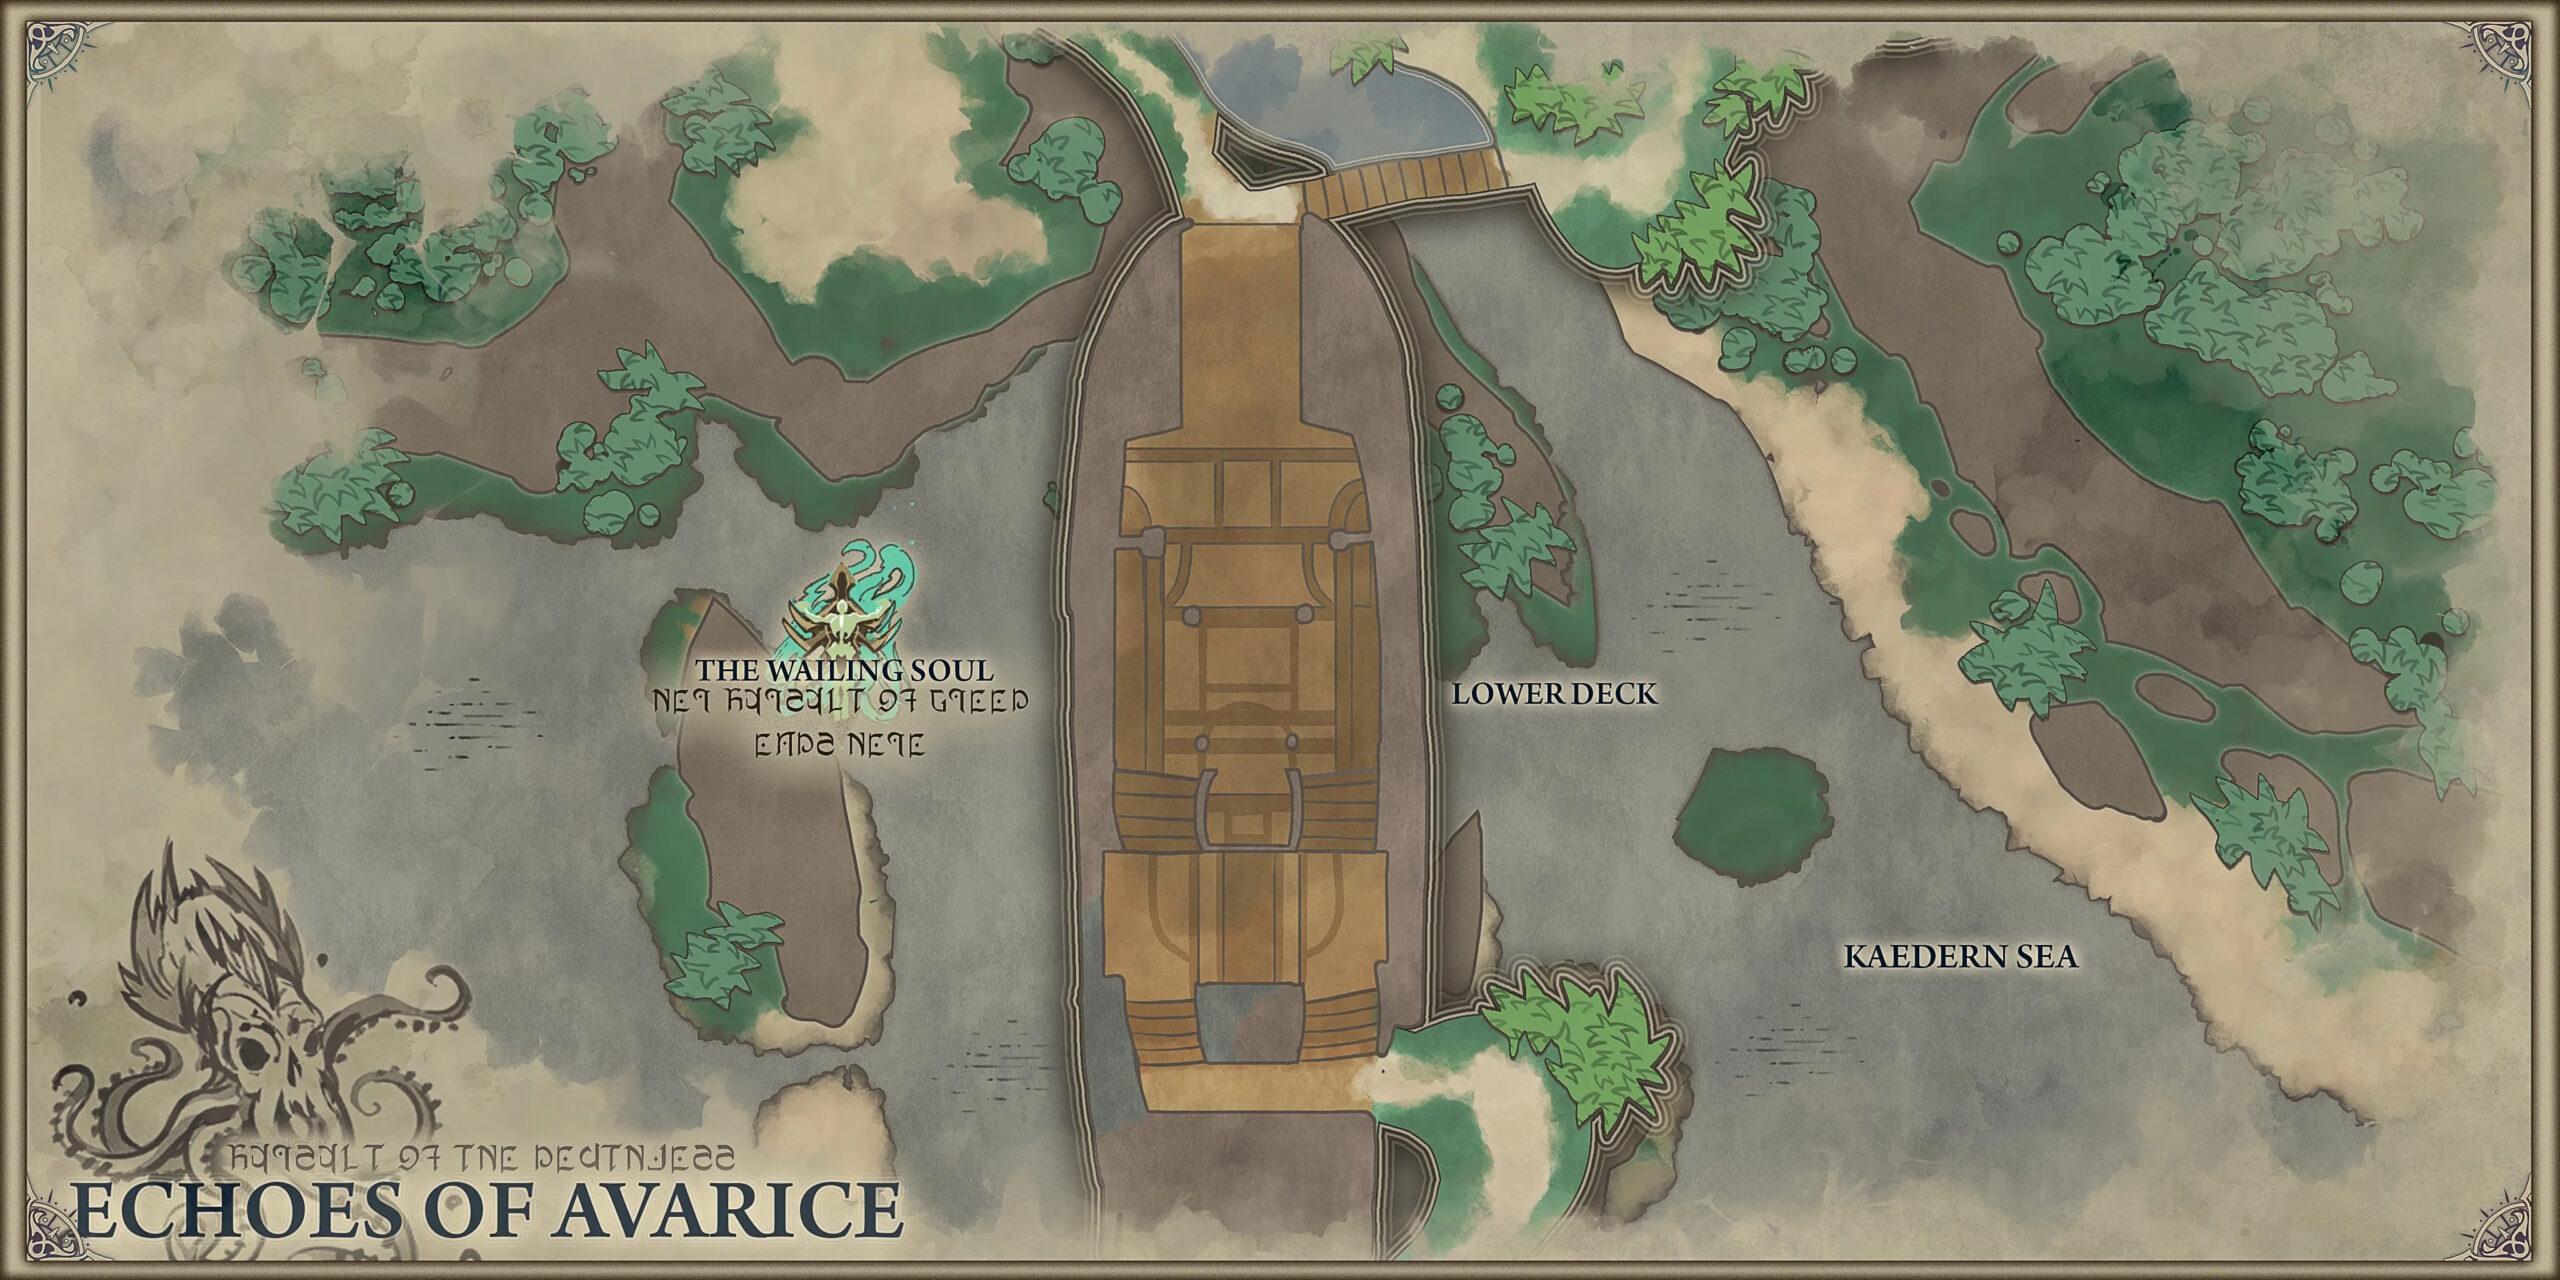
Deathless Katrine's Boss Room
Wraithtide Vault is built as a looping dungeon with several distinct zones that connect back to a central area. It starts with a split in the path, letting you choose between heading right toward First Mate Marrow or left toward Deathless Katrine. Wraithtide Vault is divided into 4 separate maps, making it one of the largest dungeons in the game up to that point.
Both routes wind through different sections of the map before meeting again near Bael’Aurum. The layout of the dungeon is basically a loop, so you will naturally clear both sides before reaching the center.
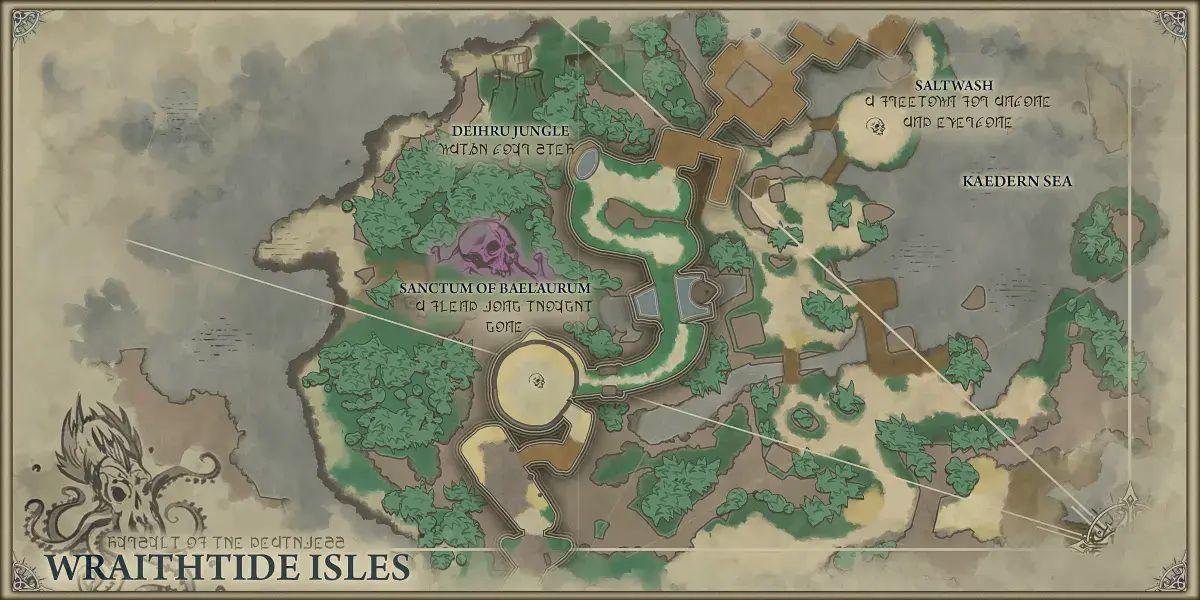
Fellowship Wraithtide Vault Route

It’s generally best to start your Wraithtide Vault run by taking the right path toward First Mate Marrow. This route offers more open space and fewer overlapping mechanics, making early trash pulls easier to control. You will move through the docks and camp areas filled with Tide Witches and Buccaneers, so keep interrupts ready and stay grouped to manage ranged enemies efficiently.
After defeating Marrow, continue further down the path from the boss, and you will reach the next one, Bael’Aurum. The area before the boss has some tight corridors, so watch for enemy packs that you can pull on accident, or even chain-pull them into larger groups, as this might result in a wipe or a major time loss.
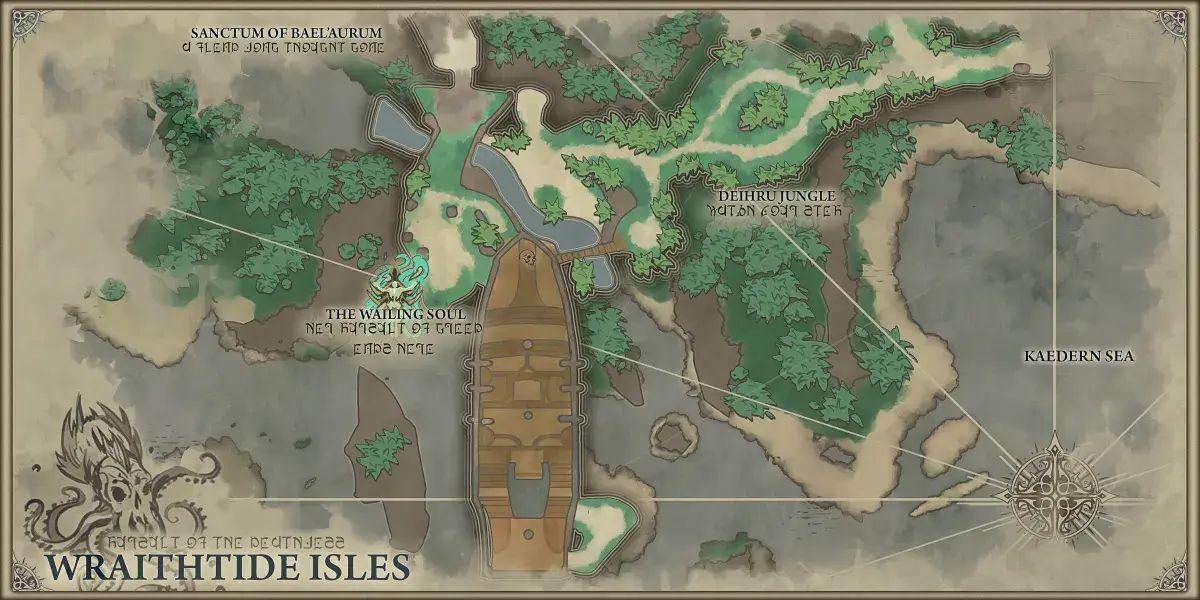
Once your team kills Bael’Aurum, loop back toward the left side of the map, where the shipwreck and Deathless Katrine are located. Clearing this final section completes the full circuit of the vault and brings your run to an end.
If you don’t want to memorize the route, but want to clear this dungeon efficiently, our Capstone Dungeon service can help you complete the Wraithtide Vault without stress.
Fellowship Wraithtide Vault Important Interrupts
Before and between the main boss fights in Wraithtide Vault, your team will face several types of trash mobs that can quickly overwhelm your group if their casts aren’t stopped in time. Here we have prepared a list of the most important interrupts to watch out for:
| Mob | Ability to Interrupt | Description |
|---|---|---|
| Tide Witch | Sunken Gale | Fires a damaging tornado toward a random player |
| Soulpowder Buccaneer | Soulpowder Shot | Debuffs a random target and explodes in an AoE |
| Scuttlejack Cannoneer | Shackle Blast | Chains a player until chains are destroyed |
| Bilgerat | Vermin Tide | Summons explosive rats |
| Greedspawn Sentinel | Greed’s Embrace | Applies a stacking DoT and increases Sentinel’s damage taken by 80% |
| Greedbound Prism | Mindrender Barrage | Heavy AoE channel that can easily wipe the group if not stopped |
Missing these interrupts can make Wraithtide Vault far more difficult and drastically slow your run. If you are aiming to reach the next league and want a smooth, coordinated clear with skilled teammates, our League services can help you complete Wraithtide Vault efficiently to progress into Paragon League stress-free.
Fellowship Wraithtide Vault Bosses
Wraithtide Vault has three main bosses, each with their own twist on the dungeon’s core mechanics. The trash packs leading up to each fight give you a preview of what’s coming, so paying attention early on will make a big difference later. Here we have prepared a detailed breakdown of each boss and how to handle their main mechanics.
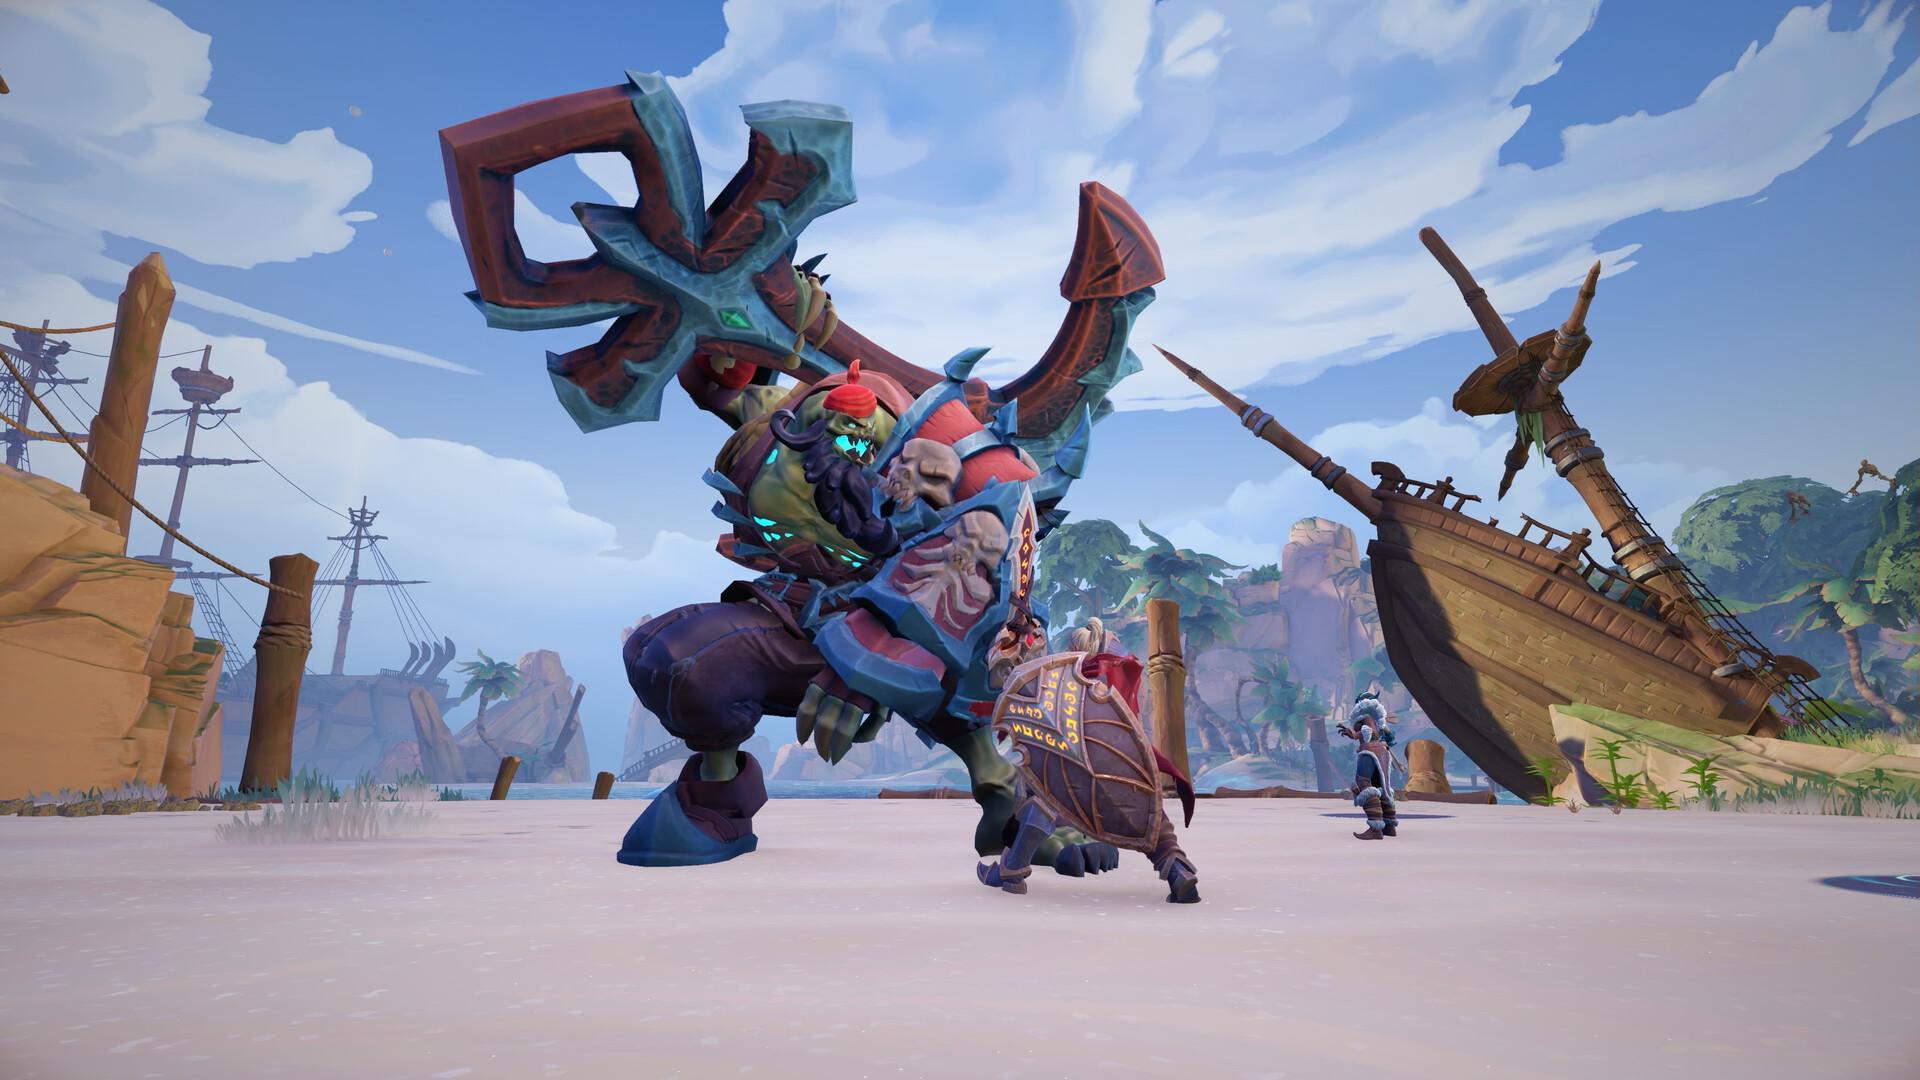
First Mate Marrow Strategy
First Mate Marrow is the first boss of the Wraithtide Vault. The fight alternates between two phases, a standard boss phase and a High Tide intermission.
During the main phase, the biggest threat is Wavestomp. It is a wide frontal attack that deals heavy damage and slows anyone hit. Tanks should aim Marrow away from the group and use defensives during this cast. All other players should stay behind the boss at all times to avoid getting cleaved by Anchor Strike.
Marrow will also summon adds with Cannonball Troops, spawning Saltsworn Scallywags and Tide Witches around the room. Group up near the boss so the tank can pick them up quickly, and focus interrupts on Tide Witches. Each wave increases in size over time, so using cooldowns during later spawns is important.
When Marrow throws his anchor into the center, the High Tide intermission begins. Click on the anchor to tether yourself, then start dodging sharks swimming across the room. Healers should be ready for heavy group damage during this phase. Once the water recedes, the fight returns to the main phase and repeats until Marrow is dead.
Bael’Aurum Strategy
Bael’Aurum’s encounter is pretty unique, especially for tank players, as the boss doesn’t melee. This means that tanks will instead be assigned to handle mechanics. The main part of the fight is the mechanic called Orb of Bael’Aurum, which summons a ball that players can move by attacking it. The goal is to roll the orb through piles of Cursed Treasure that appear on the floor.
When the boss casts Hoard, he consumes all remaining treasure piles to heal himself. If the orb has absorbed enough treasure, it will take a big burst of damage and get stunned. Keeping the orb active and well-fed with treasure is the key to winning.
Throughout the fight, watch out for Erupting Envy, a large frontal cast aimed at a random player — move to the side to avoid it. Bael’Aurum also summons Coalescing Avarice tornadoes that bounce around the arena and block the orb’s path, forcing players to plan their orb movement carefully.
The fight ramps up in difficulty over time due to Temptation, a spell Bael’Aurum casts repeatedly, granting himself a stacking haste buff called Deepening Shadows. The faster he casts, the more chaotic things get. Finally, when he channels Shadowgreed Eclipse, be ready with healing cooldowns as it deals heavy group-wide damage.
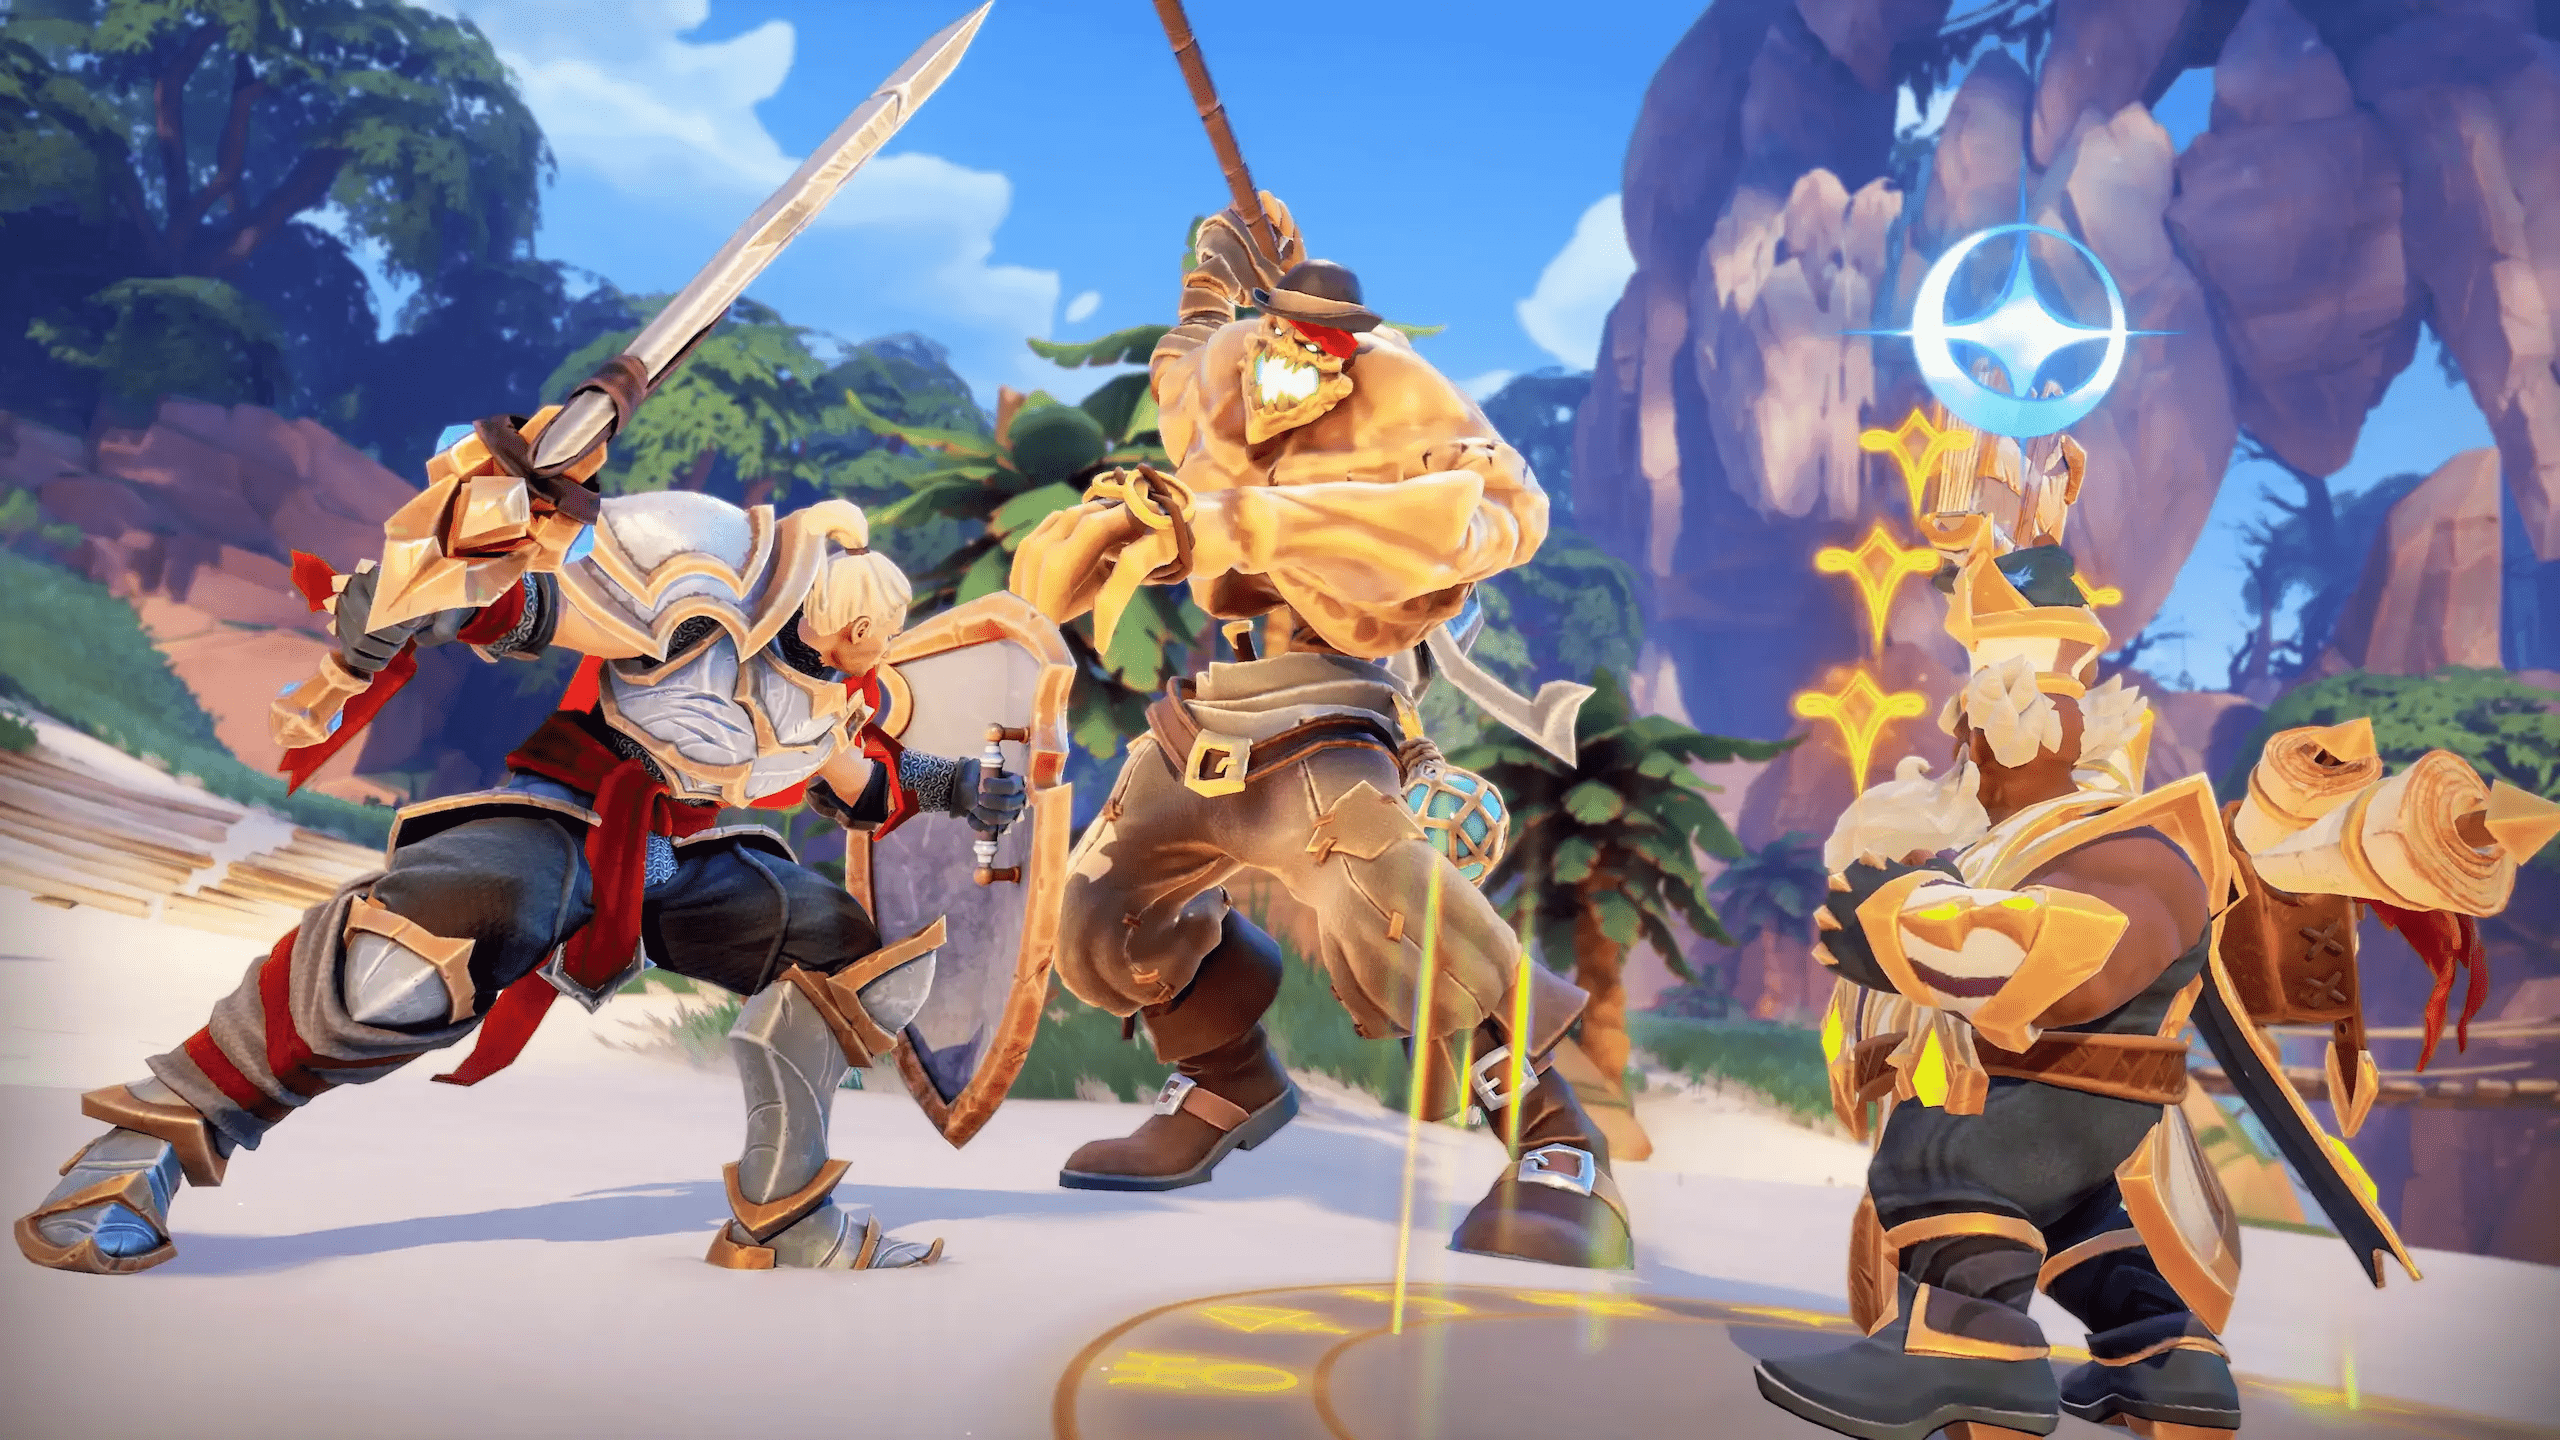
Deathless Katrine Strategy
Deathless Katrine is the final boss of Wraithtide Vault, fought aboard her ghostly ship. The fight plays out in two main phases, with a short gauntlet section between them.
At the start, Katrine is joined by two Scuttlejack Cannoneers. Focus these adds immediately while keeping interrupts and crowd control rolling on their Shackle Blast and Bombs Away! abilities. Once both adds are down, the fight becomes far easier to manage.
The main danger here is Quick Draw, which fires a series of bullets at random players. Pair this with Soulpowder Cyclone, where Katrine spins and sends out line attacks that apply Soulpowder Shot — players hit will explode after a short delay, so keep spread out and avoid the beams.
When Katrine casts No Quarters!, she fills most of the ship with dangerous puddles, leaving only a small safe zone under her. Wait at the edge until the puddles finish forming, then step in quickly.
At 0% health, Katrine revives and casts Thwart the Mutiny, sending everyone to the far end of the ship to run through a gauntlet of souls and beams. Once you return, the second phase begins. The fight stays similar but adds new mechanics — mainly Touch of Death, which drops slowing puddles when it expires, and Sever Soul, which teleports a random player (including your healer) back to the start of the ship. Be ready to survive without heals during these moments using group defensives or potions.
Fellowship Wraithtide Vault Rewards
Wraithtide Vault drops loot from the Champion League, making it one of the best ways to gear up before moving into higher-tier dungeons. Each boss has its own dedicated loot table, and the final encounter offers a chance at rare set pieces and unique weapons tied to the vault’s theme.
Wraithtide Vault Tier Set
Several items from this dungeon belong to the Torment of Bael’Aurum set. Equipping multiple pieces grants a bonus that gives you +4% to your main stat, as well as instantly heals you for 35% of your maximum health when your health goes below 20%. This effect can only happen once every 180 seconds.
Set items are marked with an asterisk (*) in loot lists, making it easy to spot which pieces contribute to the Torment of Bael’Aurum bonus.
Wraithtide Vault Helena Loot
| Name | Slot | Stats |
|---|---|---|
| Greedwatcher Helm* | Head | Critical Strike, Expertise |
| Greedwatcher Spaulders* | Shoulders | Critical Strike, Spirit |
| Greedwatcher Hauberk* | Chest | Haste, Spirit |
| Greedwatcher Sarong* | Legs | Critical Strike, Haste |
| Greedwatcher Torc* | Necklace | Haste, Expertise |
| Rusting Armet | Head | Expertise, Spirit |
| Pauldrons of Eight | Shoulders | Expertise, Spirit |
| Cuirass of Pillaging | Chest | Critical Strike, Spirit |
| Salted Iron Legguards | Legs | Critical Strike, Expertise |
| Soulpowder Handguards | Gloves | Expertise, Spirit |
| Barnacled Boots | Feet | Critical Strike, Haste |
| Bonebleached Sail Remnant | Back | Critical Strike, Spirit |
| Chain-shot Necklace | Necklace | Critical Strike, Expertise |
| Doubloon Ring | Ring | Expertise, Haste |
Wraithtide Vault Meiko Loot
| Name | Slot | Stats |
|---|---|---|
| Greedwatcher Cowl* | Head | Expertise, Spirit |
| Greedwatcher Pauldrons* | Shoulders | Critical Strike, Spirit |
| Greedwatcher Tunic* | Chest | Haste, Spirit |
| Greedwatcher Leggings* | Legs | Critical Strike, Haste |
| Greedwatcher Loop of Coins* | Necklace | Critical Strike, Expertise |
| Scallywag’s Headband | Head | Haste, Expertise |
| Wanderer’s Mantle | Shoulders | Expertise, Spirit |
| Tigerhide Leathers | Chest | Haste, Spirit |
| Bonebleached Legwraps | Legs | Critical Strike, Expertise |
| Marrow’s Knuckledusters | Gloves | Critical Strike, Spirit |
| Shipworthy Boots | Feet | Expertise, Spirit |
| Spare Rigging | Wrist | Critical Strike, Haste |
| Gilded Pearlescent Clasp | Necklace | Critical Strike, Haste |
| Ancient Gift | Ring | Expertise, Spirit |
Wraithtide Vault Rime Loot
| Name | Slot | Stats |
|---|---|---|
| Goldreaver Circlet* | Head | Critical Strike, Spirit |
| Goldreaver Pauldrons* | Shoulders | Critical Strike, Haste |
| Goldreaver Doublet* | Chest | Critical Strike, Expertise |
| Goldreaver Leggings* | Legs | Expertise, Spirit |
| Goldreaver Amulet* | Necklace | Critical Strike, Haste |
| Pillaged Headdress | Head | Haste, Spirit |
| Bonebleached Shoulders | Shoulders | Expertise, Spirit |
| Salted Leathers | Chest | Critical Strike, Expertise |
| Kathrine’s Fancy Pantaloons | Legs | Haste, Expertise |
| Gloves of Deceptive Narrows | Gloves | Haste, Spirit |
| Driftwood Boots | Feet | Critical Strike, Expertise |
| Belaying Cloak | Back | Expertise, Spirit |
| Soulpowder Pendant | Necklace | Haste, Expertise |
| Ancient Gold Ring | Ring | Critical Strike, Haste |
Wraithtide Vault Tariq Loot
| Name | Slot | Stats |
|---|---|---|
| Goldreaver Visage* | Head | Critical Strike, Expertise |
| Goldreaver Mantle* | Shoulders | Critical Strike, Haste |
| Goldreaver Brigandine* | Chest | Haste, Spirit |
| Goldreaver Tassets* | Legs | Critical Strike, Haste |
| Goldreaver Talisman* | Necklace | Haste, Expertise |
| Coral Greathelm | Head | Expertise, Spirit |
| Bonebleached Spaulders | Shoulders | Expertise, Spirit |
| Barnacled Brigandine | Chest | Critical Strike, Spirit |
| Oiled Legplates | Legs | Critical Strike, Haste |
| Water-Tight Oiled Gloves | Gloves | Expertise, Spirit |
| Marrow’s Weighted Boots | Feet | Critical Strike, Haste |
| Mangle Brute’s Leather Wrap | Back | Critical Strike, Spirit |
| Cursed Golden Torc | Necklace | Critical Strike, Expertise |
| Salted Patina Loop | Ring | Haste, Expertise |
Wraithtide Vault Mara Loot
| Name | Slot | Stats |
|---|---|---|
| Goldreaver Headband* | Head | Expertise, Spirit |
| Goldreaver Shoulderpads* | Shoulders | Critical Strike, Spirit |
| Goldreaver Surcoat* | Chest | Haste, Spirit |
| Goldreaver Leggings* | Legs | Critical Strike, Haste |
| Goldreaver Necklace* | Necklace | Critical Strike, Expertise |
| Aging Skullcap | Head | Haste, Expertise |
| Junglehide Shadowmantle | Shoulders | Expertise, Spirit |
| Saltstained Leather Tunic | Chest | Haste, Spirit |
| Spare Canvas Patched Pantaloons | Legs | Critical Strike, Expertise |
| Ropeburned Wraps | Gloves | Critical Strike, Spirit |
| Mud Encrusted Boots | Feet | Expertise, Spirit |
| Bindings of Bael’Aurum | Wrist | Critical Strike, Haste |
| Bonestitched Amulet | Necklace | Critical Strike, Haste |
| Calcified Knucklebone Loop | Ring | Expertise, Spirit |
Wraithtide Vault Elarion Loot
| Name | Slot | Stats |
|---|---|---|
| Goldreaver Coronet* | Head | Expertise, Spirit |
| Goldreaver Shoulderpads* | Shoulders | Critical Strike, Spirit |
| Goldreaver Tunic* | Chest | Haste, Spirit |
| Goldreaver Leggings* | Legs | Critical Strike, Haste |
| Goldreaver Talisman* | Necklace | Critical Strike, Expertise |
| Sailor’s Skullcap | Head | Haste, Expertise |
| Salt Scoured Shoulderpads | Shoulders | Expertise, Spirit |
| Once Bloodied Tunic | Chest | Haste, Spirit |
| Breezy Pants | Legs | Critical Strike, Expertise |
| Long Oiled Gloves | Gloves | Critical Strike, Spirit |
| Sandy Boots | Feet | Expertise, Spirit |
| Hammered Bracelet of Eight | Wrist | Critical Strike, Haste |
| Necklace of Eight | Necklace | Critical Strike, Haste |
| Aging Grommet | Ring | Expertise, Spirit |
Wraithtide Vault Ardeos Loot
| Name | Slot | Stats |
|---|---|---|
| Goldreaver Coif* | Head | Critical Strike, Spirit |
| Goldreaver Shoulders* | Shoulders | Critical Strike, Haste |
| Goldreaver Vest* | Chest | Critical Strike, Expertise |
| Goldreaver Leggings | Legs | Expertise, Spirit |
| Goldreaver Collar* | Necklace | Critical Strike, Haste |
| Gilded Hood | Head | Haste, Spirit |
| Salt-Stained Shoulderpads | Shoulders | Expertise, Spirit |
| Robe of Avarice | Chest | Critical Strike, Expertise |
| Buccaneer Leggings | Legs | Haste, Expertise |
| Gloves of Brine | Gloves | Haste, Spirit |
| Boned Sandals | Feet | Critical Strike, Expertise |
| Sailcloth Cape | Back | Expertise, Spirit |
| Seasalt Necklace | Necklace | Haste, Expertise |
| Whispering Ring | Ring | Critical Strike, Haste |
Wraithtide Vault Sylvie Loot
| Name | Slot | Stats |
|---|---|---|
| Vaultbinder Helmet* | Head | Expertise, Spirit |
| Vaultbinder Shoulderpads* | Shoulders | Critical Strike, Spirit |
| Vaultbinder Furs* | Chest | Haste, Spirit |
| Vaultbinder Legwraps* | Legs | Critical Strike, Haste |
| Vaultbinder Amulet* | Necklace | Critical Strike, Expertise |
| Riptide Coronet | Head | Haste, Expertise |
| Canvas Mantle | Shoulders | Expertise, Spirit |
| First-Mate’s Tunic | Chest | Haste, Spirit |
| Sharkskin Clasp | Legs | Critical Strike, Expertise |
| Rigging Gloves | Gloves | Critical Strike, Spirit |
| Coral Crusted Shoes | Feet | Expertise, Spirit |
| Cutthroat Cuffs | Wrist | Critical Strike, Haste |
| Whelk Pendant | Necklace | Critical Strike, Haste |
| Sharktooth Band | Ring | Expertise, Spirit |
Wraithtide Vault Vigour Loot
| Name | Slot | Stats |
|---|---|---|
| Vaultbinder Casque* | Head | Critical Strike, Expertise |
| Vaultbinder Pauldrons* | Shoulders | Critical Strike, Spirit |
| Vaultbinder Breastplate* | Chest | Haste, Spirit |
| Vaultbinder Legguards* | Legs | Critical Strike, Haste |
| Vaultbinder Festoon* | Necklace | Haste, Expertise |
| Coral-Encrusted Helm | Head | Expertise, Spirit |
| Waterlogged Shoulderpads | Shoulders | Expertise, Spirit |
| Gilded Breastplate | Chest | Critical Strike, Spirit |
| Salted Legplates | Legs | Critical Strike, Expertise |
| Exorcist Gauntlets | Gloves | Expertise, Spirit |
| Muddied Boots | Feet | Critical Strike, Haste |
| Bonebleached Cape | Back | Critical Strike, Spirit |
| Halyard Necklace | Necklace | Critical Strike, Expertise |
| Beguiling Ring | Ring | Haste, Expertise |
If you’re looking to get this loot or upgrade the gear you’ve already earned from Wraithtide Vault, our Gear Level service can help you do exactly that. It’s a quick and reliable way to boost your character’s power and get ready for the next league.
Wraithtide Vault FAQ
Wraithtide Vault can be tough to navigate, especially if you’re aiming for the Paragon League. Below are answers to some common questions players have about the dungeon.
How Many Bosses Are in the Wraithtide Vault?
There are three main bosses — First Mate Marrow, Bael’Aurum, and Deathless Katrine. Each fight introduces unique mechanics that build on what you’ve learned from the trash packs.
What’s the Best Route Through Wraithtide Vault?
Start by heading right toward First Mate Marrow. After defeating him, push through the jungle to take down Bael’Aurum, then swing back to the left side to face Deathless Katrine. This route avoids overlapping abilities and gives you space to handle trash mobs safely.
What’s the Wraithtide Vault Tier Set?
Wraithtide Vault tier set gives you +4% to your main stat and triggers a 35% instant heal when your health drops below 20% (once every 180 seconds).
4.9Wraithtide Vault is one of the toughest Champion League dungeons, challenging your coordination, interrupts, and boss mechanics. Following the right route, managing trash effectively, and handling each boss carefully will help you complete the dungeon and step into the Paragon League.
