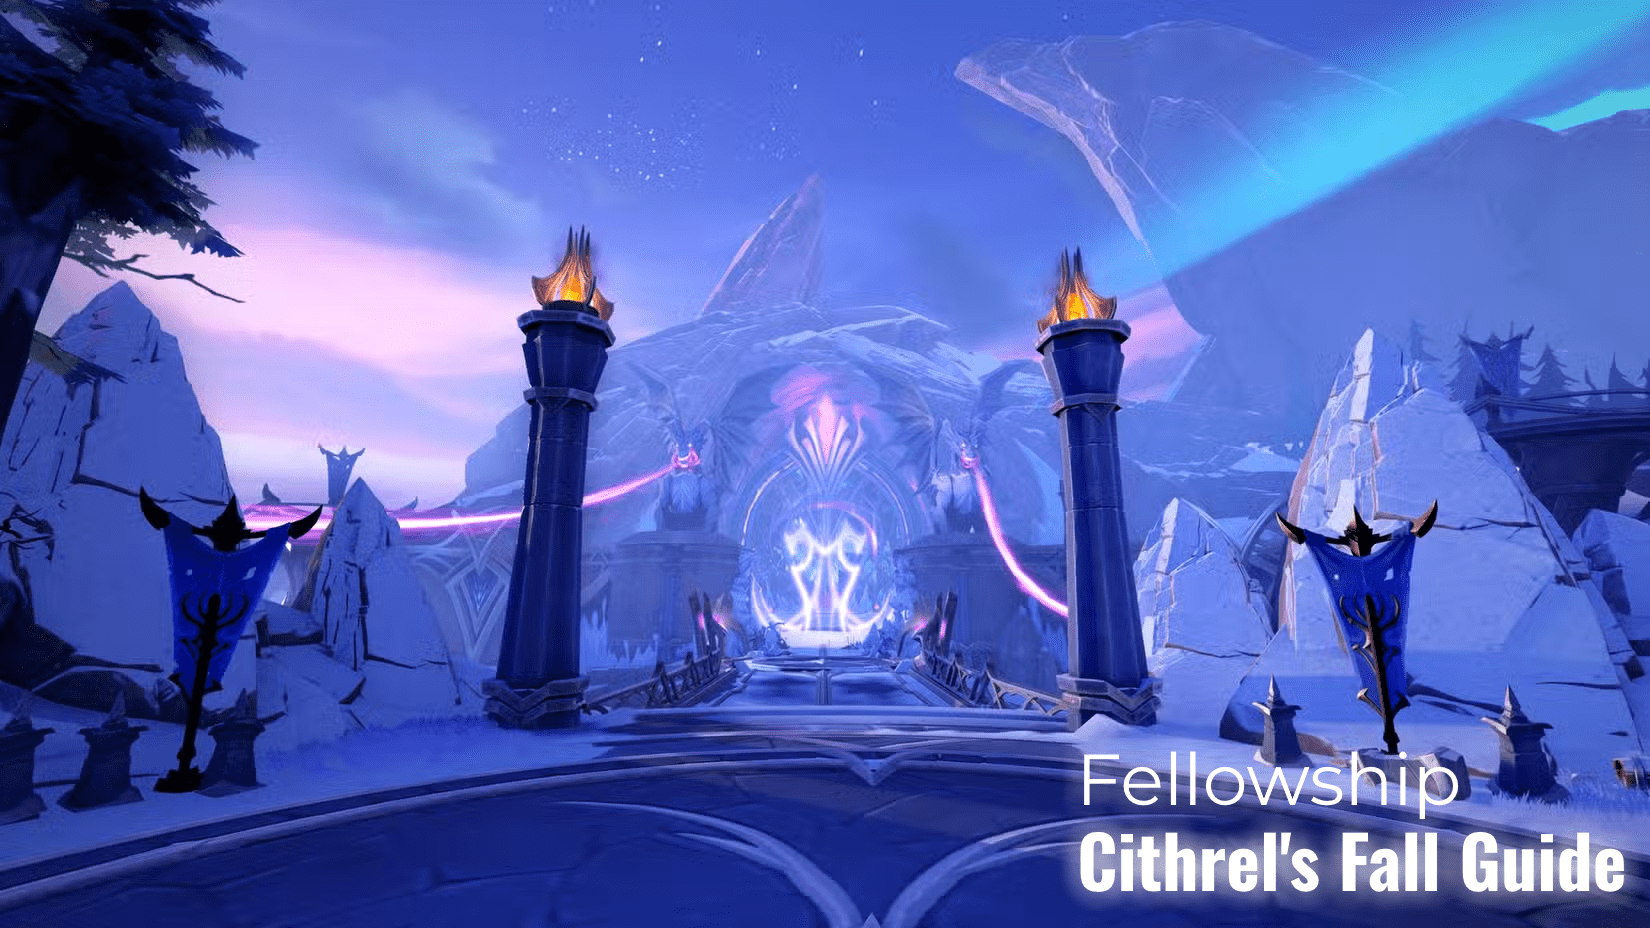
Cithrel’s Fall is the capstone dungeon for the Contenders League in Fellowship. It’s the final major challenge before you move into the Adept League, and it introduces new enemy modifiers called Vayr’s Legacy, which grant certain trash mobs an extra empowered ability. These modifiers will appear again later in the game, so this dungeon serves as a good introduction to them. In this guide, we will take a look at the route, boss strategy, and other information that will help you get into the Adept league without breaking a sweat!
Key Takeaways
- Cithrel’s Fall is the final capstone dungeon for the Contenders League and unlocks access to the Adept League when completed.
- The easiest route is to go left first, starting with Noor for easier pulls and smoother pacing.
- Key interrupts are Shattering Barrier, Rune of Detonation, Drain Life, and Slicing Blades (CC). Missing these can easily cause wipes.
 4.9
4.9Fellowship Cithrel’s Fall Overview
Cithrel’s Fall features three bosses — Noor, the Betrayer, Ancient Koros, and Cithrel herself. Each has unique mechanics and pacing, with the final fight being the most demanding in terms of positioning and coordination. The dungeon is semi-linear, with a branching path early on that eventually loops back to the same area. This is a capstone dungeon, meaning that timing it will grant you access to the next league – Adept. If you want to get through it faster, but don’t have a reliable team to do it with, our Capstone Dungeon services are here to help!
Fellowship Cithrel’s Fall Map
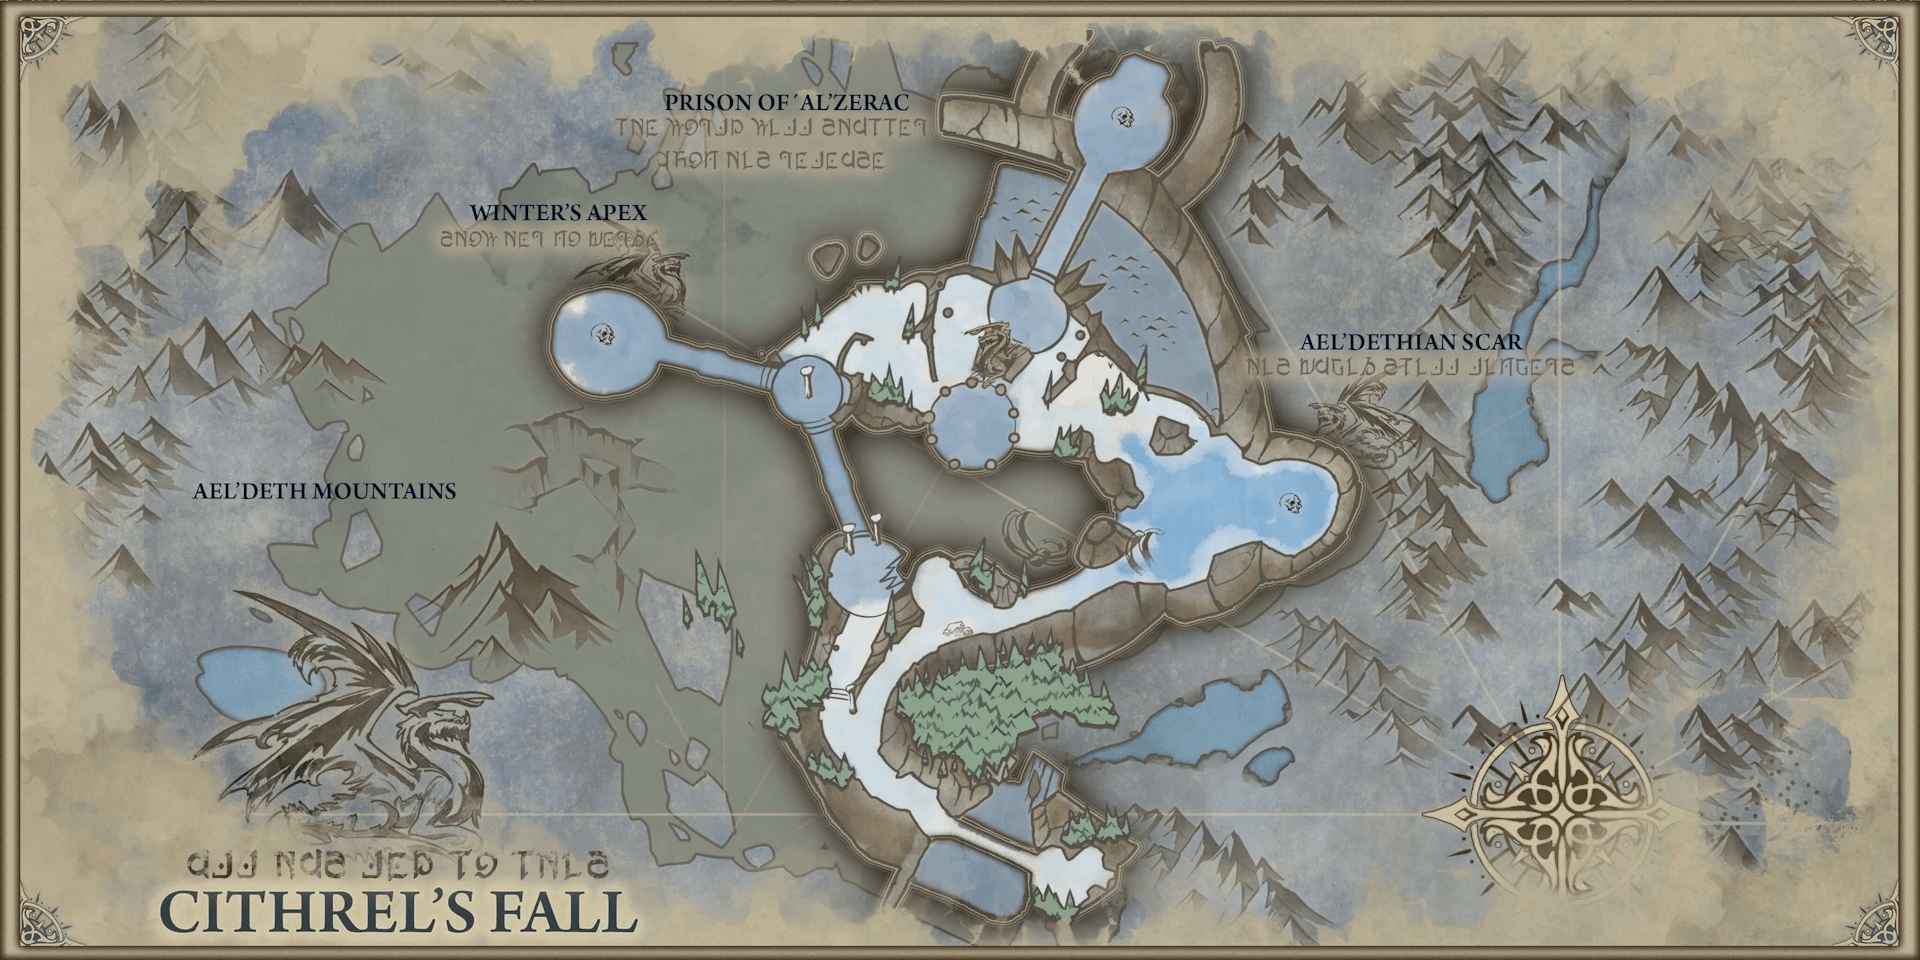
The dungeon begins with a forked pathway. After clearing one side, the layout loops around toward the other boss. Both paths connect near the center, where ramps lead up to Cithrel’s arena. The way the dungeon is laid out makes it easy to complete both wings before getting to the final boss.
Fellowship Cithrel’s Fall Route
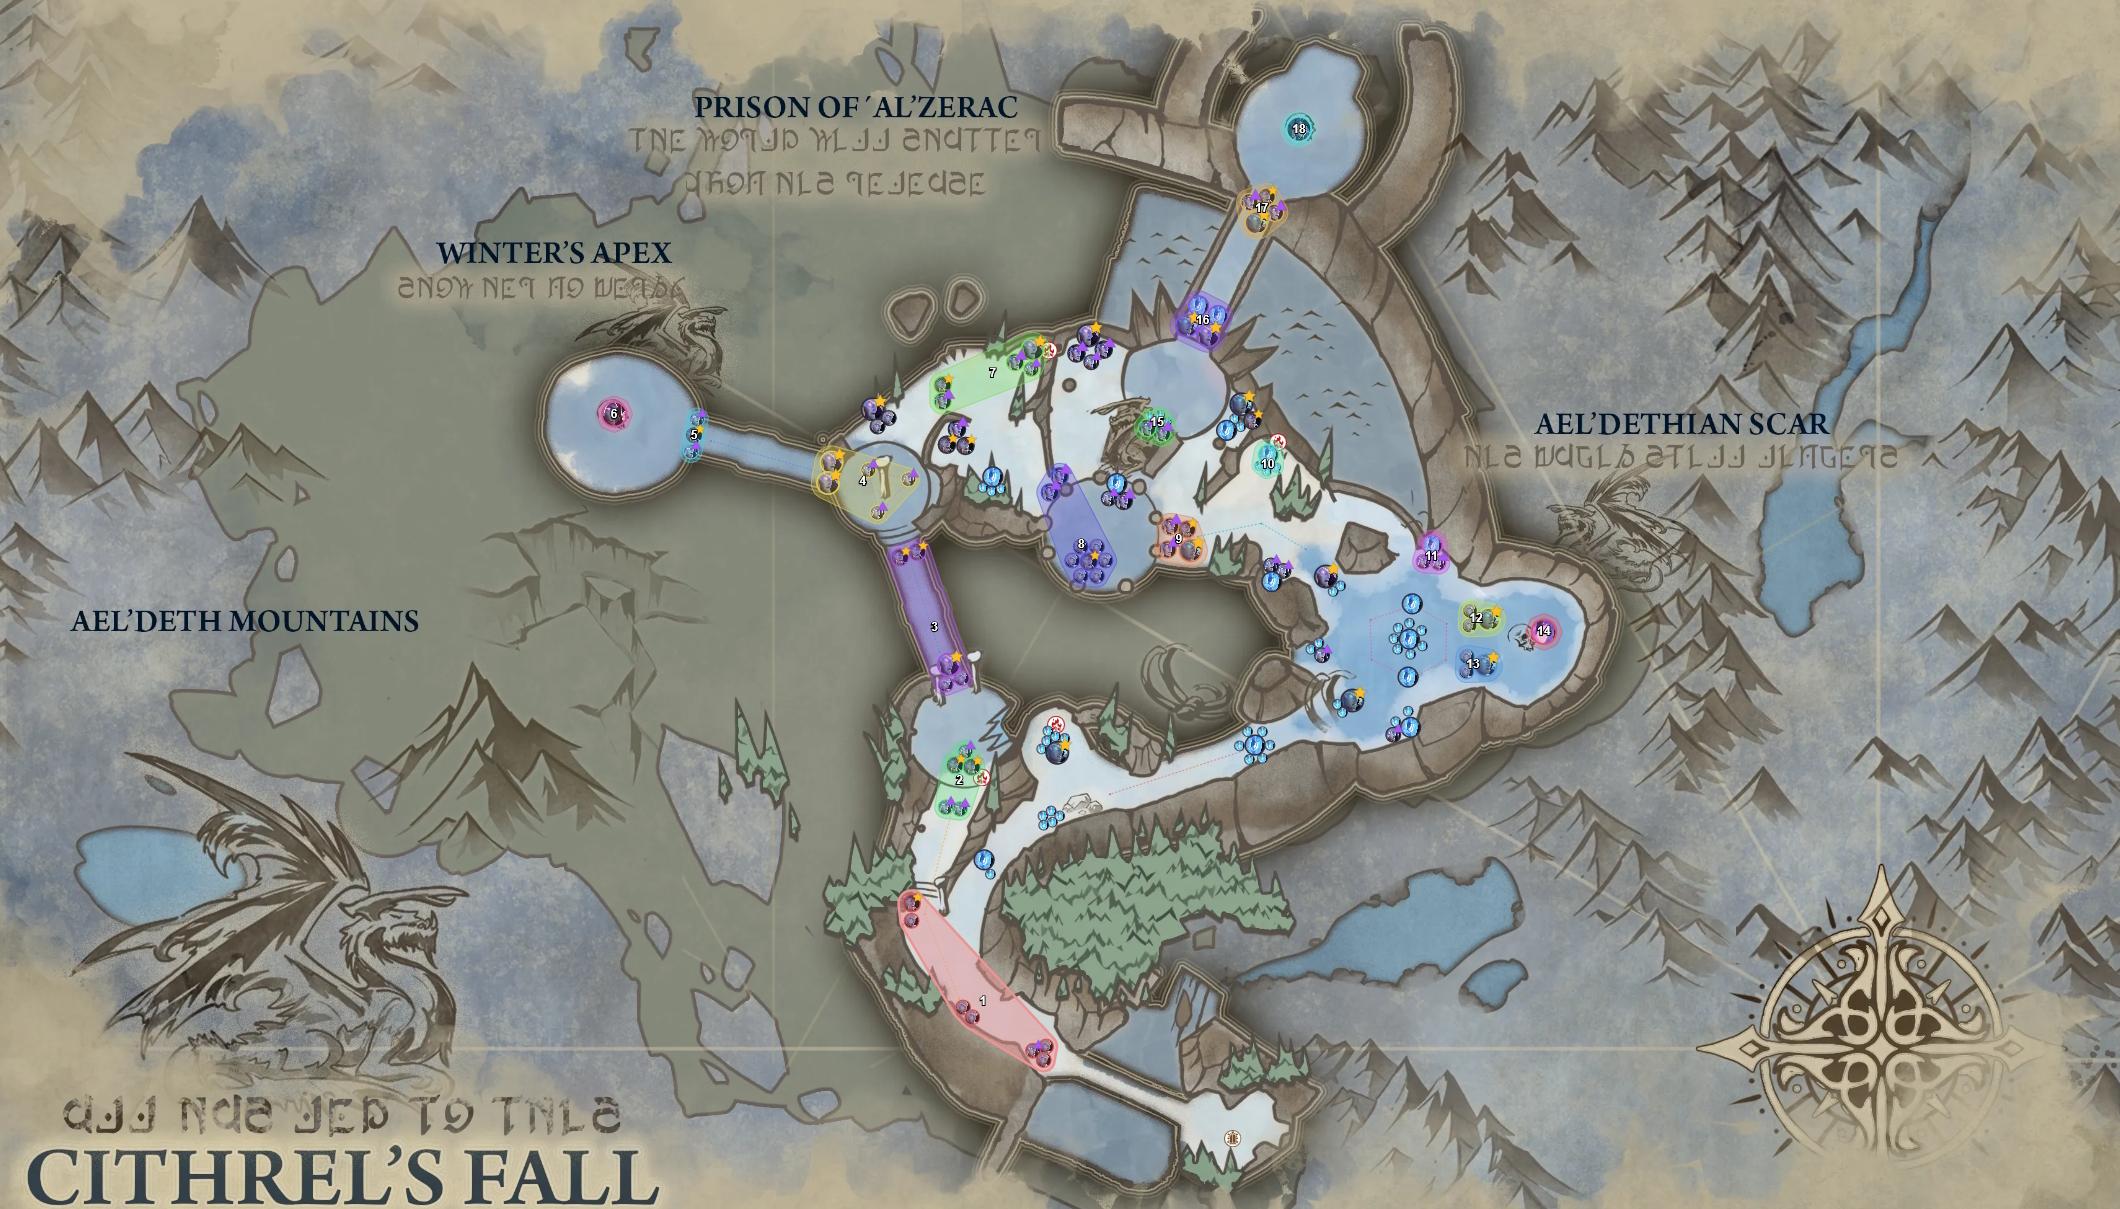
The recommended route starts by taking the left path first, fighting through humanoid enemies toward Noor, the Betrayer. After that, you can circle back around to the elemental section and fight Ancient Koros. This route offers easier pulls with fewer overlaps and interrupts required to survive. Once you are done with bosses on each side of the dungeon, you can move up toward the final fight.
Fellowship Cithrel’s Fall Important Interrupts
Before and between boss fights in Cithrel’s Fall, you will encounter trash mobs, some of which can wipe a group if their casts go off. Here is the list of important interrupts in Cithrel’s Fall for each enemy:
- Eldin Sentinel: Shattering Barrier
- Deceitful Scholar: Rune Of Detonation
- Corrupter: Drain Life
- Blade of Cithrel: Slicing Blades (CC)
Not being able to interrupt these abilities will make finishing the dungeon and getting into the next league nearly impossible. If you want to get into a higher league to play with more skilled teammates, our League service is exactly what you are looking for.
Fellowship Cithrel’s Fall Bosses
Cithrel’s Fall has three bosses. Each has its own mechanics that build on what you’ve seen in earlier fights. Here we have prepared a strategy for each fight.
Noor the Betrayer Strategy
Noor is a single-phase fight focused on movement and awareness. Noor’s most important ability is Cold-Blooded Twist. She will jump to the center of the arena and split it into different sections. She will then fire rotating waves of icicles through the icy zones.
Her other ability, Razor Trap, targets random players, leaving traps that root anyone who steps on them. Place these carefully away from the center so you have room to dodge later. Betrayer’s Arrow marks a player and explodes after a few seconds. Move away from the group to avoid splash damage. Arcane Volley deals ramping group damage over six seconds. Healers should use cooldowns or Mass Dispel near the end.
Lastly, Actuate Ambush summons two Recruits and one Sentinel. Tanks should grab them quickly and interrupt the Sentinel’s Shattering Barrier cast.
Ancient Koros Strategy
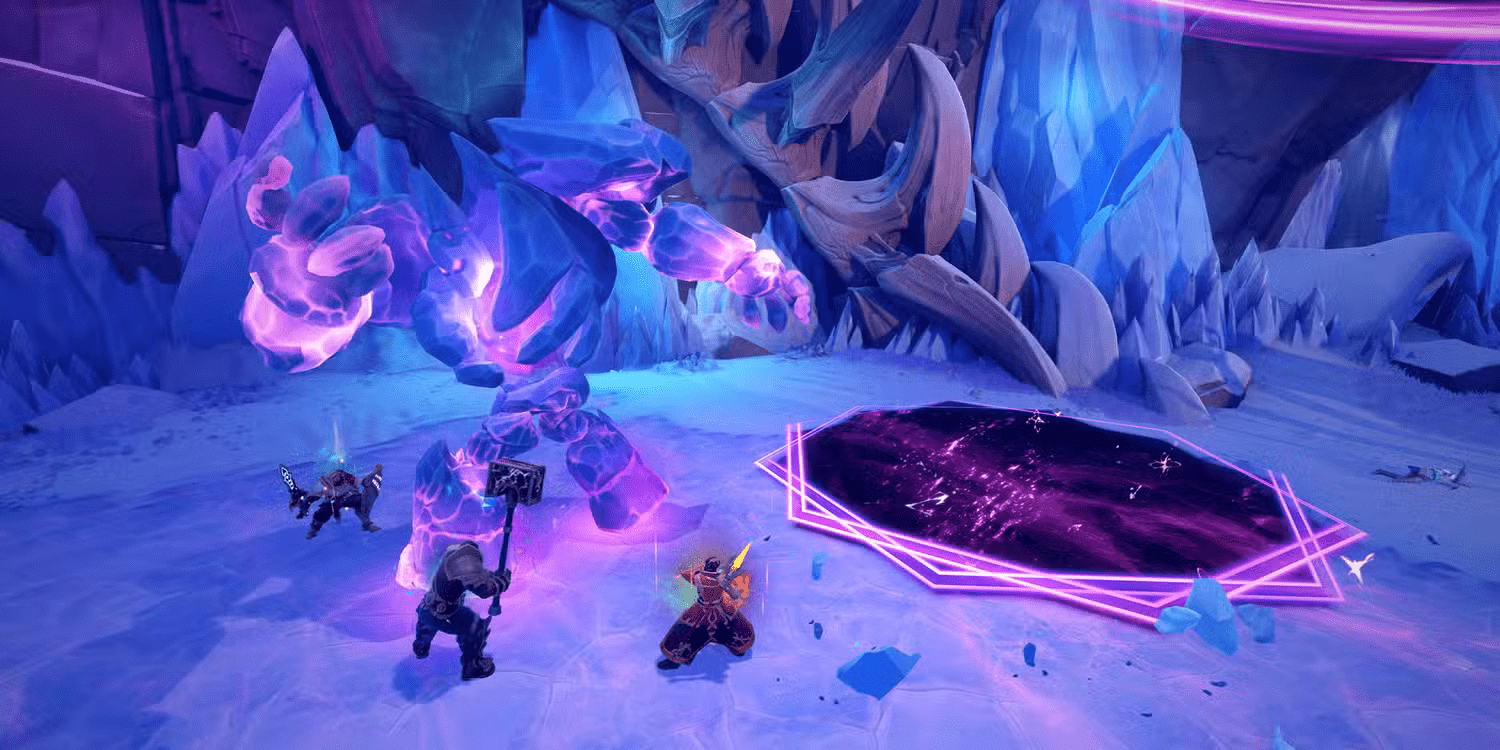
The second boss of Cithrel’s Fall is Ancient Koros, a large elemental that tests your coordination and positioning. This fight is entirely single-target, with a few repeating mechanics that stack in difficulty as it goes on.
Assign one ranged player to stand furthest away and bait all Volatile Orbs toward them. This keeps the rest of the group safe from their explosions. When Shatterstrike is cast, position the boss so the frontal cone passes through the orb to destroy it. Avoid standing in front of the boss during this cast, as it hits hard and applies Converging Cold, which needs to be dispelled immediately.
When Calamitous Fracture appears, one player must soak the circle to prevent a massive explosion. The soaker will later drop a Calamity Rift, so they should move away from both the boss and the orb kiter before it spawns. Over time, the arena will fill with these rift pools, creating limited safe zones.
Because the soaker gains a stacking debuff that increases damage taken from future soaks, you’ll need to rotate this role among non-kiting players. Watch for overlaps between Fracture and Shatterstrike, and adjust on the fly — preventing the orb explosion always takes priority.
Cithrel Strategy
The final boss of the dungeon is Cithrel, fought on a large elevated platform after clearing a mix of previous trash enemies. This is a fast-paced encounter that starts simple but quickly escalates as the boss gains speed and the arena space shrinks.
Tanks will need to handle Breath of Al’zerac, a heavy frontal attack that deals major damage. Always face the boss away from the group and use a defensive cooldown before the cast finishes.
The main group mechanic is Path to Oblivion. This targets one player and requires everyone to stack inside the marked zone to split the incoming hit. The second explosion happens a few seconds later, so make sure to move away right after the soak. Each cast also shrinks the arena slightly, reducing movement space as the fight goes on. Use group-wide damage reduction abilities later in the fight when these overlaps become harder to manage.
Next, Bloodhunter’s Mark targets two random players, marking them for a short delay before Cithrel dashes between them. Each hit deals AoE damage and applies a bleed, so the marked players should move away from each other and the rest of the group. This becomes tricky when combined with Maelstrom, an ability that pulls everyone toward the boss right before she dashes. The best way to handle this is for non-marked players to stay close to the boss during the pull, while the marked players move to opposite sides once the pull ends.
At 50% health, Cithrel enters Draconic Frenzy, dramatically increasing the speed of all her abilities. The shrinking arena and faster cast times make the second half of the fight chaotic. Save your burst damage and cooldowns for this phase to shorten it as much as possible.
Fellowship Cithrel’s Fall Rewards

Cithrel’s Fall, being a capstone dungeon, offers players loot from one league higher (Adept). Here we have prepared a full list of loot from this dungeon, as well as an explanation of the tier set found in this dungeon.
Cithrel’s Fall Tier Set
Some Cithrel’s Fall items are a part of a Draconic Might Tier set, which provides you with a chance (0.9 PMM) of your critical strikes to increase your Primary Stat by 18% for 15 seconds. However, non-Wyrmguard items lack this tier set bonus. We marked tier set items with an asterisk (*) so you can easily recognize them.
Cithrel’s Fall Helena Loot
| Name | Slot | Stats |
|---|---|---|
| Wyrmguard Drakenhelm* | Head | Critical Strike, Expertise |
| Wyrmguard Pauldrons* | Shoulders | Critical Strike, Spirit |
| Wyrmguard Cuirass* | Chest | Critical Strike, Expertise |
| Wyrmguard Leggings* | Legs | Critical Strike, Haste |
| Wyrmguard Initiate Mark* | Necklace | Critical Strike, Spirit |
| Faceplate of the Destroyer | Head | Haste, Expertise |
| Eldring Emblazoned Shoulders | Shoulders | Haste, Expertise |
| Cithrel’s Guardplate | Chest | Critical Strike, Expertise |
| Legplates of Draconic Might | Legs | Critical Strike, Haste |
| Handguards of Biting Frost | Gloves | Haste, Spirit |
| Noor’s Fancy Greaves | Feet | Critical Strike, Spirit |
| Ice Tempered Vambraces | Wrist | Critical Strike, Spirit |
| Commander’s Locket | Necklace | Haste, Spirit |
| Ring of Fealty | Ring | Expertise, Spirit |
Cithrel’s Fall Meiko Loot
| Name | Slot | Stats |
|---|---|---|
| Wyrmguard Hood* | Head | Critical Strike, Haste |
| Wyrmguard Shoulders* | Shoulders | Critical Strike, Expertise |
| Wyrmguard Dragonhide* | Chest | Haste, Spirit |
| Wyrmguard Sash* | Legs | Critical Strike, Expertise |
| Wyrmguard Necklace* | Necklace | Expertise, Spirit |
| Regal Eldrin Hood | Head | Haste, Expertise |
| Fervent Recruit’s Epaulets | Shoulders | Critical Strike, Spirit |
| Ancient Niigano Shroud | Chest | Critical Strike, Expertise |
| Frosthide Leather Pants | Legs | Expertise, Spirit |
| Duelist’s Gloves | Gloves | Haste, Spirit |
| Frosted Leather Boots | Feet | Haste, Expertise |
| Ice Golem Bindings | Wrist | Expertise, Spirit |
| Joromaiden Pendant | Necklace | Haste, Spirit |
| Seal of the Great Wyrm | Ring | Critical Strike, Haste |
Cithrel’s Fall Rime Loot
| Name | Slot | Stats |
|---|---|---|
| Drakebreaker’s Hood* | Head | Haste, Spirit |
| Drakebreaker’s Amice* | Shoulders | Critical Strike, Haste |
| Drakebreaker’s Garb* | Chest | Critical Strike, Spirit |
| Drakebreaker’s Clasp* | Legs | Expertise, Spirit |
| Drakebreaker’s Amulet* | Necklace | Haste, Expertise |
| Cowl of the Summit | Head | Critical Strike, Spirit |
| Corruptor’s Amice | Shoulders | Critical Strike, Haste |
| Wyrmcall Robes | Chest | Critical Strike, Haste |
| Scribe’s Leggings | Legs | Expertise, Spirit |
| Insulated Grips | Gloves | Critical Strike, Expertise |
| Ael’Dethi Boots | Feet | Critical Strike, Spirit |
| Fur Trim Cloak | Back | Haste, Spirit |
| Frozen Shardling Necklace | Necklace | Haste, Spirit |
| Ring of Elemental Corruption | Ring | Critical Strike, Expertise |
Cithrel’s Fall Tariq Loot
| Name | Slot | Stats |
|---|---|---|
| Drakebreaker Drakehelm* | Head | Critical Strike, Expertise |
| Drakebreaker Pauldrons* | Shoulders | Critical Strike, Spirit |
| Drakebreaker Dragonhide* | Chest | Critical Strike, Expertise |
| Drakebreaker Leggings* | Legs | Critical Strike, Haste |
| Drakebreaker Mark* | Necklace | Critical Strike, Spirit |
| Coldheart’s Sallet | Head | Haste, Expertise |
| Frost-pitted Mantle | Shoulders | Haste, Expertise |
| Frosted Iron Brigandine | Chest | Critical Strike, Expertise |
| Recruit’s Standard Tassets | Legs | Critical Strike, Haste |
| Cold Iron Gauntlets | Gloves | Haste, Spirit |
| Spiked Sabatons | Feet | Critical Strike, Spirit |
| Frost-Covered Bindings | Wrist | Critical Strike, Spirit |
| Frostdrake Collar | Necklace | Haste, Spirit |
| Cithrel’s Loop | Ring | Expertise, Spirit |
Cithrel’s Fall Mara Loot
| Name | Slot | Stats |
|---|---|---|
| Drakebreaker Hood* | Head | Critical Strike, Haste |
| Drakebreaker Mantle* | Shoulders | Critical Strike, Expertise |
| Drakebreaker Garb* | Chest | Haste, Spirit |
| Drakebreaker Codpants* | Legs | Critical Strike, Expertise |
| Drakebreaker Talisman* | Necklace | Expertise, Spirit |
| Winter Shroud | Head | Haste, Expertise |
| Drakehide Mantle | Shoulders | Critical Strike, Spirit |
| Sentinel’s Inner Chestpiece | Chest | Critical Strike, Expertise |
| Stalker’s Furred Hidepants | Legs | Expertise, Spirit |
| Oiled Leather Wraps | Gloves | Haste, Expertise |
| Leather Snowboots | Feet | Haste, Expertise |
| Nezari Emblazoned Brazer | Wrist | Expertise, Spirit |
| Coldfire Talisman | Necklace | Haste, Spirit |
| Frosted Loop | Ring | Critical Strike, Haste |
Cithrel’s Fall Elarion Loot
| Name | Slot | Stats |
|---|---|---|
| Drakebreaker Mask* | Head | Critical Strike, Haste |
| Drakebreaker Spauldrons* | Shoulders | Critical Strike, Expertise |
| Drakebreaker Surcoat* | Chest | Haste, Spirit |
| Drakebreaker Legwraps* | Legs | Critical Strike, Expertise |
| Drakebreaker Chain* | Necklace | Expertise, Spirit |
| Frostweave Cowl | Head | Haste, Expertise |
| Noor’s Epaulets | Shoulders | Critical Strike, Spirit |
| Tundra Stalker’s Tunic | Chest | Critical Strike, Expertise |
| Insulated Hidepants | Legs | Expertise, Spirit |
| Heavy Leather Gloves | Gloves | Haste, Expertise |
| Snowmelt Frostpads | Feet | Haste, Expertise |
| Elemental Bindings | Wrist | Expertise, Spirit |
| Pendant of the Aurora | Necklace | Haste, Spirit |
| Rubellite Focus | Ring | Critical Strike, Haste |
Cithrel’s Fall Ardeos Loot
| Name | Slot | Stats |
|---|---|---|
| Drakebreaker Bonnet* | Head | Haste, Spirit |
| Drakebreaker Spaulders* | Shoulders | Critical Strike, Haste |
| Drakebreaker Robes* | Chest | Critical Strike, Spirit |
| Drakebreaker Cinch* | Legs | Expertise, Spirit |
| Drakebreaker Necklace* | Necklace | Haste, Expertise |
| Hood of the Warden | Head | Critical Strike, Spirit |
| Mantle of the Great Wyrm | Shoulders | Critical Strike, Haste |
| Al’Zerac Cultist’s Robe | Chest | Critical Strike, Haste |
| Frostproof Leggings | Legs | Expertise, Spirit |
| Gloves of Elemental Bindings | Gloves | Critical Strike, Expertise |
| Frost-resistant Boots | Feet | Critical Strike, Spirit |
| Rune Embroidered Shawl | Back | Haste, Spirit |
| Frost-imbued Dragonglass Torc | Necklace | Haste, Spirit |
| Frazil Band | Ring | Critical Strike, Expertise |
Cithrel’s Fall Sylvie Loot
| Name | Slot | Stats |
|---|---|---|
| Scalemender Hood* | Head | Critical Strike, Haste |
| Scalemender Shoulders* | Shoulders | Critical Strike, Expertise |
| Scalemender Dragonhide* | Chest | Haste, Spirit |
| Scalemender Hideskirt* | Legs | Critical Strike, Expertise |
| Scalemender Chain* | Necklace | Expertise, Spirit |
| Icicled Circlet | Head | Haste, Expertise |
| Noor’s Frozen Shoulderpads | Shoulders | Critical Strike, Spirit |
| Frost-Infused Dragonhide | Chest | Critical Strike, Expertise |
| Drakehide Leggings | Legs | Expertise, Spirit |
| Grips of the Glacial Spring | Gloves | Haste, Expertise |
| Talonstrapped Boots | Feet | Haste, Expertise |
| Coldiron Bindings | Wrist | Expertise, Spirit |
| Elemental Guardian’s Chain | Necklace | Haste, Spirit |
| Gemmed Band of Violet Fire | Ring | Critical Strike, Haste |
Cithrel’s Fall Vigour Loot
| Name | Slot | Stats |
|---|---|---|
| Scalemender Drakehelm* | Head | Critical Strike, Expertise |
| Scalemender Hidemantle* | Shoulders | Critical Strike, Spirit |
| Scalemender Plate* | Chest | Critical Strike, Expertise |
| Scalemender Legguards* | Legs | Critical Strike, Haste |
| Scalemender Gauntlets* | Necklace | Critical Strike, Spirit |
| Ancient Eldrin Greathelm | Head | Haste, Expertise |
| Runic Vanguards Pauldrons | Shoulders | Haste, Expertise |
| Frostruned Cuirass | Chest | Critical Strike, Expertise |
| Sentinel Legguards | Legs | Critical Strike, Haste |
| Draconic Gauntlets | Gloves | Haste, Spirit |
| Snow-shoed Boots | Feet | Critical Strike, Spirit |
| Commander’s Glacial Wristbands | Wrist | Critical Strike, Spirit |
| Pendant of Black Ice | Necklace | Haste, Spirit |
| Frost-covered Seal | Ring | Expertise, Spirit |
If you want to get this loot or increase the ilvl of gear you’ve already got from Cithrel’s Fall, our Item Level service can help you out with just that.
Fellowship Cithrel’s Fall FAQ
If you’re planning your first few runs of Cithrel’s Fall, it’s normal to have a few questions. This dungeon introduces several new mechanics, scaling modifiers, and some of the toughest trash in the early Adept League. Below you’ll find quick answers to the most common questions about this dungeon:
What’s the Easiest Route for Cithrel’s Fall?
Go left first and start with Noor the Betrayer. This route has easier trash and gives players time to get used to Vayr’s Legacy modifiers before the more punishing elemental packs on the right side.
What Is Vayr’s Legacy Modifier in Cithrel’s Fall?
It’s a dungeon-wide modifier that empowers certain trash mobs with an extra ability. The exact ability varies by enemy type. You’ll start seeing these more often as you move into Adept League dungeons.
What Happens After Completing Cithrel’s Fall?
Finishing the dungeon unlocks access to the Adept League and rewards a cache containing one item from the Draconic Might Tier set, along with a chance for bonus materials used in crafting Wyrmguard gear.
4.9Cithrel’s Fall is a solid check of how well your group works together. The fights are straightforward once you know what to look for, but small mistakes can still add up fast. It’s more about coordination and timing than pure damage.
