This Season of Discovery Molten Core raid guide will help you to get ready for the challenges that are to come in the center of the mountain. As Phase 4 of WoW SoD unfolds, adventurers face their greatest challenge yet: a reimagined Molten Core. This raid has been rebalanced for 20 players and also added a new powerful boss and new valuable loot. We also advise you to read our Season of Discovery Runes guide.
 4.9
4.9What is Season of Discovery Molten Core?
Molten Core is a classic 20-player raid dungeon in WoW Classic Season of Discovery. Featuring fiery inhabitants, Molten Core requires cooperation and strategy to defeat all 11 bosses of the instance and get new weapons and Tier 1 armor sets.
Season of Discovery Molten Core Layout
Molten Core is comprised of a series of interconnected caverns and lava-filled chambers. These are the entrance tunnel, several side chambers where the bosses are located, and the main lava lake leading up to the iconic boss Ragnaros.

Molten Core Map Explained
A – Entrance
You will encounter bosses in the following order:
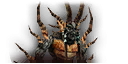
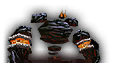
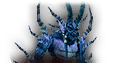
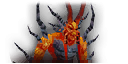
Season of Discovery Molten Core Trash
Trash in SoD Molten Core can be even more dangerous than some of the bosses in the instance. It is important to be consistent and safe to have a successful run. Never pull trash in large groups and always make sure that you clear more space than you expect to have a boss. Here are the most dangerous Season of Discovery Molten Core trash mobs to be aware of:
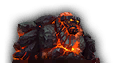
- Lava Surgers: These large rock elementals knock back anyone nearby, so do not pull them into a position where you can tank them near the edges. Because they are elementals, Warlocks can always use Banish on them if the need arises.
- Lava Elementals: These elementals have a stun attack and also place massive Fire damage over time on players. Remove them from the sight of the other ranged members of your group. Warlocks can also use Banish on these mobs.
- Molten Giants and Molten Destroyers: These large giants amaze other players around them. Avoid getting into the range of the tanks and just focus on taking them out individually.
- Firelords: These fire elementals spawn adds, which are smaller creatures that can also breathe fire. The adds will start spawning and the player must kill them as fast as possible while also dealing damage to the Firelord.
- Ancient Core Hounds: These large dogs breathe fire in a cone in front of them. Make sure the tank positions them with their back towards the raid during combat.
By following these guidelines, you can avoid these dangers and ensure that your raid group stays as safe as possible. Our team is ready to provide you with Pre Raid Gear so that you can easily conquer endgame content.
Season of Discovery Molten Core Resets
Molten Core, like other raids in World of Warcraft, has a weekly reset. This means that once you complete the raid, you can attempt it again after the reset, which occurs once a week. Molten Сore in Season of Discovery will be released on July 25th at 10:00 p.m. CET for Europe and 1:00 p.m. PST for North America. We will add a SoD Molten Core reset timer later for your convenience.
Where is Season of Discovery Molten Core Located?
Molten Core is situated in Blackrock Mountain (20.5, 32.8) that is in between the Burning Steppes and Searing Gorge. To get there, players can go to Blackrock Depths, where players must complete a short run to the instance portal.

How to Get to Molten Core in Season of Discovery?
Here are some ways to find the Molten Core entrance location in SoD:
- Travel to Blackrock Mountain: You can enter Blackrock Mountain through the Searing Gorge or the Burning Steppes.
- Enter Blackrock Depths: To get to the portal of Molten Core, you have to pass through Blackrock Depths.
- Use the Portal: If you are attuned, you can access the portal directly to Molten Core located near the entrance of Blackrock Depths.
What Level is Needed for Molten Core in Season of Discovery?
The level requirement to enter Molten Core is level 60 which is the highest level for characters in WoW Classic SoD. This helps to ensure that all the players are at the peak of their abilities and can effectively participate in the raid.
Molten Core Attunement in SoD
To get attuned to Molten Core, you have to go through the quest Attunement to the Core which is given by Lothos Riftwaker in Blackrock Mountain. When done, it allows Lothos to teleport you directly into Molten Core instead of having to run there on your own.
- Take Attunement to the Core quest from Lothos Riftwaker at Blackrock Mountain (starts at level 55).
- Start the Blackrock Depths instance with a party of 5 players.
- Clear Blackrock Depths up to the entrance of Molten Core.
- Gather the Core Fragment which can be picked up at the entrance to Molten Core.
- Take the Core Fragment back to Lothos Riftwaker to finish the quest.
- Once the quest is done, return to Lothos Riftwaker to get ported directly to Molten Core whenever you want.
By doing the attunement quest, players can easily access the Molten Core for subsequent raids in the future. You also don’t have to waste your time on this, just entrust Molten Core Attunement to our professional players.
Best Molten Core Classes in Season of Discovery
Some classes are dominating Molten Core because of new runes, tier sets, and class changes that came with WoW Classic Season of Discovery Phase 4. The top Classes for Molten Core in SoD are the following:
DPS
- Feral Druid (DPS): Increased AoE damage with the Improved Swipe, powerful tier sets, and improved rotation make Feral Druids one of the best DPS for Molten Core.
- Elemental Shaman: Advantages of such runes as Storm, Earth, and Fire that decrease the cooldowns and increase damage, making them potential candidates for the PvE DPS.
- Fire Mage: Having abilities that allow them to cast spells with no cooldowns and faster, Fire Mages are excellent in PvE with massive damage output.
Healers
- Holy Paladin: Heals the most in the healing scene because of the massive party healing and the best defensive cooldowns. Their new tier set greatly increases their healing output, making them very useful.
- Holy Priest: New tier sets that enable Flash Heal to be used in Shadowform, thus increasing their durability and usefulness in different situations.
Tanks
- Protection Warrior: Still remains the best choice for the role of a tank in raids. New runes and class armor sets increase their crowd control and survivability, making them perfect for dealing with multiple enemies and bosses in Molten Core.
- Protection Paladin: Have very good survivability and healing abilities, thus they are able to support their team with heals and boosts, which makes them suitable for the role of a tank in Molten Core.
Of course, these are only the leading ones. If you have the right equipment and the players know what they are doing any class can be successful in Molten Core. The main point is to choose the class that will be fun to play and suitable for your raid group.
Season of Discovery Molten Core Rewards
WoW Classic SoD provides players with an opportunity to get some valuable items after finishing the Molten Core raid. Let’s take a closer look at what kind of Season of Discovery Molten Core raid loot awaits you.
Item Sets
In the Season of Discovery Phase 4, Molten Core introduces a new system for obtaining Tier sets. To get these sets, you need to collect Tier Tokens, which drop from bosses in the Molten Core raid. Once you have a Token, you can exchange it for the corresponding Tier Piece for your class.
This system differs from the previous universal Tokens found in Sunken Temple, as these new Tokens are class-specific. This means that if you get a Token, it will only be usable by certain classes, which could impact how quickly different classes can gear up.
Here’s an outline of the SoD Molten Core Tier 1 sets you can get for these Tier Tokens.
Molten Core Item Sets
Druid Tier Set – Cenarion
| Spec | Set Name | Set Bonus | Slot | Item |
|---|---|---|---|---|
| Balance Druid | Cenarion Eclipse | 2 pieces: Thorns‘ damage is increased by 100%, and its duration is extended by 200%. 4 pieces: Your hit chance with spells and attacks is increased by 3%. 6 pieces: The cooldown of Starfall is reduced by 50%. | Helm | Cenarion Antlers |
| Belt | Cenarion Cord | |||
| Chest | Cenarion Embrace | |||
| Hands | Cenarion Gauntlets | |||
| Shoulder | Cenarion Mantle | |||
| Legs | Cenarion Pants | |||
| Boots | Cenarion Sandals | |||
| Bracer | Cenarion Wrists | |||
| Feral DPS Druid | Cenarion Cunning | 2 pieces: Faerie Fire and Faerie Fire (Feral) also increase the chance for all attacks to hit the target by 1% for 40 seconds. 4 pieces: Periodic damage from Rake and Rip can now critically strike. 6 pieces: Rip and Ferocious Bite have a 20% chance per combo point spent to reset Savage Roar‘s duration to its initial value. | Helm | Cenarion Horns |
| Belt | Cenarion Girdle | |||
| Chest | Cenarion Tunic | |||
| Hands | Cenarion Fists | |||
| Shoulder | Cenarion Shoulders | |||
| Legs | Cenarion Trousers | |||
| Boots | Cenarion Treads | |||
| Bracer | Cenarion Bands | |||
| Feral Tank Druid | Cenarion Rage | 2 pieces: You can cast Rebirth and Innervate while in Bear Form or Dire Bear Form. 4 pieces: Reduces the cooldown of Enrage by 30 seconds and removes its armor reduction effect. 6 pieces: Bear Form and Dire Bear Form increase all threat generated by an additional 20%. Cower now removes all your threat against the target but has a 20-second longer cooldown. | Helm | Cenarion Crown |
| Belt | Cenarion Waistguard | |||
| Chest | Cenarion Armor | |||
| Hands | Cenarion Grips | |||
| Shoulder | Cenarion Pauldrons | |||
| Legs | Cenarion Legguards | |||
| Boots | Cenarion Walkers | |||
| Bracer | Cenarion Wristguards | |||
| Restoration Druid | Cenarion Bounty | 2 pieces: Casting Innervate on another player also casts it on yourself. 4 pieces: Casting Healing Touch or Nourish gives you a 25% chance to gain Mana equal to 35% of the spell’s base cost. 6 pieces: Reduces Tranquility’s cooldown by 100% and increases its healing by 100%. | Helm | Cenarion Helm |
| Belt | Cenarion Belt | |||
| Chest | Cenarion Vestments | |||
| Hands | Cenarion Gloves | |||
| Shoulder | Cenarion Spaulders | |||
| Legs | Cenarion Leggings | |||
| Boots | Cenarion Boots | |||
| Bracer | Cenarion Bracers |
Hunter Tier Set – Giantstalker
| Spec | Set Name | Set Bonus | Slot | Item |
|---|---|---|---|---|
| Ranged DPS Hunter | Giantstalker Pursuit | 2 pieces: After using Distracting Shot, you generate 100% more threat for 8 seconds. 4 pieces: While tracking a creature type, you deal 3% increased damage to that type. 6 pieces: Within 10 seconds after Aimed Shot, your next Shot ability deals 20% more damage. | Helm | Giantstalker’s Helmet |
| Belt | Giantstalker’s Belt | |||
| Chest | Giantstalker’s Breastplate | |||
| Hands | Giantstalker’s Gloves | |||
| Shoulder | Giantstalker’s Epaulets | |||
| Legs | Giantstalker’s Leggings | |||
| Boots | Giantstalker’s Boots | |||
| Bracer | Giantstalker’s Bracers | |||
| Melee DPS Hunter | Giantstalker Prowess | 2 pieces: Mongoose Bite reduces the target’s chance to Dodge by 1% and increases your chance to hit by 1% for 30 seconds. 4 pieces: While tracking a creature type, you deal 3% increased damage to that creature type. 6 pieces: Mongoose Bite activates for 5 seconds whenever your target Parries, Blocks, or when your melee attack misses. | Helm | Giantstalker’s Guise |
| Belt | Giantstalker’s Girdle | |||
| Chest | Giantstalker’s Chainmail | |||
| Hands | Giantstalker’s Handguards | |||
| Shoulder | Giantstalker’s Spauldrons | |||
| Legs | Giantstalker’s Chain Leggings | |||
| Boots | Giantstalker’s Sabatons | |||
| Bracer | Giantstalker’s Wristguards |
Mage Tier Set – Arcanist
| Spec | Set Name | Set Bonus | Slot | Item |
|---|---|---|---|---|
| DPS Mage | Arcanist Insight | 2 pieces: You are immune to all damage while channeling Evocation. 4 pieces: Each time you cast a spell from a different school of magic, you gain a 1% damage increase for 15 seconds. 6 pieces: Mage Armor increases your mana regeneration while casting by an additional 15%. Molten Armor increases your spell damage and healing by 18%. Ice Armor grants a 20% increased chance to trigger Fingers of Frost. | Helm | Arcanist Crown |
| Belt | Arcanist Belt | |||
| Chest | Arcanist Robes | |||
| Hands | Arcanist Gloves | |||
| Shoulder | Arcanist Mantle | |||
| Legs | Arcanist Leggings | |||
| Boots | Arcanist Boots | |||
| Bracer | Arcanist Bindings | |||
| Healer Mage | Arcanist Moment | 2 pieces: Temporal Beacons last 20% longer. 4 pieces: All chronomantic healing you deal is increased by 10%. 6 pieces: Each time you heal a target with Regeneration, the remaining cooldown on Rewind Time is reduced by 1 second. | Helm | Arcanist Headdress |
| Belt | Arcanist Cord | |||
| Chest | Arcanist Garments | |||
| Hands | Arcanist Handguards | |||
| Shoulder | Arcanist Shoulders | |||
| Legs | Arcanist Pants | |||
| Boots | Arcanist Sandals | |||
| Bracer | Arcanist Wristwraps |
Paladin Tier Set – Lawbringer
| Spec | Set Name | Set Bonus | Slot | Item |
|---|---|---|---|---|
| Holy Paladin | Lawbringer Mercy | 2 pieces: Allies have a 100% chance to trigger your Judgement of Light or Judgement of Wisdom. 4 pieces: Increases your critical strike chance with spells and attacks by 2%. 6 pieces: When your Flash of Light, Holy Light, or Beacon of Light heals a target to full health, all members of their party are healed for 189 to 211 health. | Helm | Lawbringer Helm |
| Belt | Lawbringer Belt | |||
| Chest | Lawbringer Chestplate | |||
| Hands | Lawbringer Gauntlets | |||
| Shoulder | Lawbringer Spaulders | |||
| Legs | Lawbringer Legplates | |||
| Boots | Lawbringer Boots | |||
| Bracer | Lawbringer Bracers | |||
| Retribution Paladin | Lawbringer Radiance | 2 pieces: Your Judgement of Light and Judgement of Wisdom also apply the effects of Judgement of the Crusader. 4 pieces: Increases your critical strike chance with spells and attacks by 2%. 6 pieces: Your Seal of Command, Seal of Righteousness, and Seal of Martyrdom now persist for 6 seconds after casting another Seal, or until you cast a third Seal. Your Judgements can trigger multiple active Seals. | Helm | Lawbringer Crown |
| Belt | Lawbringer Girdle | |||
| Chest | Lawbringer Breastplate | |||
| Hands | Lawbringer Grips | |||
| Shoulder | Lawbringer Spaulders | |||
| Legs | Lawbringer Leggings | |||
| Boots | Lawbringer Battleboots | |||
| Bracer | Lawbringer Warbands | |||
| Protection Paladin | Lawbringer Will | 2 pieces: Increases your shield’s block value by 30. 4 pieces: Heal for 189 to 211 when you block, with a cooldown between heals. 6 pieces: Holy Shield no longer has charges and always lasts its full duration. Additionally, its damage is increased by 200% of your shield block value. | Helm | Lawbringer Headguard |
| Belt | Lawbringer Battlebelt | |||
| Chest | Lawbringer Chestguard | |||
| Hands | Lawbringer Handguards | |||
| Shoulder | Lawbringer Pauldrons | |||
| Legs | Lawbringer Legguards | |||
| Boots | Lawbringer Sabatons | |||
| Bracer | Lawbringer Vambraces |
Priest Tier Set – Prophecy
| Spec | Set Name | Set Bonus | Slot | Item |
|---|---|---|---|---|
| Healer Priest | Dawn Prophecy | 2 pieces: Reduces the casting time of Flash Heal and Greater Heal by 0.1 seconds. 4 pieces: Increases your critical strike chance with spells and attacks by 2%. 6 pieces: Increases your critical strike chance with Prayer of Healing and Circle of Healing by 25%. | Helm | Circlet of Prophecy |
| Belt | Girdle of Prophecy | |||
| Chest | Robes of Prophecy | |||
| Hands | Gloves of Prophecy | |||
| Shoulder | Mantle of Prophecy | |||
| Legs | Pants of Prophecy | |||
| Boots | Boots of Prophecy | |||
| Bracer | Vambraces of Prophecy | |||
| DPS Priest | Twilight Prophecy | 2 pieces: Allows you to cast Flash Heal while in Shadowform. 4 pieces: Increases your critical strike chance with spells and attacks by 2%. 6 pieces: Mind Blast critical strikes reduce the duration of your next Mind Flay by 50% and increase its total damage by 100%. | Helm | Crown of Prophecy |
| Belt | Belt of Prophecy | |||
| Chest | Garments of Prophecy | |||
| Hands | Hands of Prophecy | |||
| Shoulder | Shoulderpads of Prophecy | |||
| Legs | Leggings of Prophecy | |||
| Boots | Sandals of Prophecy | |||
| Bracer | Wristwraps of Prophecy |
Rogue Tier Set – Nightslayer
| Spec | Set Name | Set Bonus | Slot | Item |
|---|---|---|---|---|
| DPS Rogue | Nightslayer Thrill | 2 pieces: Feint grants Avoidance for 6 seconds, reducing all area of effect damage from non-players by 50%. 4 pieces: Increases the critical strike damage bonus of your Poisons by 100%. 6 pieces: Your finishing moves have a 5% chance per combo point to make your next ability cost no energy. | Helm | Nightslayer Cover |
| Belt | Nightslayer Belt | |||
| Chest | Nightslayer Chestpiece | |||
| Hands | Nightslayer Gloves | |||
| Shoulder | Nightslayer Shoulder Pads | |||
| Legs | Nightslayer Pants | |||
| Boots | Nightslayer Boots | |||
| Bracer | Nightslayer Bracelets | |||
| Tank Rogue | Nightslayer Battlearmor | 2 pieces: While Just a Flesh Wound and Blade Dance are active, Crimson Tempest, Blunderbuss, and Fan of Knives cost 20 less Energy and generate 100% increased threat. 4 pieces: Vanish now reduces all Magic damage taken by 50% for its duration but no longer grants Stealth or removes movement-impairing effects. 6 pieces: Your finishing moves have a 20% chance per combo point to reduce the Physical damage you take by 50% from the next melee attack that hits you within 10 seconds. | Helm | Nightslayer Hood |
| Belt | Nightslayer Waistguard | |||
| Chest | Nightslayer Cuirass | |||
| Hands | Nightslayer Handguards | |||
| Shoulder | Nightslayer Pauldrons | |||
| Legs | Nightslayer Legguards | |||
| Boots | Nightslayer Tabi | |||
| Bracer | Nightslayer Bracers |
Shaman Tier Set – Earthfury
| Spec | Set Name | Set Bonus | Slot | Item |
|---|---|---|---|---|
| Healer Shaman | Earthfury Relief | 2 pieces: Increases the radius of your totems affecting friendly targets to 40 yards. 4 pieces: Casting Healing Wave, Lesser Healing Wave, or Riptide grants a 25% chance to regain Mana equal to 35% of the spell’s base cost. 6 pieces: Healing Wave will now jump to up to 2 additional nearby targets, with each jump reducing the heal’s effectiveness by 80%. | Helm | Earthfury Helmet |
| Belt | Earthfury Belt | |||
| Chest | Earthfury Vestments | |||
| Hands | Earthfury Gauntlets | |||
| Shoulder | Earthfury Epaulets | |||
| Legs | Earthfury Legguards | |||
| Boots | Earthfury Boots | |||
| Bracer | Earthfury Bracers | |||
| Melee DPS Shaman | Earthfury Impact | 2 pieces: Increases the radius of your totems affecting friendly targets to 40 yards. 4 pieces: Increases your critical strike chance with spells and attacks by 2%. 6 pieces: Your Flurry talent grants an additional 10% increase to attack speed. | Helm | Earthfury Headpiece |
| Belt | Earthfury Girdle | |||
| Chest | Earthfury Chainmail | |||
| Hands | Earthfury Grips | |||
| Shoulder | Earthfury Spaulders | |||
| Legs | Earthfury Chain Leggings | |||
| Boots | Earthfury Battleboots | |||
| Bracer | Earthfury Bindings | |||
| Ranged DPS Shaman | Earthfury Eruption | 2 pieces: The radius of your totems that affect friendly targets is increased to 40 yards. 4 pieces: Your Lightning Bolt critical strikes have a 35% chance to reset the cooldown on Lava Burst and Chain Lightning, making the next Lava Burst, Chain Heal, or Chain Lightning cast within 10 seconds instant. 6 pieces: Lava Burst now also refreshes the duration of Flame Shock on your target back to 12 seconds. | Helm | Earthfury Visor |
| Belt | Earthfury Cord | |||
| Chest | Earthfury Ringmail | |||
| Hands | Earthfury Hands | |||
| Shoulder | Earthfury Mantle | |||
| Legs | Earthfury Leggings | |||
| Boots | Earthfury Walkers | |||
| Bracer | Earthfury Wristbands | |||
| Tank Shaman | Earthfury Resolve | 2 pieces: Increases your attack speed by 30% for your next 3 swings after you parry, dodge, or block. 4 pieces: Your parries and dodges also activate your Shield Mastery rune ability. 6 pieces: Your Stoneskin Totem reduces Physical damage taken by 5%, and your Windwall Totem reduces Magical damage taken by 5%. | Helm | Earthfury Greathelm |
| Belt | Earthfury Waistguard | |||
| Chest | Earthfury Scalemail | |||
| Hands | Earthfury Handguards | |||
| Shoulder | Earthfury Pauldrons | |||
| Legs | Earthfury Scaled Leggings | |||
| Boots | Earthfury Sabatons | |||
| Bracer | Earthfury Wristguards |
Warlock Tier Set – Felheart
| Spec | Set Name | Set Bonus | Slot | Item |
|---|---|---|---|---|
| Warlock | Corrupted Felheart | 2 pieces: Lifetap generates 50% more mana and no threat. 4 pieces: Increases your critical strike chance with spells and attacks by 2%. 6 pieces: Nightfall talent has a 4% increased chance to trigger. Immolate‘s periodic damage has a 4% chance to grant Fire Trance, reducing the cast time of your next Incinerate or Immolate by 100%. | Helm | Felheart Horns |
| Belt | Felheart Belt | |||
| Chest | Felheart Robes | |||
| Hands | Felheart Gloves | |||
| Shoulder | Felheart Shoulder Pads | |||
| Legs | Felheart Pants | |||
| Boots | Felheart Slippers | |||
| Bracer | Felheart Bracers |
Warrior Tier Set – Might
| Spec | Set Name | Set Bonus | Slot | Item |
|---|---|---|---|---|
| DPS Warrior | Unstoppable Might | 2 pieces: Gain 10 Rage when changing stances. 4 pieces: For 5 seconds after leaving a stance, you can use abilities requiring that stance as if you were still in it. 6 pieces: For the first 10 seconds after activating a stance, gain an additional benefit: Battle Stance/Gladiator Stance: 10% increased damage done. Berserker Stance: 10% increased critical strike chance. Defensive Stance: 10% reduced physical damage taken. | Helm | Jaws of Might |
| Belt | Sash of Might | |||
| Chest | Hauberk of Might | |||
| Hands | Hands of Might | |||
| Shoulder | Pauldrons of Might | |||
| Legs | Leggings of Might | |||
| Boots | Treads of Might | |||
| Bracer | Armguards of Might | |||
| Tank Warrior | Immoveable Might | 2 pieces: Increases your shield’s block value by 30. 4 pieces: Gain 1 extra Rage whenever you take damage or deal auto attack damage. 6 pieces: Increases all threat generated in Defensive Stance by an additional 10% and increases all damage dealt in Gladiator Stance by 4%. | Helm | Helm of Might |
| Belt | Belt of Might | |||
| Chest | Breastplate of Might | |||
| Hands | Gauntlets of Might | |||
| Shoulder | Shoulderplates of Might | |||
| Legs | Legplates of Might | |||
| Boots | Sabatons of Might | |||
| Bracer | Bracers of Might |
Loot Table
Molten Core in WoW SoD introduces reimagined loot tables, offering players new and exciting challenges compared to the classic raid. Many items have been revamped to enhance gameplay and reward progression. Here is the Season of Discovery Molten Core loot table with some items you can expect from this raid.
Molten Core Raid Loot Table
Weapons
Cloth Items
The Best Season of Discovery Molten Core Consumables
Certain consumables stand out as essential for maximizing your performance in PvE. Here are some of the best consumables for WoW SoD Molten Core raid:
Flasks and Elixirs
- Flask of the Titans: Raises maximum health by 1200 for 2 hours. This is an important consumable for tanks to increase their durability and endurance on the battlefield.
- Flask of Supreme Power: Raises spell damage by 150 for 2 hours, which is good for spell casters such as mages and warlocks.
- Elixir of the Mongoose: Gives 25 Agility and 2% increased critical strike chance for Melee DPS classes such as Rogues and Hunters.
- Greater Arcane Elixir: Casts a spell that increases the spell damage by 35 for one hour, which is beneficial to spell casters.
- Elixir of Greater Firepower: Raises the fire spell by up to 40 for half an hour, ideal for Fire Mages.
- Major Mana Potion: Returns 1350 to 2250 mana, which is crucial for healers and casters to have during long fights.
Food Buffs
- Nightfin Soup: It increases the mana regeneration by 8 mana every 5 seconds, which is perfect for classes like Priest and Druid, who need to heal their allies frequently.
- Runn Tum Tuber Surprise: Adds 10 Intellect for 10 min, useful for any caster class.
- Smoked Desert Dumplings: Raises Strength by 25 for 1 hour, good for melee DPS and tanks.
Other Consumables
- Elemental Sharpening Stone: Gives a 2% increase in critical strike chance with melee weapons for 30 minutes. This is a strong DPS consumable for melee DPS classes.
- Dense Weightstone: A 30-minute boost to weapon damage by 8, which is beneficial for the melee classes.
These items are designed to improve various aspects of a raid, such as making tanks more durable, healers more efficient with their mana, and DPS classes more productive. To purchase these consumables you will need Gold. And Overgear is ready to provide you with it in any quantity.
Season of Discovery Molten Core Bosses Strategies
Completing Molten Core in WoW Classic SoD is a challenging task that requires a strategic approach and planning. Here’s how to kill all the bosses in Season of Discovery Molten Core raid.
| Boss | Abilities | Strategy for Tanks | Strategy for DPS | Strategy for Healers |
|---|---|---|---|---|
 Lucifron | Impending Doom Lucifron’s Curse Shadow Shock Cleave Dominate Mind | Position Lucifron and Flamewaker Protectors to avoid Cleave hitting others. Manage aggro carefully. | Focus on killing Flamewaker Protectors first. Avoid unnecessary damage from Cleave and Shadow Shock. | Dispel Impending Doom and Lucifron’s Curse quickly. Keep an eye on mind-controlled players. |
 Magmadar | Frenzy Lava Bomb Panic Magma Spit | Keep Magmadar in place, move when hit by Lava Bomb. Use Berserker Rage to avoid Panic. | Avoid Lava Bomb patches. Stay out of Panic range if ranged DPS. Be prepared for constant healing if melee DPS. | Focus on the tank’s health, especially during Frenzy. Heal melee DPS affected by Magma Spit constant damage. |
 Gehennas | Rain of Fire Gehennas’ Curse Shadow Bolt | Position Gehennas away from the raid, avoid Rain of Fire areas. | Spread out to minimize Rain of Fire damage. Prioritize dispelling Gehennas’ Curse. | Keep the raid topped up, especially those standing in Rain of Fire. Dispel Gehennas’ Curse. |
 Garr | Antimagic Pulse Magma Shackles Summon Firesworn | Assign off-tanks to handle Firesworn adds. Spread out to avoid simultaneous explosions. | Focus on killing Firesworn one at a time. Switch targets as necessary. | Keep off-tanks alive. Heal through periodic damage from Anti-Magic Pulse. |
 Shazzrah | Arcane Explosion Deaden Magic Gate of Shazzrah | Position Shazzrah centrally, move only when necessary to avoid Arcane Explosion. | Stay spread out to minimize Arcane Explosion damage. Interrupt Deaden Magic. | Focus on raid-wide healing due to frequent Arcane Explosion damage. |
 Baron Geddon | Living Bomb Inferno Ignite Mana | Keep Baron Geddon away from the raid. Move out of Inferno. | Avoid standing near others to minimize Living Bomb damage. Manage mana to mitigate Ignite Mana. | Dispel Living Bomb quickly. Ensure raid stays topped up during Inferno. |
 Sulfuron Harbinger | Inspire Dark Mending Shadow Word: Pain | Handle Sulfuron and adds, interrupt Dark Mending on adds. | Kill adds first to reduce healing and damage from Inspire. | Keep tanks and DPS alive through Shadow Word: Pain damage. Assist with interrupting and dispelling. |
 Golemagg the Incinerator | Magma Splash Pyroblast Summon Core Rager | Maintain threat on Golemagg and Core Ragers. Position them away from the raid. | Focus on Golemagg while ensuring Core Ragers are off-tanked and managed. | Heal through heavy tank damage. Be prepared for burst damage from Pyroblast. |
 Majordomo Executus | Magic Reflection Damage Shield Summon Flamewaker Healer/Flamewaker Elite | Control Flamewaker Elites and Healers, interrupt spells and manage positioning. | Focus on killing Flamewaker Healers first. Switch to Elites after Healers are down. | Keep tanks alive through heavy damage. Be prepared for burst healing when Magic Reflection is active. |
 Ragnaros | Wrath of Ragnaros Magma Blast Lava Burst | Position Ragnaros centrally. Handle knockbacks from Wrath of Ragnaros. | Spread out to minimize blast damage from Lava Burst. Focus on adds during Submerge phase. | Manage raid-wide healing, especially during Submerge phase when adds spawn. |
Important Note: In the Season of Discovery, a new boss was added to Molten Core raid, but nothing is known about it yet. We will update the table as soon as we receive new info.
Molten Core in Season of Discovery Phase 4 is a mix of the old and the new, which is always great to see. If you plan well, communicate effectively, and are ready to make changes to your strategy, your raid team will triumph over the fiery depths and take the spoils.