Our Blackfathom Deeps raid guide is an in-depth look at this WoW Season of Discovery raid, with the information and methods you need to face its challenges and emerge victorious. Here you will find information about BFD location, loot and rewards, quests, bosses, leveling, and more. We also advise you to check out the Scarlet Monastery In-Depth Leveling Guide.
 4.9
4.9How to Get to BFD?
Walk to the temple gate on the Zoram Way in Ashenvale. Take the ramps or jump into the water. Have no fear, the water will break your fall. When you are ready, dive westwards as indicated by the minimap. You’ll come out in the inner part of the tunnel. Go through these tunnels till you get to the Blackfathom Deeps entrance.
Blackfathom Deeps Location
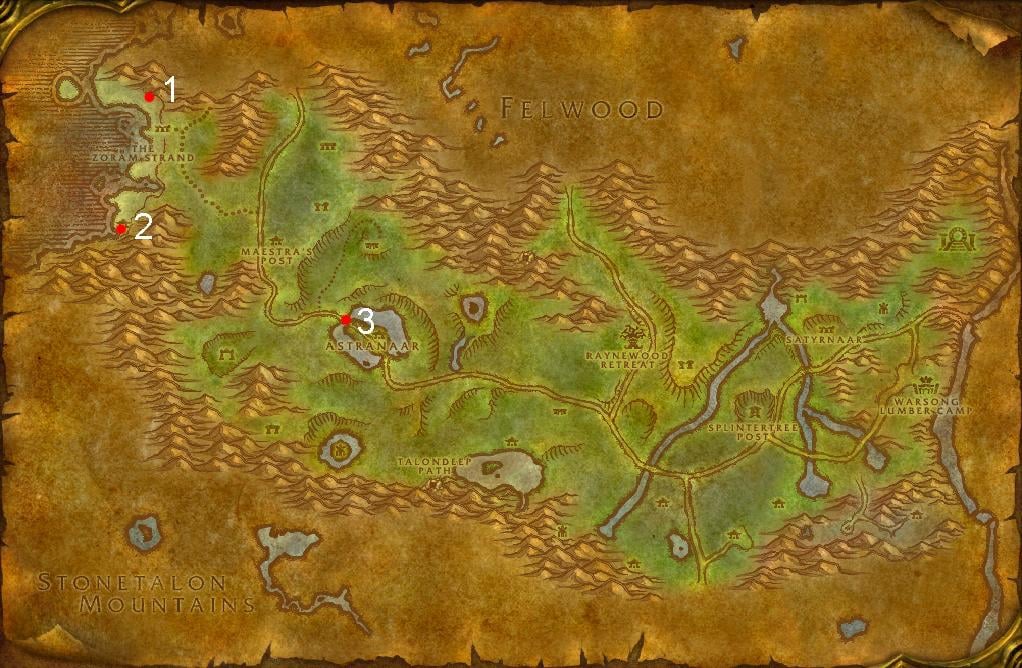
Blackfathom Deeps is a 10-man raid located at the northwestern part of Ashenvale (1), specifically on the Zoram Strand. Depending on your faction the closest flight point is either Zoram’gar for the Horde version (2) or Astranaar for the Alliance version (3).
BFD Map
Use this Blackfathom Deeps layout to simplify the raid navigation.

Blackfathom Deeps Map Explained
A) Entrance
1) Ghamoo-ra
2) Lorgalis Manuscript
3) Lady Sarevess
4) Argent Guard Thaelrid
5) Gelihast
6) Lorgus Jett (Varies)
7) Baron Aquanis
8) Twilight Lord Kelris
9) Old Serra’kis
10) Aku’mai
What Level Should You Have for BFD?
Level 25 is a minimum level for Blackfathom Deeps level-up raid, but engaging in the raid at this level may turn out to be a daunting task. It’s advised for players to be in the level range of 25-30 for better gameplay.
How to Level Up in BFD Fast?

Here’s a breakdown of experience gains:
- Levels 1-25: Blackfathom Deeps bosses give around 4,000 experience points per boss, which is roughly 28,000 XP for an entire run. Thus, this means that the player will only need 15% of the experience to reach this level range. Along with the increased buff, you will be able to gain nearly 1.5 levels from each clear.
- Levels 26-29: Experience gain remains substantial, making Blackfathom Deeps the fastest leveling method. You can still expect to gain roughly 1.5 levels per clear.
- Levels 30-34: Experience gain slightly decreases, offering around 26,000 to 27,000 XP per clear instead of 28,000. This still represents approximately 50% of the experience required to level up. Expect to gain roughly 1 level per clear for these levels.
- Levels 35-38: Experience gain drops significantly, ranging from 25,000 at level 35 to just 10,000 at level 38. This translates to roughly 10% to 25% of the experience needed per level. Despite the decrease, Blackfathom Deeps remains the most efficient method in terms of time spent versus experience gained.
- Level 39-50: Clearing Blackfathom Deeps for experience at these levels is not recommended.
Important Note: Dying during boss fights eliminates experience gained for that specific boss kill.
If you want to skip the process of farming XP and reach the level cap as quickly as possible, then SoD power leveling will help you with this task.
What is the Best BFD Composition?
Here are some examples of team setups to optimize your runs and maximize experience gain:
Balanced Team
2 Tanks + 3 Healers + 5 DPS
This composition offers a good balance, incorporating buffs from various classes and providing massive damage output. When a Feral Druid is tanking, including Warriors in the DPS setup can be beneficial due to their strong sustained damage.
Burst Team
1 Tank + 2 Healers +7 DPS
This aggressive setup prioritizes speed. A high level main tank and damage dealers (ideally 32+) are recommended. Focus on full casters and a couple of Hunters for additional ranged damage.
Crowd Control Team
2 Tanks + 2 Healers + 6 DPS
This team is suitable for groups where most members are between levels 25 and 29. It prioritizes effective crowd control, while the Burst Team focuses on rapid boss elimination.
Speedrun Team Compositions
1 Protection Warrior+ 2 Holy Priests + 7 Hunters
This setup boasts high boss defeat speed. Additionally, clearing trash mobs is efficient due to Explosive Shot from the Hunters.
Important Note: While team composition does hold some value, character levels are generally more crucial for a smooth Blackfathom Deeps run. Ideally, aim for a group where most members are level 30+ while you’re still at level 25.
Blackfathom Deeps Quests
Blackfathom Deeps isn’t just about conquering the raid; it also offers quests that grant valuable rewards. Here’s a breakdown of the key quests you can undertake within this zone:
BFD Bosses
There are 7 bosses that players need to defeat to progress through the raid and obtain Blackfathom Deeps best loot. Here’s a table summarizing the strategies and tips for each BFD boss encounters during the Season of Discovery:
| Boss | Abilities | Strategy |
|---|---|---|
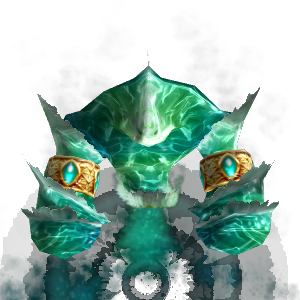 Baron Aquanis | Greater Frostbolt: A powerful frost bolt spell that deals massive frost damage. Bubble Beam: Knocks back anyone hit in front of Baron Aquanis. Depth Charge: Debuff that, upon expiration, deals frost/arcane damage and knocks back nearby players. Torrential Downpour: Area of effect damage over a target, dealing damage every 2 seconds to those standing in it. | 1. Activate three fathom stones to aggro Baron Aquanis. 2. Clear the room of neutral and hostile enemies. 3. Spread out on platforms to mitigate Torrential Downpour damage. 4. Tank builds a threat while other players damage him. 5. Depth Charge applies to a random player; jump into the water to avoid knockback. 6. Baron casts Bubble Beam, turning clockwise; melee DPS and tank move behind him. 7. Ranged DPS and healers avoid Torrential Downpour damage by moving out of its path. |
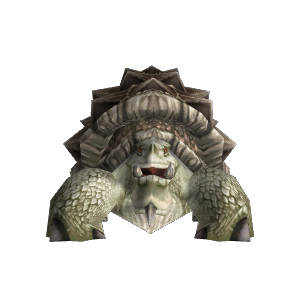 Ghamoo-ra | Aqua Shell: Makes Ghamoo-Ra invulnerable until removed by inflicting 100 instances of damage. Aqua Shell: Deal significant AoE damage to the entire raid. Crunch Armor: Debuff reducing the target’s armor per stack. Triple Chomp: Three quick successive attacks on the current target, dealing devastating damage. | 1. Clear turtles from the island. 2. Tank pulls Ghamoo-ra to the center. 3. Break Ghamoo-ra’s Aqua Shell with 100 hits. 4. Watch for bubbles for mana or avoid them. 5. Off-tank taunts after two Crunch Armor stacks. 6. Brace for considerable damage as Aqua Shell shatters. 7. DPS intensifies post-shatter. 8. Repeat the cycle every minute. |
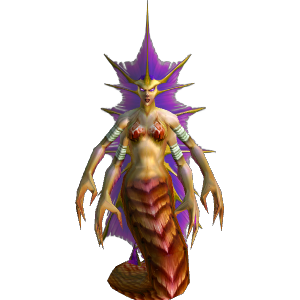 Lady Sarevess | Frost Arrow: Targets a random player, dealing physical damage and casting a slowing debuff. Forked Lightning: Strikes the target with nature chain damage to nearby players. Freezing Arrow: Creates a frost patch, slowing and freezing anyone standing in it. Freezing Arrow: Encases targets in ice if caught in its frost patch for over 10 seconds, affecting both allies and enemies. | 1. The main tank grabs Lady Sarevess; the second tank handles the Blackfathom Elite. 2. Ignore the Elite; it despawns upon Lady Sarevess’s death. 3. Watch out for Freezing Arrow; move away from the frost patch to avoid stunning. 4. Tank faces her away for Forked Lightning; DPS interrupts her casts. 5. Off-tank moves Elite onto the frost patch to stun it temporarily. 6. Spread out to avoid unnecessary damage. 7. The second Elite spawns after a minute; off-tank it and continue burning Lady Sarevess. |
 Gelihast | Curse of Blackfathom: Ramping damage curse, must be decursed. Shadow Crash: Creates a reticle on the ground, throwing a shadowbolt at it. Shadow Strike: Increases shadow damage taken per stack. Fear: Causes a random target to flee in fear, dispellable. March of the Murlocs: Summons an army of Murlocs that swarm the room, must be avoided. Ground Rupture: Summons Blackfathom Tendrils that deal melee damage and cast Mind Flay. | 1. Ensure a decurser for Curse of Blackfathom. 2. The main tank pulls Gelihast to the center; the raid spreads out to avoid Shadow Crash. 3. Tank swap at 2 stacks of Shadow Strike to manage the damage. 4. Healers dispel Fear; DPS focuses on Gelihast. 5. At 10% HP, Gelihast runs to the altar to regain HP; March of the Murlocs begins. 6. Avoid shadow Murlocs during March; dodge Shadow Crash. 7. Repeat upon Gelihast reaching full HP. 8. DPS focuses on Blackfathom Tendrils when they spawn; then return to Gelihast. 9. Continue managing mechanics and DPS until Gelihast is defeated. |
 Lorgus Jett | Corrupted Lightning Shield Totem: Buffs Lorgus with a thorns effect. Corrupted Windfury Totem: Buffs Lorgus with Windfury, allowing multiple attacks. Corrupted Molten Fury Totem: Summons a fiery boulder that tracks players. | 1. Clear Naga and Murloc waves, prioritizing Blackfathom Tide Priestess. 2. Once the third Naga wave is down, engage Lorgus Jett. 3. Dodge totems; kill Corrupted Lightning Shield Totem immediately. 4. Ignore other totems; focus on Lorgus Jett boss. 5. With proper totem management, Lorgus Jett should be a simple fight. |
 Twilight Lord Kelris | Mind Blast: Casts shadow damage on the closest player to Kelris. Shadowy Chains: Casts a shadow damage spell chaining to nearby players. Sleep: Sends two players closest to the boss to the dream realm, removing them temporarily. Shadow Crash: Throws a shadow bolt at a targeted player, creating a pool of damaging shadow magic. Enrage: At 35%, Kelris absorbs power, gaining damage buff and becoming uninterruptible. | Phase 1: 1. Tank engages Kelris, ranged stack at max range, prepared to move for Shadow Crash. 2. Interrupt Mind Blast and Shadowy Chains promptly. 3. Two players get Sleep debuff, enter the dream realm, kill Phantasmal Priestesses, and return. 4. Rotate players for Sleep debuff; avoid using warlocks in the dream realm. 5. Ranged move around to avoid Shadow Crashes, and conserve resources for Phase 2. Phase 2 (35% HP): 1. Kelris becomes uninterruptible; raid spreads out. 2. Melee stack in pairs at max range; watch for Shadowy Chains. 3. Ranged watch for Shadow Crash DoT, and conserve resources. 4. Consider using Shadow Protection and Minor Magic Resistance Potions for extra survivability. |
 Aku’mai | Hateful Bite: Bites the primary target with the highest threat other than the current tank. Corrosion: Stacking debuff dealing damage every 3 seconds. Corrosive Bite: Periodic biting, applying a stack of Corrosion. Corrosive Blast: Targets a player, channels a breath, and applies stacks of Corrosion. Dark Protection: At 50%, reduces damage taken by 99%.Shadow Seep: Stacking debuff reducing max HP and increasing shadow damage taken. Void Fang: Replaces Corrosive Bite, applying a stack of Shadow Seep. Void Blast: Replaces Corrosive Blast, applying stacks of Shadow Seep. Cleansing Pool: At each corner of the room, cleanses Corrosion or Shadow Seep but spawns small elementals. | Phase 1: 1. The main tank engages Aku’mai; raid spreads in a close circle to avoid Corrosive Blast stacks. 2. Tank stacks Corrosion; after 3-4 stacks, move to Cleansing Pool and spawn adds. 3. Raid switches to adds; avoid Corrosive Blast. Unused Cleansing Pools return mana. 4. Repeat 2-3 times until Aku’mai is near 50%; manage adds carefully. Phase 2: 1. Aku’mai casts Dark Protection, transforms into a void hydra, and returns to the tank. 2. Abilities now deal shadow magic damage; the tank gets 3-4 stacks of Shadow Seep. 3. Off-tank taunts and takes 3-4 stacks; focus on the boss and skip cleansing mechanic. 4. If necessary, the main tank can cleanse and pick up adds until the raid defeats Aku’mai. |
Blackfathom Deeps Raid Loot and Drops
Blackfathom Deeps promises fantastic loot for explorers in the Season of Discovery. It can offer BiS gear which is still useful throughout Phase 3, making BFD level-up raid a great farming spot for many character classes.
Blackfathom Deeps Loot Table
Even though raids are the main way to get BiS gear, it can be long and tedious. Therefore, you can trust it to our professional players.
Tier Sets
In Season of Discovery, Blackfathom Deeps has 4 Tier Sets available in cloth, melee leather, ranged leather, and mail. There are 3 items in each set, and for the 2 set and 3 set pieces you will receive bonuses.
| Set Name | Set Bonus | Slot | Item |
|---|---|---|---|
| Twilight Invoker’s Vestments | 2 pieces: The magical spells and effects that deal damage and heal become stronger by up to 9%. 3 pieces: Increases your chance to hit with spells and with melee and ranged attacks by 1%. | Head | Twilight Invoker’s Shawl |
| Chest | Twilight Invoker’s Robes | ||
| Feet | Twilight Invoker’s Shoes | ||
| Blackfathom Slayer’s Leather | 2 pieces: +12 Attack Power. 3 pieces: Increases your chance to hit with spells and with melee and ranged attacks by 1%. | Head | Twilight Slayer’s Cowl |
| Chest | Twilight Slayer’s Tunic | ||
| Feet | Twilight Slayer’s Footpads | ||
| Blackfathom Elementalist’s Hide | 2 pieces: Adds 12% damage and healing to all types of magical spells and effects. 3 pieces: Increases your chance to hit with spells and with melee and ranged attacks by 1%. | Head | Twilight Elementalist’s Cowl |
| Chest | Twilight Elementalist’s Robe | ||
| Feet | Twilight Elementalist’s Footpads | ||
| Blackfathom Avenger’s Mail | 2 pieces: +12 Attack Power. 3 pieces: Increases your chance to hit with spells and with melee and ranged attacks by 1%. | Head | Twilight Avenger’s Helm |
| Chest | Twilight Avenger’s Chain | ||
| Feet | Twilight Avenger’s Boots |
World Buff
Join in the Blackfathom Villainy or Blackfathom Villainy quest and get the Boon of Blackfathom world buff as a result. This Blackfathom Deeps world buff grants 20 attack power, 2% critical chance for spells, melee, and ranged, and increases movement speed by 20% for 120 minutes.
4.9Our Blackfathom Deeps guide gives you all the necessary knowledge for you to successfully complete this challenging raid. Through careful application of these strategies with your adventurer skills, you will be able to overcome every challenge and come out on top in the bowels of the Azeroth’s underworld! Best of luck, and may your loot be abundant!