Throne of Thunder is one of the toughest raids in Mists of Pandaria Classic. Yet. It’s one of the best raids you can find, with complicated mechanics and a vast map. In this overview, you will learn about the raid release date, all the available rewards, as well as raid location. Also, we describe the strategy for each boss.
Mists of Pandaria Classic Throne of Thunder Key Takeaways:
- The Throne of Thunder raid will become available on December 11, 2025.
- The raid is located on the Isle of Thunder and is accessible via portals in Shado-Pan Garrison.
- In the Throne of Thunder, there are 12 bosses and 1 secret boss for Heroic difficulty.
 4.9
4.9MoP Classic Throne of Thunder Release Date
The Throne of Thunder raid itself, with 12 bosses, will open globally on December 11 at 3:00 p.m. PST. Completing the raid in heroic mode will allow you to fight the secret 13th boss, Ra-den.
The raid unlock follows the Thunder King update, which will launch on December 9 at 3:00 p.m. PST (00:00 UTC+1). It introduces two new zones (Thunder Isle and Isle of Giants), a new item enhancement system, and world bosses.
MoP Classic Throne of Thunder Rewards
Among the many reasons players remain engaged with Mists of Pandaria Classic, the rewards that come with the Throne of Thunder must surely be considered. This raid provides powerful pieces of Tier 15 sets for every class, as well as empowered Thunderforged gear pieces:
| Difficulty | Item Level | Thunderforged |
|---|---|---|
| Normal | 522 | 528 |
| Heroic | 535 | 542 |
Throne of Thunder also offers exclusive pet models such as the Spawn of Horridon or the Clutch of Ji-Kun. And if you spend enough time on the Heroic mode, you will also be able to attain the Reins of the Armored Skyscreamer through the meta-achievement, Glory of the Thundering Raider.
MoP Classic Throne of Thunder Tier Sets

During the Throne of Thunder raid in Mists of Pandaria Classic, you will be able to gather Tier 15 Set items or tier set tokens (Crackling Conqueror, Protector, and/or Vanquisher), along with matching chests, gloves, and pants. These classes share Tier Token for Throne of Thunder in Mists of Pandaria Classic:
- Vanquisher: Death Knight, Druid, Mage, and Rogue;
- Conquerer: Paladin, Priest, and Warlock;
- Protector: Hunter, Monk, Shaman, and Warrior.
And here’s a full list of Throne of Thunder gear for every class and spec in MoP Classic:
| Class | Set Name |
|---|---|
| Death Knight | Plate of the All-Consuming Maw (Blood) Battleplate of the All-Consuming Maw (Frost and Unholy) |
| Druid | Regalia of the Haunted Forest (Balance) Battlegear of the Haunted Forest (Feral) Armor of the Haunted Forest (Guardian) Vestments of the Haunted Forest (Restoration) |
| Hunter | Battlegear of the Saurok Stalker |
| Mage | Regalia of the Chromatic Hydra |
| Monk | Fire-Charm Armor (Brewmaster) Fire-Charm Vestments (Mistweaver) Fire-Charm Battlegear (Windwalker) |
| Paladin | Vestments of the Lightning Emperor (Holy) Plate of the Lightning Emperor (Protection) Battlegear of the Lightning Emperor (Retribution) |
| Priest | Vestments of the Exorcist (Discipline and Holy) Regalia of the Exorcist (Shadow) |
| Rogue | Nine-Tail Battlegear |
| Shaman | Regalia of the Witch Doctor (Elemental) Battlegear of the Witch Doctor (Enhancement) Vestments of the Witch Doctor (Restoration) |
| Warlock | Regalia of the Thousandfold Hells |
| Warrior | Battleplate of the Last Mogu (Arms and Fury) Plate of the Last Mogu (Protection) |
MoP Classic Throne of Thunder Mounts
| Mount | How to Get |
|---|---|
| Spawn of Horridon | Low drop chance from Horridon; Bonus rolls won’t grant this mount |
| Clutch of Ji‑Kun | Dropped by Ji‑Kun; Black Market Auction House |
| Reins of the Armored Skyscreamer | Glory of the Thundering Raider meta‑achievement |
MoP Classic Throne of Thunder Pets
| Pet | How to Get |
|---|---|
| Living Sandling | Low drop chance from Sand Elementals |
| Ji-Kun Hatchling | Dropped by Ji-Kun |
| Son of Animus | Low drop chance from Dark Animus |
MoP Classic Throne of Thunder Achievements
If you’re an achievement person, there’s plenty of variety in the Throne of Thunder achievements in Mists of Pandaria Classic. Each wing has its own set of offbeat tasks, some of them being harmless, some of them requiring good coordination. Completing them will give you the metaachievement Glory of the Thundering Raider as well as the Armored Skyscreamer mount.
- Last Stand of the Zandalari: Lightning Overload, Cretaceous Collector, Cage Match.
- Forgotten Depths: One-Up, Head Case, Soft Hands.
- Halls of Flesh‑Shaping: You Said Crossing the Streams Was Bad, Genetically Unmodified Organism, Ritualist Who?.
- Pinnacle of Storms: Can’t Touch This, From Dusk ’til Dawn, A Complete Circuit, Throne of Thunder Guild Run.
- Heroic achievements: Defeat each boss on Heroic, plus Ahead of the Curve and Cutting Edge for Lei Shen, and Heroic-specific feats for Ra‑den.
All these achievements bring you closer to the ultimate meta-achievement — Glory of the Pandaria Raider, which requires great patience and skill to get. You need to be strong enough to complete dozens of achievements in Pandaria raids. Also, you can ask our team to deal with the Glory of the Pandaria Raider for you to do it much faster.
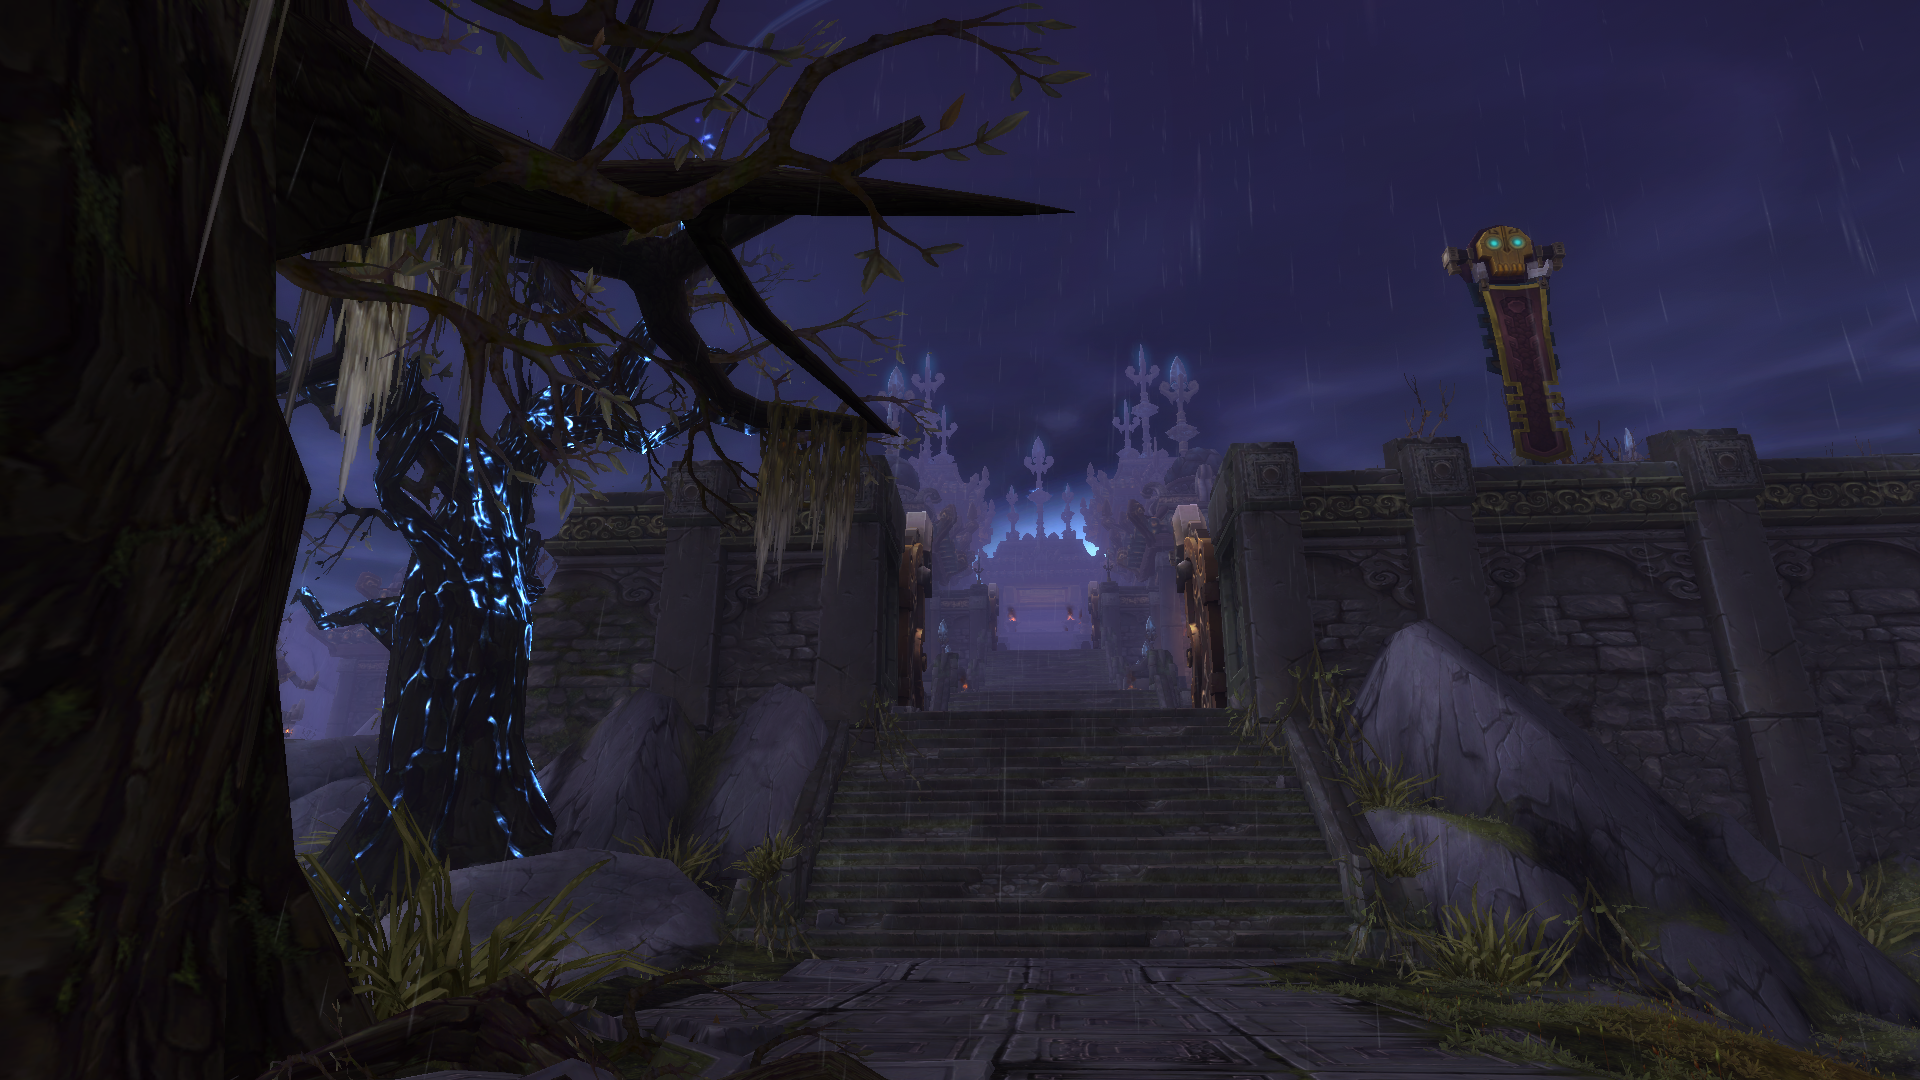
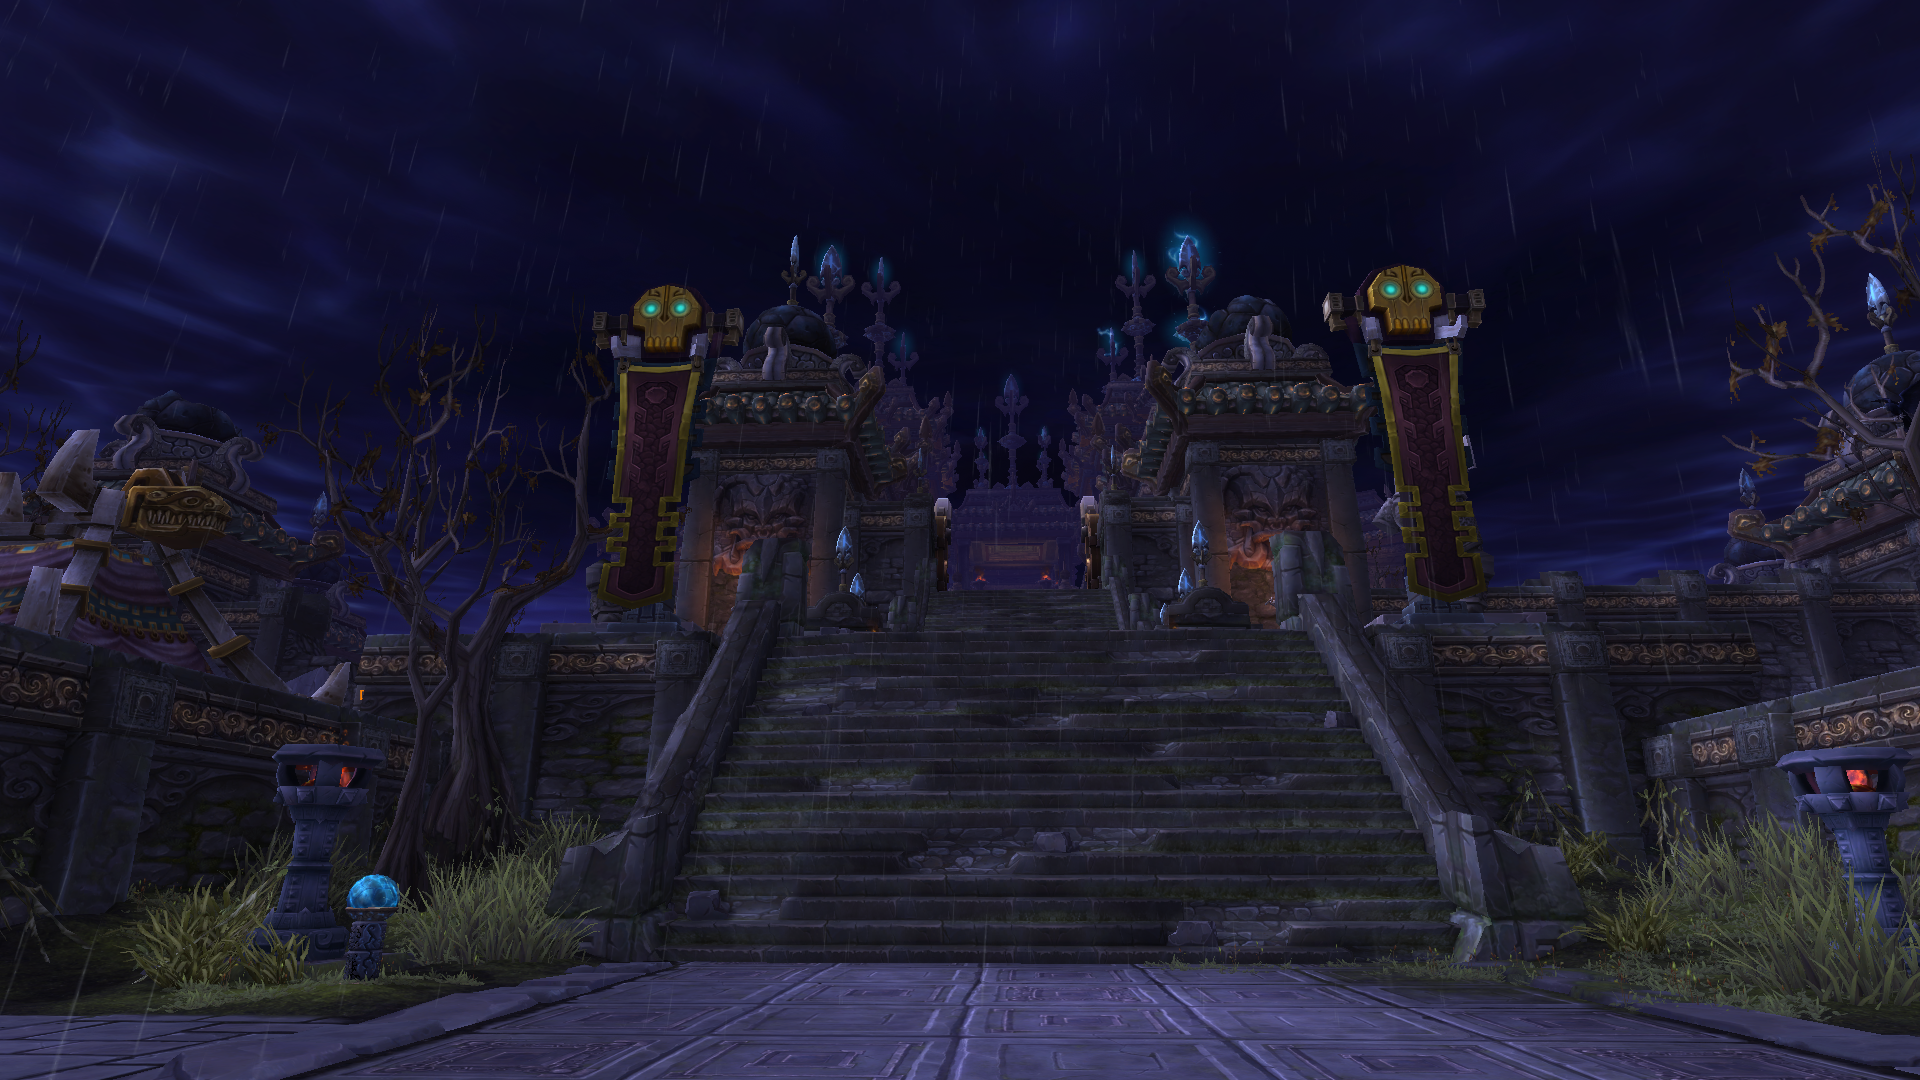
MoP Classic Throne of Thunder Location
Alliance Portal
Horde Portal
Throne of Thunder in Mists of Pandaria Classic is situated on the Isle of Thunder. You can find portals that will take you there in the faction camps near the Shadow Pan’s garrison in Tonglong Steps. Throne of Thunder portal coordinates:
- Alliance: /way 49.7, 68.7;
- Horde: /way 50.6, 73.4.
After that, you will follow the central path, proceed through Diremur, turn left, and move further along until you come near the Shadow Pan camp through Bleak Hollow’s sewer, where the grate will take you through the entrance /way 63.7, 32.2.
MoP Classic Throne of Thunder Map


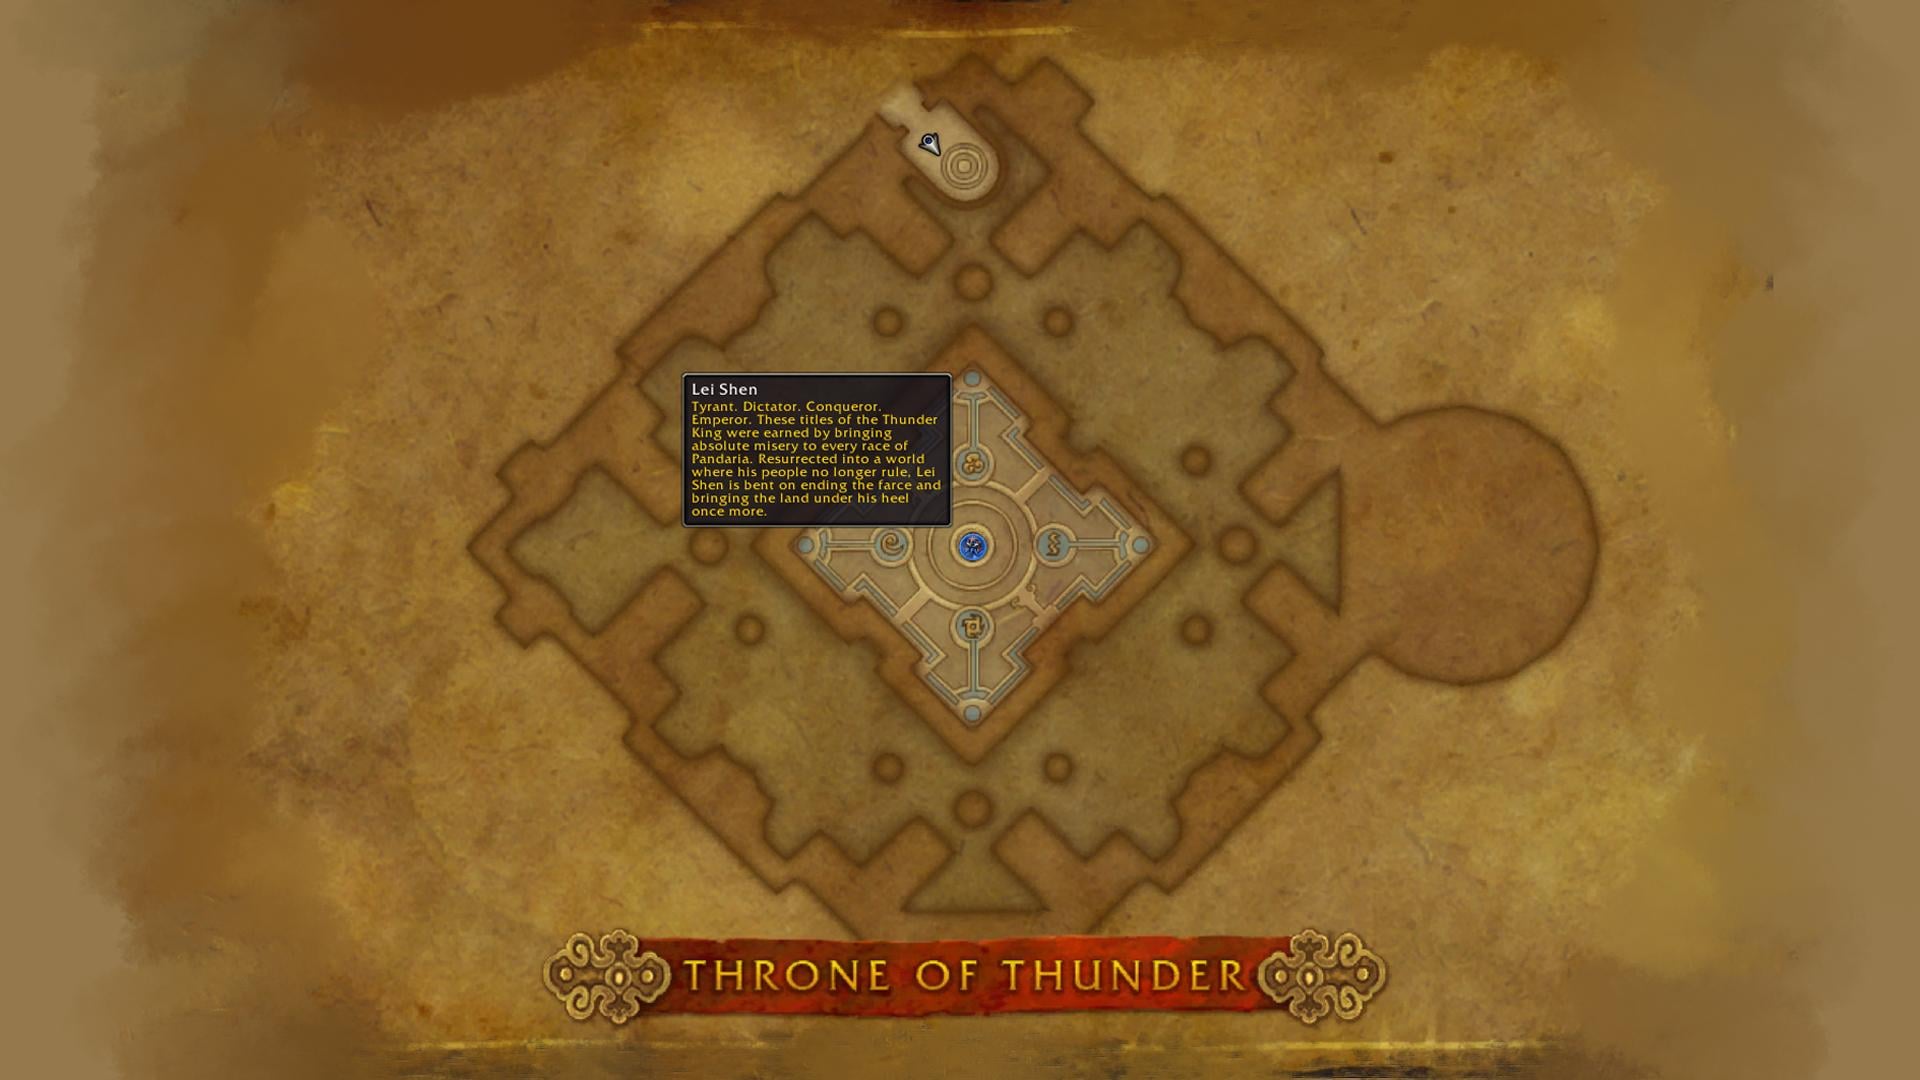
Mists of Pandaria Classic Throne of Thunder map assists you in navigating one of the most complex raids within Mists of Pandaria. The raid is divided into different wings and floors, with each wing having its own routes, as well as boss fight areas.
When on the the Isle of Thunder, you can find both Horde and Alliance base, as well as faction flight masters:
- Horde: /way 32.0 35.0;
- Alliance: /
way 65.0 75.0.
| Wing / Floor | Description & Bosses |
|---|---|
| Overgrown Statuary | The starting area; Jin’rokh the Breaker |
| Royal Amphitheater | A large combat arena; Horridon and the Council of Elders |
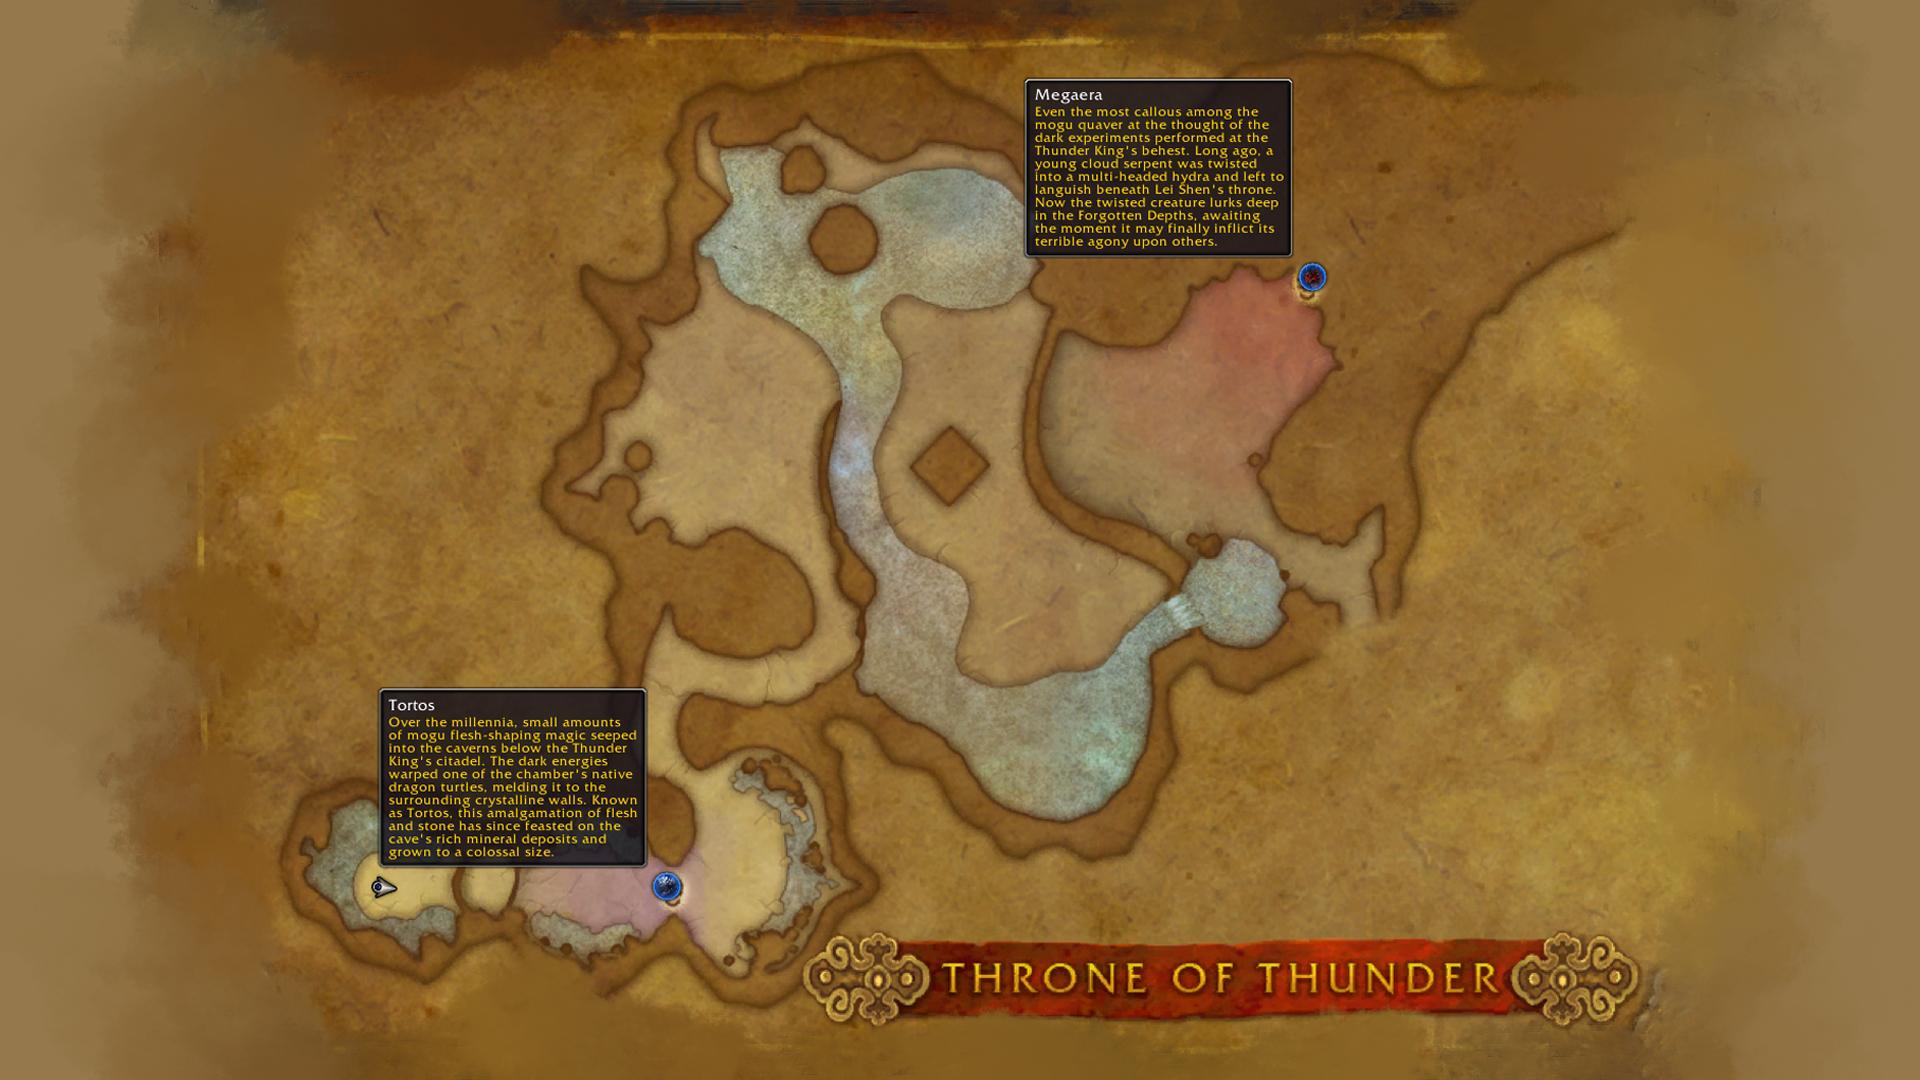
| Forgotten Depths | A series of underground caverns; Tortos, Megaera, and Ji-Kun |
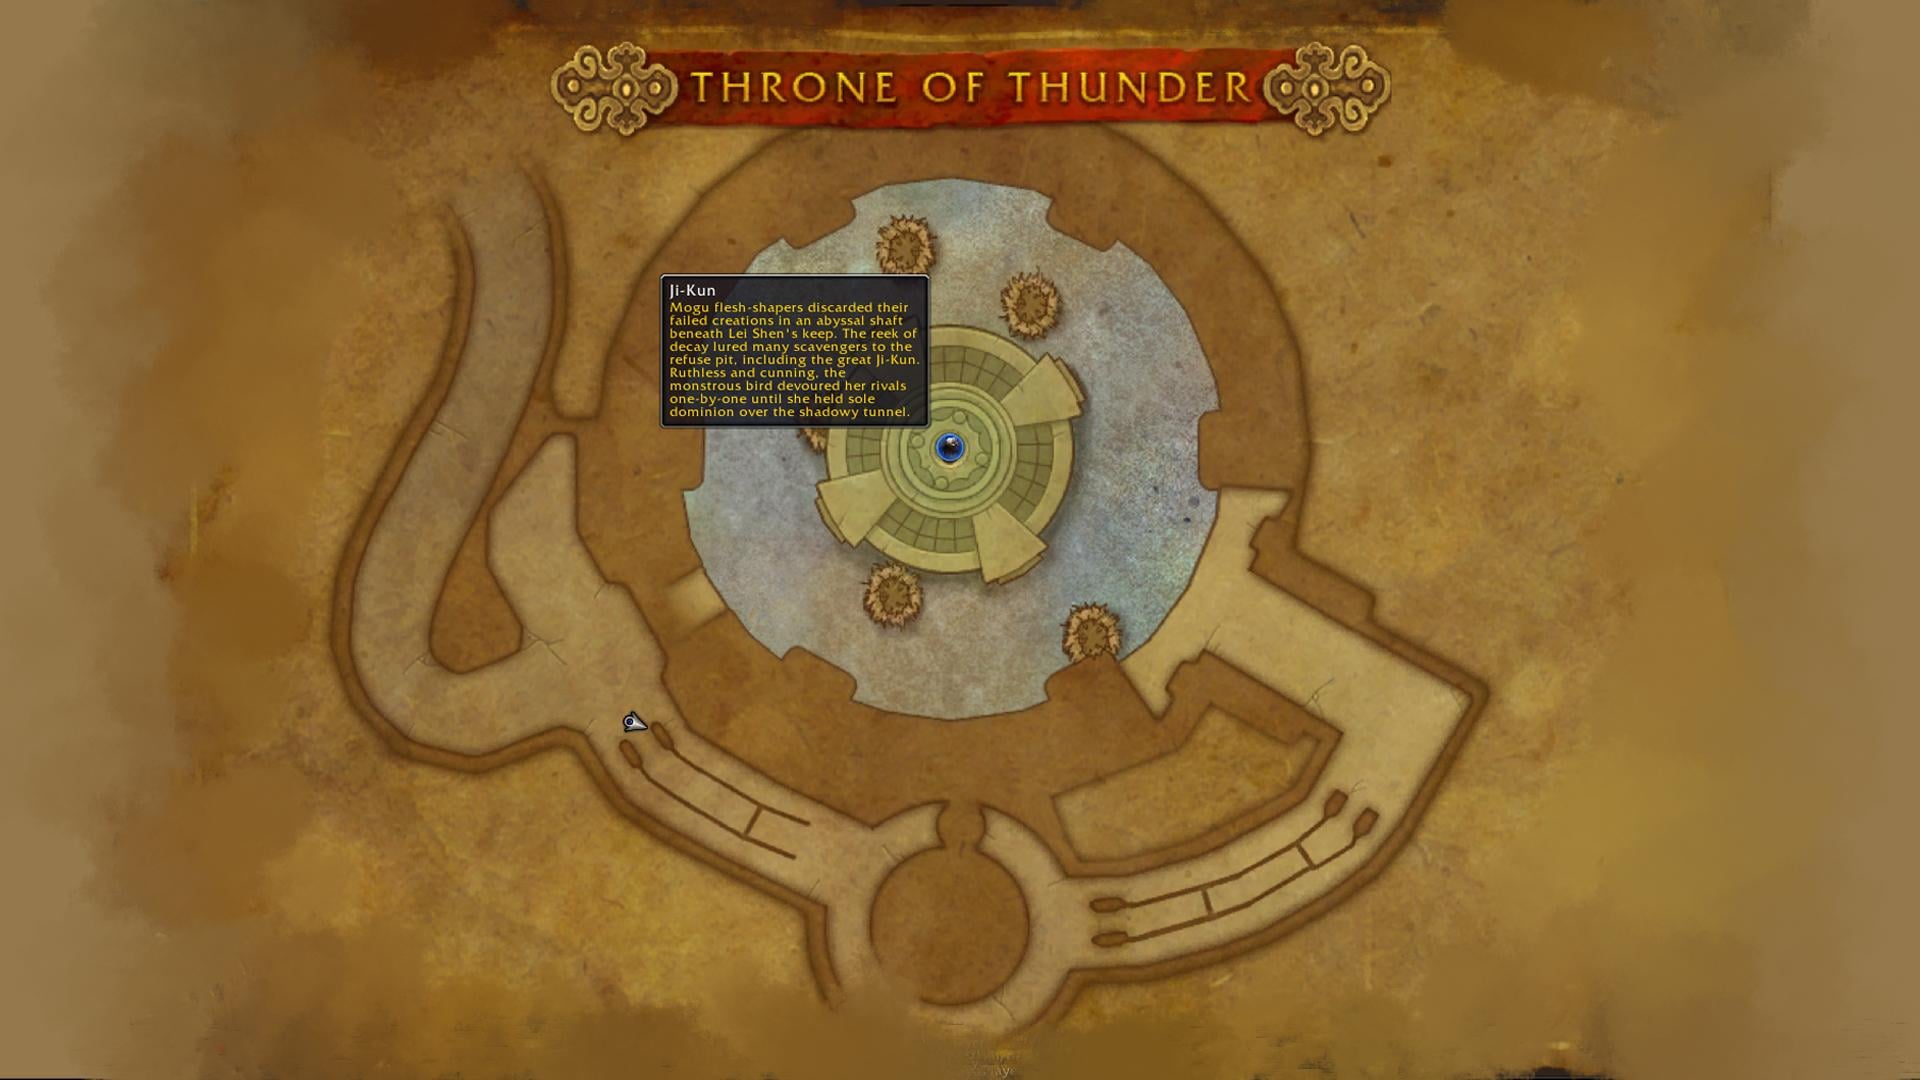
| Roost of Ji-Kun | A platform leading into the Ji-Kun encounter |
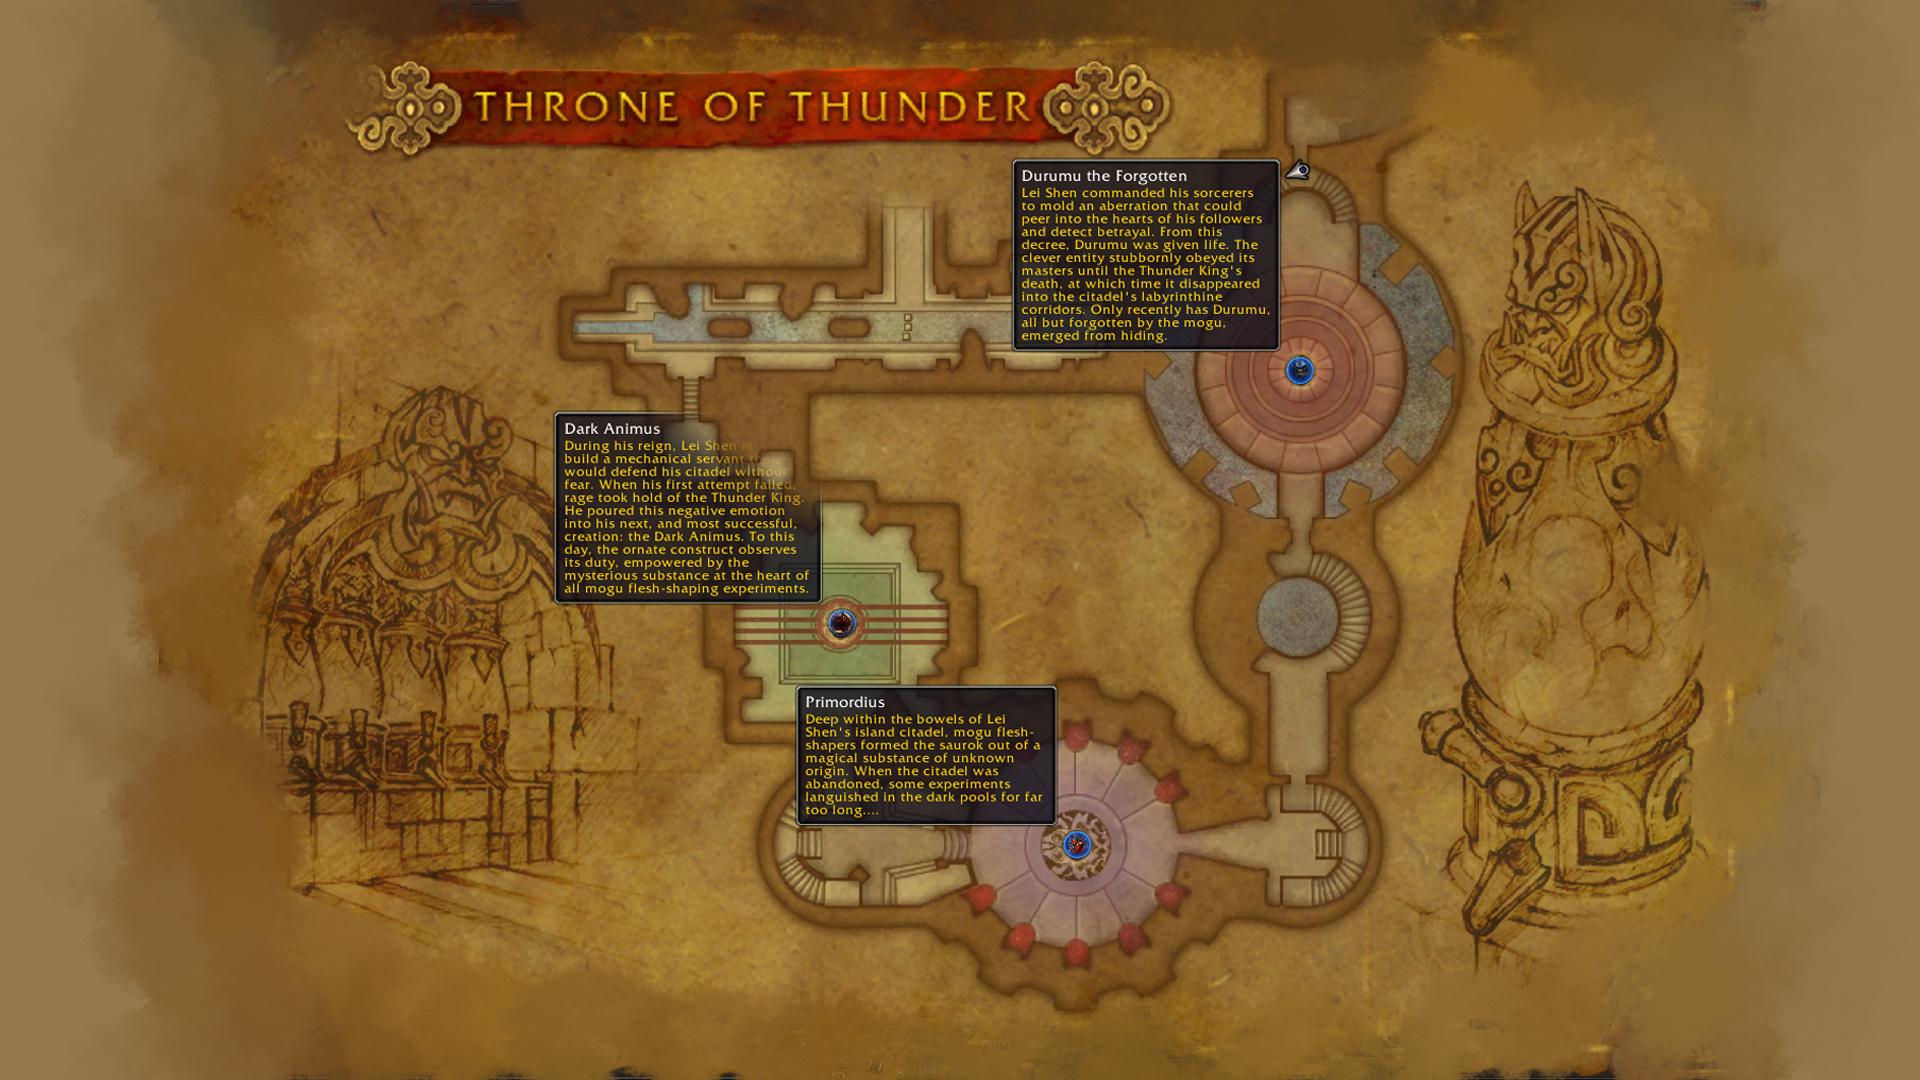
| Halls of Flesh-Shaping | The Mogu laboratories; Durumu the Forgotten, Primordius, and Dark Animus |
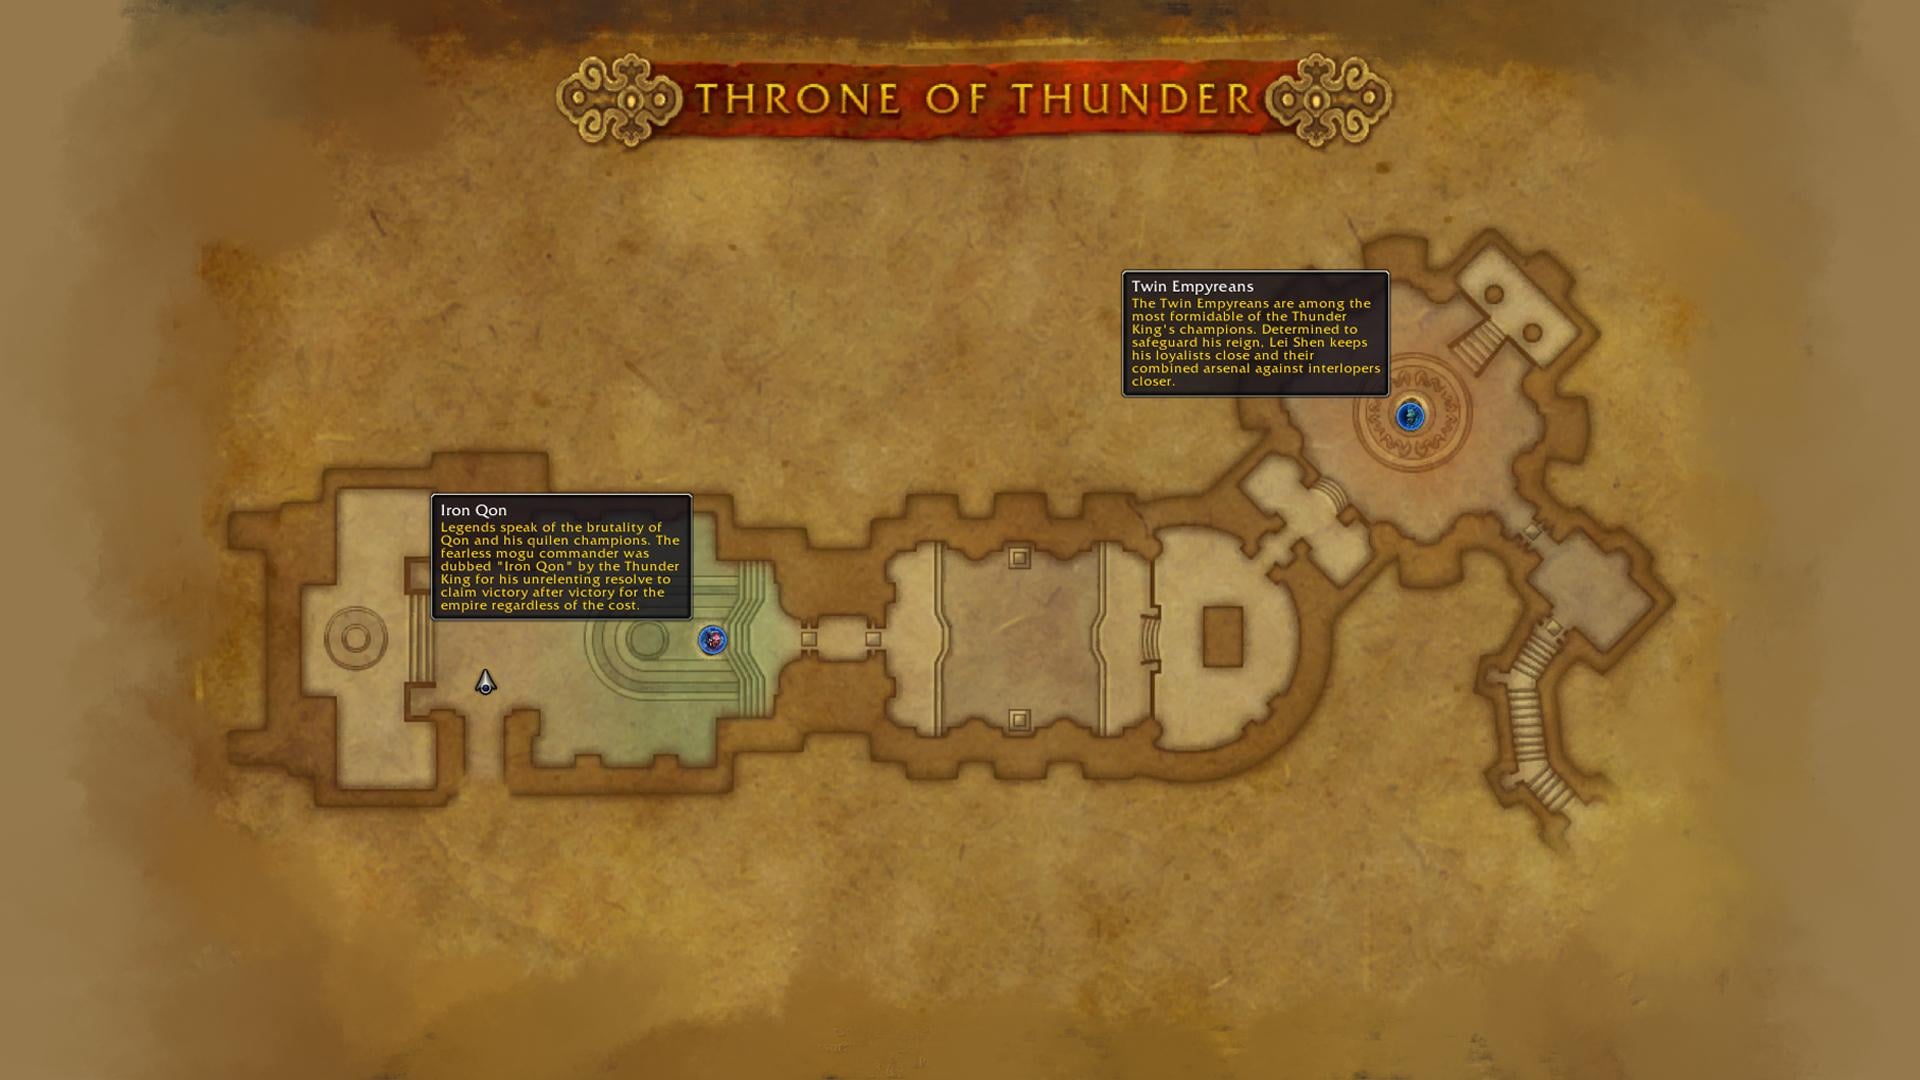
| Hall of Kings | The ceremonial hall; Iron Qon |
| Pinnacle of Storms | The top tower of the raid; Twin Consorts and Lei Shen |
| Hidden Cell | A secret chamber accessible only in Heroic mode; Ra-den |
MoP Classic Throne of Thunder Reputation
Mists of Pandaria Classic Shado-Pan Assault is a new faction on the Isle of Thunder. The primary way to farm Shado-Pan Assault reputation beyond Friendly is doing raid runs and killing trash. Farming Shado-Pan Assault reputation is worth for the rewards the faction can provide:
- Level 522 gear, e.g., Soothing Talisman of the Shado-Pan Assault or Vicious Talisman of the Shado-Pan Assault:
- Frinedly: Necks, Cloaks, Chests, Hands, Legs, Rings, Trinkets, Waists, Wrists;
- Exalted: Shoulders, Tabard.
- Faction Tabard — Shado-Pan Assault Tabard.
MoP Classic Throne of Thunder Bosses
Each MoP Classic’s Throne of Thunder boss brings something fresh in terms of their abilities. They have lots of mechanics that you need to learn before entering the raid. Below, you can find the entire list of raid bosses in Throne of Thunder:
- Jin’rokh the Breaker;
- Horridon;
- Council of Elders (Kazra’jin);
- Tortos;
- Megaera;
- Ji-Kun;
- Durumu the Forgotten;
- Primordius;
- Dark Animus;
- Iron Qon;
- Twin Consorts (Lu’lin);
- Lei Shen — The Thunder King;
- Ra-den.
✏️ The boss progression in Throne of Thunder is linear with no skips or alternative routes.
Jin’rokh the Breaker
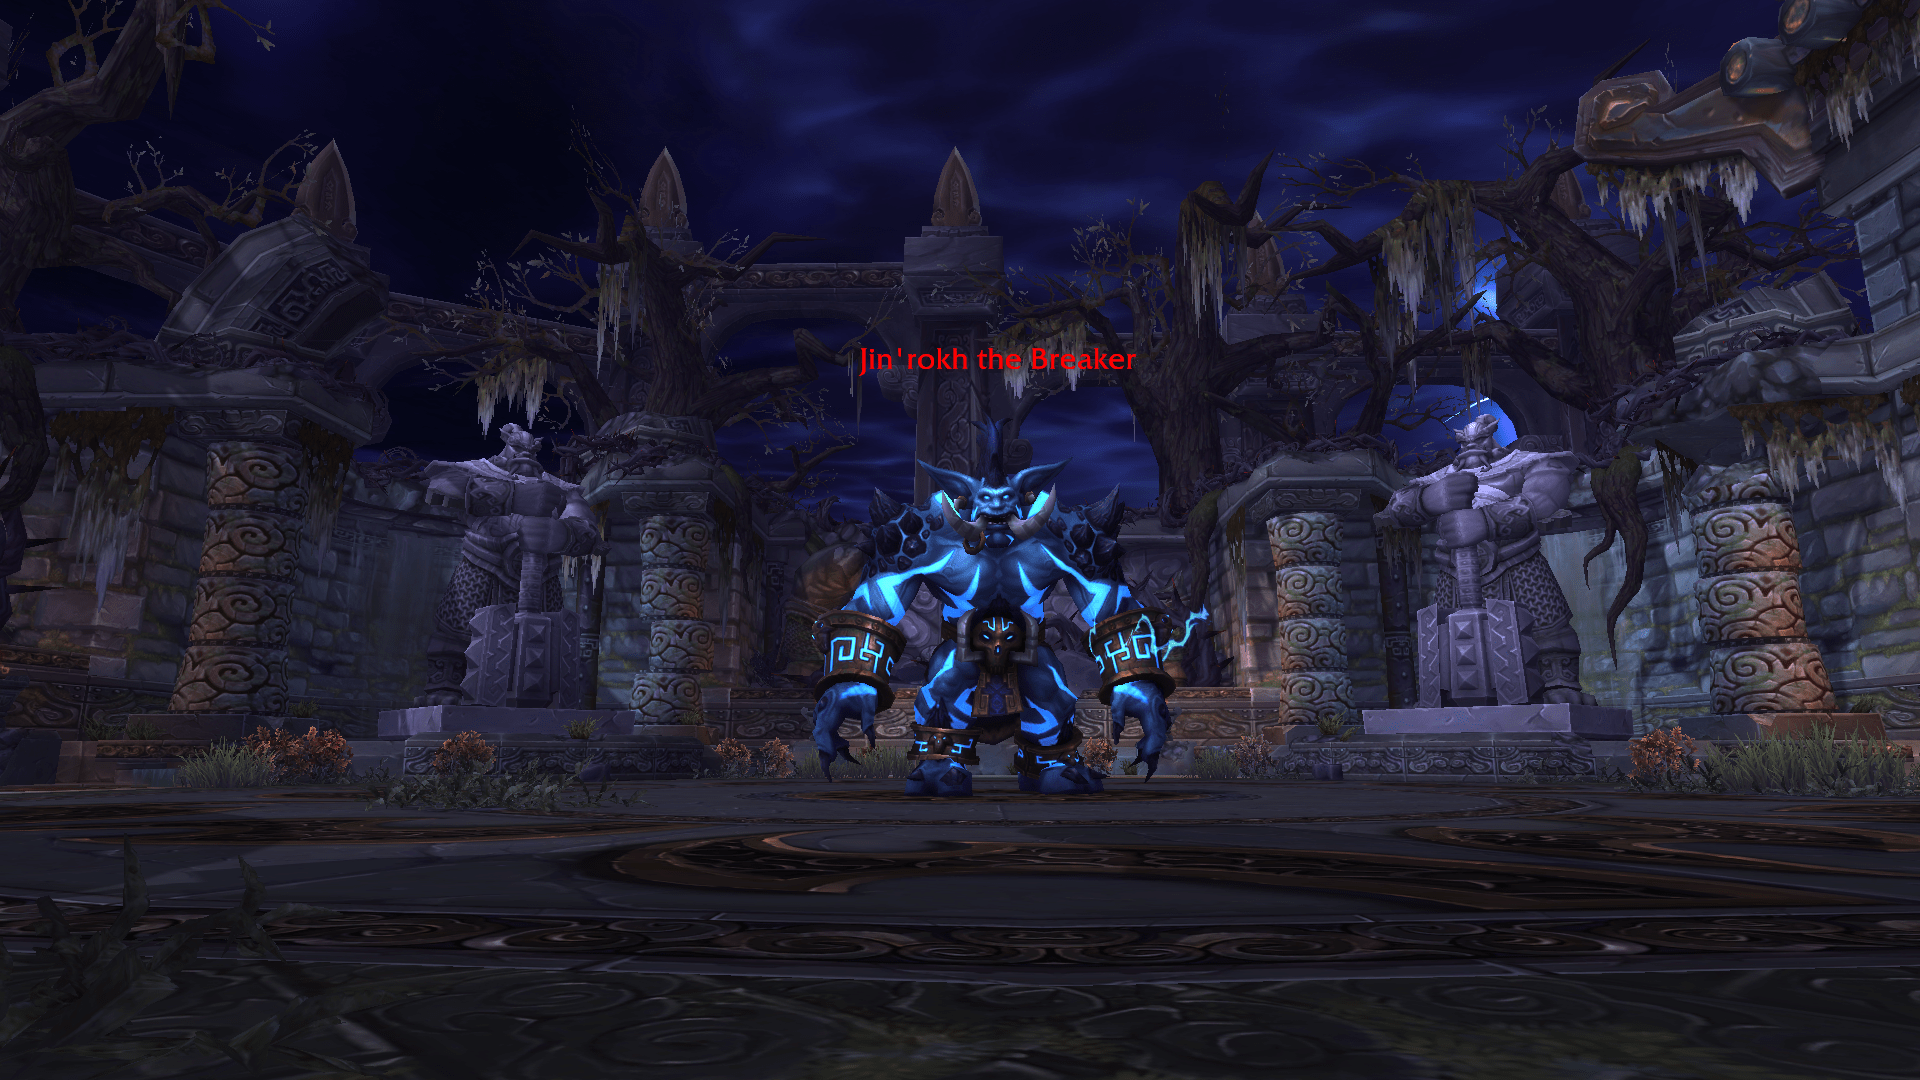
Jin’rokh the Breaker is the first boss in the Throne of Thunder raid in Mists of Pandaria Classic. Jin’rokh the Breaker Strategy in MoP Classic:
- Position the boss at the room’s edge to control Conductive Water spawns.
- Move the raid into the pool for the damage/healing boost, beware rising Nature damage.
- Tanks: swap on high Static Wound stacks and adjust after Thundering Throw.
- If Focused Lightning is on you, run the orb away and detonate it outside the pool.
- When Lightning Storm begins, everyone leaves the water, stacks together, and uses defensives.
- After the storm ends, reset positions and repeat the cycle.
Jin’rokh the Breaker Rewards
| Item | Type | Slot |
|---|---|---|
| Trinket | Trinket | |
| Ring | Finger | |
| Ring | Finger | |
| Ring | Finger | |
| Cloak | Back | |
| Cloth Armor | Chest | |
| Cloth Armor | Hands | |
| Cloth Armor | Shoulder | |
| Cloth Armor | Legs | |
| Leather Armor | Head | |
| Leather Armor | Wrist | |
| Mail Armor | Shoulder | |
| Mail Armor | Legs | |
| Mail Armor | Feet | |
| Plate Armor | Chest | |
| Plate Armor | Waist | |
| Plate Armor | Wrist | |
| Plate Armor | Chest | |
| One-Handed Sword | One-Hand | |
| One-Handed Axe | One-Hand |
Horridon
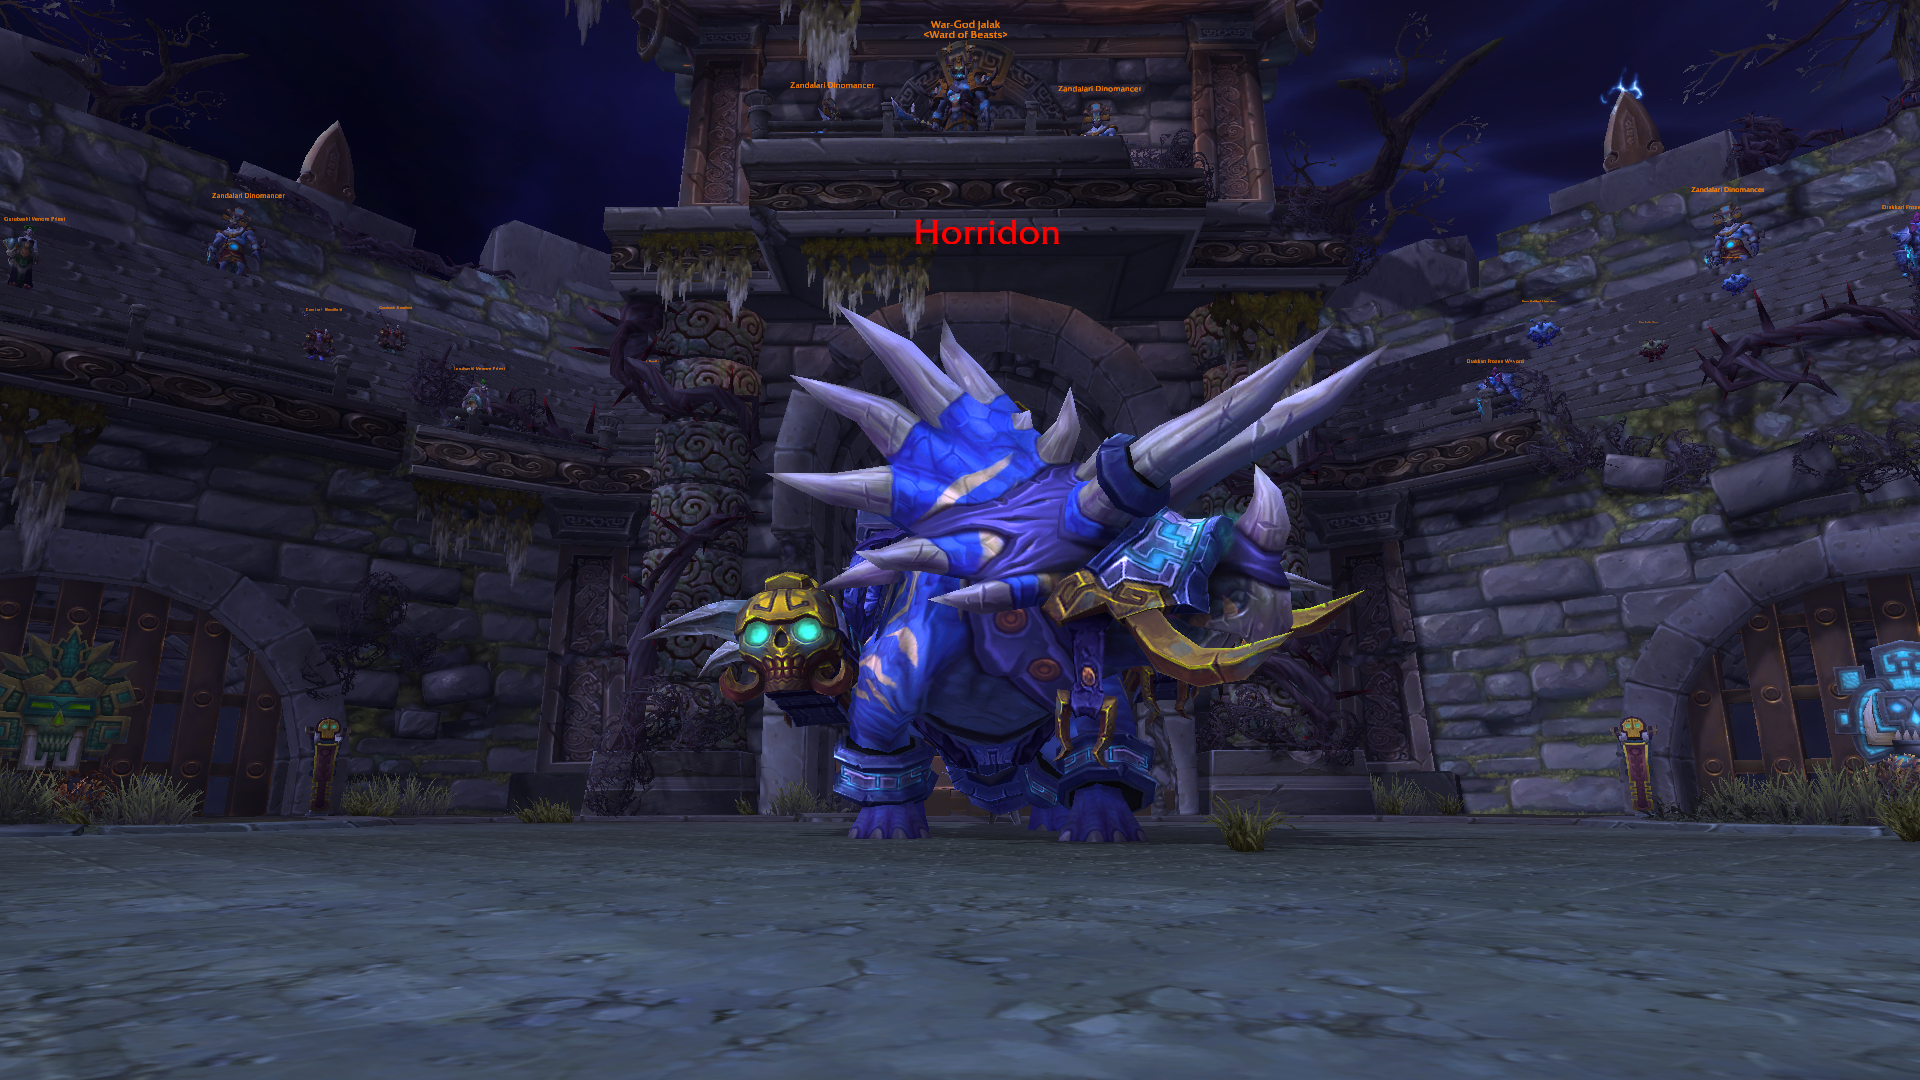
Horridon offers an ‘add control’ fight. Different mobs are spawning through every door, so keep an eye on the surroundings. Here’s a Horridon Strategy for MoP Classic:
- Tanks: swap on Triple Puncture stacks.
- Never stand in front of or behind the boss (avoid Double Swipe and Charge).
- Clear mobs fast:
- Farakki: avoid Stone Gaze, move out of Sand Trap.
- Gurubashi: interrupt Venom Bolt Volley, spread from poison.
- Others: kill casters/totems, keep space clean.
- On Dire Call, let the fixated player kite the Direhorn Spirit alone.
Horridon Rewards
| Item | Type | Slot |
|---|---|---|
| Trinket | Trinket | |
| Trinket | Trinket | |
| Ring | Finger | |
| Amulet | Neck | |
| Amulet | Neck | |
| Cloak | Back | |
| Cloak | Back | |
| Cloth Armor | Wrist | |
| Cloth Armor | Head | |
| Leather Armor | Shoulder | |
| Leather Armor | Legs | |
| Leather Armor | Wrist | |
| Mail Armor | Legs | |
| Mail Armor | Chest | |
| Plate Armor | Wrist | |
| Plate Armor | Legs | |
| Plate Armor | Head | |
| Plate Armor | Wrist | |
| Staff | Two-Hand | |
| Staff | Two-Hand | |
| Wand | Ranged | |
| Mount | – |
Council of Elders
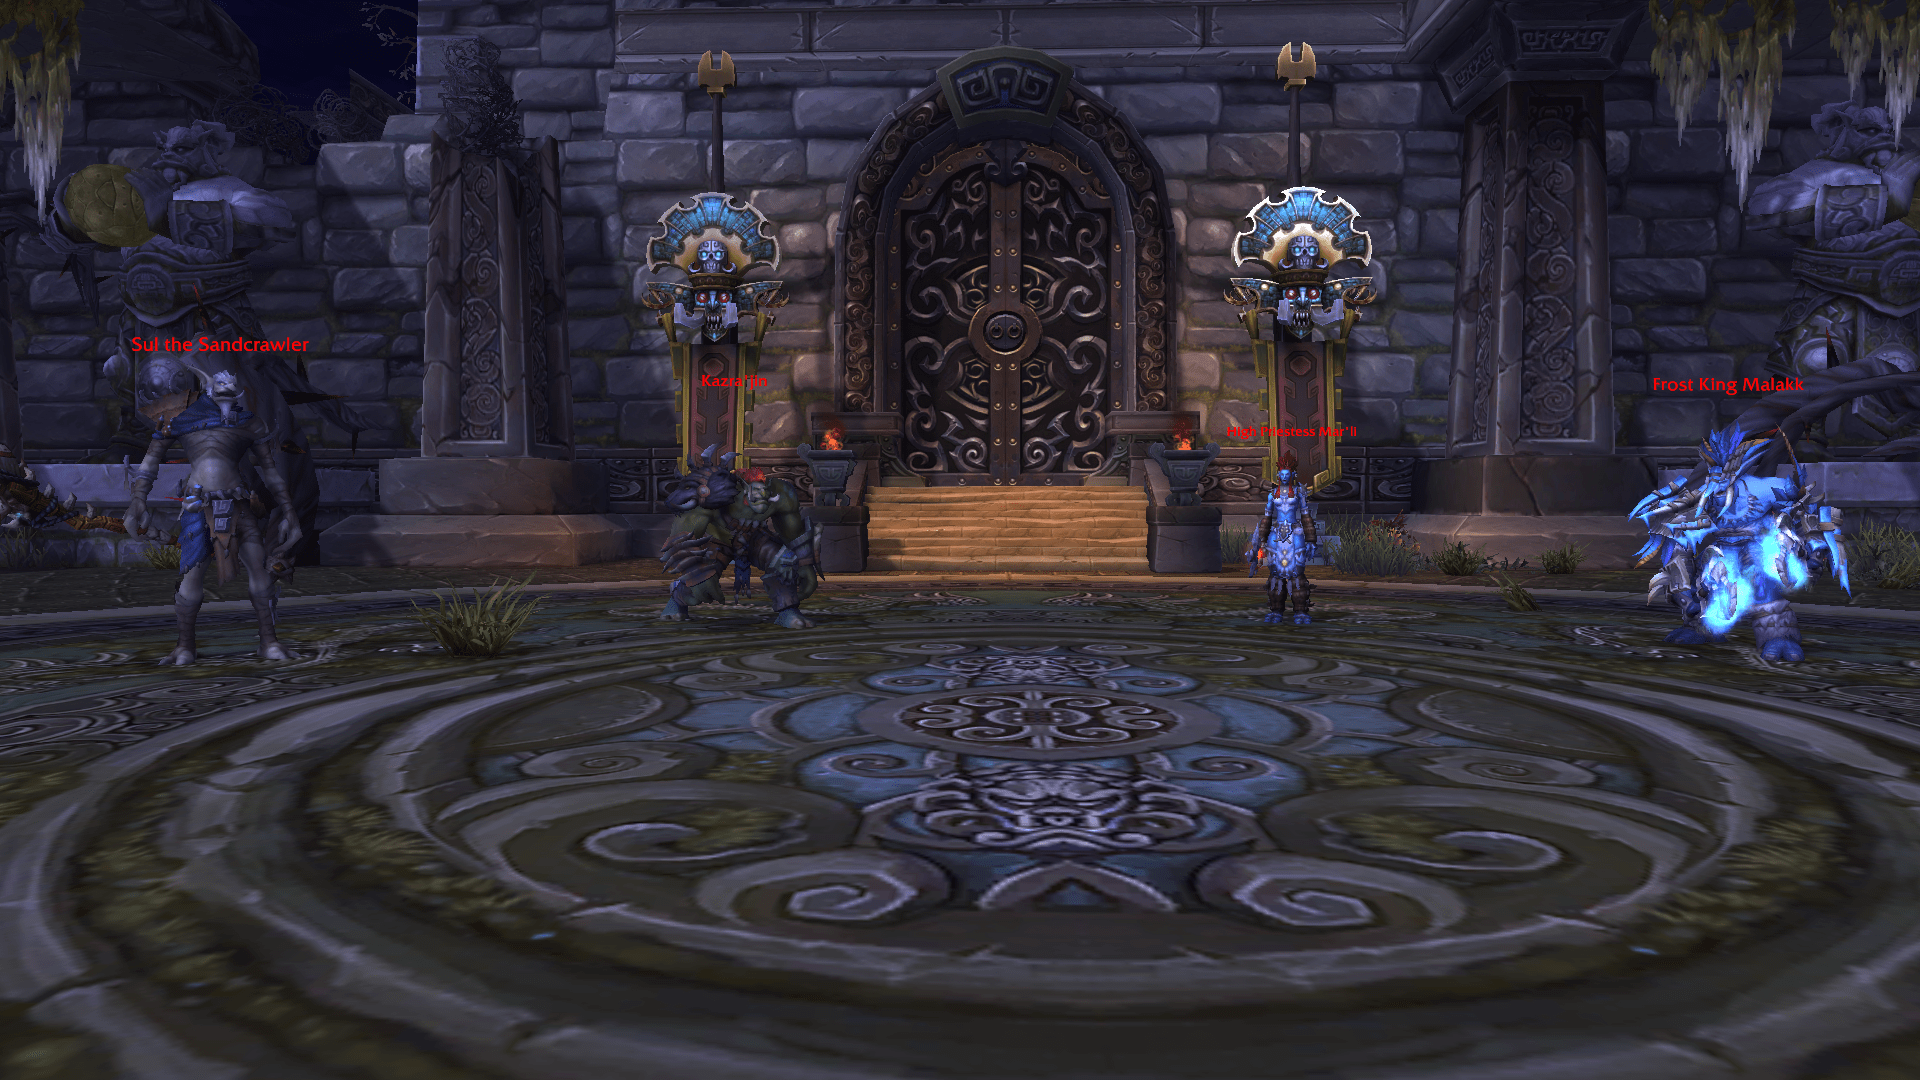
The Council is a four-boss encounter with the Spirit of Gara’jal, periodically buffing one of the elder bosses. Council of Elders Strategy in MoP Classic goes like this:
- Tanks: pick up Malakk and Sul, swapping on Frigid Assault.
- Kill priority: Empowered elder → adds → everything else.
- Malakk: stack to split Frostbite, avoid freezes.
- Kazra’jin: reduce DPS during Overload to avoid reflect deaths.
- Sul: stay out of Quicksand, kill Living Sands quickly.
- Mar’li: focus Shadowed Loa Spirit before it reaches a player.
- Interrupt Sand Bolt and Wrath of the Loa at every opportunity.
- Burst empowered targets fast to stop Dark Power buildup.
Council of Elders Rewards
| Item | Type | Slot |
|---|---|---|
| Trinket | Trinket | |
| Trinket | Trinket | |
| Trinket | Trinket | |
| Amulet | Neck | |
| Cloth Armor | Feet | |
| Cloth Armor | Chest | |
| Leather Armor | Chest | |
| Mail Armor | Head | |
| Mail Armor | Wrist | |
| Plate Armor | Chest | |
| One-Handed Axe | One-Hand | |
| Fist Weapon | One-Hand | |
| Two-Handed Sword | Two-Hand | |
| Armor Token | – | |
| Armor Token | – | |
| Armor Token | – |
Tortos
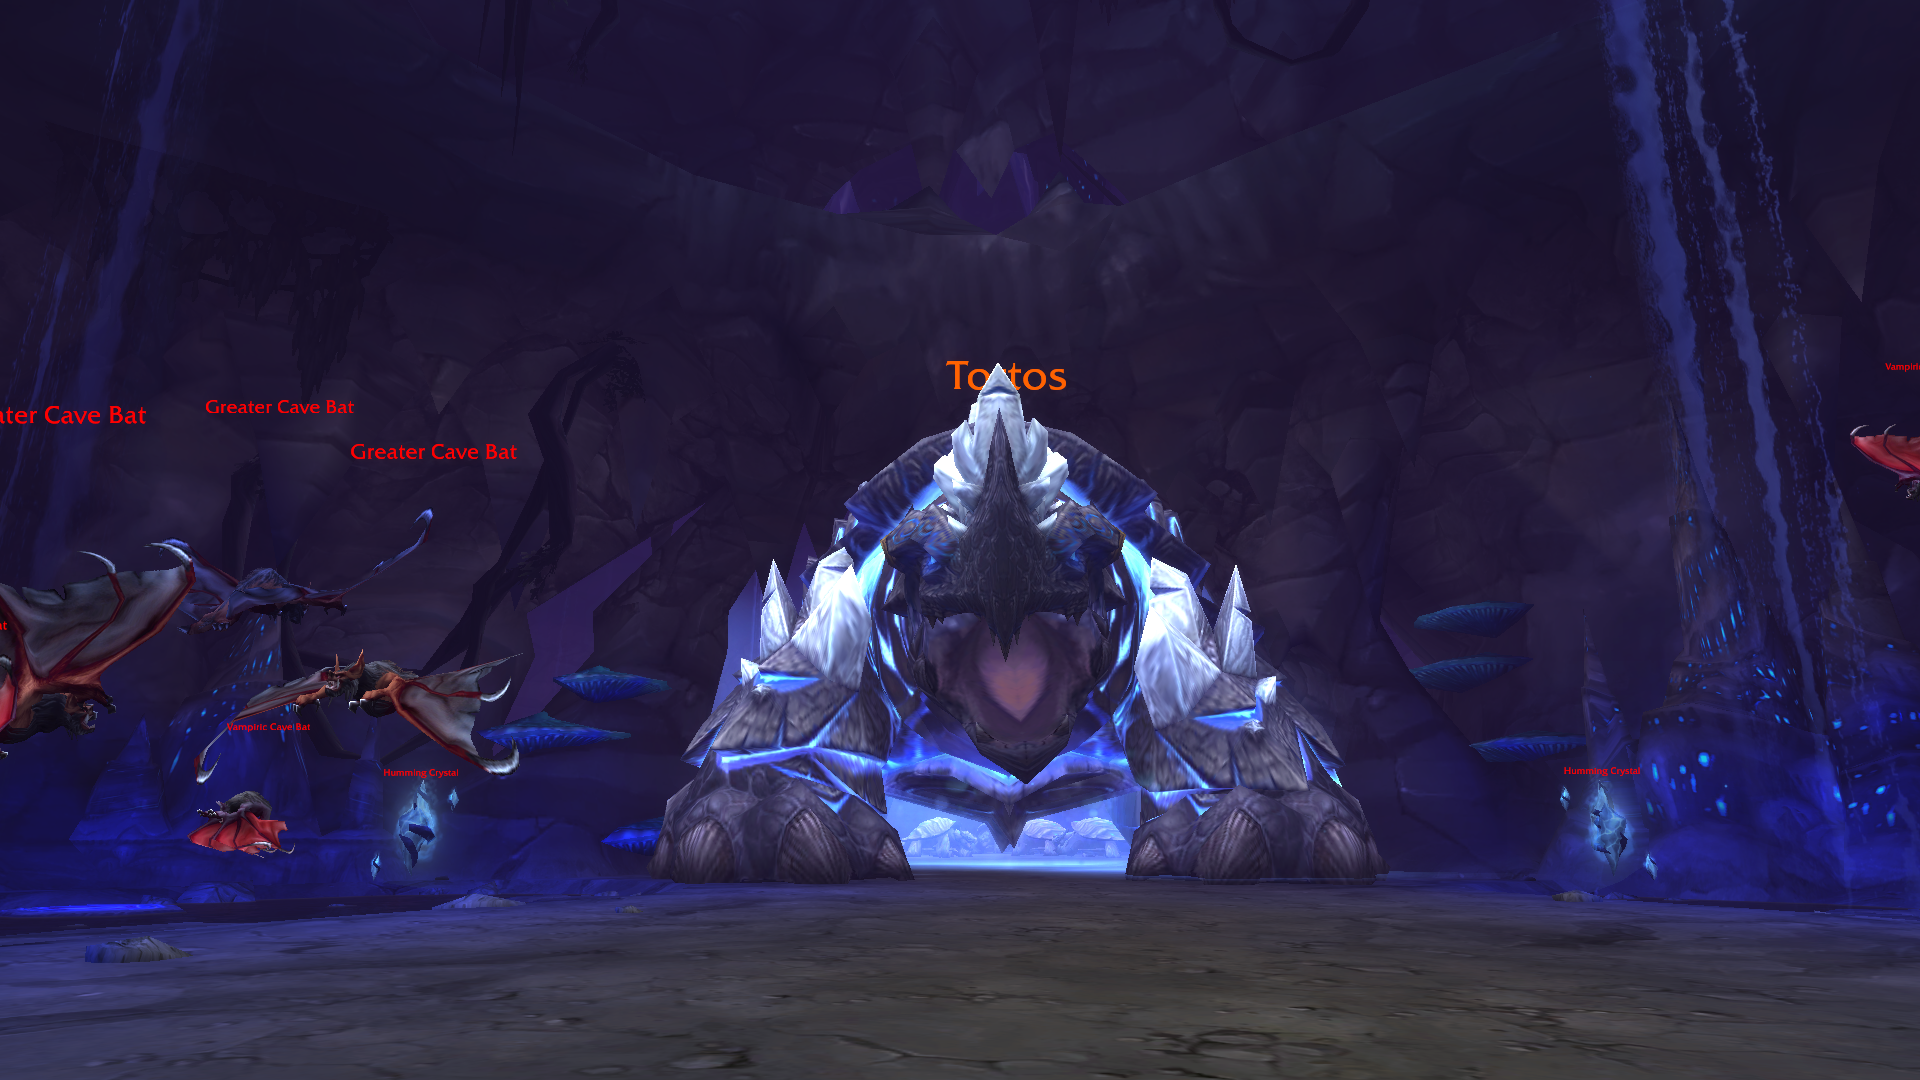
Tortos is a messy fight that revolves around controlling Whirl Turtles, interrupting Stone Breath, as well as dealing with constant Rockfall. Here’s a MoP Classic Tortos Strategy:
- Kick Whirl Turtles into Tortos to stop Furious Stone Breath.
- Don’t stand in front — avoid Snapping Bite.
- Move constantly to dodge Rockfall.
- Stun/slow turtles to control the room.
- Use strong healing for Quake Stomp.
- Kill Vampiric Cave Bats fast to stop Drain the Weak.
- Maintain a clear space, so turtle kicks stay consistent.
Tortos Rewards
| Item | Type | Slot |
|---|---|---|
| Cloak | Back | |
| Cloak | Back | |
| Amulet | Neck | |
| Cloth Armor | Hands | |
| Cloth Armor | Wrist | |
| Cloth Armor | Head | |
| Leather Armor | Chest | |
| Leather Armor | Wrist | |
| Leather Armor | Hands | |
| Leather Armor | Chest | |
| Mail Armor | Wrist | |
| Mail Armor | Feet | |
| Mail Armor | Shoulder | |
| Plate Armor | Wrist | |
| Plate Armor | Shoulder | |
| Plate Armor | Waist | |
| Plate Armor | Hands | |
| Shield | Shield | |
| Bow | Ranged | |
| One-Handed Axe | One-Hand |
Megaera

Megaera is a hydra with multiple heads, and two of its heads are always active. When a head is annihilated, the boss activates the ‘Rampage’ ability, a devastating factorial assault, as the other head rises in strength. Use this Megaera Strategy in MoP Classic:
- To summon Megaera, kill three Eternal Guardians and ring the bells behind them.
- Set a head kill order and follow it (e.g., fire → ice → poison).
- Spread to manage Cinders, Torrent of Ice, and Acid Rain.
- Players with Cinders move away, get dispelled, and drop fire safely.
- Torrent of Ice targets kite away from the raid.
- Use Cinders to melt frozen patches.
- Pop major healing CDs during Rampage every time.
- Tanks: position heads safely and dodge breath cones.
Ji-Kun
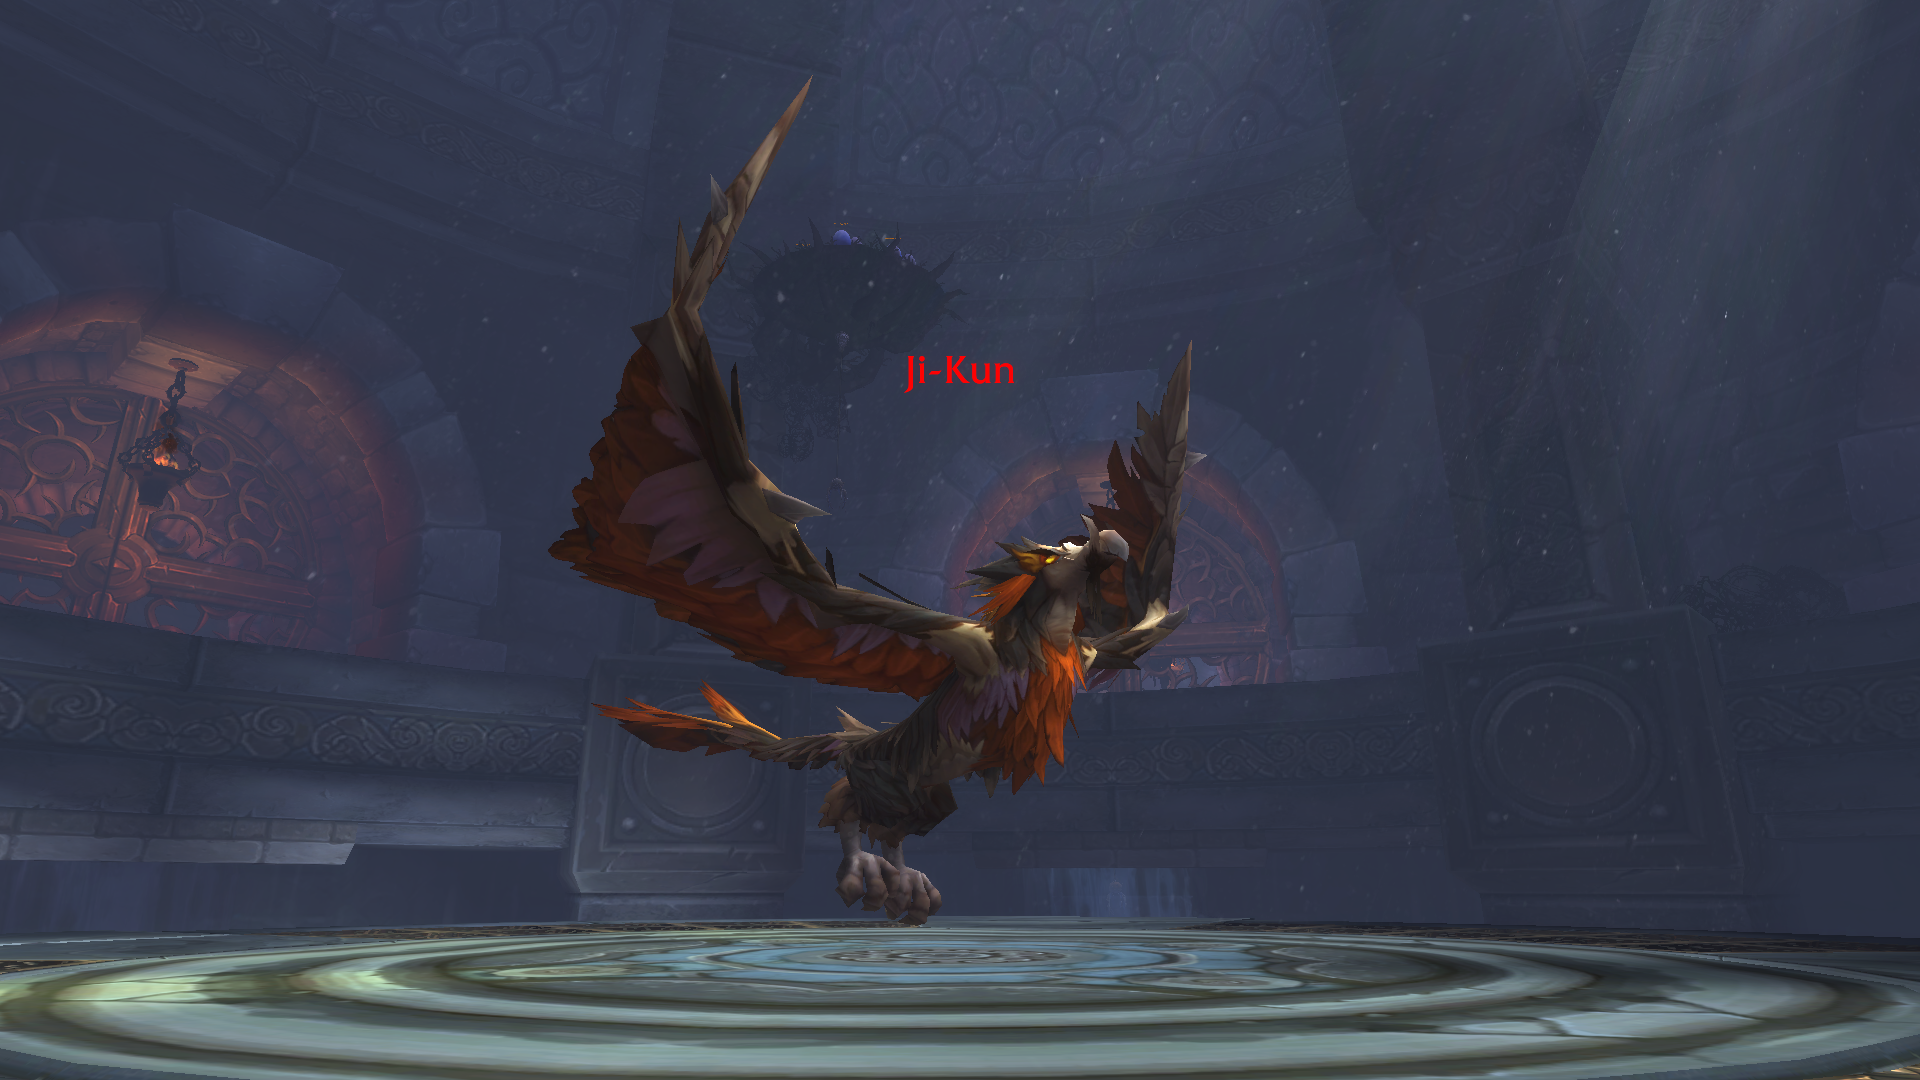
Ji-Kun combines platform movement, control of the hatchlings, and strategic use of the Primal Nutrient buff. For this fight, use our Ji-Kun Strategy:
- Use feathers to fly to nests and kill eggs early.
- Catch Feed Young globules for Primal Nutrient and burst damage.
- Tanks: swap on Talon Rake.
- Spread for Caw.
- Stack and heal through Quills.
- Stay near the center and use movement skills during Down Draft.
- Assign nest teams (main + backup) to prevent egg overflows.
Ji-Kun Rewards
| Item | Type | Slot |
|---|---|---|
| Trinket | Trinket | |
| Trinket | Trinket | |
| Cloak | Back | |
| Cloth Armor | Chest | |
| Cloth Armor | Waist | |
| Leather Armor | Waist | |
| Mail Armor | Hands | |
| Plate Armor | Hands | |
| Plate Armor | Head | |
| Plate Armor | Chest | |
| Staff | Two-Hand | |
| Armor Token | – | |
| Armor Token | – | |
| Armor Token | – | |
| Companion | – | |
| Mount | – |
Durumu the Forgotten
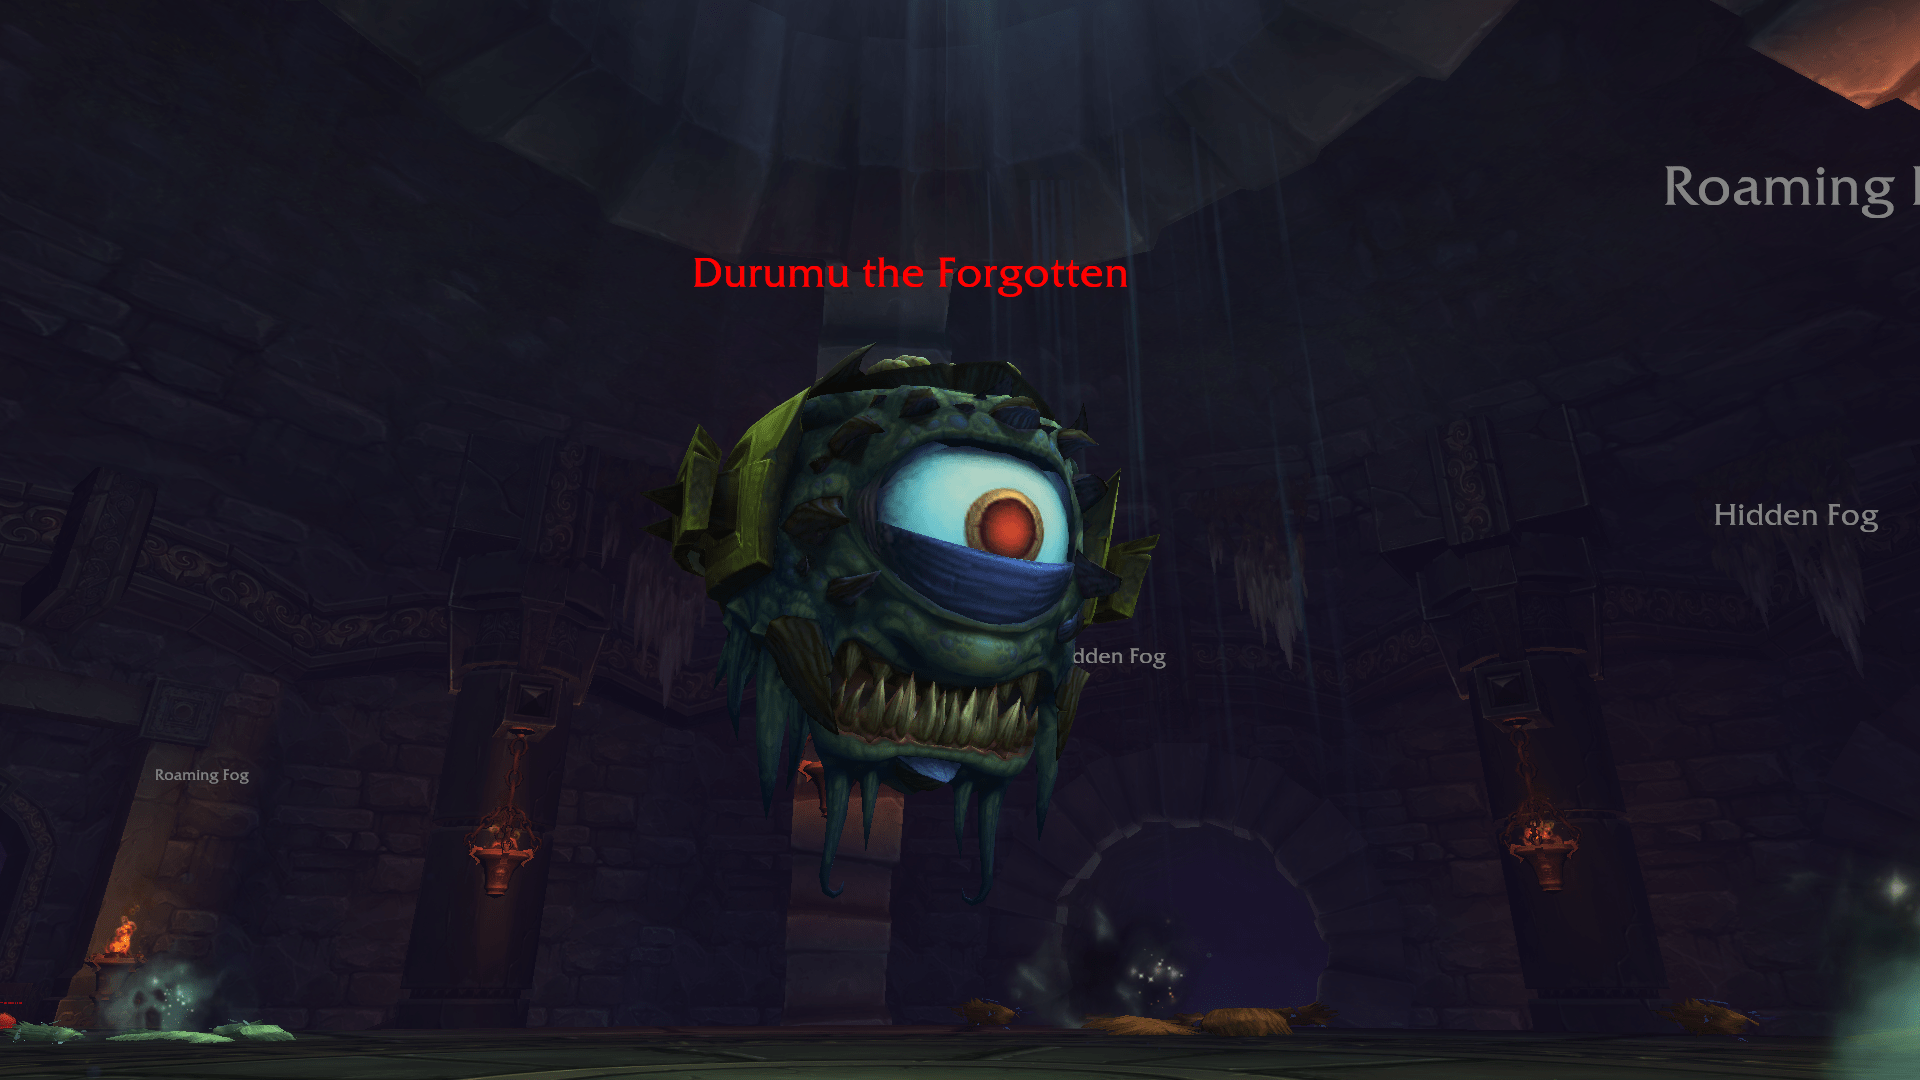
Durumu is one of the hardest fights in this raid. You need to build a strategy around beam management, add detection during the Color phase, and survive his deadly maze during Disintegration Beam. Also, you may need Good Gear to ensure that the encounter goes smoothly and your HP stays full. Durumu the Forgotten Strategy goes like this:
- Rotate through Life Drain to reduce boss healing.
- Step out of Lingering Gaze zones.
- During the Color phase, stand in beams to reveal adds.
- Avoid Force of Will zones (lethal).
- Follow the safe path during the Disintegration Beam.
Durumu the Forgotten Rewards
| Item | Type | Slot |
|---|---|---|
| Ring | Finger | |
| Ring | Finger | |
| Cloak | Back | |
| Cloak | Back | |
| Mail Armor | Chest | |
| Mail Armor | Waist | |
| Cloth Armor | Legs | |
| Cloth Armor | Shoulder | |
| Cloth Armor | Hands | |
| Leather Armor | Feet | |
| Leather Armor | Legs | |
| Mail Armor | Wrist | |
| Plate Armor | Feet | |
| Plate Armor | Hands | |
| Plate Armor | Legs | |
| Plate Armor | Wrist | |
| Plate Armor | Hands | |
| Plate Armor | Legs | |
| Crossbow | Ranged | |
| Dagger | One-Hand |
Primordius
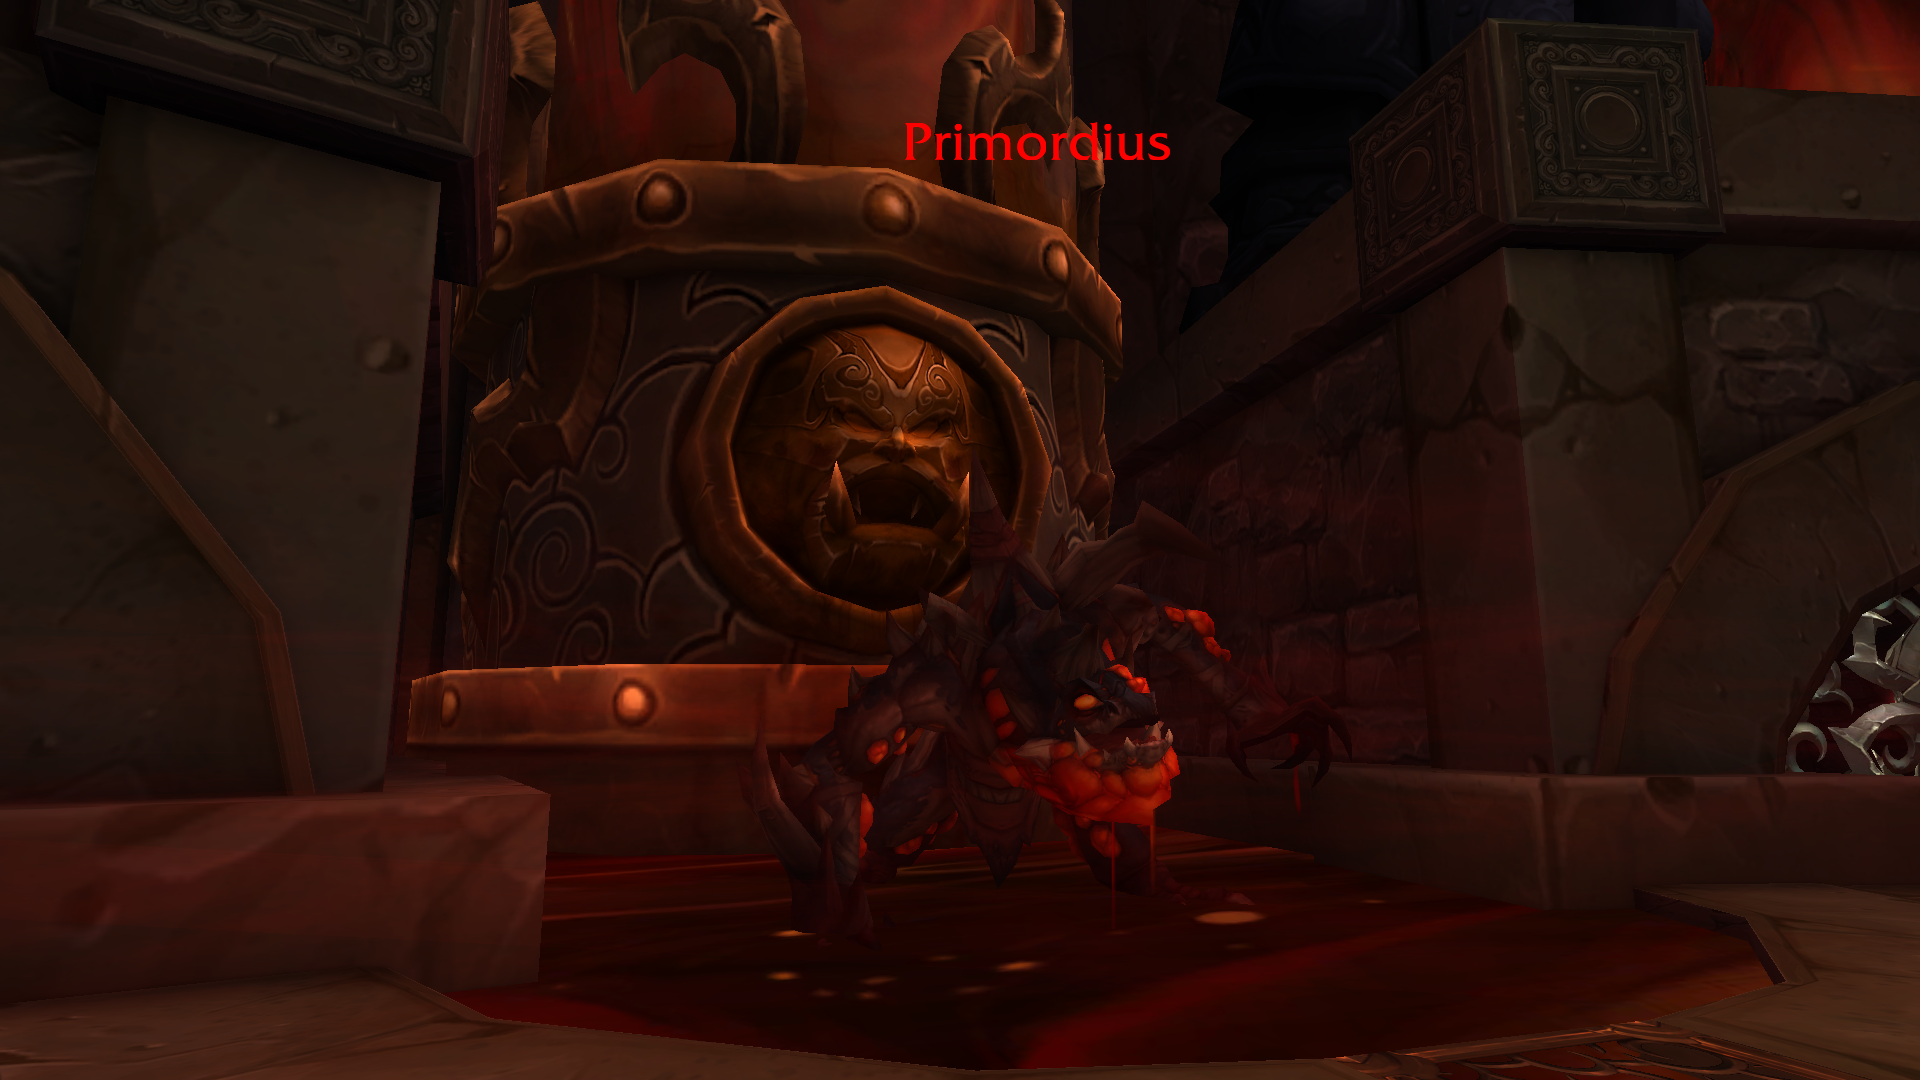
Primordius will become more and more dangerous as he absorbs more Living Fluids. You need to follow the Primordius Strategy to win the encounter:
- Kill Living Fluids to create Mutagenic Pools.
- Step into pools to stack buffs and reach Fully Mutated quickly.
- Avoid harmful pools that apply negative mutations.
- Tanks: swap on Malformed Blood and avoid the Primordial Strike cone.
- Fully mutated players tunnel the boss; unmutated players handle adds.
- Prevent Primordius from absorbing too many fluids.
Primordius Rewards
| Item | Type | Slot |
|---|---|---|
| Trinket | Trinket | |
| Trinket | Trinket | |
| Trinket | Trinket | |
| Ring | Finger | |
| Cloak | Back | |
| Cloth Armor | Legs | |
| Cloth Armor | Hands | |
| Cloth Armor | Wrist | |
| Cloth Armor | Chest | |
| Leather Armor | Hands | |
| Leather Armor | Legs | |
| Mail Armor | Wrist | |
| Mail Armor | Hands | |
| Mail Armor | Head | |
| Plate Armor | Hands | |
| Plate Armor | Shoulder | |
| Plate Armor | Legs | |
| Plate Armor | Shoulder | |
| Plate Armor | Wrist | |
| Shield | Shield | |
| One-Handed Mace | One-Hand | |
| Companion | – |
Dark Animus
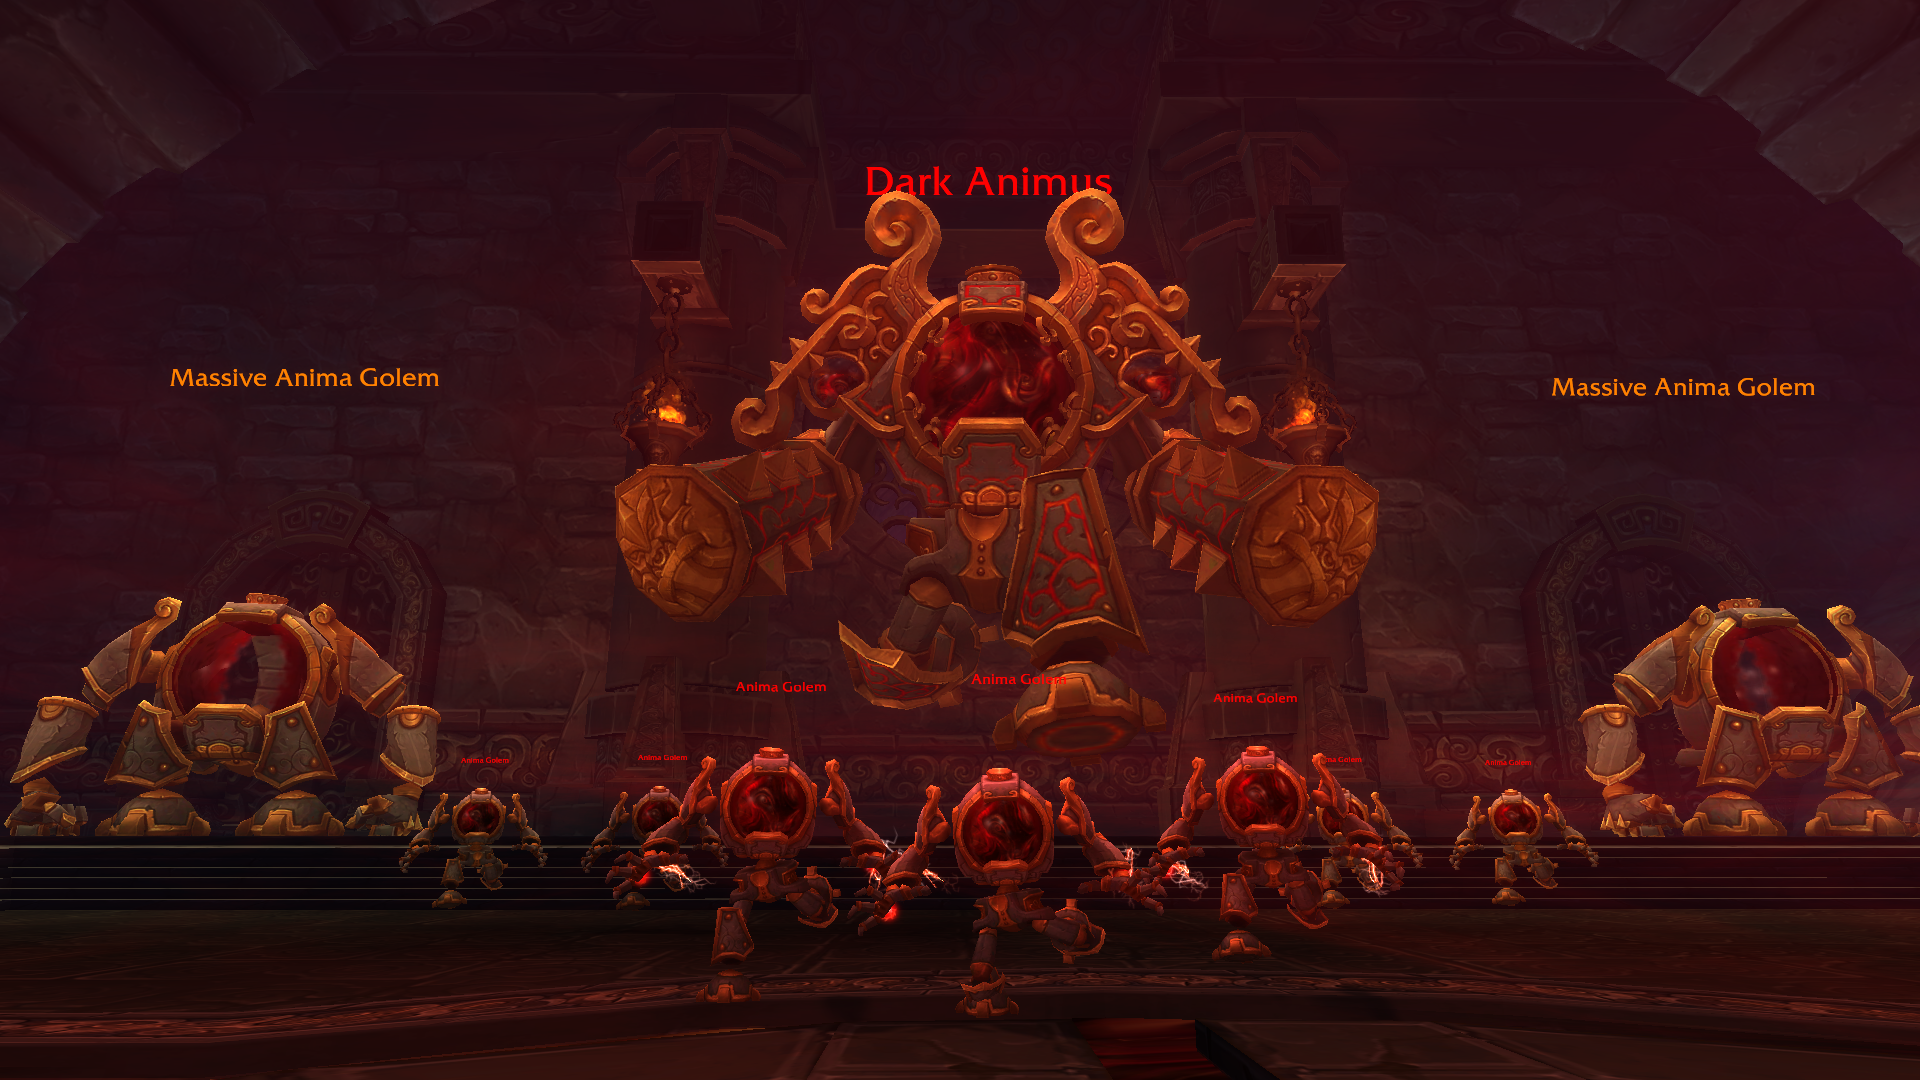
Dark Animus is a resource management fight that relies entirely upon managing Anima between the golems. If you wear BiS Gear, it will also be a huge bonus to survivability, as this boss is the tough one. The Dark Animus Strategy:
- Kill small golems apart from each other, avoid random Anima transfers.
- Activate only the golems required.
- Assign players to pick up each active golem.
- Avoid Crimson Wake and handle Matter Swap safely.
- Save mobility for the Anima Ring movement.
- Burn Dark Animus once active, but keep him away from 100 Anima.
- Use raid CDs during Interrupting Jolt.
Dark Animus Rewards
| Item | Type | Slot |
|---|---|---|
| Trinket | Trinket | |
| Trinket | Trinket | |
| Ring | Finger | |
| Cloak | Back | |
| Cloth Armor | Head | |
| Leather Armor | Hands | |
| Leather Armor | Legs | |
| Plate Armor | Legs | |
| Plate Armor | Head | |
| One-Handed Mace | One-Hand | |
| Dagger | One-Hand | |
| Armor Token | – | |
| Armor Token | – | |
| Armor Token | – | |
| Companion | – |
Iron Qon
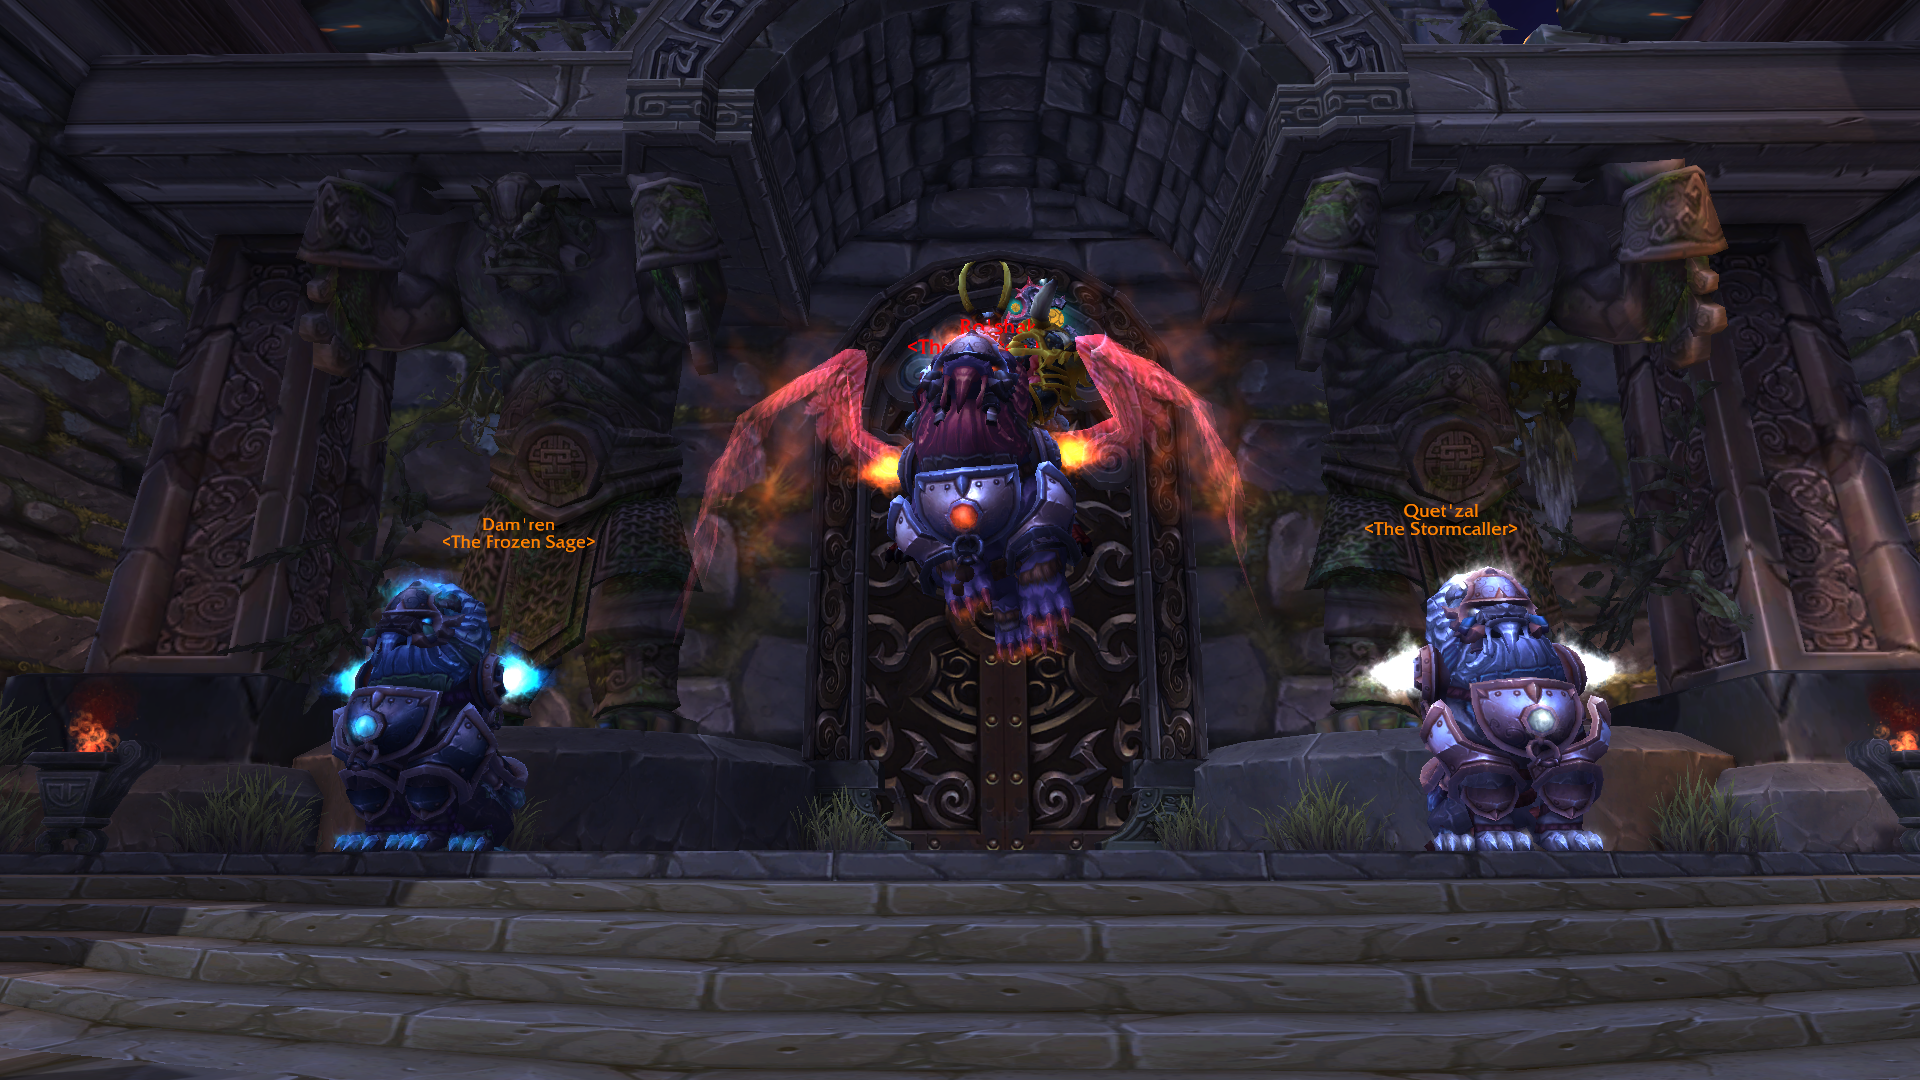
Iron Qon is a four-phase fight. In each phase, you will fight a boss representing one of the three elements: Ro’shak (Fire), Quet’zal (Wind), and Dam’ren (Frost). Here’s an Iron Qon Strategy:
Phase 1 — Ro’shak (Fire):
- Group and share Unleashed Flame.
- Spread after Molten Inferno.
- Avoid fire patches from spears.
Phase 2 — Quet’zal (Wind):
- Escape tornadoes during Windstorm.
- Break stuns from Arcing Lightning.
- Dodge wind lines.
Phase 3 — Dam’ren (Frost):
- Stay out of Dead Zone shields.
- Free frozen players.
- Avoid Frozen Blood areas.
Final Phase — Iron Qon:
- Dodge overlapping mechanics.
- Use defensives on Fist Smash.
Iron Qon Rewards
| Item | Type | Slot |
|---|---|---|
| Ring | Finger | |
| Cloth Armor | Legs | |
| Cloth Armor | Waist | |
| Cloth Armor | Feet | |
| Leather Armor | Feet | |
| Mail Armor | Chest | |
| Plate Armor | Hands | |
| Dagger | One-Hand | |
| Gun | Ranged | |
| One-Handed Sword | One-Hand | |
| Off-hand Frill | Held In Off-hand | |
| Armor Token | – | |
| Armor Token | – | |
| Armor Token | – |
Twin Consorts

Twin Consorts abilities cycle through Night and Day phases. Night Phase is when you need to fight Lu’lin, and when it changes to Day Phase, you encounter Suen. The raid must manage sleep clouds, fire damage, and Ice Comets to stay alive. So here’s a Twin Consorts Strategy:
Night Phase — Lu’lin:
- Avoid Moon Lotus sleep clouds.
- Spread for Cosmic Barrage.
- Tanks: handle Beast of Nightmares.
- Healers: avoid healing tanks unless needed.
Day Phase — Suen:
- Tanks: swap on Fan of Flames.
- Dodge Flames of Passion charges.
- Pull Suen into the Ice Comet shade to drop her stacks.
- Comets need to be alive for future cycles.
Lei Shen — The Thunder King
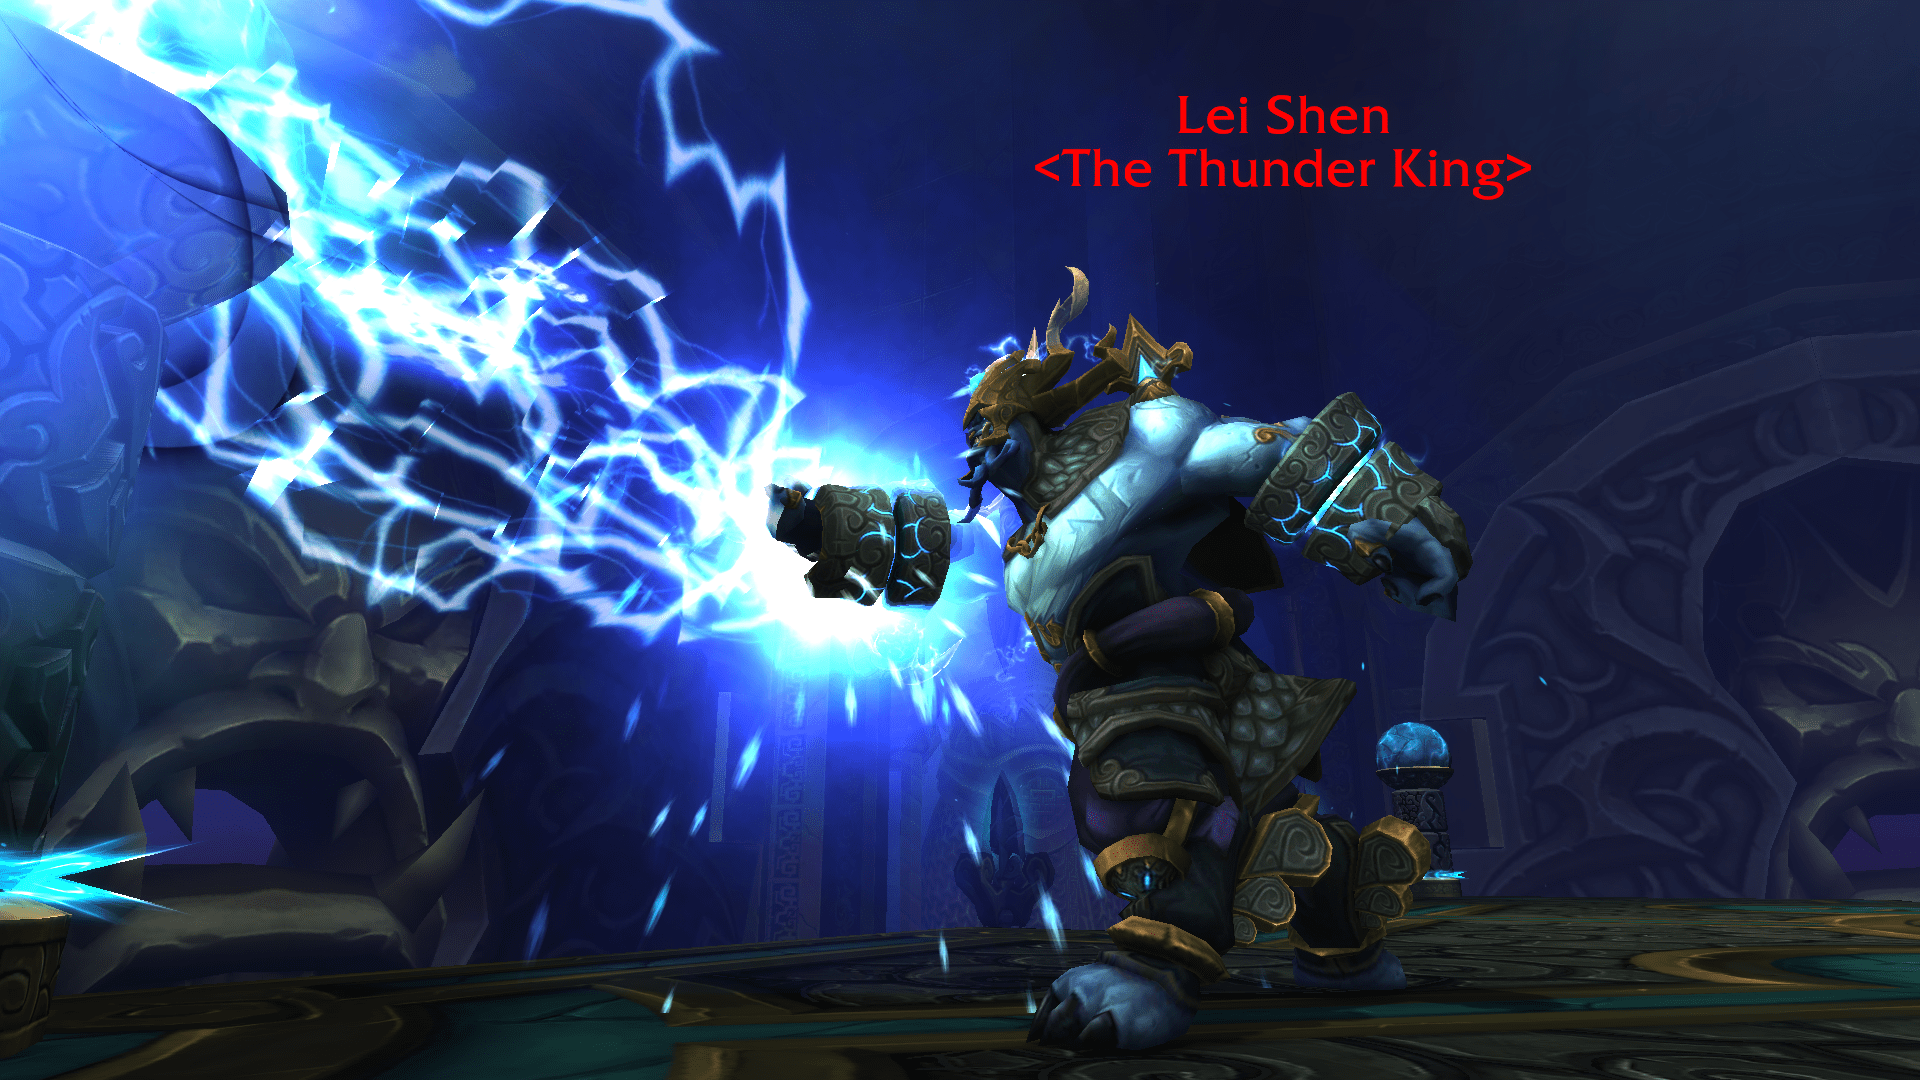
Lei Shen is a three-phase boss with two transition phases. The raid must rotate through all four conduits: North, East, South, and West, with every Conduit having its unique lethal. Lei Shen — The Thunder King Strategy:
Phase 1:
- Split groups into four quadrants.
- Handle conduits:
- Static Shock: stack.
- Diffusion Chain: spread.
- Overcharge: move out.
- Bouncing Bolt: soak.
- Tanks: run out for Decapitate.
Transition 1 (65%):
- Spread to assigned corners.
- Avoid the overloaded quadrant.
- Regroup for Phase 2.
Phase 2:
- Tanks: face away for Fusion Slash knockback.
- Dodge Lightning Whip lines.
- Spread and kill Ball Lightning adds.
Transition 2 (30%):
- Spread to assigned corners.
- Avoid the overloaded quadrant.
- Regroup for Phase 3.
Phase 3:
- Brace for Violent Gale Winds movement.
- Keep dodging Whip/Thunderstruck.
Lei-Shen Rewards
| Item | Type | Slot |
|---|---|---|
| Trinket | Trinket | |
| Trinket | Trinket | |
| Trinket | Trinket | |
| Trinket | Trinket | |
| Amulet | Neck | |
| Cloth Armor | Legs | |
| Cloth Armor | Hands | |
| Leather Armor | Chest | |
| Leather Armor | Hands | |
| Mail Armor | Legs | |
| Mail Armor | Legs | |
| Plate Armor | Chest | |
| Plate Armor | Legs | |
| Plate Armor | Head | |
| Plate Armor | Legs | |
| Shield | Shield | |
| Off-hand Frill | Held In Off-hand | |
| Two-Handed Axe | Two-Hand | |
| Polearm | Two-Hand | |
| One-Handed Mace | One-Hand | |
| Miscellaneous Item | – |
Ra-den
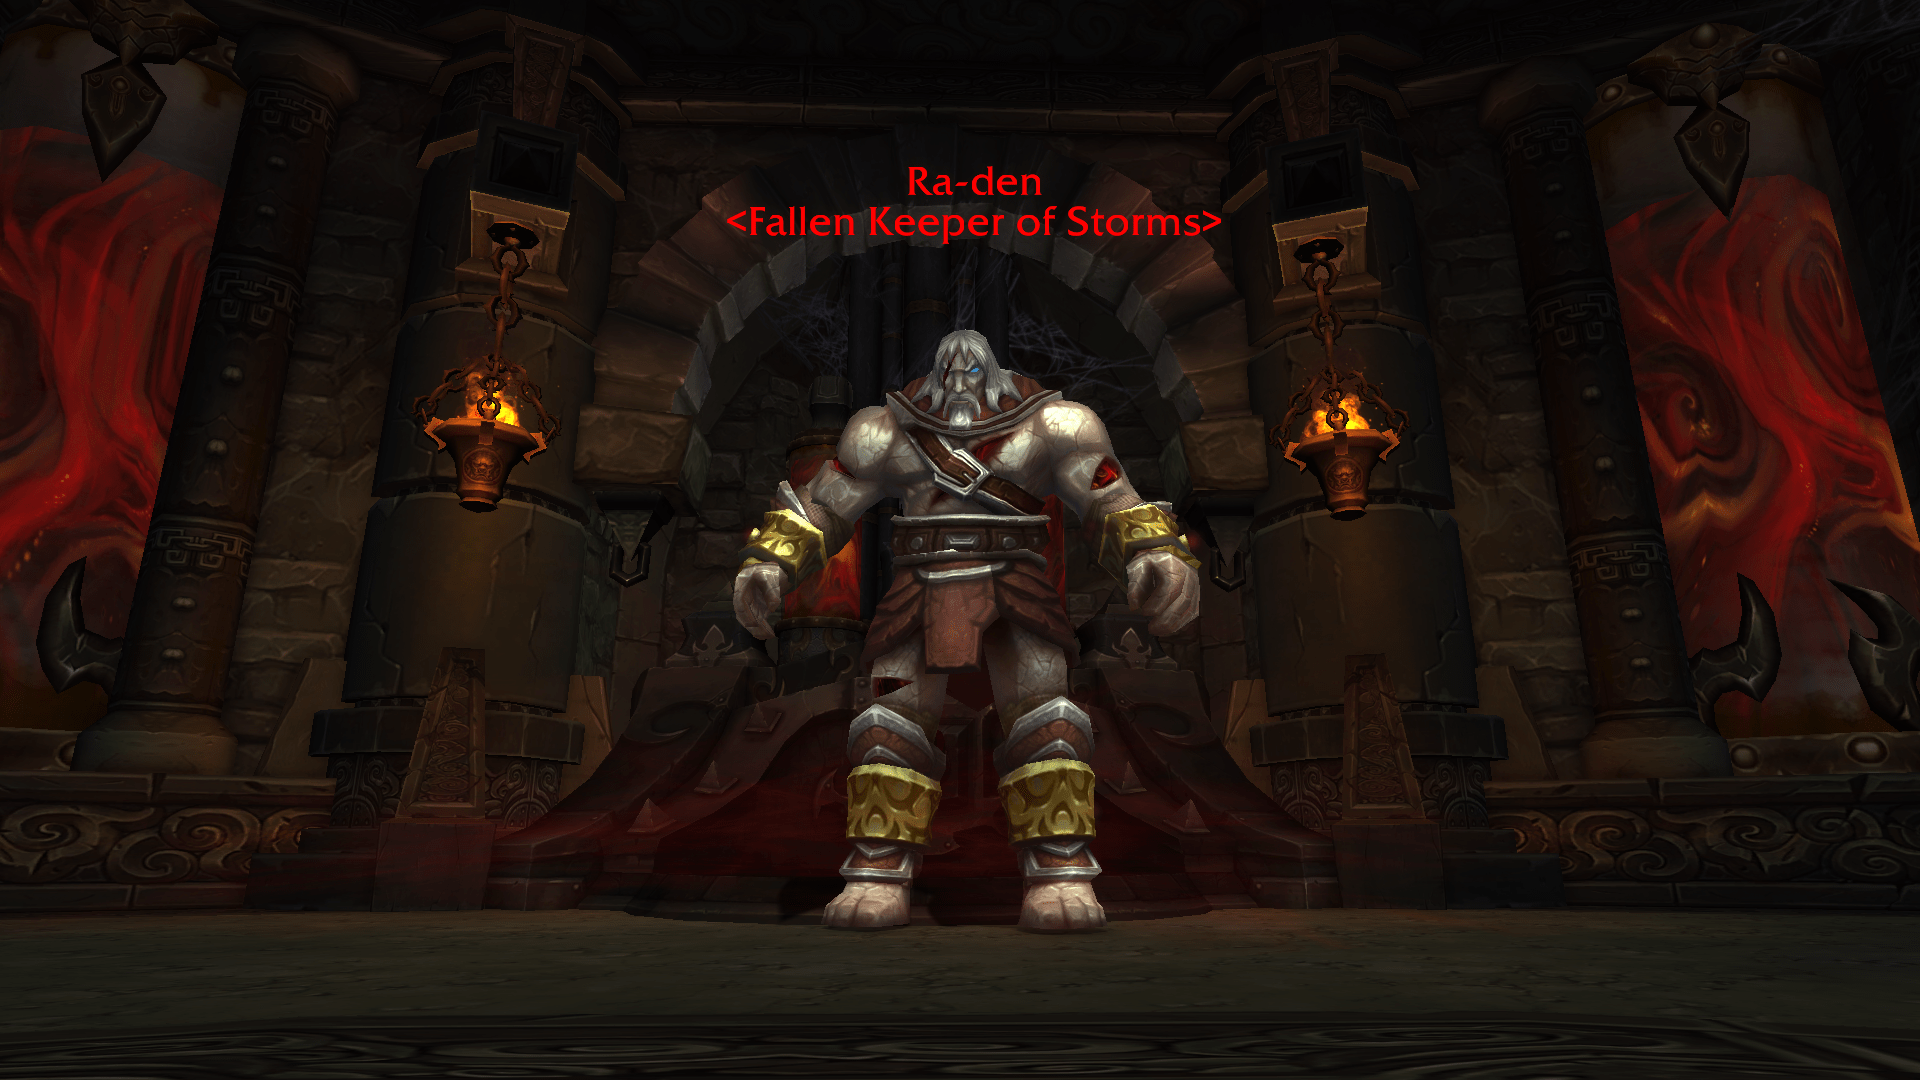
Ra-den is a two-energy fight where the boss alternates between Anima and Vita abilities. Ra-den Strategy relies on control of every orb type:
- Tanks: rotate CDs for Fatal Strike.
- Pass Unstable Vita to the farthest assigned player.
- Stack for Unstable Anima dispels.
- Kill adds based on energy type (Anima or Vita).
- Keep Lingering Energies low by controlling transitions.
- At 40%, pop healing CDs and finish through Ruin.
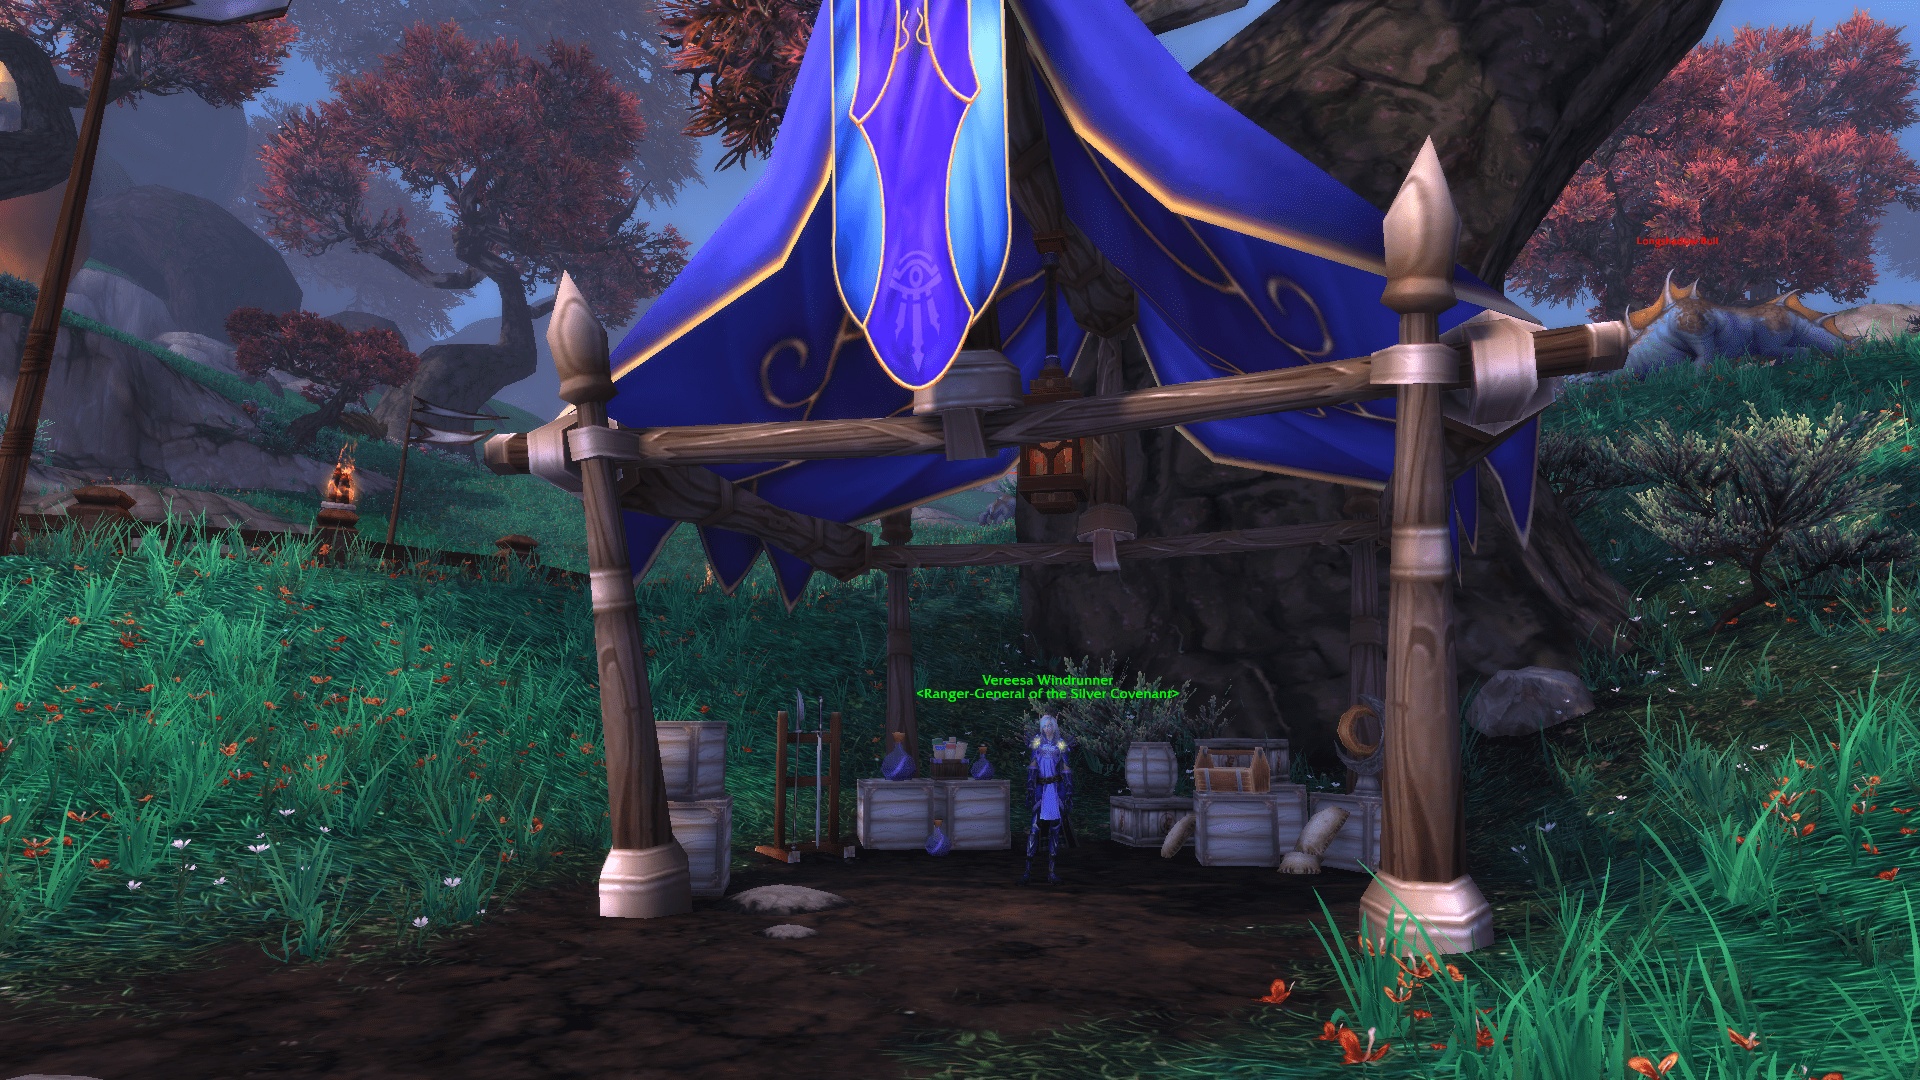
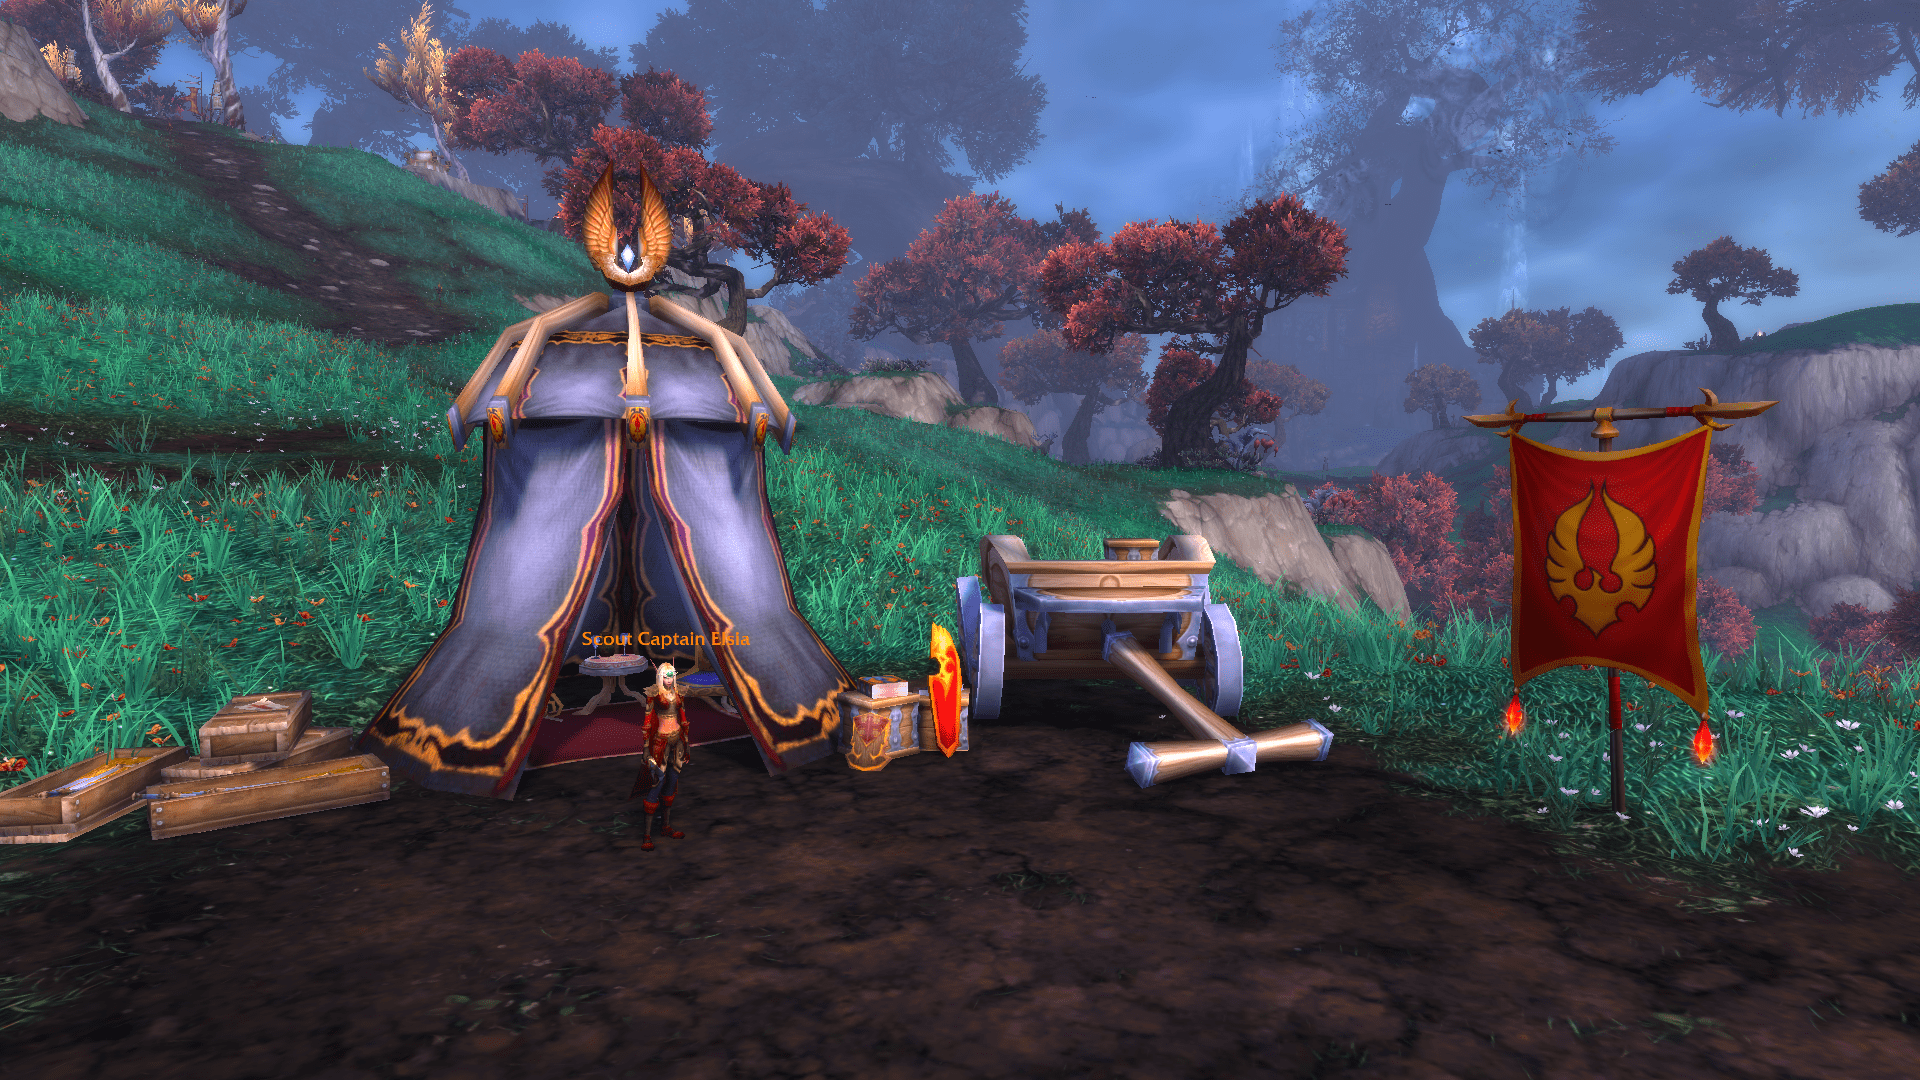
4.9Summing up our Throne of Thunder Overview, this raid has a lot to offer. The list of valuable rewards is huge, and many of these items are quite rare, so it’s your chance to try and get them. Tier 15 set is the jewel of the raid’s rewards, as every class can receive a tier set piece or token. So head to the Shado-Pan Garrison, ask Vereesa or Elsia to transfer you to the Isle of Thunder, and enjoy the raid!