Choosing the Destiny Rising best settings is an important step in preparing for smooth and enjoyable gameplay. In this guide, we’ll cover the minimum device requirements and share recommendations for the best settings on both mobile and PC. You’ll also learn how to configure your controller for smoother performance and better gameplay in Destiny Rising.
 4.9
4.9Destiny Rising Device Requirements

To play Destiny Rising without any inconvenience, your device must meet the minimum requirements. Before jumping straight to discussing the best settings for Destiny Rising, ensure that your device is suitable for playing the game. Destiny Rising runs on most recent phones, but for smooth 60 FPS, go for a powerful processor and a minimum of 4–6 GB RAM.
If your device meets these requirements, you can enjoy the game and finally get your hands on all types of weapons, new characters, exciting events, and more. By the way, if you want to get it all fast and easy, our team can handle Monolith’s Fall Contest Mode for you.
Destiny Rising Mobile Requirements
Here’s a list of Destiny Rising recommended specs for mobile devices:
| Platform | Requirements |
|---|---|
| Android | Snapdragon 845 or newer |
| iPhone | iPhone 8 or newer |
| iPad | iPad (8th generation) or newer iPad Pro 12.9-inch (2nd generation) or newer iPad Pro 10.5-inch (2017) or newer iPad Pro 11-inch (1st generation) or newer iPad mini (5th generation) or newer iPad Air (3rd generation) or newer |
Destiny Rising PC Requirements
Below, you can find the minimum Destiny Rising PC requirements:
| Component | Requirements |
|---|---|
| Operating System | Microsoft Windows 7 or above, macOS 11 (Big Sur) or above |
| Processor | Intel, AMD, or Apple Silicon Processor |
| RAM | At least 4 GB |
| Storage | 10 GB Free Disk Space |
Destiny Rising Best Mobile Settings
Playing Destiny Rising on your mobile phone requires proper setup for the game to run effortlessly without lag. The best graphics, sensitivity, and control settings for Destiny Rising do wonders in this case. With the right settings, you’ll react faster and shoot more easily, even in the fiercest fights.
The mobile version of Destiny Rising also enables you to customize the interface according to your playing style, making the whole experience much easier. We are going to explain how to optimize the following Destiny Rising settings for your needs:
- Firing Mode;
- TPP Settings;
- Weapons Settings;
- Movement Settings;
- Gyro Settings;
- Effects Settings;
- Sensitivity Settings;
- Graphics Settings.
Destiny Rising Best Firing Mode
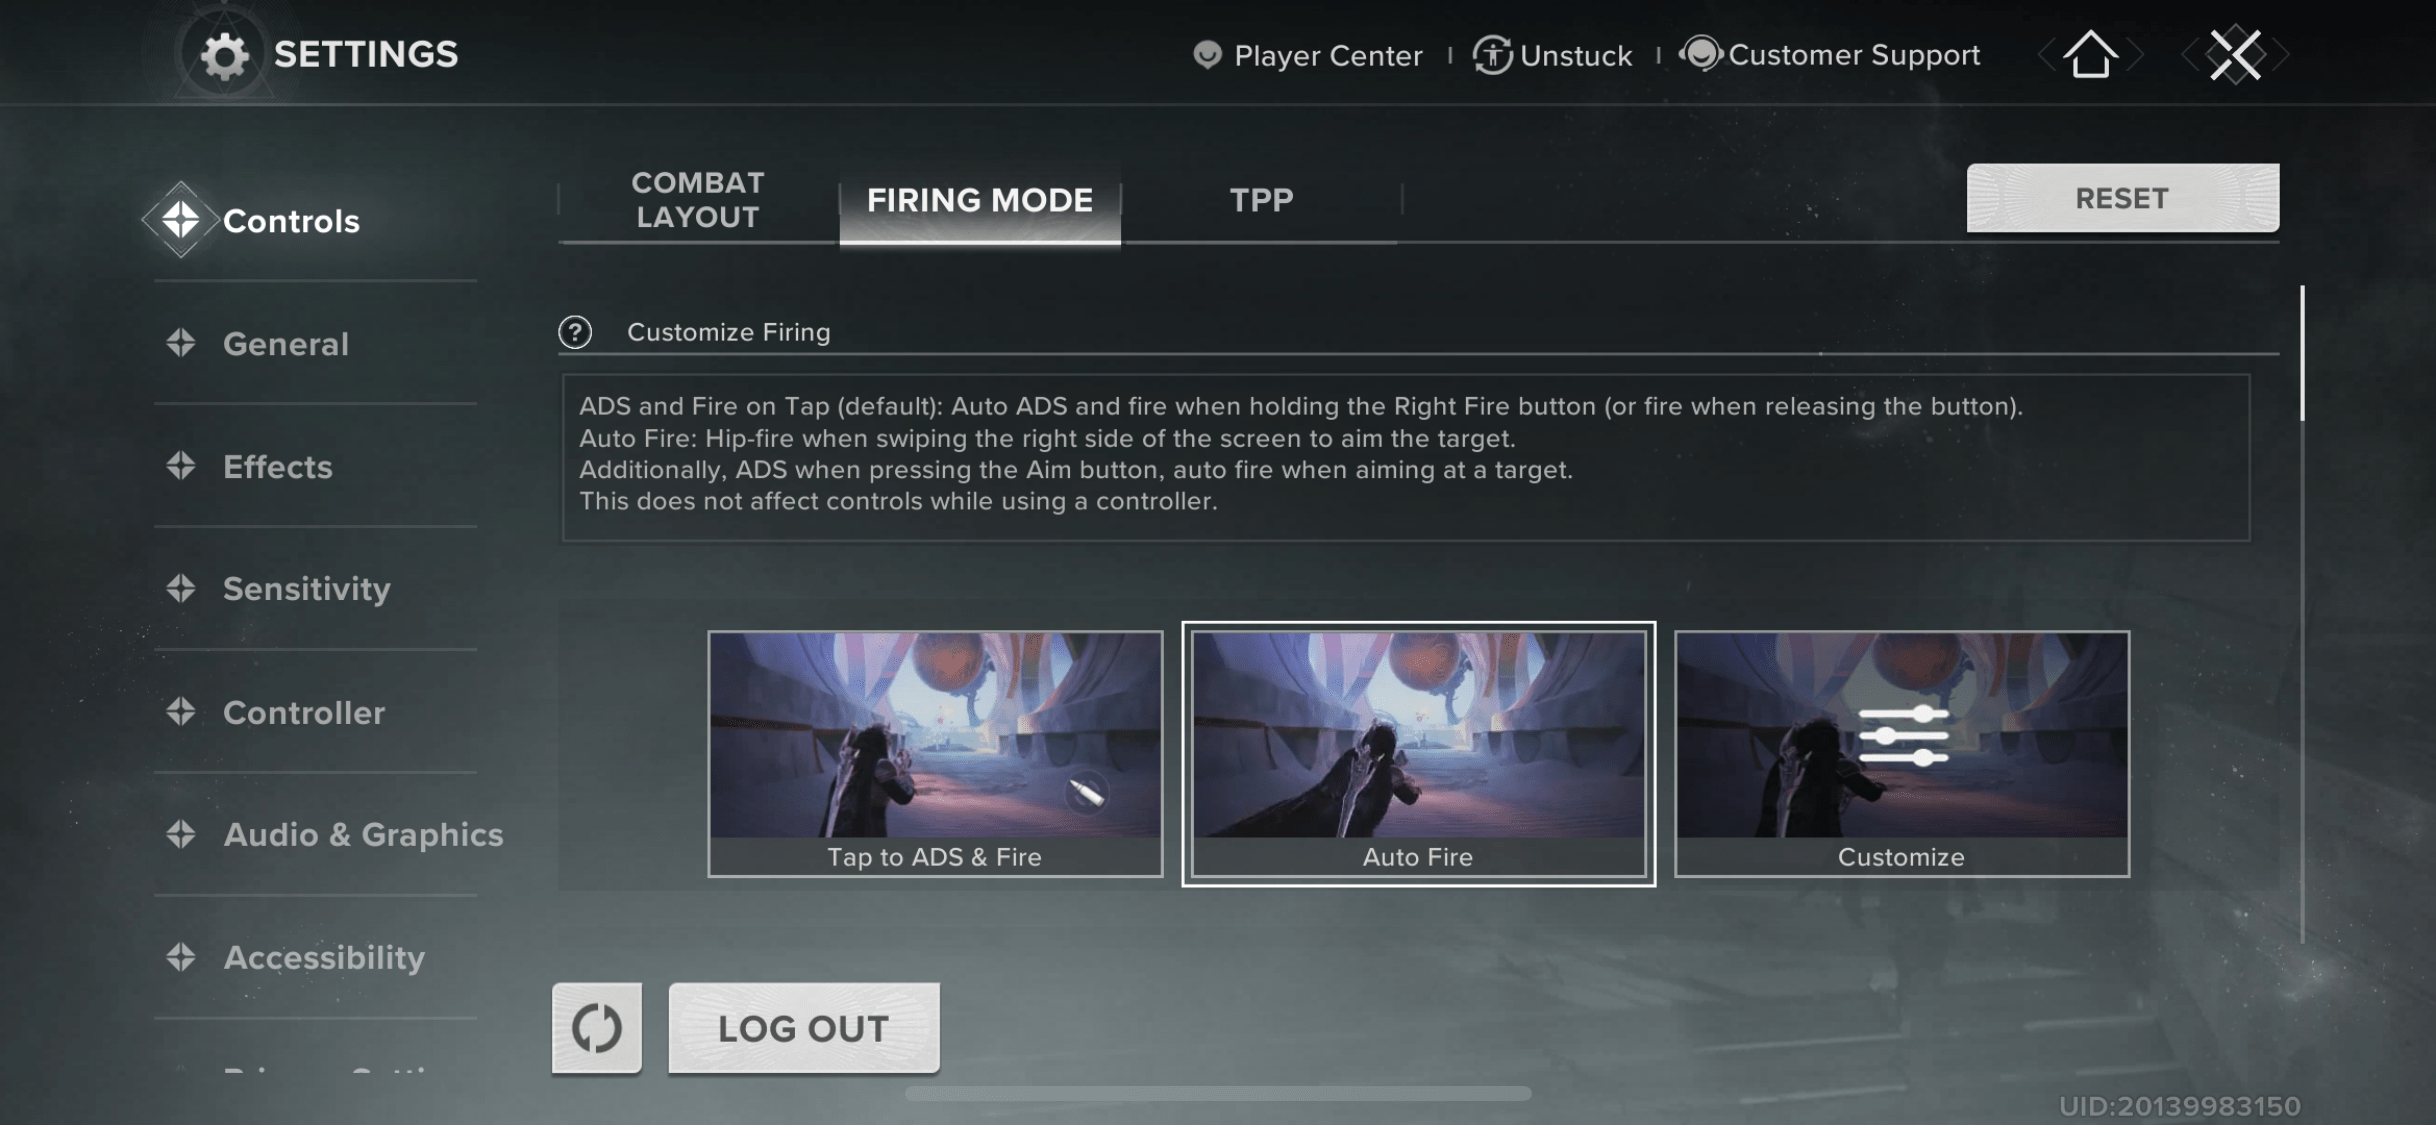
The Firing Mode in Destiny Rising controls how your gun responds to screen taps. This setting can be found at Settings → Controls → Firing Mode. The majority of players choose between Auto-Fire when aiming or complete Manual fire (Tap to ADS & Fire).
However, you can experiment with both and determine what offers you the optimal mix of speed and accuracy. Pick the ‘Customize’ option and adjust it to your needs.
✏️ Tip: You can assign a firing mode to each weapon type, and it will automatically switch whenever you equip that weapon.
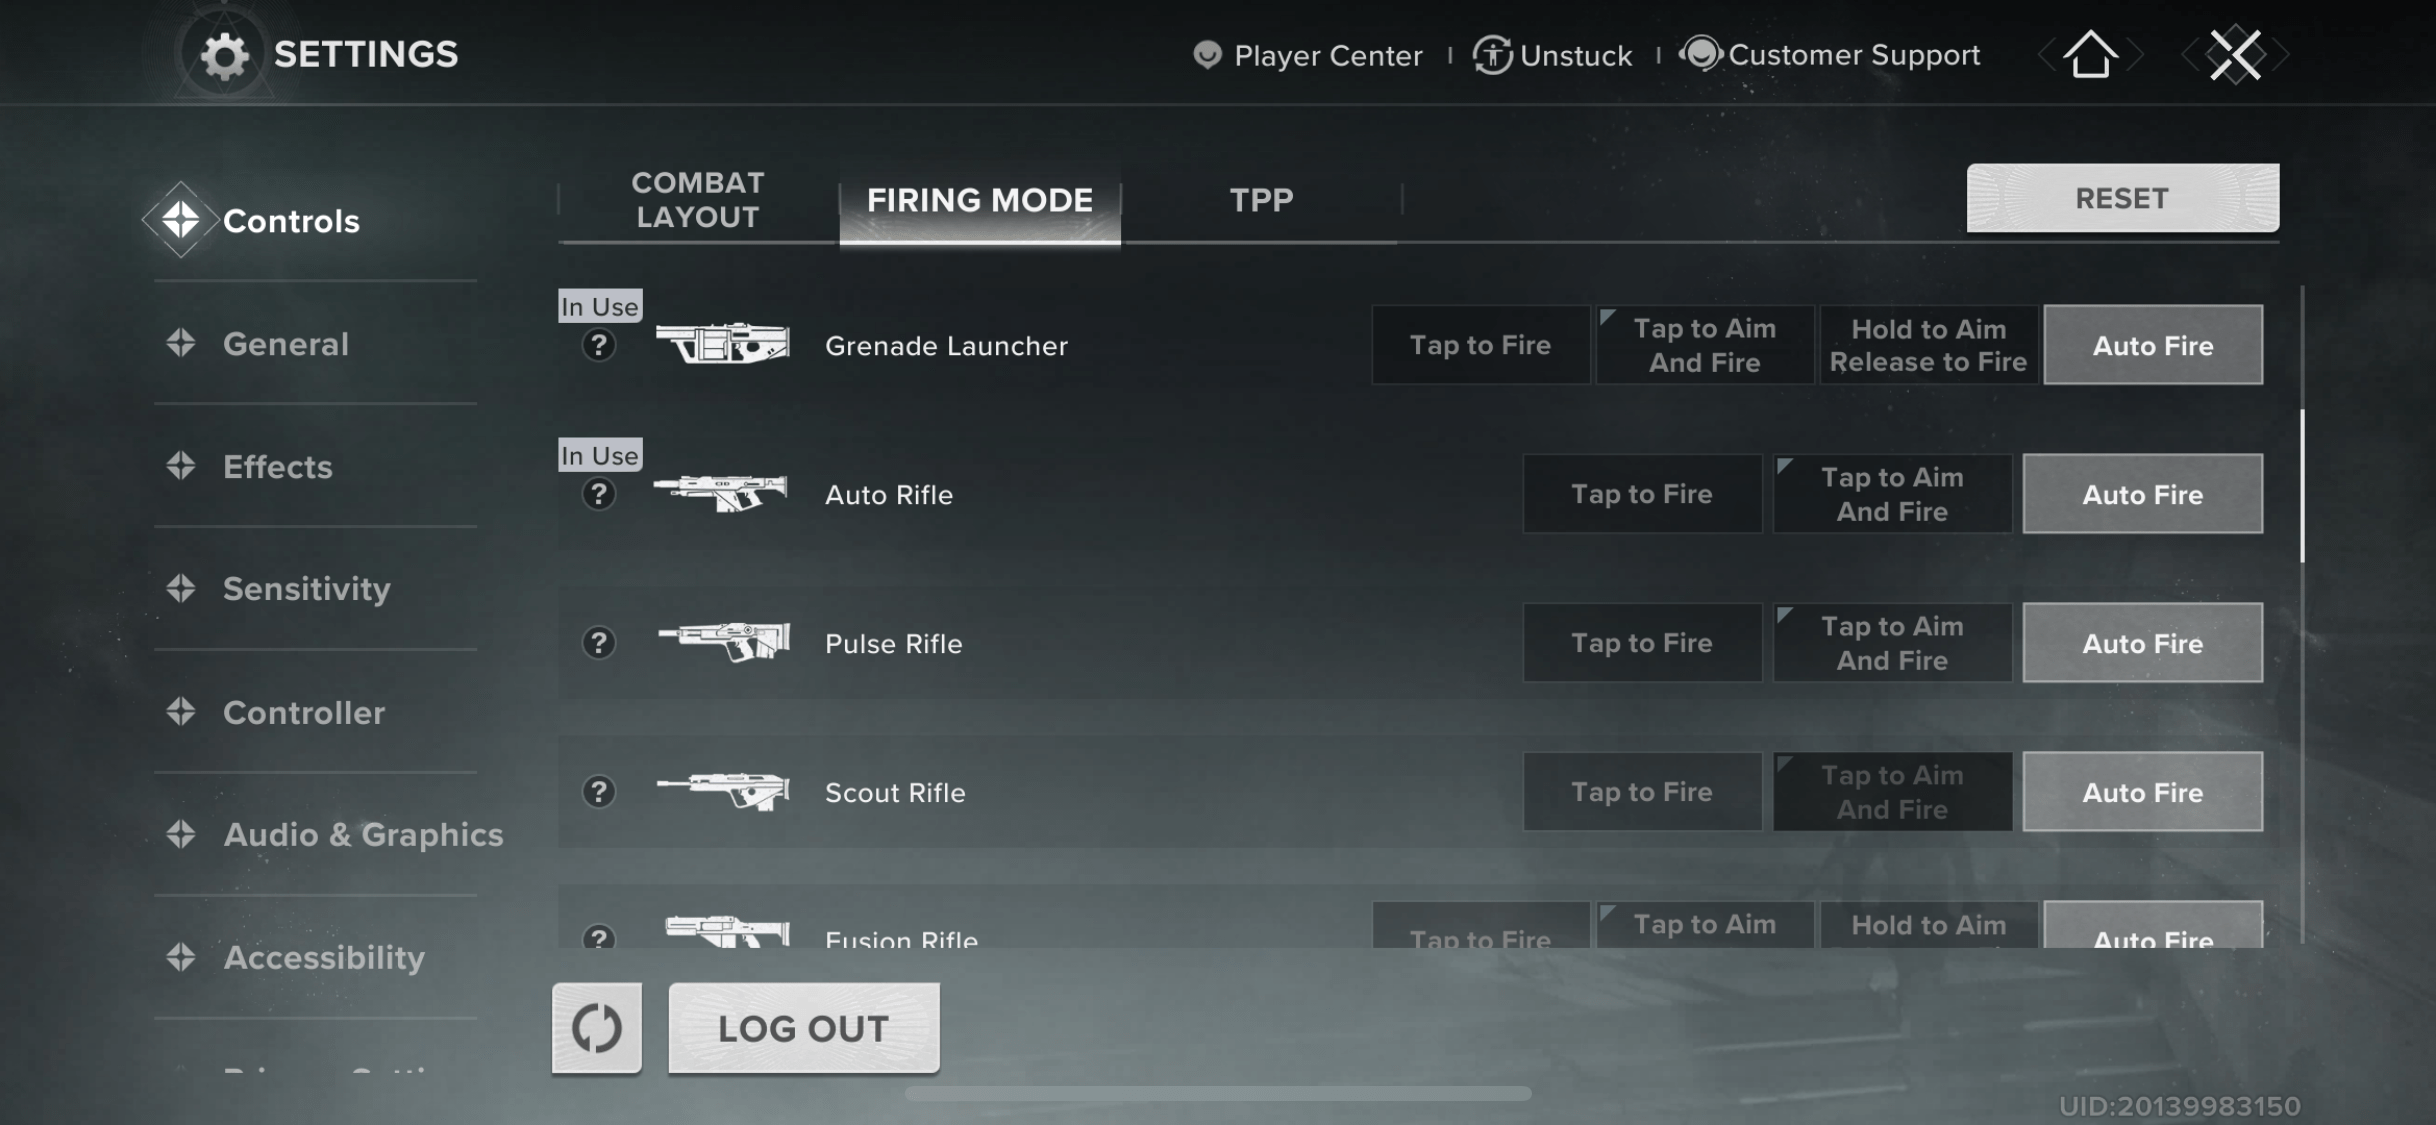
Best Destiny Rising firing mode settings:
| Weapon Type | Recommended Mode | Explanation |
|---|---|---|
| Auto Rifle | Tap to Aim and Fire | Smooth control and DPS balance |
| Pulse Rifle | Tap to Aim and Fire | Combines steady accuracy with quick burst reaction |
| Scout Rifle | Tap to Aim and Fire | Best suited for precise range aimers |
| Hand Cannon | Hold to Aim Release Fire | Gives tighter control over recoil and shot timing |
| Sniper Rifle | Hold to Aim Release Fire | Reduces misfires and stabilizes the scope |
| Shotgun | Tap to Aim and Fire | Delivers fast, close-quarters damage with instant response |
| Submachine Gun | Tap to Aim and Fire | Retains hipfire capability while improving mid-range precision |
| Sidearm | Tap to Aim and Fire | An option for quick duels and fast target swaps |
| Bow | Hold to Aim Release Fire | Rewarding for accurate players, steady aim before delivering |
| Grenade Launcher | Tap to Aim and Fire | Makes splash damage aiming simpler and more consistent |
| Rocket Launcher | Hold to Aim Release Fire | Prevents accidental fire and keeps timing on purpose |
| Fusion Rifle | Tap to Aim and Fire | Seamless rhythm of charging and regular firing |
| Linear Fusion Rifle | Tap to Aim and Fire | Prioritizes precise shots without compromising reliability |
| Machine Gun | Tap to Aim and Fire | Manages recoil for automatic fire in longer fights |
| Crossbow | Tap to Aim and Fire | Easier to get accurate shots lined up, good for patient play |
Destiny Rising Best TPP Settings
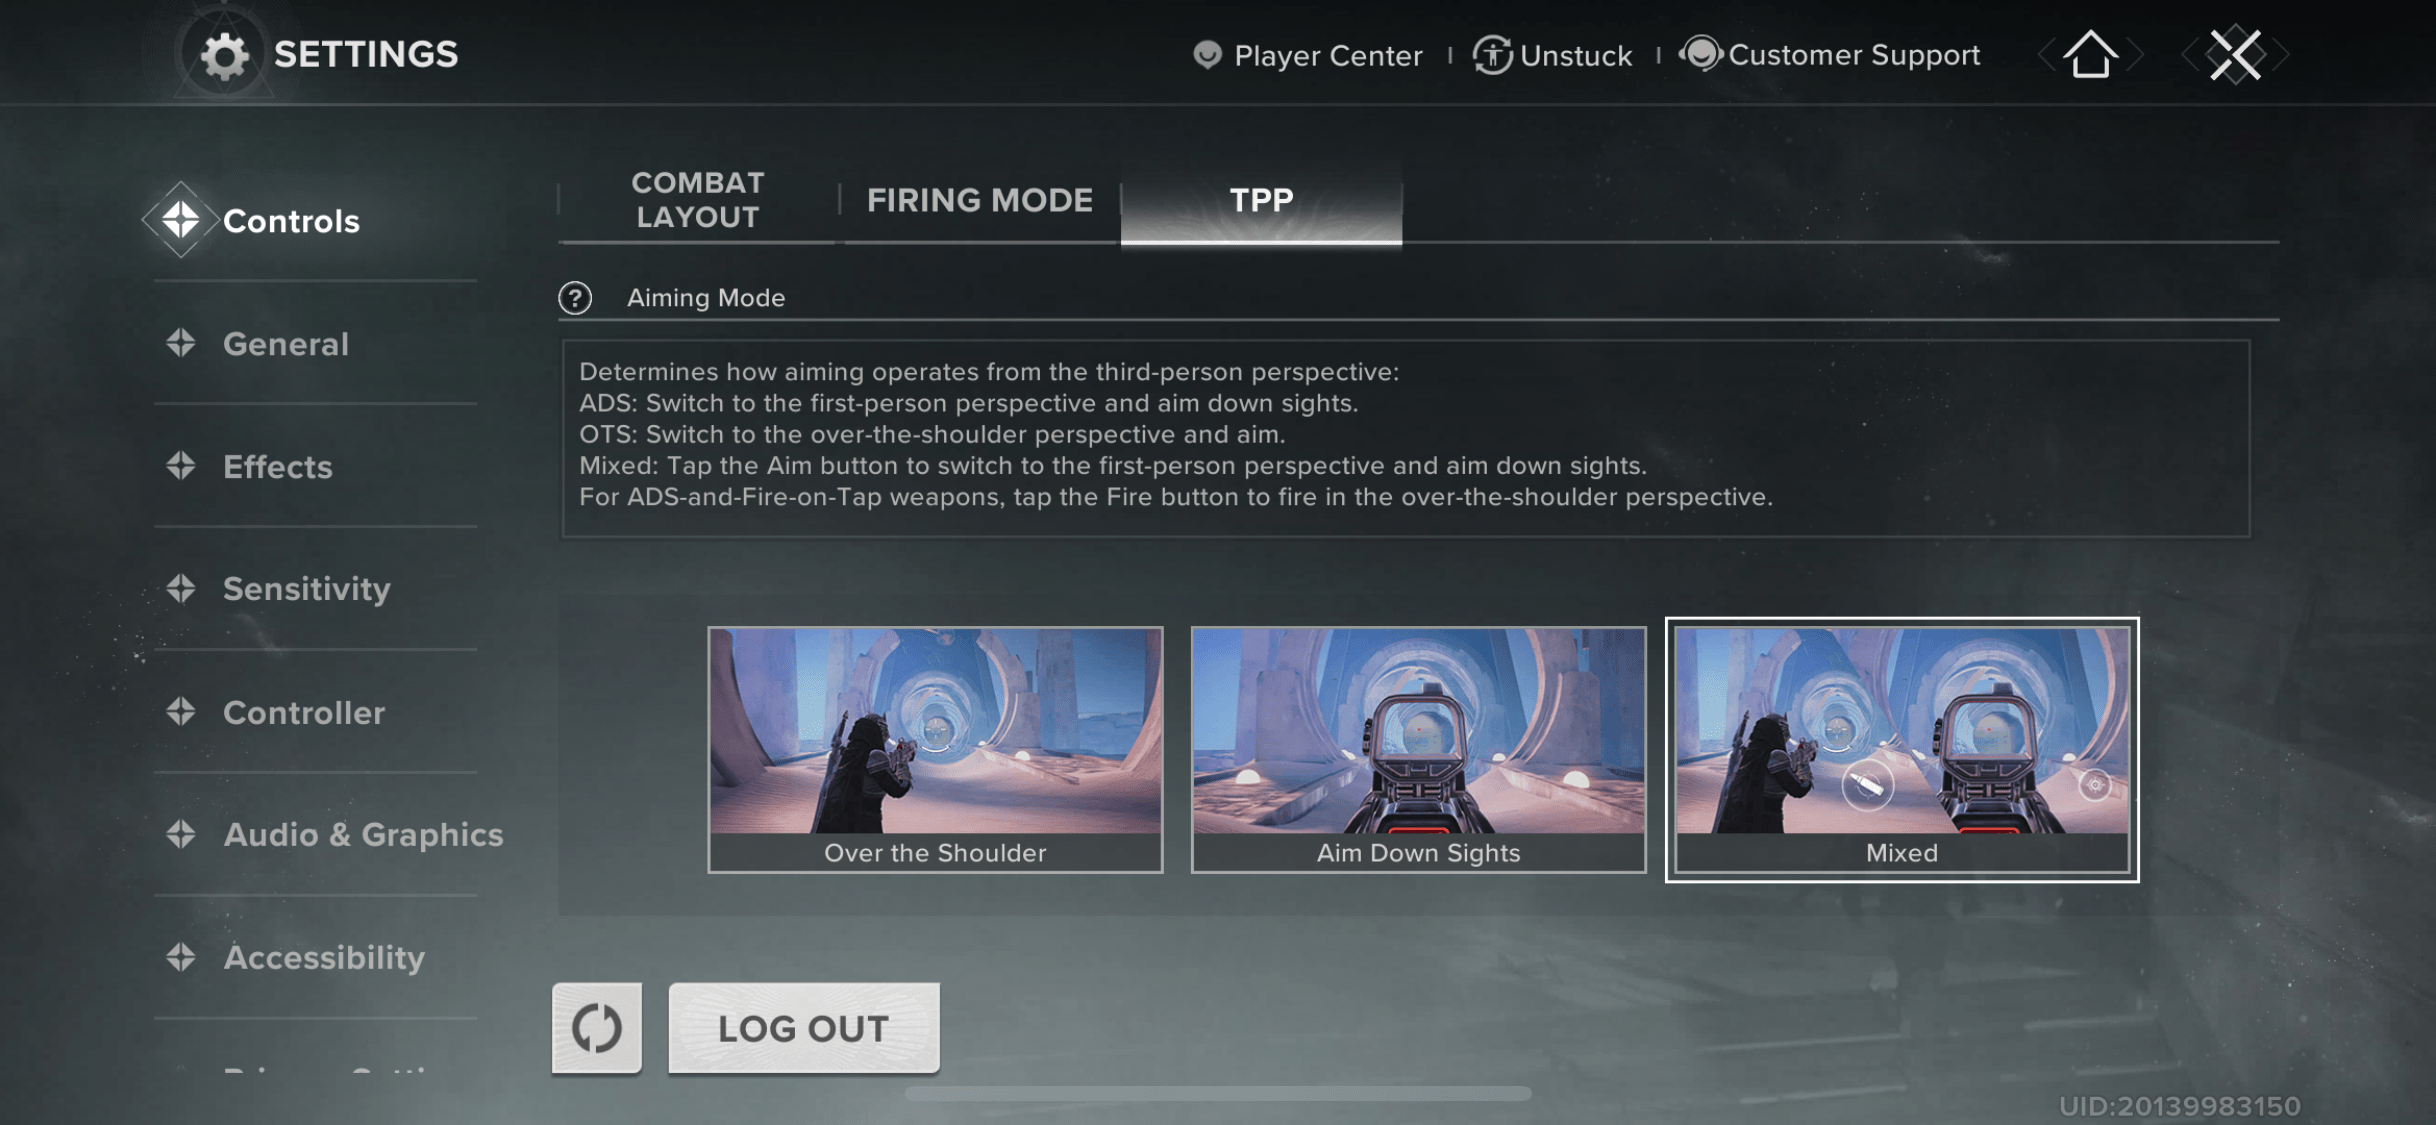
TPP (Third Person Perspective) settings manage your view and camera in Destiny Rising. It’s quite a significant setting as correct FOV and camera distance improve battlefield awareness.
The recommended TPP setting for Destiny Rising is Mixed since it enables you to switch between two perspectives. The option makes the game more interesting if you prefer manual aiming, as you can use the aim button to switch to first-person perspective to take precise shots. Find Destiny Rising TPP settings at Settings → Controls → TPP.
Destiny Rising Best Weapons Settings
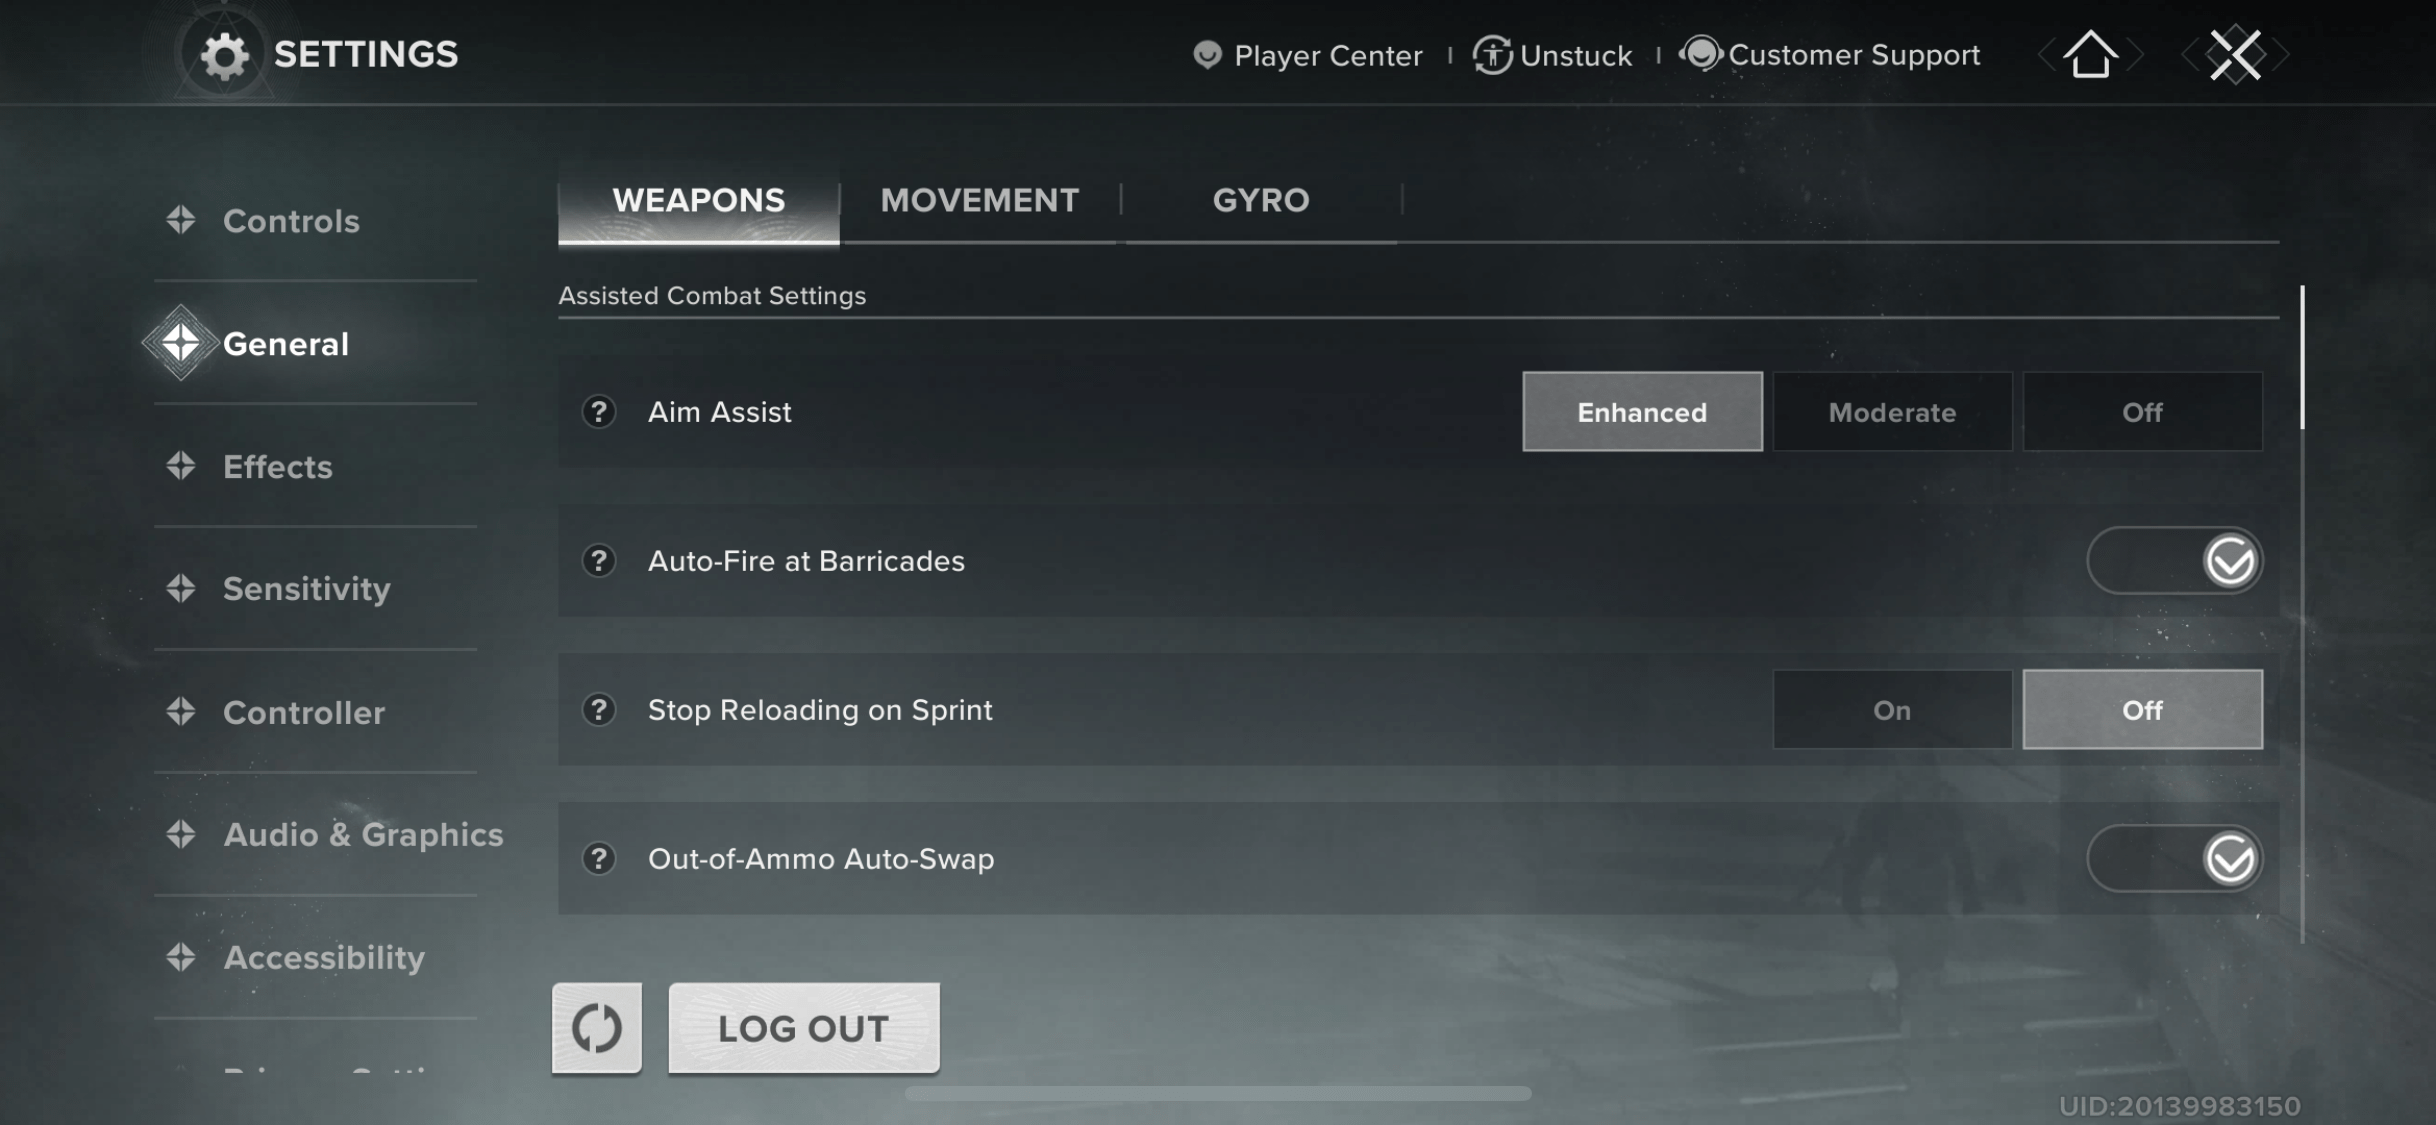
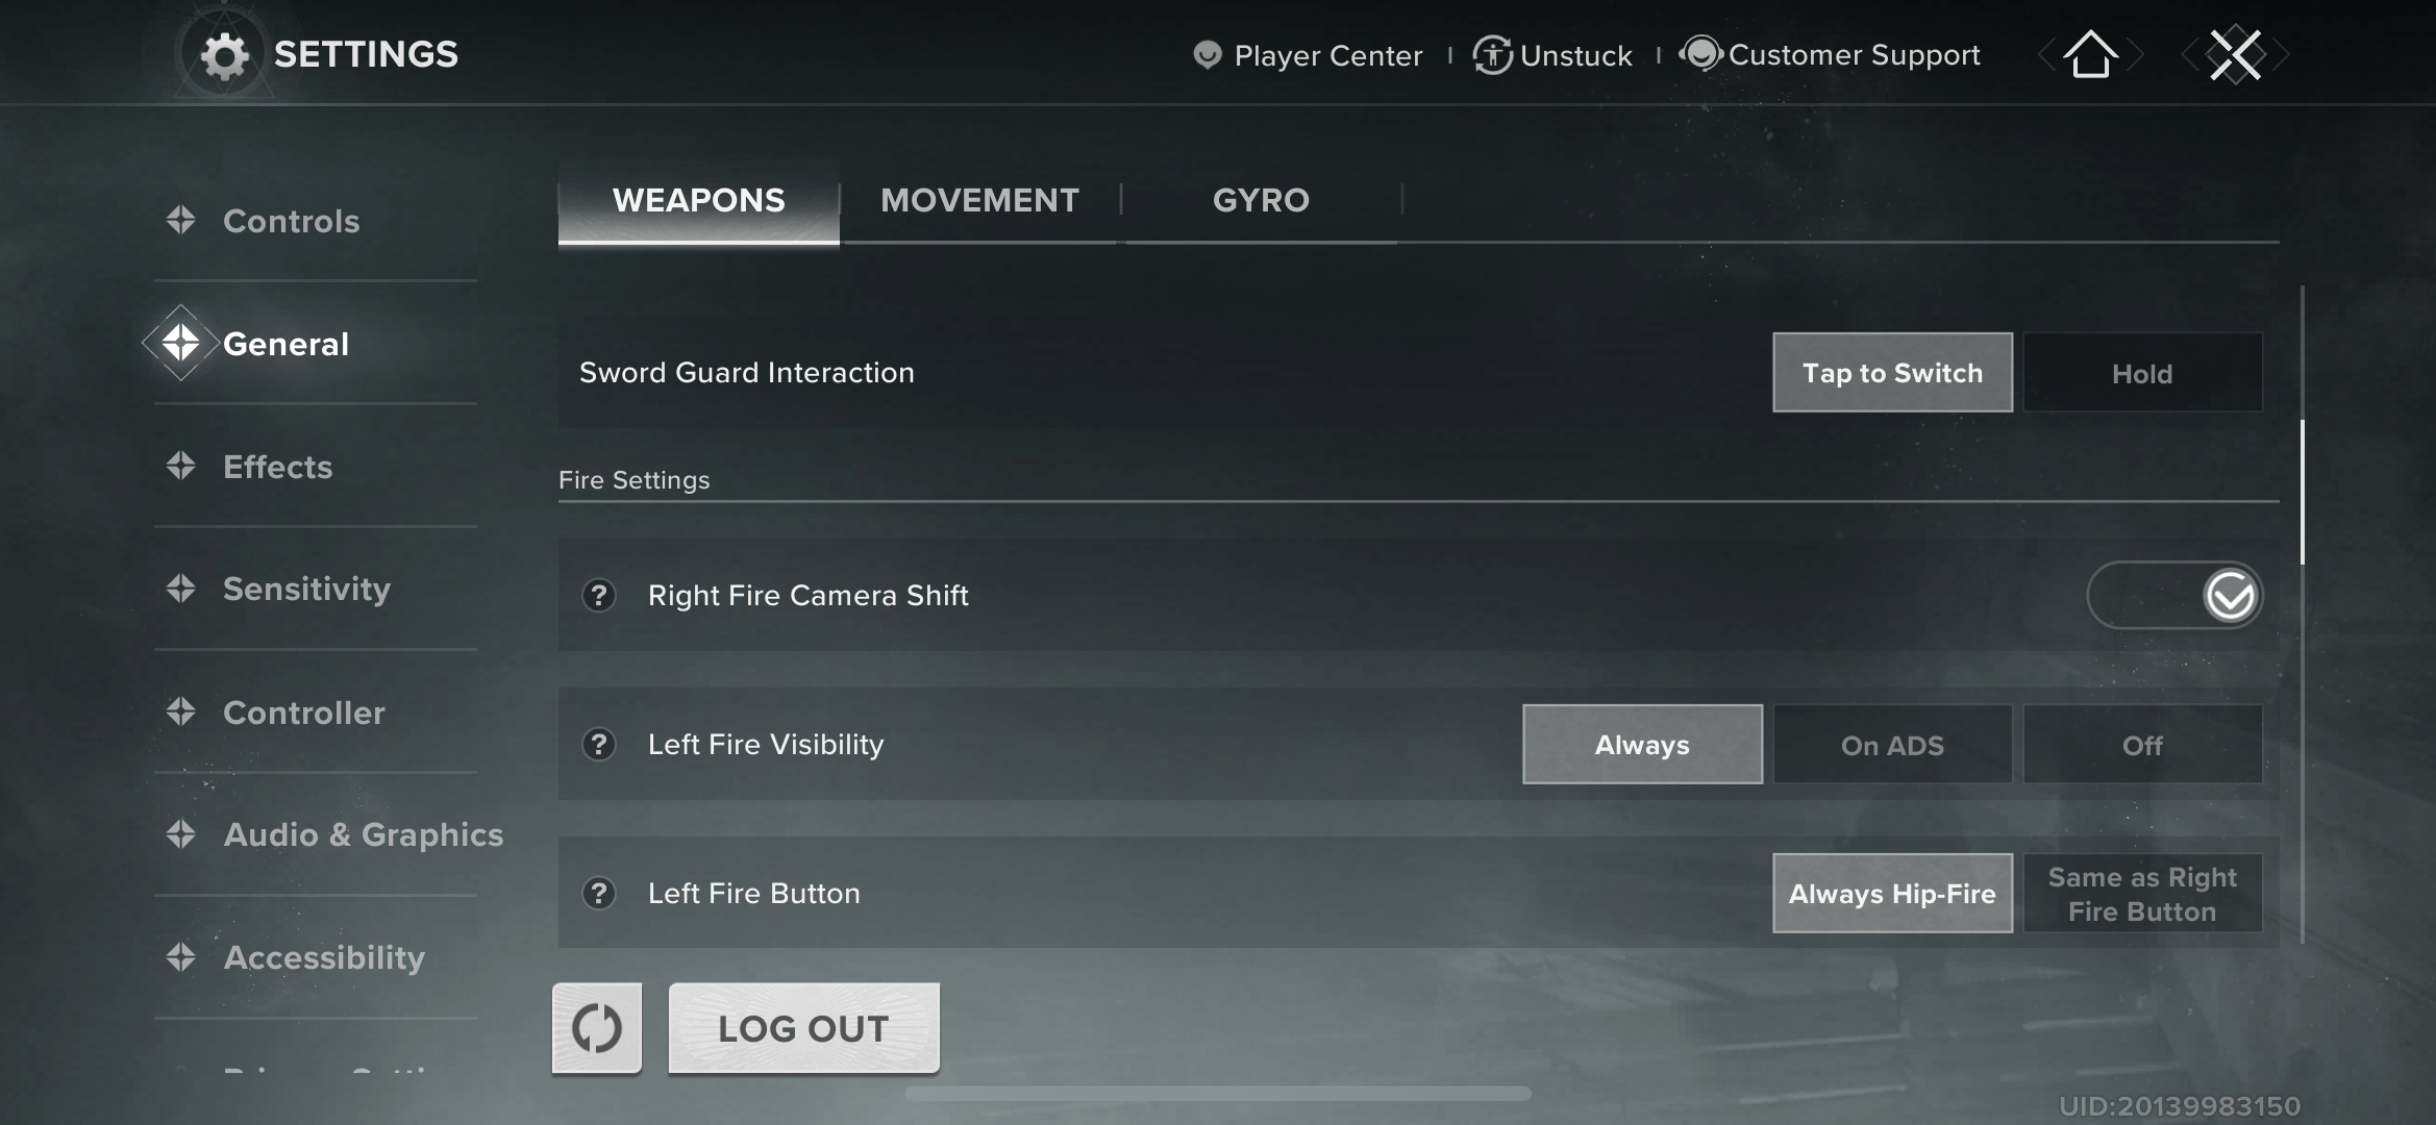
Weapons settings in Destiny Rising control aim assist, auto-fire on barricades, canceling reload while sprinting, fire modes, and other details. In Destiny Rising, you can fine-tune almost every aspect of your weapons, so take the time to set them up properly before jumping into the game. To access the Weapons setting, go to Settings → General → Weapons.
| Setting | Recommended Value | Explanation |
|---|---|---|
| Aim Assist | Enhanced | Gives extra stickiness for tracking targets on mobile screens |
| Auto-Fire at Barricades | On | Breaks cover quickly without wasting manual shots |
| Stop Reloading on Sprint | Off | Keeps reloads from being cancelled mid-fight |
| Out-of-Ammo Auto-Swap | On | Instantly swaps to a backup gun when mags run dry |
| Sword Guard Interaction | Tap to Switch | Snappier response than holding, better for close duels |
| Right Fire Camera Shift | On | Lets you aim and fire smoothly with the right button |
| Left Fire Visibility | Always | Guarantees the button is ready on either side of the screen |
| Left Fire Button | Always Hip-Fire | Keeps controls straightforward, avoids unwanted ADS |
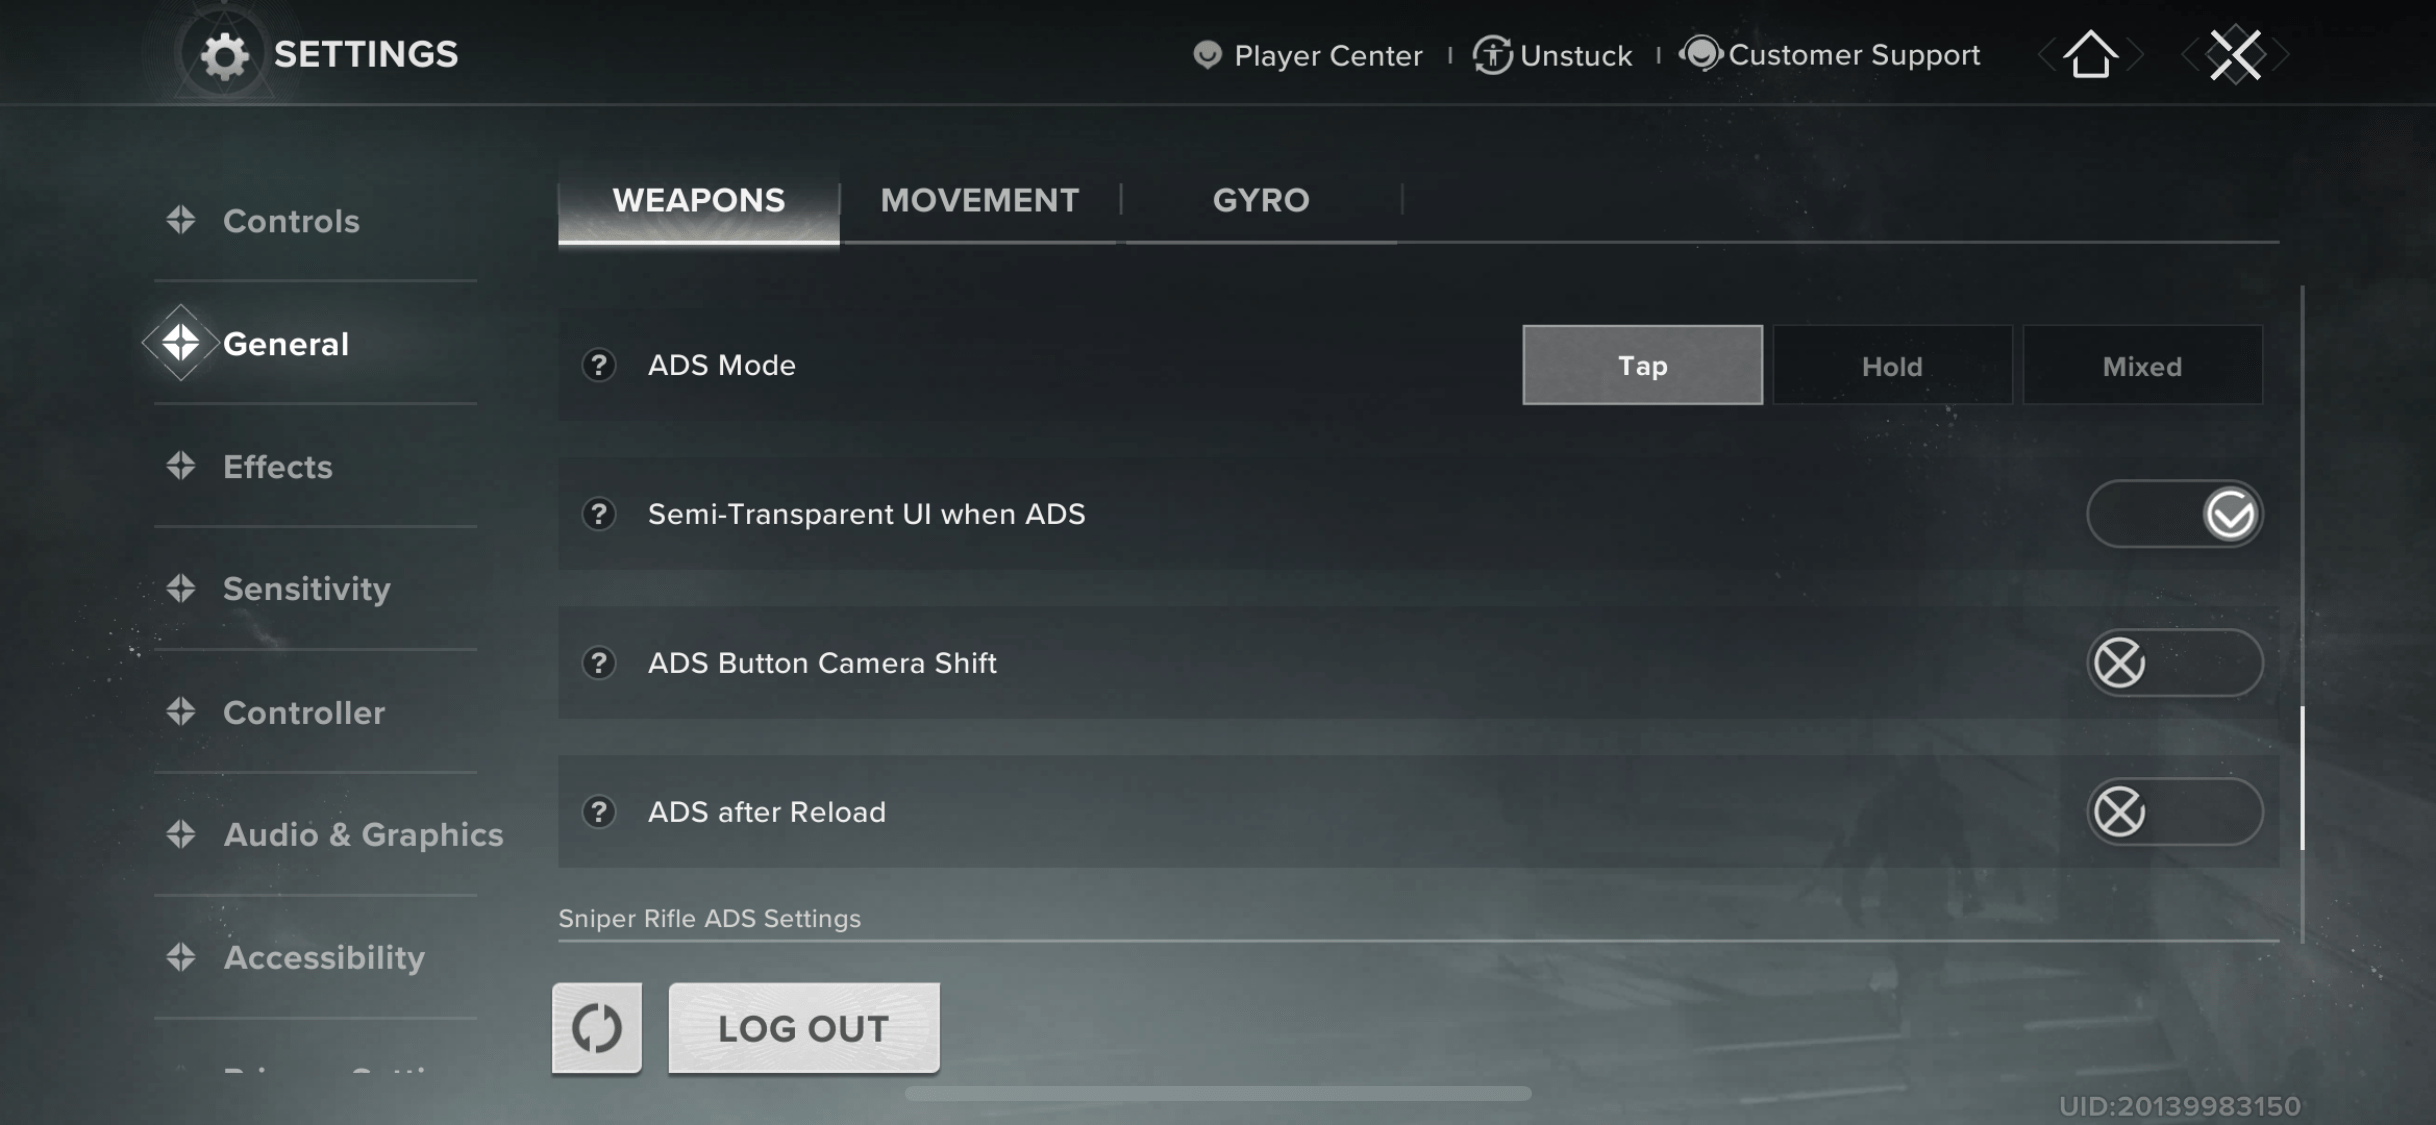
| Semi-Transparent UI when ADS | On | Clears clutter so you can focus while scoped in |
| ADS Button Camera Shift | Off | Stops accidental camera drifts during aim-down-sight |
| ADS after Reload | On | Keeps your weapon scoped after topping up bullets |
| Simultaneous Aim and Fire | On | Fires instantly without waiting to swap aim modes |
| ADS Mode | Tap | Quick and simple aiming method for mobile play |
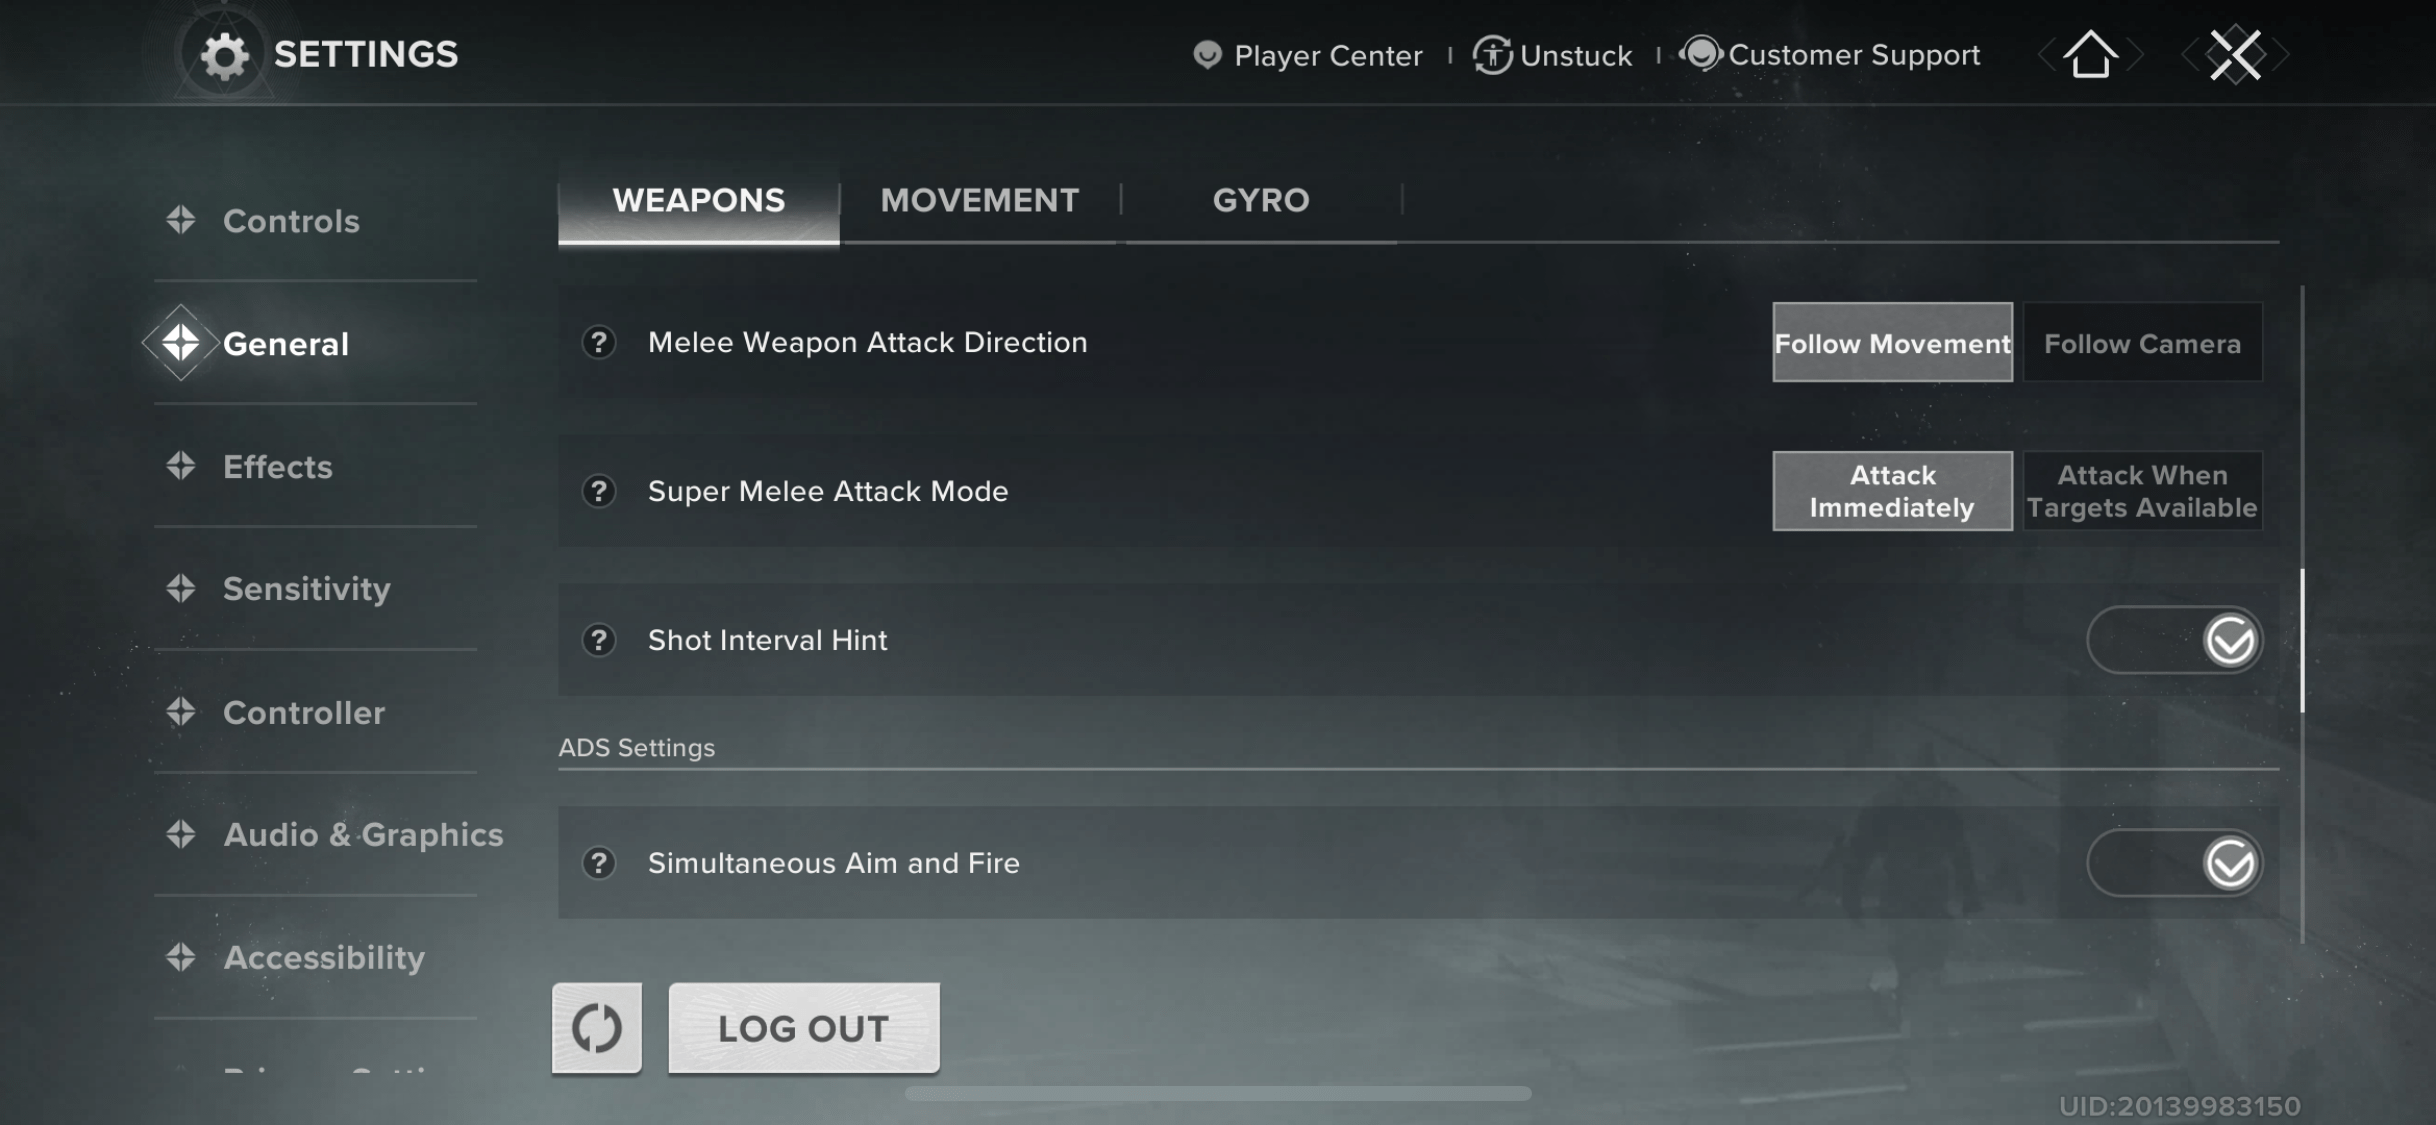
| Super Melee Attack Mode | Attack Immediately | Makes melee trigger instantly for clutch situations |
| Shot Interval Hint | On | Gives timing feedback for shotguns and snipers |
| Melee Weapon Attack Direction | Follow Movement | More natural swing control tied to your movement |
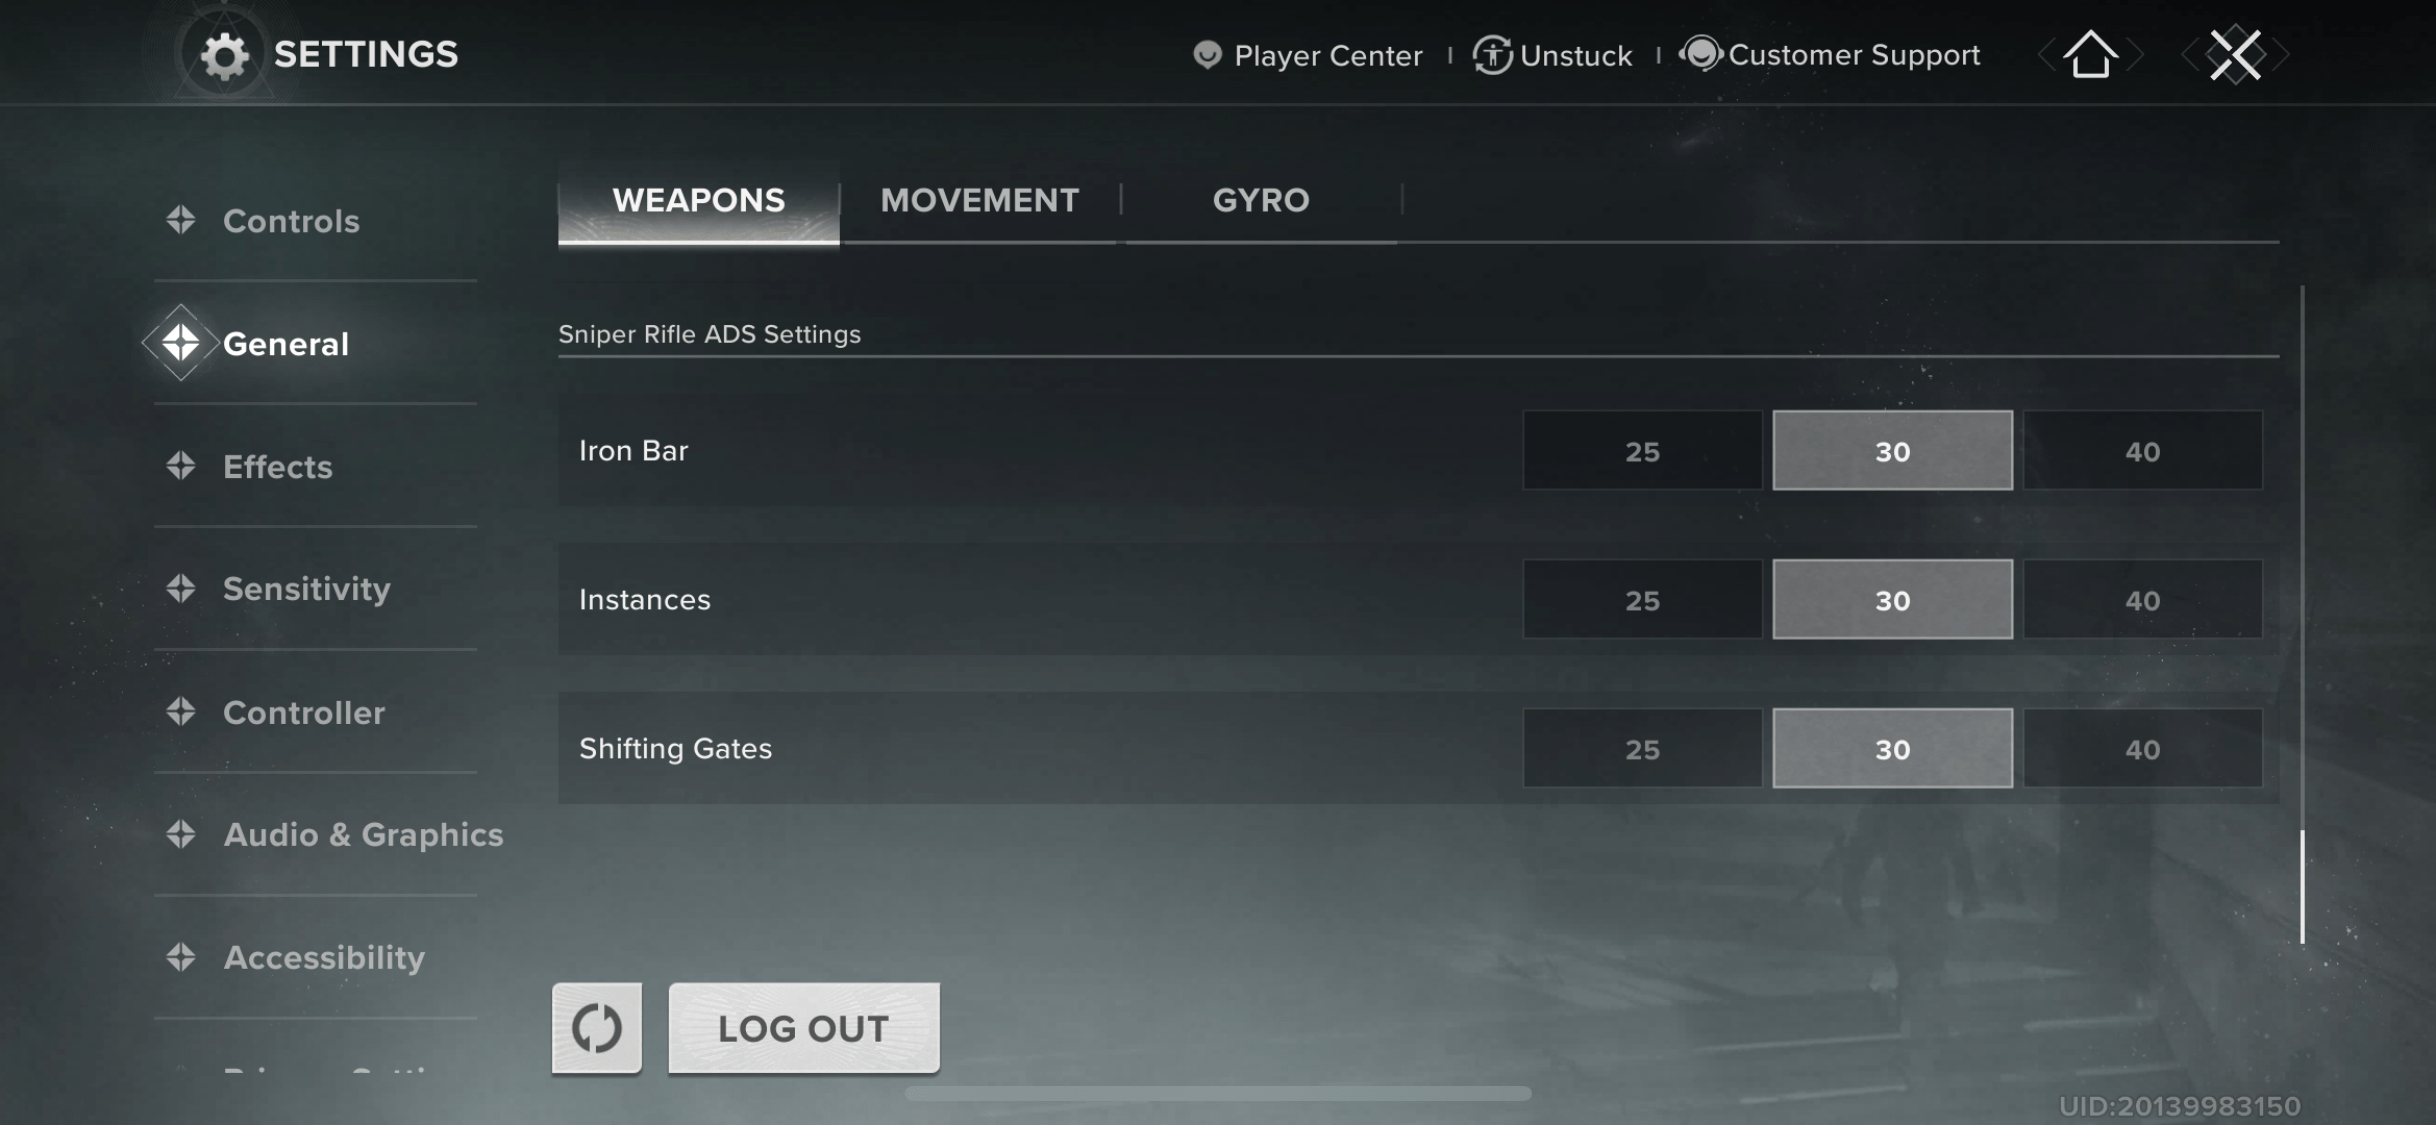
| Sniper Rifle ADS Settings | 30 | Smooth sensitivity for steady sniper shots |
Destiny Rising Best Movement Settings
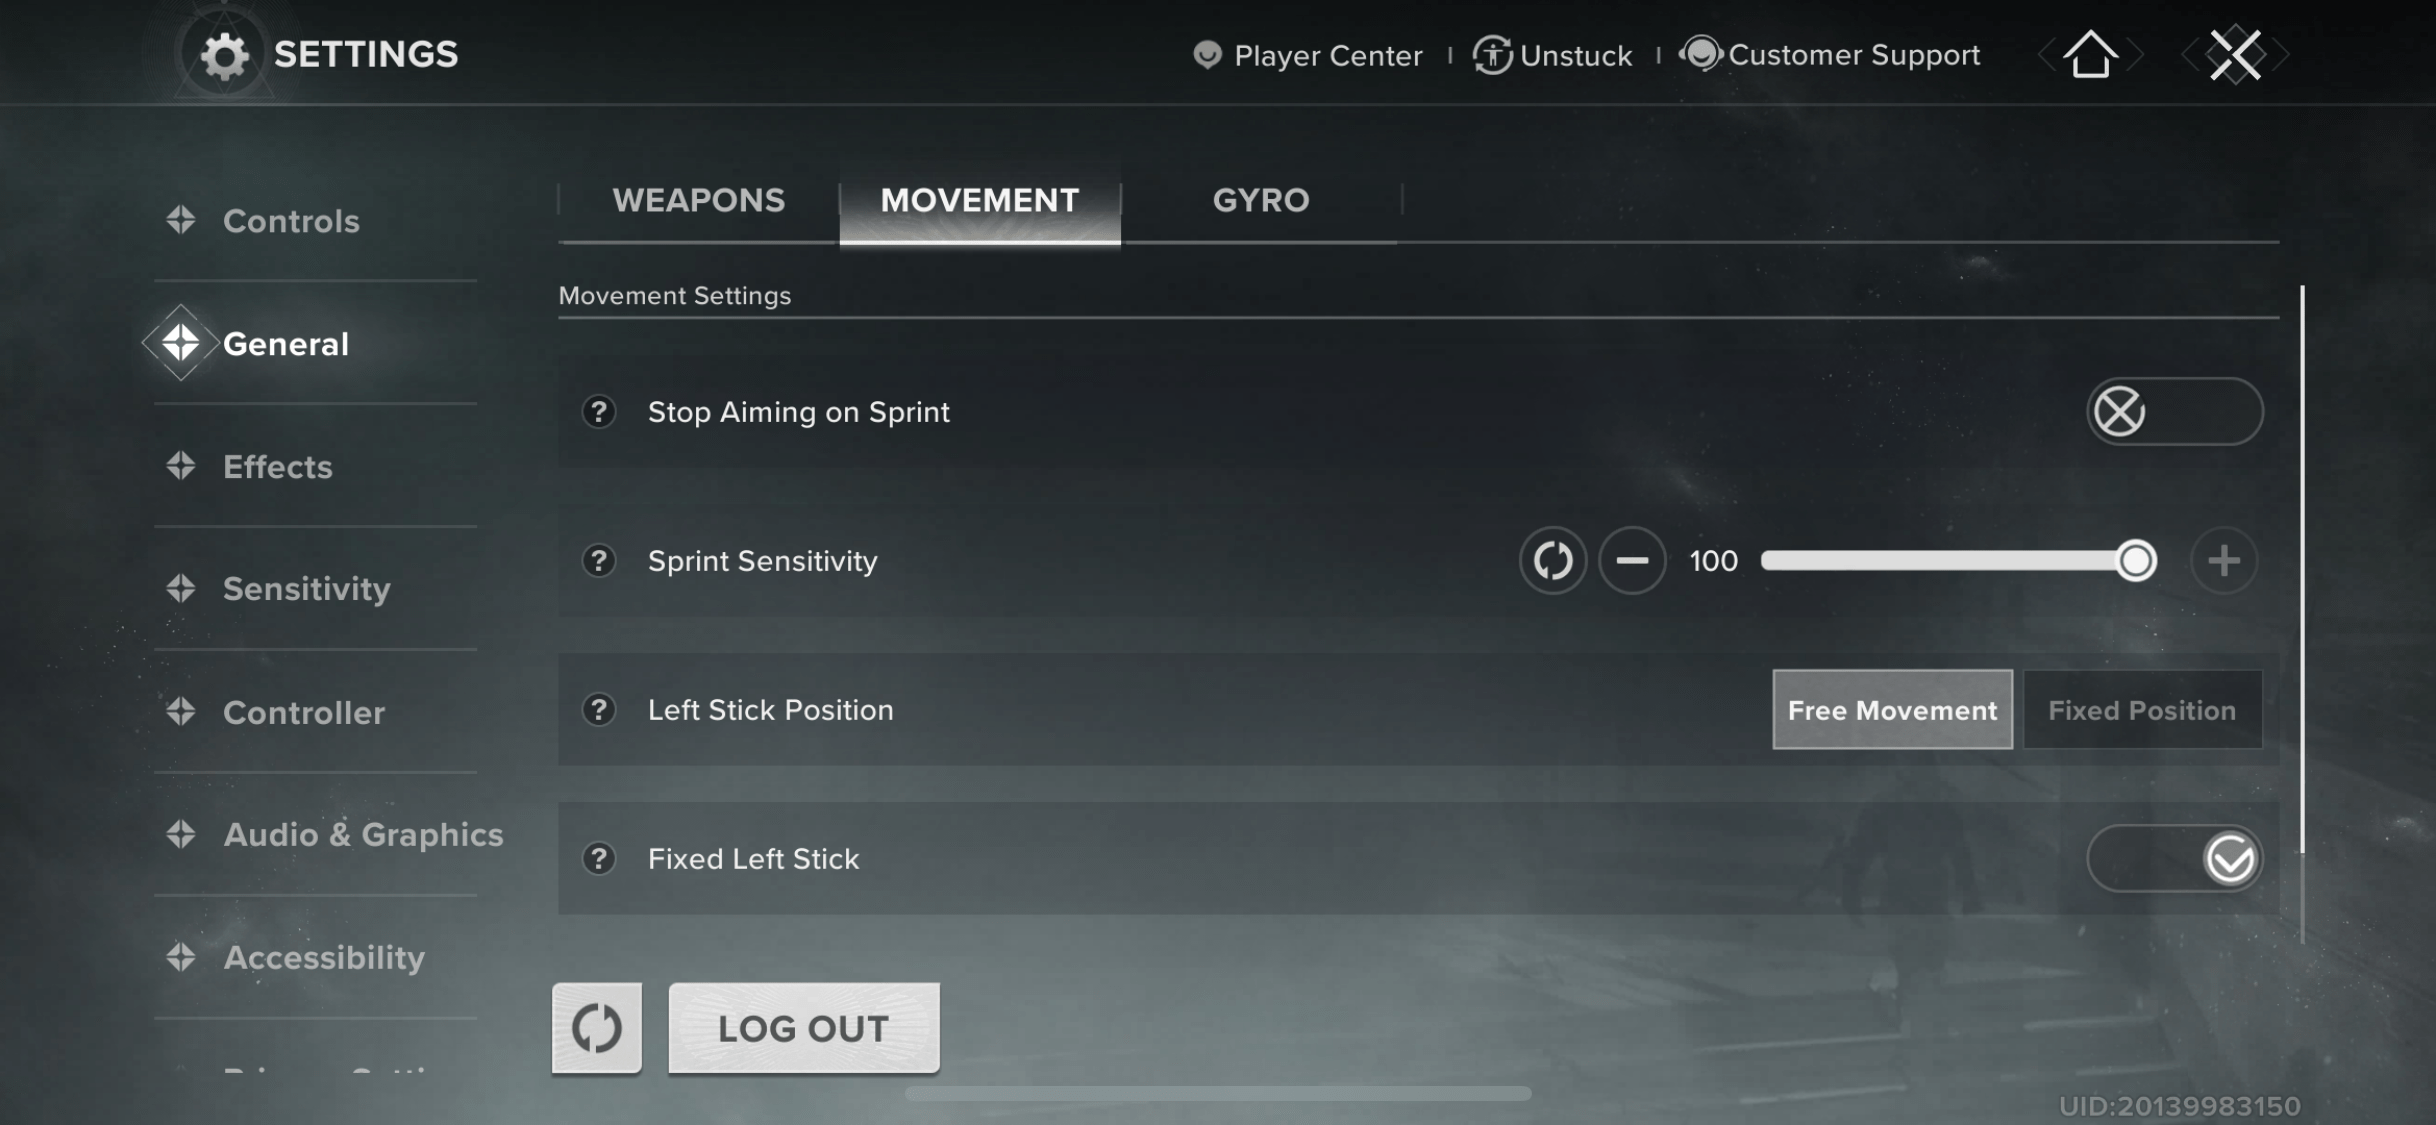
Movement is survival in Destiny Rising, as the fights there are dynamic, and you need to feel comfortable on the move. Put your primary movement buttons wherever they are most easily accessible and adjust the movement settings to your needs. To access Movement settings, go to Settings → General → Movement.
| Setting | Recommended Value | Why Pick This |
|---|---|---|
| Stop Aiming on Sprint | Off | Keeps ADS locked while running, making transitions feel smoother |
| Sprint Sensitivity | 100 | Easier to trigger sprint with minimal thumb movement |
| Left Stick Position | Free Movement | Feels more fluid and responsive compared to fixed placement |
| Fixed Left Stick | Off | Prevents controls from feeling rigid or locked in place |
| Left Stick Auto Sprint | On | Lets you sprint automatically, reducing input strain and speeding up movement |
4.9Destiny Rising Best Gyro Settings
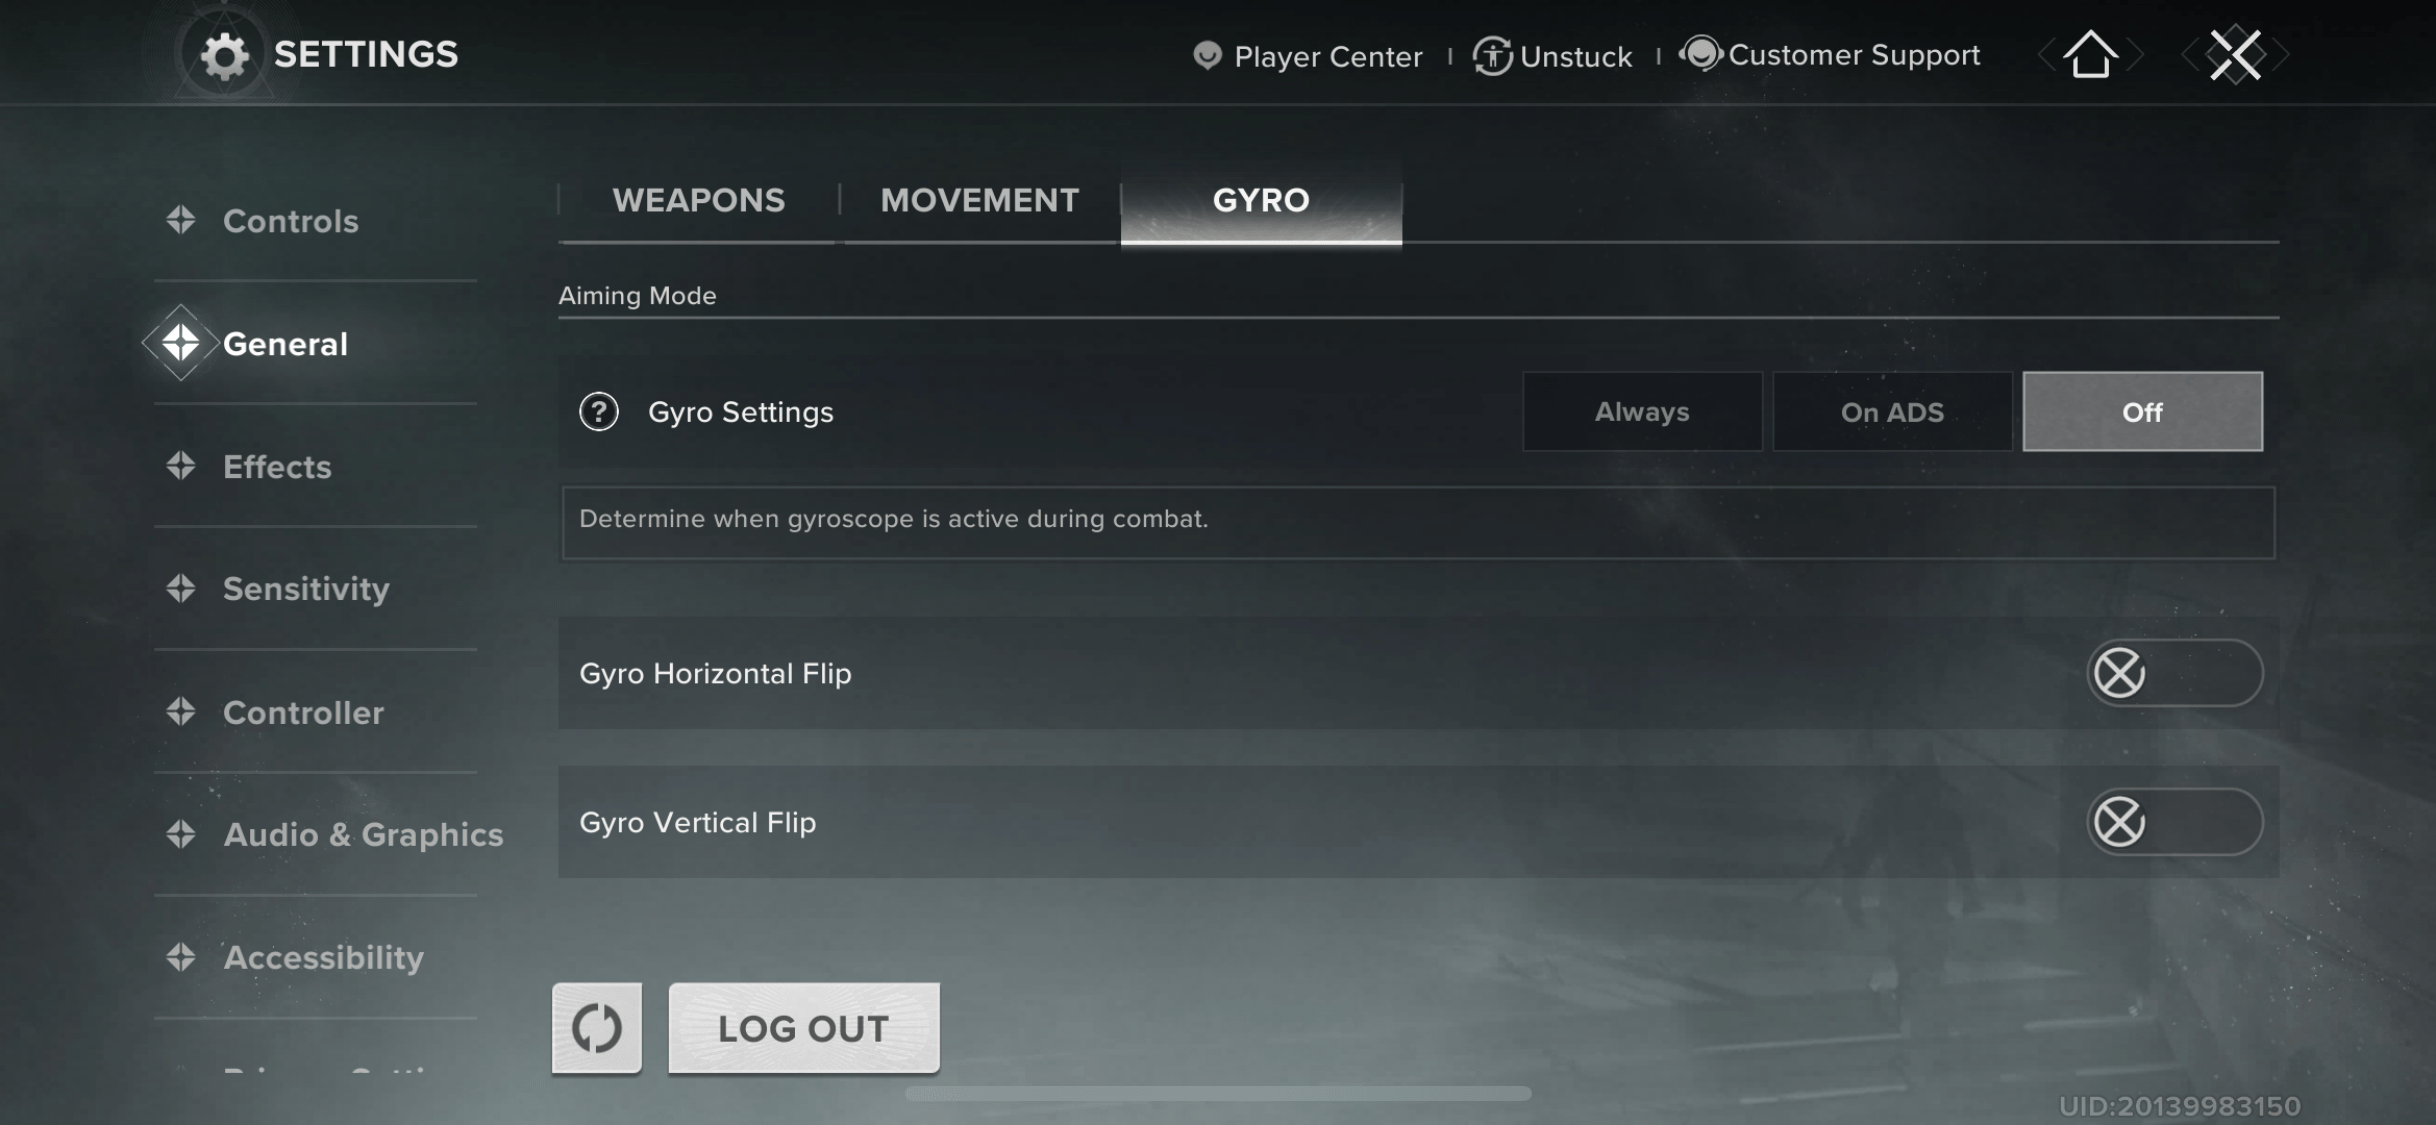
Destiny Rising Gyro aim helps with accuracy, especially during mid- to long-range combat. In Destiny Rising, you may have it for full or just aim control. Open your Settings → General → Gyro to find this tool.
| Setting | Recommended Value | Explanation |
|---|---|---|
| Gyro Settings | On ADS | Activates only while aiming, giving precision without constant movement |
| Gyro Horizontal Flip | Off | Keeps left-to-right control feeling natural |
| Gyro Vertical Flip | Off | Keeps up-and-down control intuitive and easy |
Destiny Rising Best Effects Settings

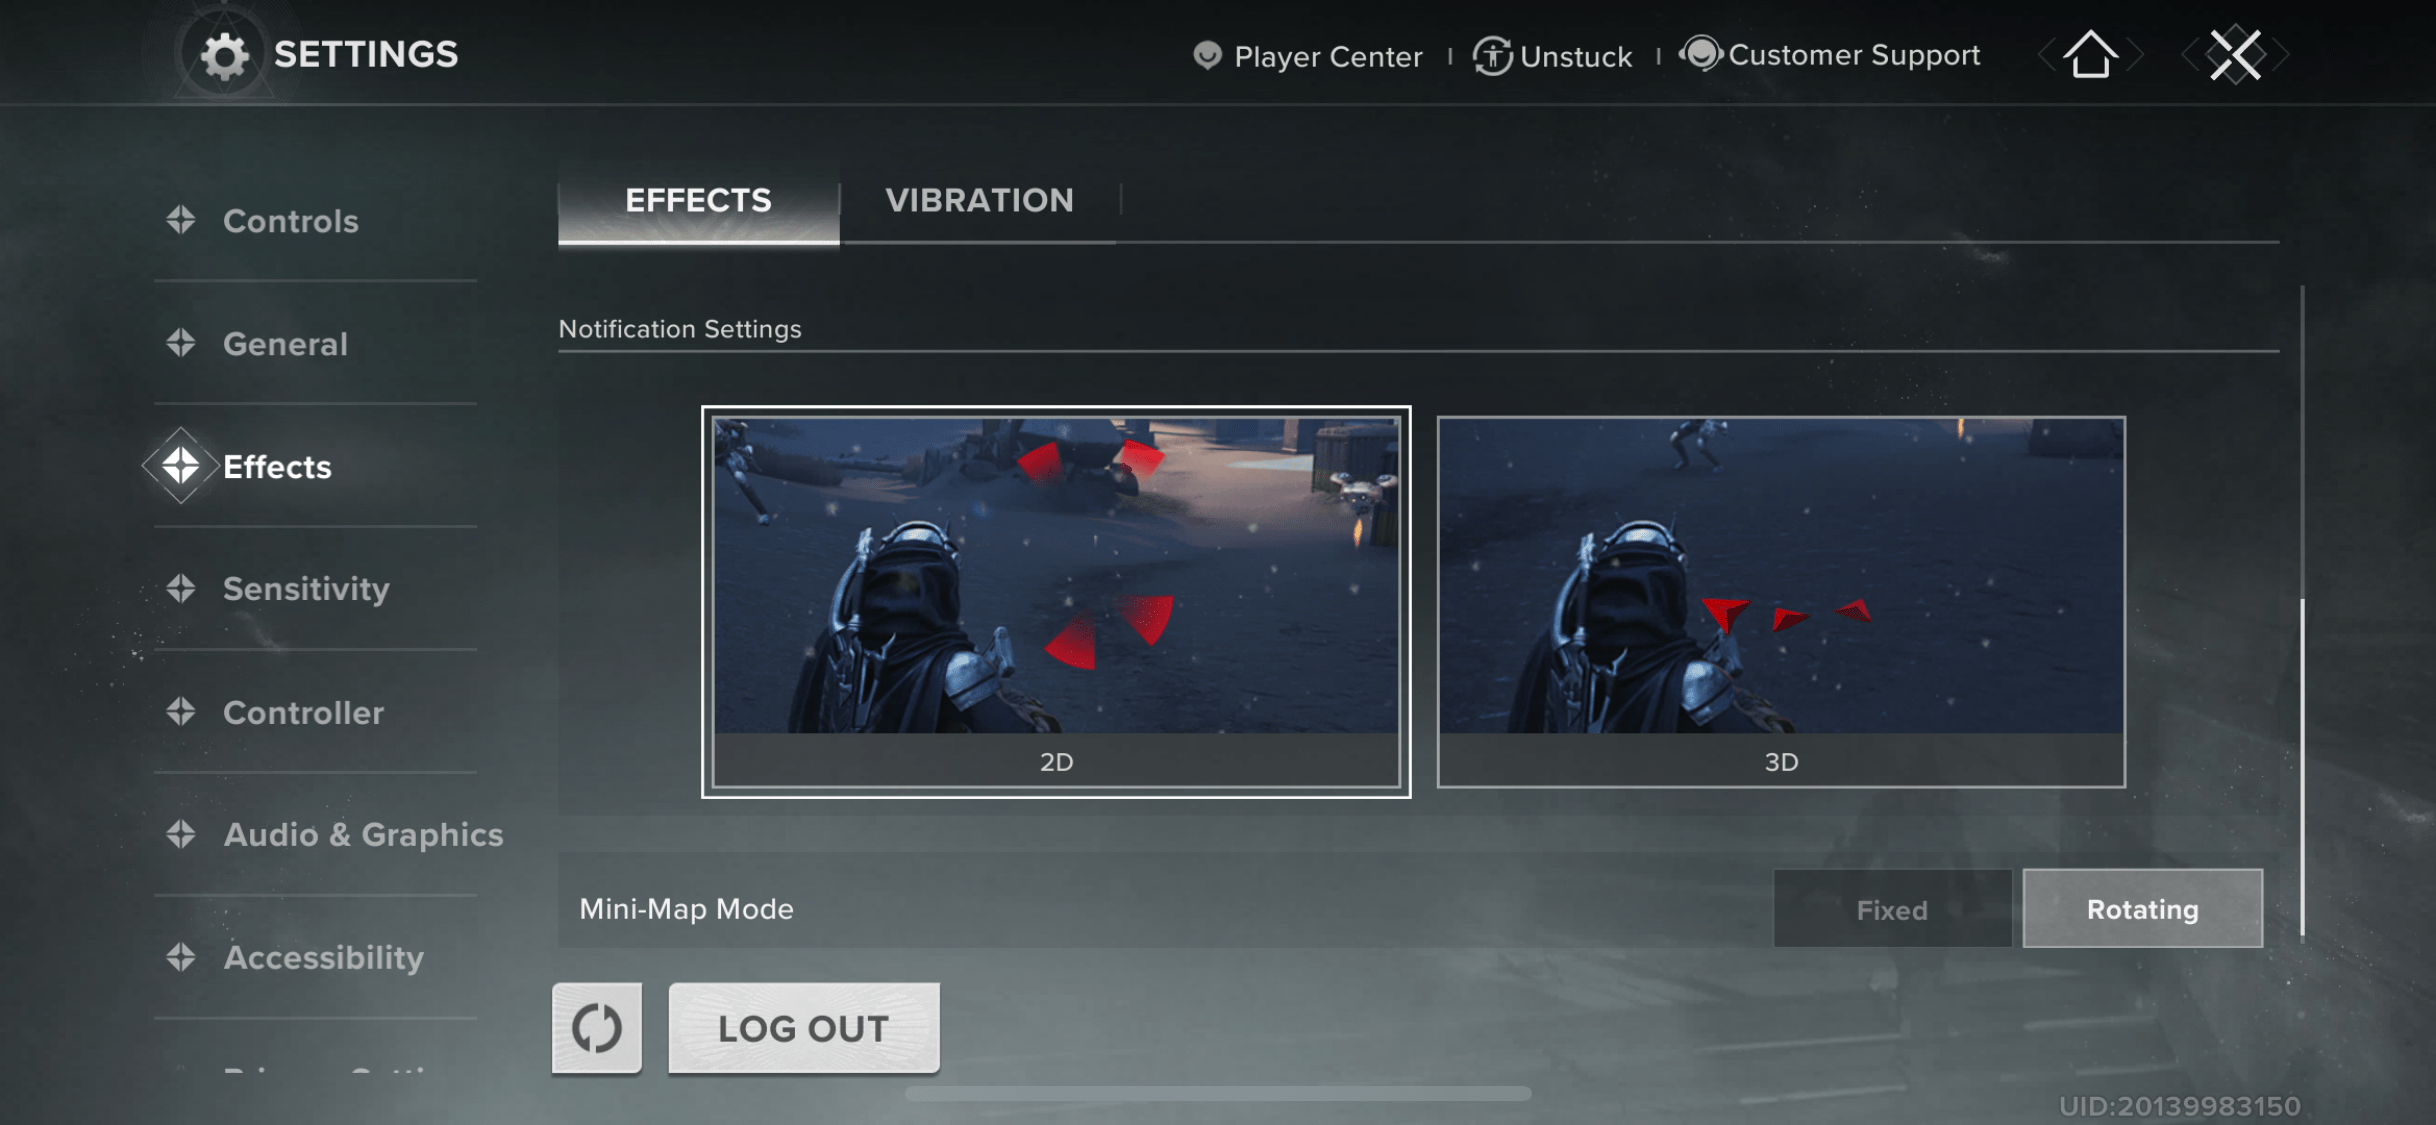
Effects control your visual clarity, screenshake, and some other essentials like notification settings. For Destiny Rising, it’s wise to weigh them against each other: disable motion blur, but put FPP and TPP Field of View to 90. Effects fine-tuning happens at Settings → Effects.
| Setting | Recommended | Reason |
|---|---|---|
| FPP Field of View | 90 | Widens vision for better awareness while keeping enemies visible at a reasonable size |
| TPP Field of View | 90 | Matches first-person FOV for smoother perspective swaps and steady awareness |
| Motion Blur | Off | Keeps visuals sharp during fast movement and aiming |
| Screenshake | Off | Removes distracting camera jolts, making aim more stable in fights |
| Notification Style | 2D | Simple hit and threat markers reduce clutter around the screen |
| Mini-Map Mode | Rotating | Always points the map toward your view, helping with quick navigation |
Destiny Rising Best Sensitivity Settings
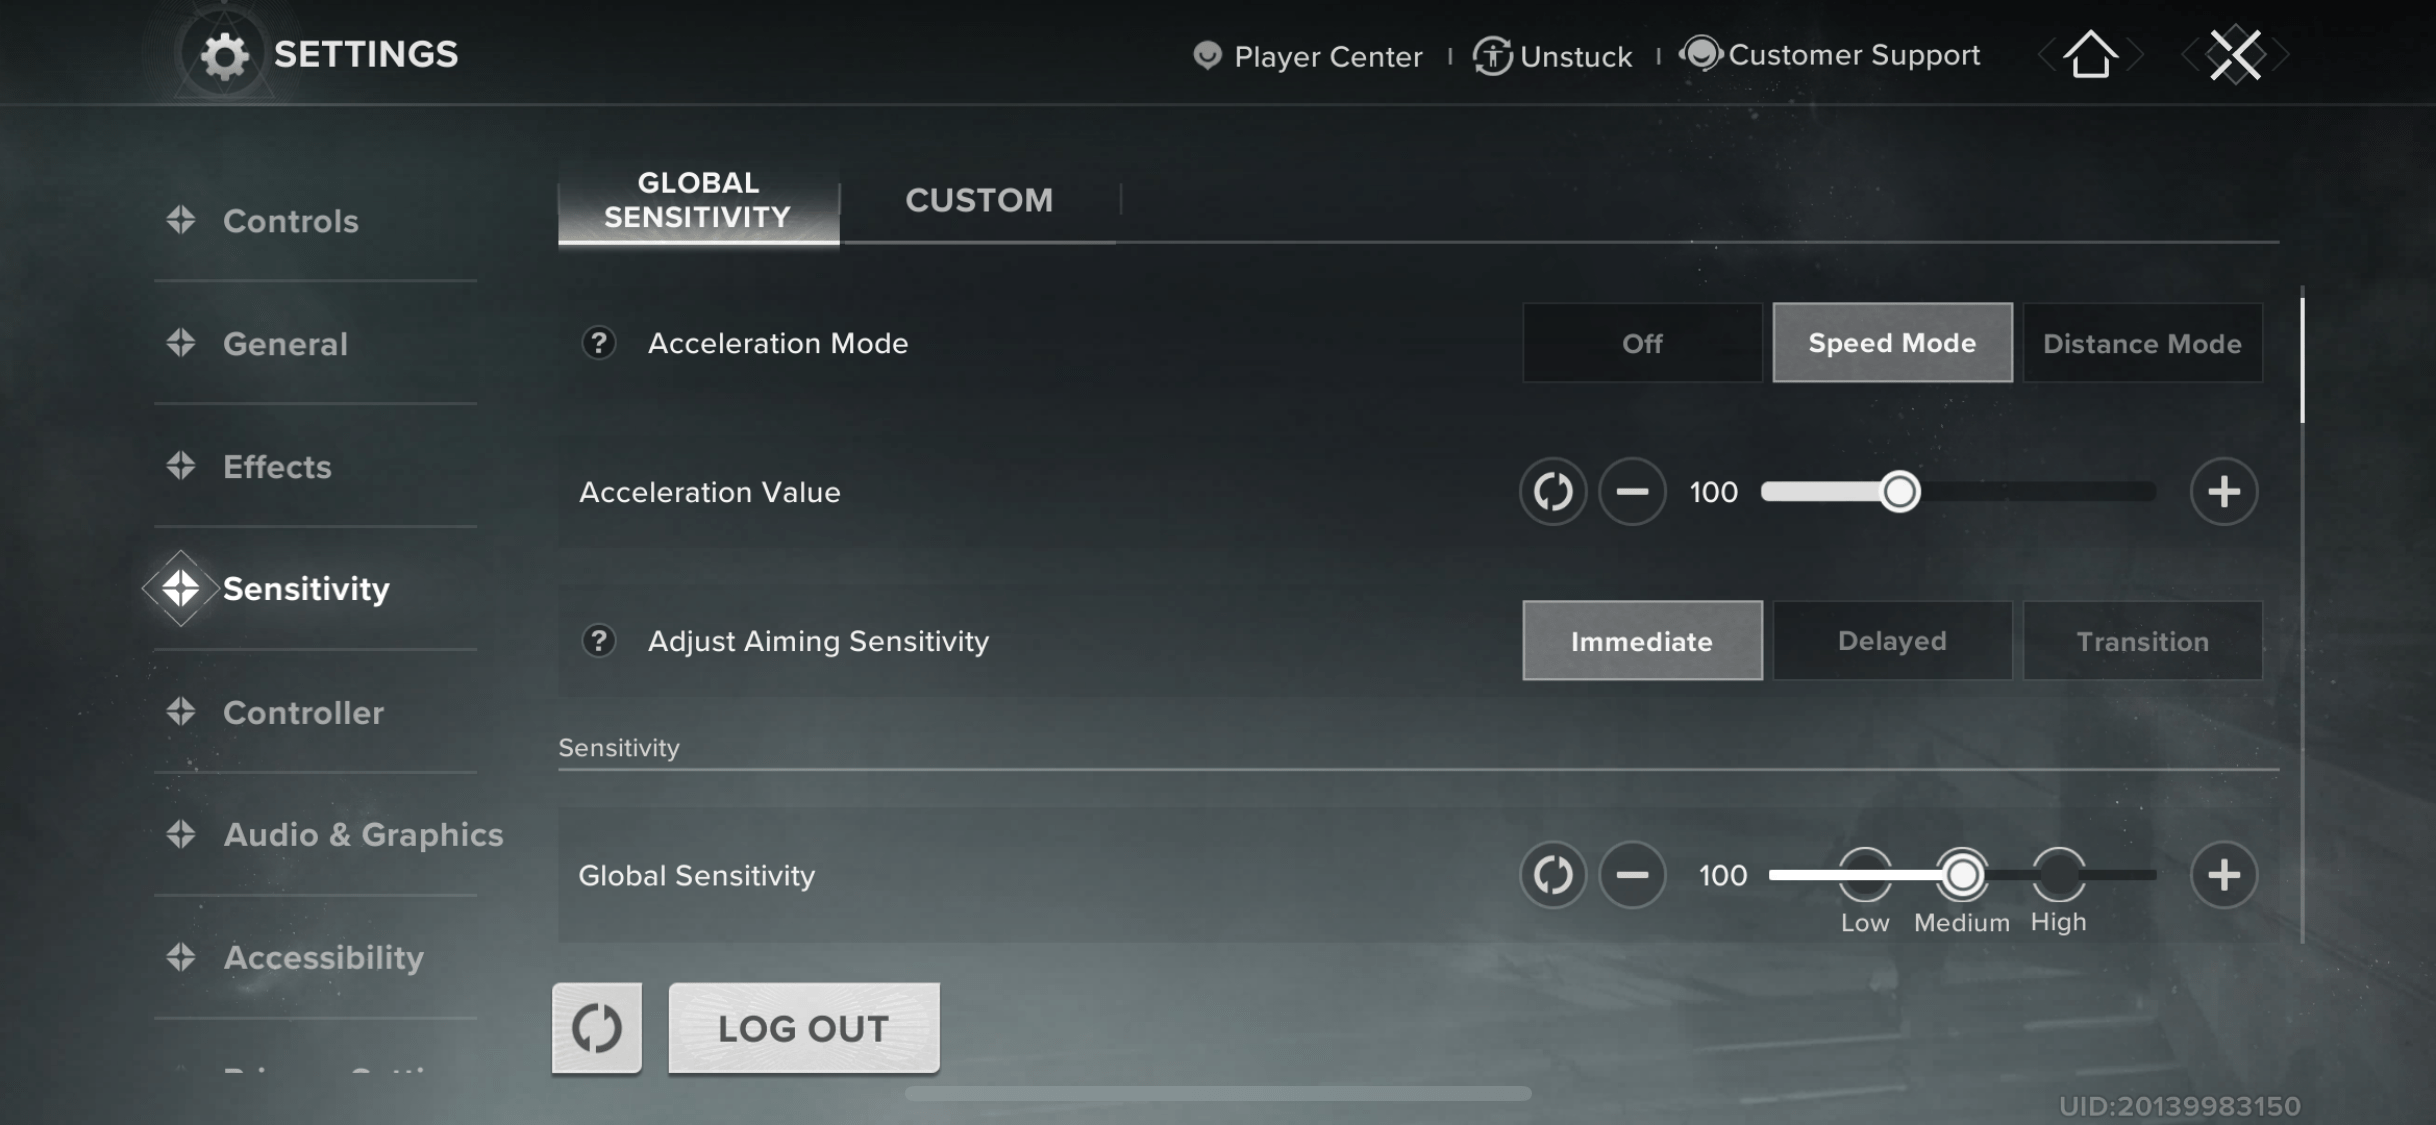
Sensitivity settings in Destiny Rising control how fast your camera and aim respond. Too low is sluggish, too high is jittery. A mid value is ideal, with separate ADS sensitivity for precise aiming.
Sensitivity is essential for dynamic fights, e.g., in Gauntlet: Onslaught trials, which are rather challenging and require fast response. Don’t worry if you don’t feel ready yet — our team can assist you with any trial.
| Setting | Recommended Value | Explanation |
|---|---|---|
| Acceleration Mode | Speed Mode | Feels more natural, responds directly to swipe speed instead of distance |
| Acceleration Value | 100 | Keeps movements fast and consistent for all actions |
| Adjust Aiming Sensitivity | Immediate | Removes delays when swapping between ADS and hipfire |
| Global Sensitivity | ~80 | Balanced setting for steady aim in both close and long-range fights |
| Outside of ADS | 80 | Smooth camera control without overshooting targets |
| Short Zoom ADS | 80 | Works well for fast weapons like SMGs, pistols, and shotguns |
| Medium Zoom ADS | 80 | Optimal for ARs, pulse rifles, and bows |
| Long Zoom ADS | 80 | Keeps sniper aim stable without dragging your crosshair |
Destiny Rising Best Graphics Settings
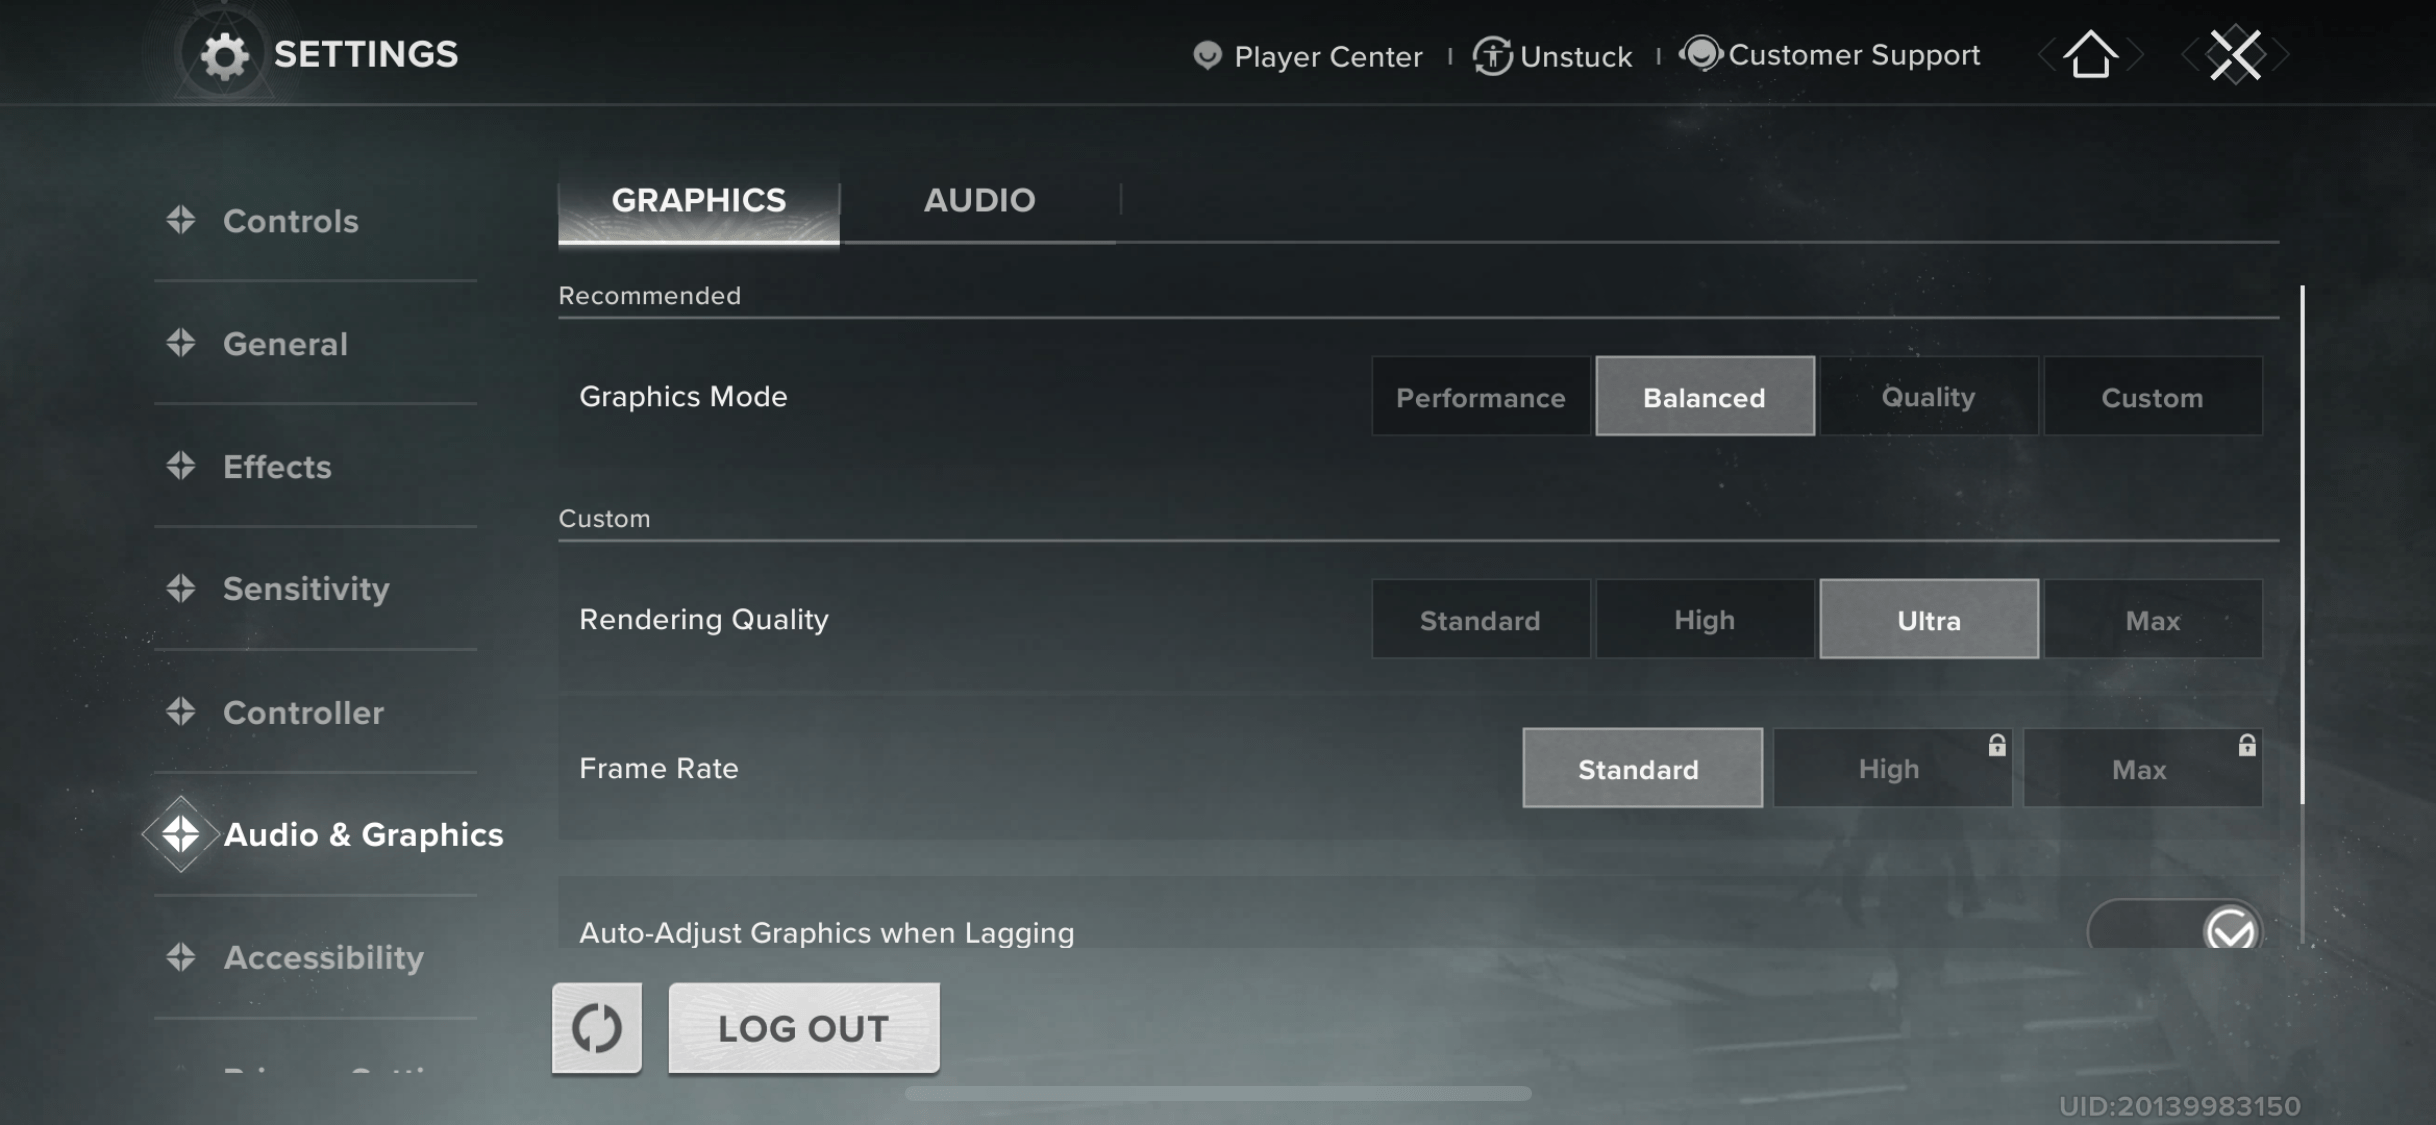
Destiny Rising Graphics settings control the graphics mode, rendering quality, frame rate, etc. Adjusting graphics is essential for smooth gameplay and overall performance. You should always optimize graphics according to your device capabilities to avoid lags and FPS drops.
| Setting | Recommended Value | Explanation |
|---|---|---|
| Graphics Mode | Custom | Gives full control to fine-tune settings instead of relying on presets |
| Rendering Quality | Ultra | Sharp visuals without the heavy battery drain of Max |
| Frame Rate | High | Smooth gameplay while avoiding overheating from Max |
| Auto-Adjust Graphics when Lagging | On | Dynamically lowers load to keep performance steady |
| Pop-up Reminder for Auto-Adjustment | On | Alerts you when the game tweaks settings mid-game |
Destiny Rising Best Controller Settings
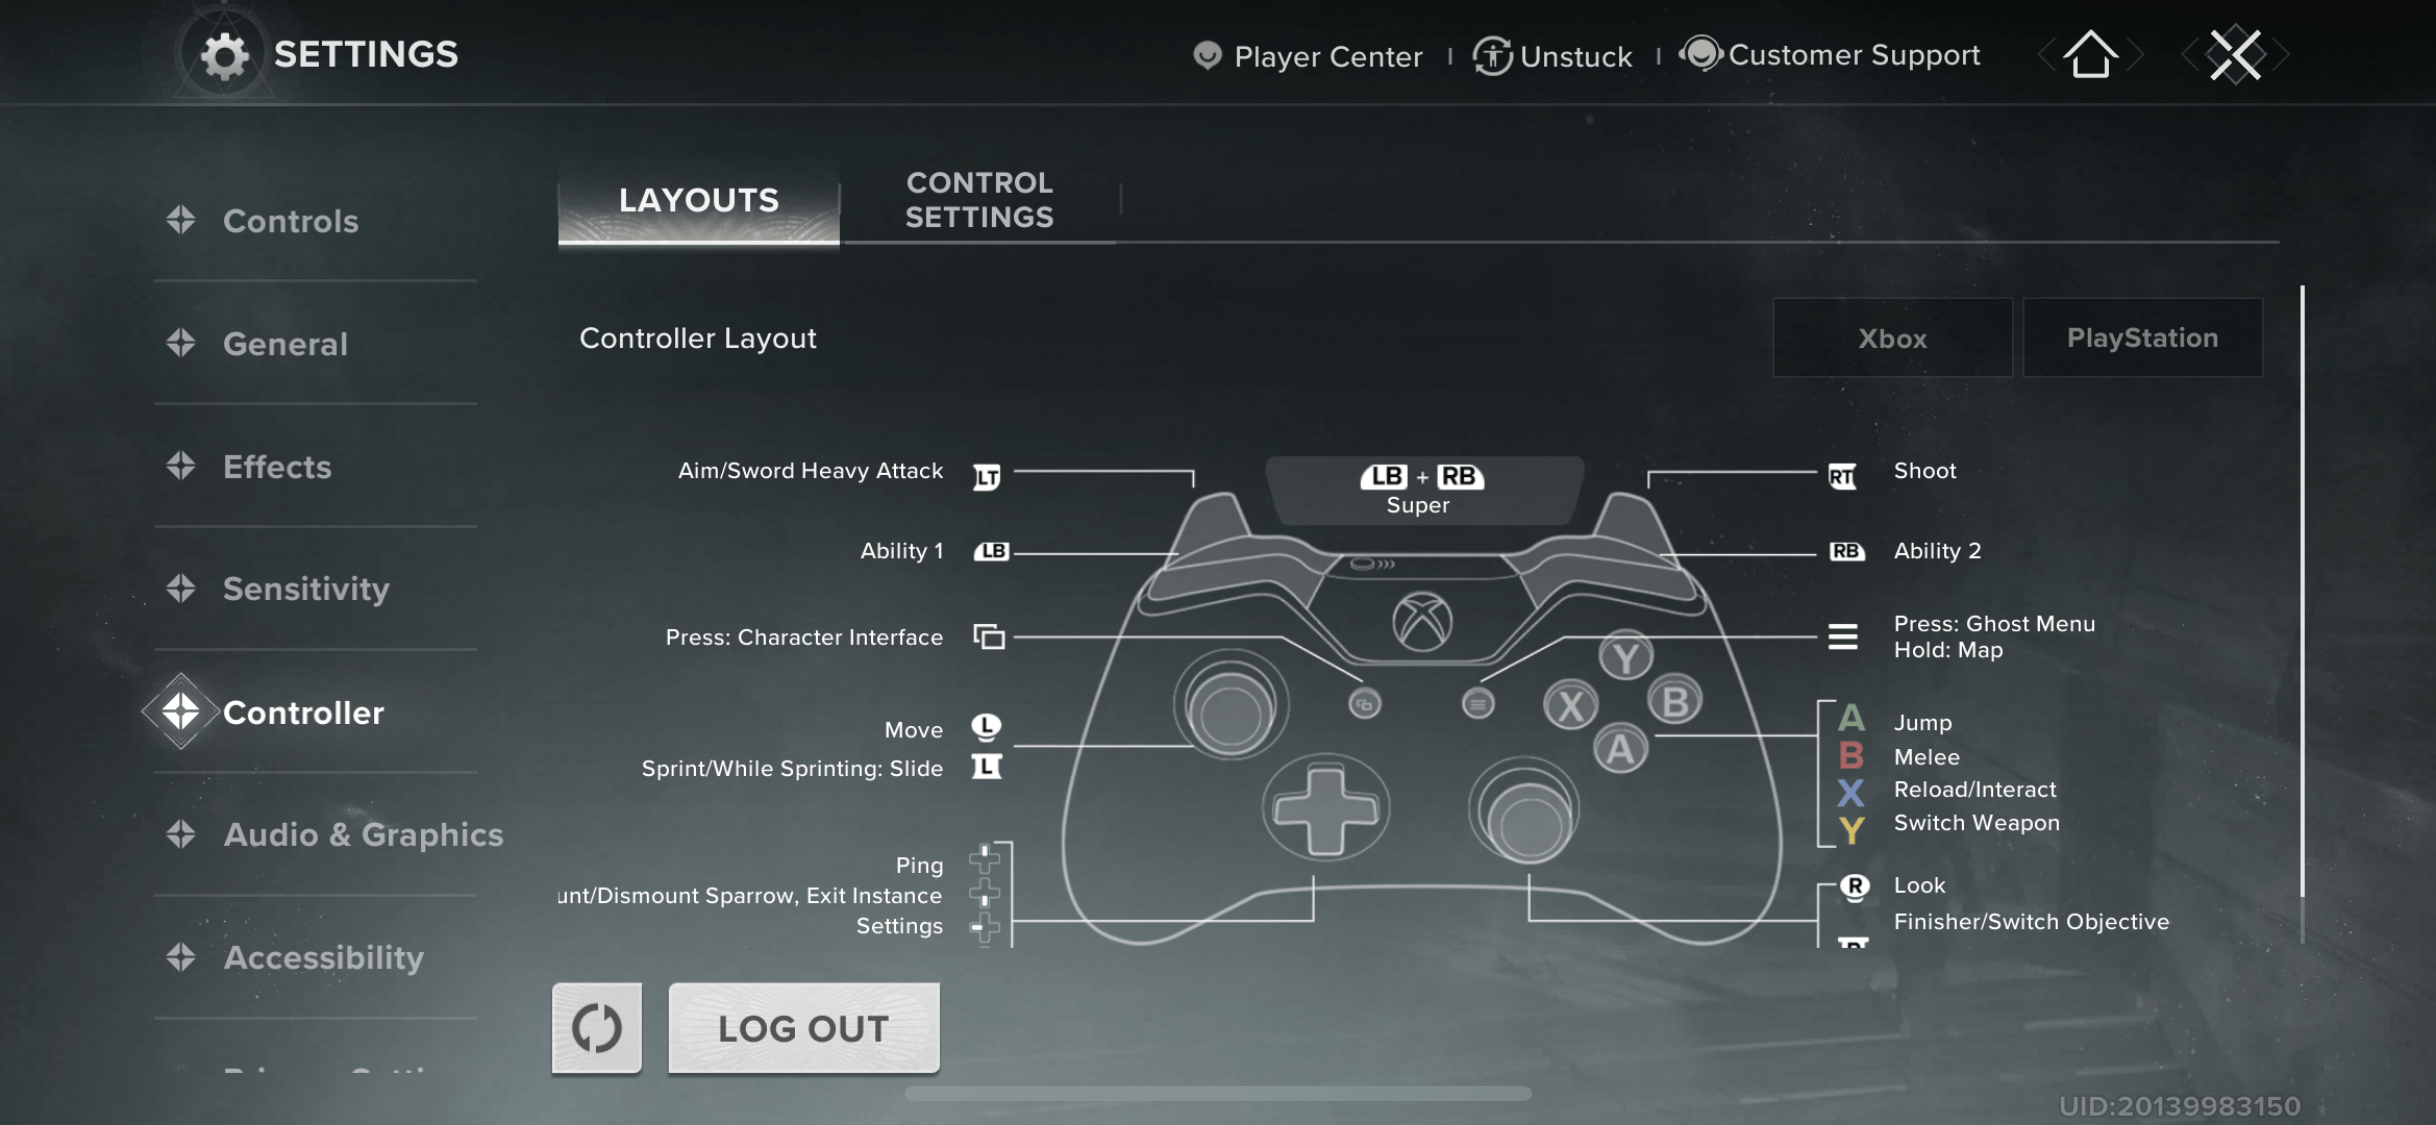
Destiny Rising supports various controllers, e.g., DualShock 4, DualSense, Xbox One, Xbox Series X|S, that you can link to your device. If you play with a gamepad, stick sensitivity and button mapping are crucial. In Destiny Rising, it’s a good idea to assign aiming and firing to triggers, dodges, and jumps to face buttons.
Read how to connect controllers to your device in our Destiny Rising Overview.
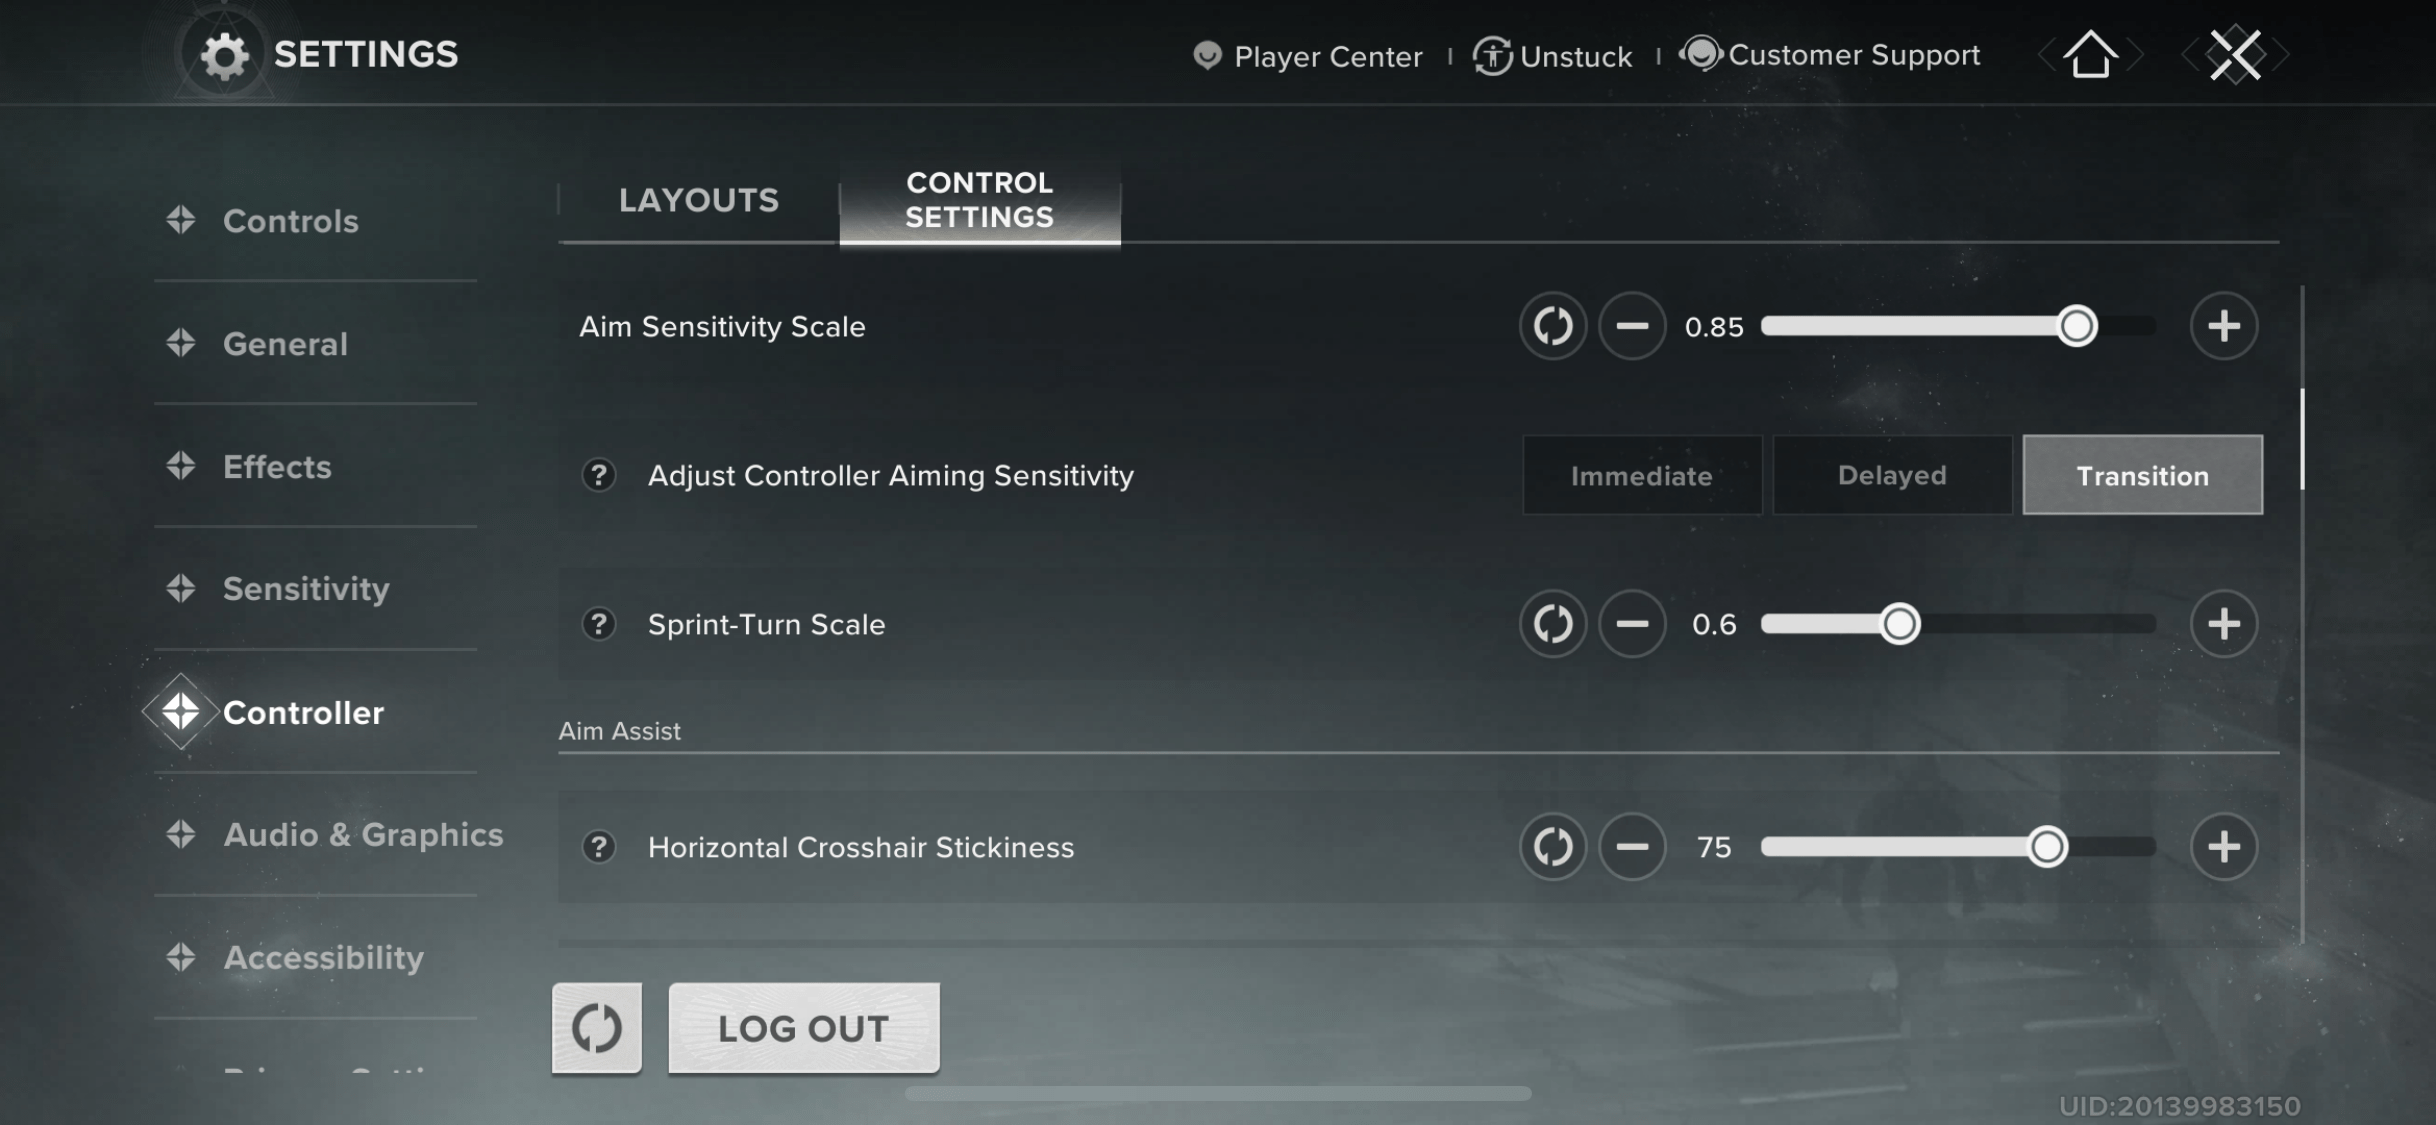
When configuring your controller within Destiny Rising, monitor these important options:
- Within the Control Settings menu, toggle the slider from Keep Touchscreen Layout to Controller Layout.
- It’s better to tweak the Horizontal / Vertical / Aim Sensitivity sliders slightly, checking at each level. Sensitivity is extremely personal, so experiment and find what works for you.
- Set Controller Aiming Sensitivity to Immediate or Transition. This is in order to prevent lag when switching modes and still be responsive in fast battles.
- Sprint-Turn Scale should be calibrated based on your experience using the controller. Lower values create slower, more fluid turns while sprinting.
- Test the best value for the Aim Assist to enable better targeting, but it’s better to avoid setting it to 0.
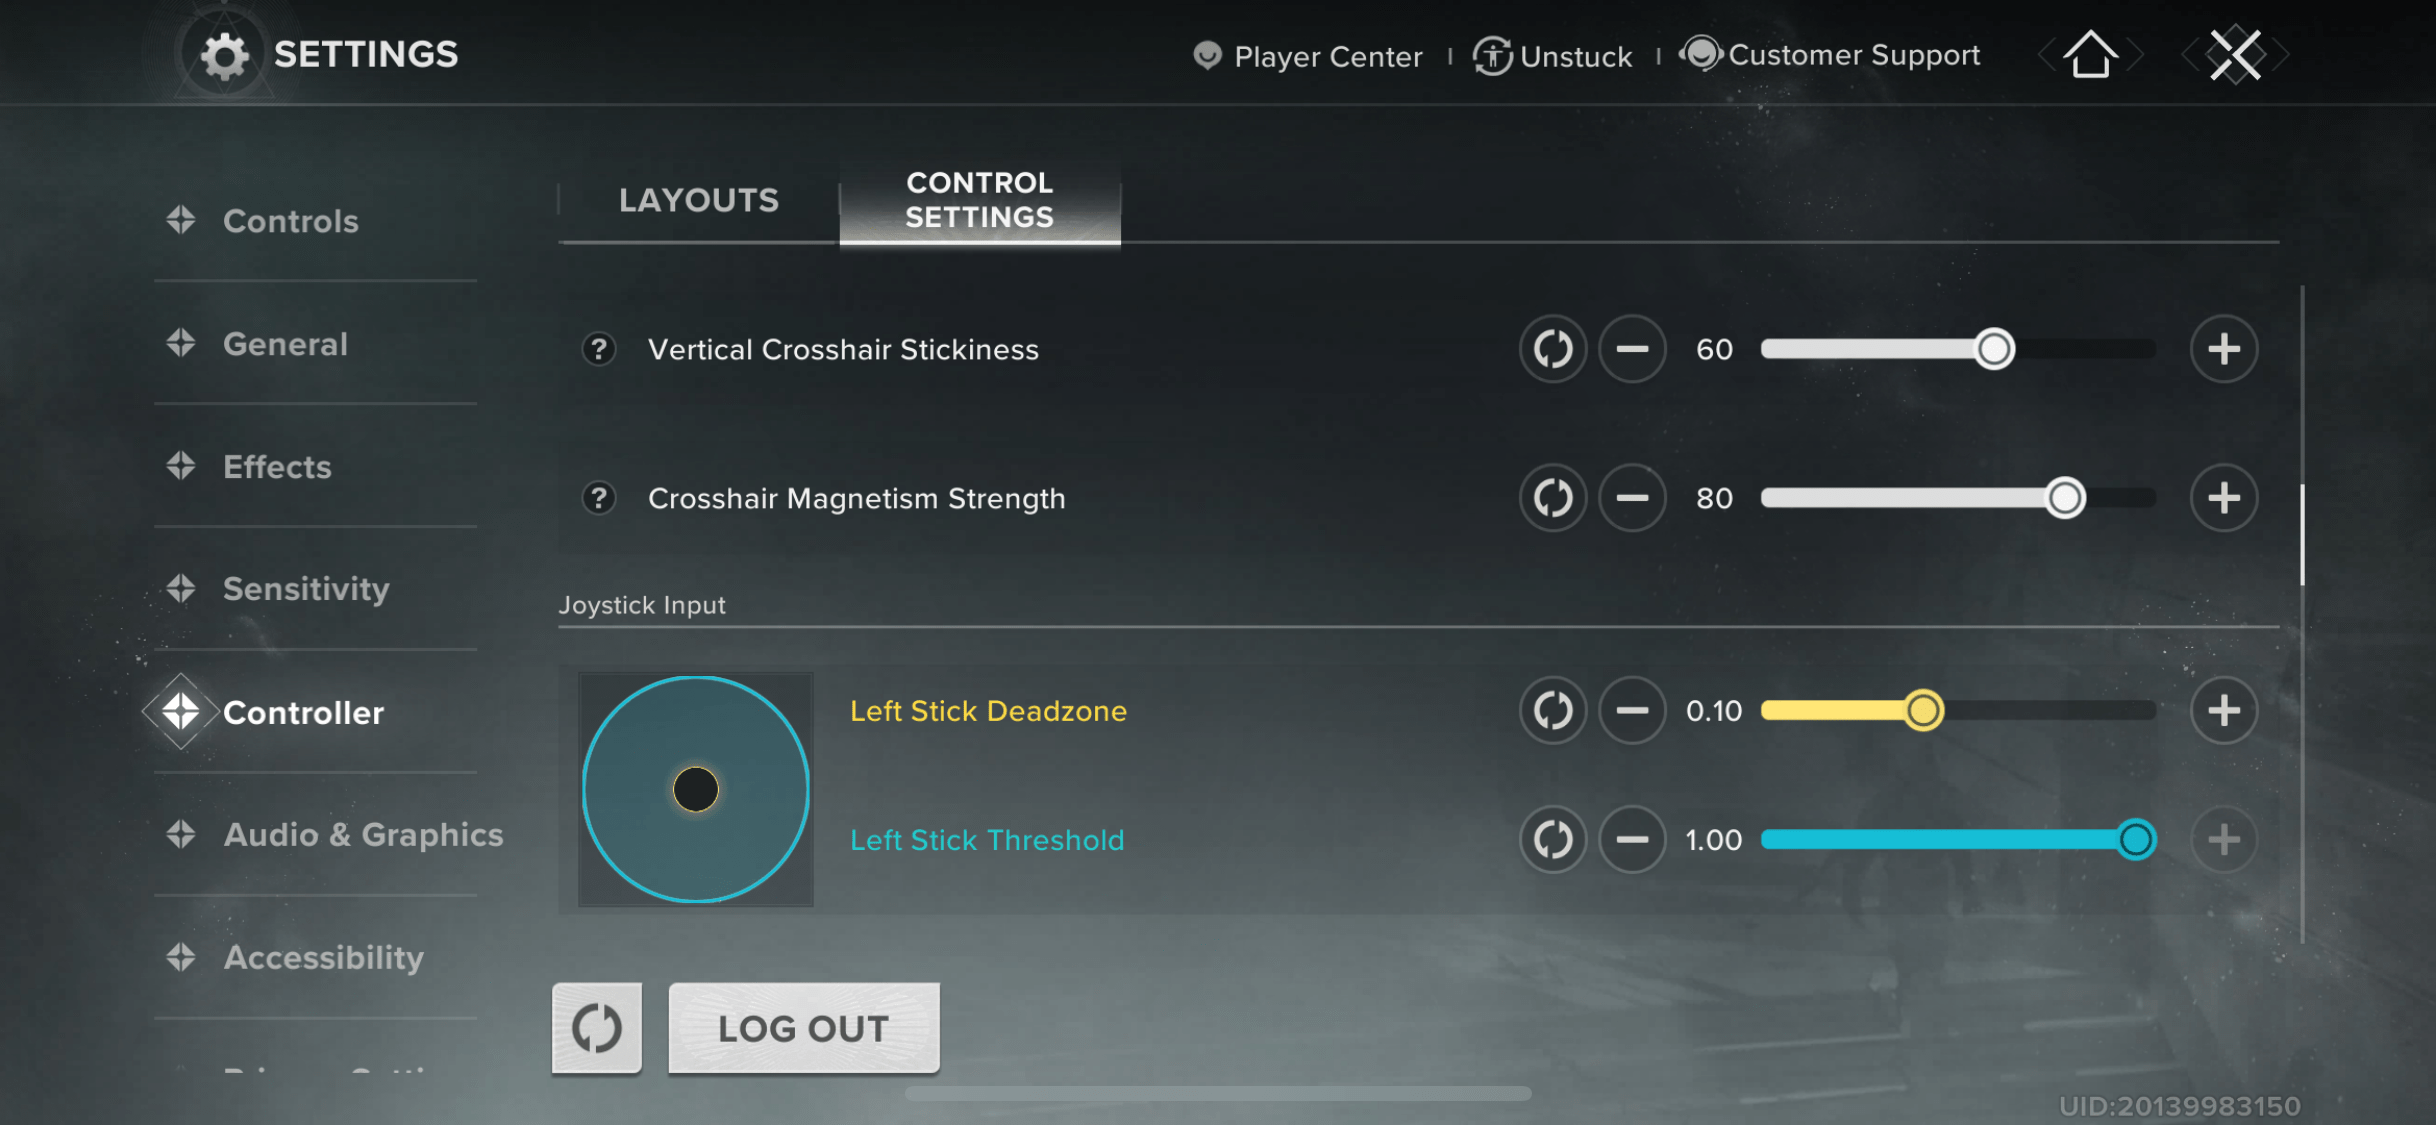
Most other Joystick Input settings are just up to personal taste, but built-in presets are usually excellent. You don’t need to tune it unless you like that extra bit of precision.
Destiny Rising Best PC Settings
Playing Destiny Rising on PC is possible thanks to BlueStacks and MuMuPlayer emulators. Therefore, to optimize your gameplay on PC, you need to look for Destiny Rising best settings for emulators.
Destiny Rising BlueStacks Emulator Settings
BlueStacks is one of the most popular programs used for Destiny Rising. BlueStacks emulator settings have the greatest visible impact on the appearance and performance of Destiny Rising on a PC. Correct CPU and memory resource allocation, as well as graphics and frame rate adjustments, are essential. Below is a table containing recommended values and quick comments on why each setting is critical.
| Setting | Recommended Value | Explanation |
|---|---|---|
| CPU Allocation | High (4 Cores) | Ensures stable performance without starving your system of resources |
| Memory Allocation | Extreme (12 GB) if available | Allocates more memory to reduce stutters and loading times |
| Performance Mode | High Performance | Fully unlocks system power for smoother gameplay |
| Frame Rate | 240 (max available) | Pushes the game beyond mobile limitations for ultra-smooth play |
| Enable High Frame Rate | On | Prevents FPS locking at 60 |
| Enable VSync | Off | Reduces input delay unless you specifically need screen tear control |
| Display FPS During Gameplay | On | Helps monitor performance in real time |
| Resolution | 2560×1440 (or higher if monitor allows) | Sharper visuals, especially for UI and text |
| Pixel Density | 320 DPI (High) | Best balance between crisp image and emulator performance |
| Mouse Cursor Style | BlueStacks | Keeps it consistent with emulator controls |
| Interface Scaling | 100% | Prevents UI scaling issues inside Destiny Rising |
BlueStacks also contains several performance modes that directly affect the performance of Destiny Rising:
- High Performance — the one to use when gaming, especially when you have 16GB+ RAM.
- Balanced Mode — a good option if you’re using other programs alongside the emulator.
- Low Memory Mode — for weaker PCs with less than 8GB RAM.
For most gamers, the best setting is High Performance + 240 FPS + 1440p/320 DPI, giving silky-smooth action with high-definition graphics.
Destiny Rising MuMuPlayer Emulator Settings
MuMuPlayer is also a suitable option to play Destiny Rising on the PC. In order to make the game smooth and the graphics sharp, you will have to optimize performance, graphics, and display settings. These are the key parameters that you must optimize in the emulator.
After changing parameters in MuMuPlayer, don’t forget to press Save Settings and restart the emulator to let the changes take effect. If you’re playing on a low-end PC, you can set the resolution lower and disable HD textures to keep it stable.
| Setting | Recommended Option | Explanation |
|---|---|---|
| Graphics Renderer | Vulkan (Exclusive) | Provides the best stability, smoothness, and image quality. Switch to DirectX only if you face issues. |
| Performance Mode | High (6–8 CPU cores, 8–12 GB RAM) | Ensures maximum smoothness. If you have 16 GB+ system RAM, allocate 12 GB for best results. |
| Resolution | 1920×1080 (standard) or 2560×1440 (high-res) | Higher resolutions give sharper visuals but demand more from your GPU. |
| Frame Rate | 120 FPS (or match your monitor refresh rate) | Ultra-smooth gameplay; avoid setting above your monitor’s limit. |
| Forced Use of Discrete GPU | On | Guarantees the game runs on your dedicated graphics card. |
| Smart Memory Optimization | Off | Disabling prevents potential stutter. Enable only on low-RAM PCs. |
| GPU Usage Strategy | Better Graphics Performance | Prioritizes image quality and smoothness; use “Less Resource Usage” only on weaker PCs. |
| Vertical Sync (V-Sync) | Off | Reduces input lag; turn on only if you notice screen tearing. |
| Screen Brightness & Style | 50–60%, Common | Balanced visibility without washing out colors. |
Most Destiny Rising gamers would agree that the optimal setting is Vulkan + 8 CPU cores + 8GB RAM + 1080p/120 FPS. This setting offers smooth graphics and smooth controls with no lag.
As you can see, finding the Destiny Rising Best Settings isn’t complicated at all. Now that you know the top setups for both mobile and PC, and have fine-tuned your weapon and aiming options, you’re fully ready to jump in and play.