Our Delta Force Best Operators guide breaks down the current operator rankings in Delta Force Season 10 Meltdown. We’ll go over every available operator, explain what makes them strong or situational, and share useful tips to help you get more value from each pick.
Delta Force Best Operators Key Takeaways:
- Delta Force Best Operators rankings are now updated for Season 10 Meltdown.
The latest season added N-Two, a new Engineer operator built around cryo control and area denial. - Our current S-Tier Operators are Luna, Raptor, Stinger, D-Wolf, Nox, and N-Two.
- A-Tier Operators are Gizmo, Vlinder, Tempest, Sineva, Shepherd, and Morse.
- B-Tier Operators are Hackclaw, Toxik, Vyron, and Uluru.
- Gizmo is still strong, but his Crawler Nest is less oppressive after Season 10 changes.
- Morse remains useful, though his jammer gives enemies more room to react now.
- Right now, the best Delta Force operators bring reliable recon, healing, area control, or fast pressure across Warfare and Operations.
 4.9
4.9Delta Force Operators Tier List

Delta Force Operators Tier List looks very different in Season 10 Meltdown. In this tier list, we break down the best Delta Force operators for the current season and explain which ones give you the most value right now.
| Tier | Operators |
|---|---|
| S-Tier | Luna, Raptor, Stinger, D-Wolf, Nox, N-Two |
| A-Tier | Gizmo, Vlinder, Tempest, Sineva, Shepherd, Morse |
| B-Tier | Hackclaw, Toxik, Vyron, Uluru |
If you’ve chosen one of these operators and want to level them up, our team is here to help. Our Delta Force Operators Leveling service ensures you quickly achieve your desired operator level while you focus on other tasks.
Delta Force S-Tier Operators
Delta Force S-Tier Operators are the strongest picks in the current season. These operators stand out because they bring the most reliable value in real matches, whether that means strong recon, clean support, aggressive pressure, or better control over key areas. In Delta Force Season 10 Meltdown, the best operators are those who can impact fights quickly and remain useful across both Warfare and Operations.
- Luna
- Raptor
- Stinger
- D-Wolf
- Nox
- N-Two
Luna
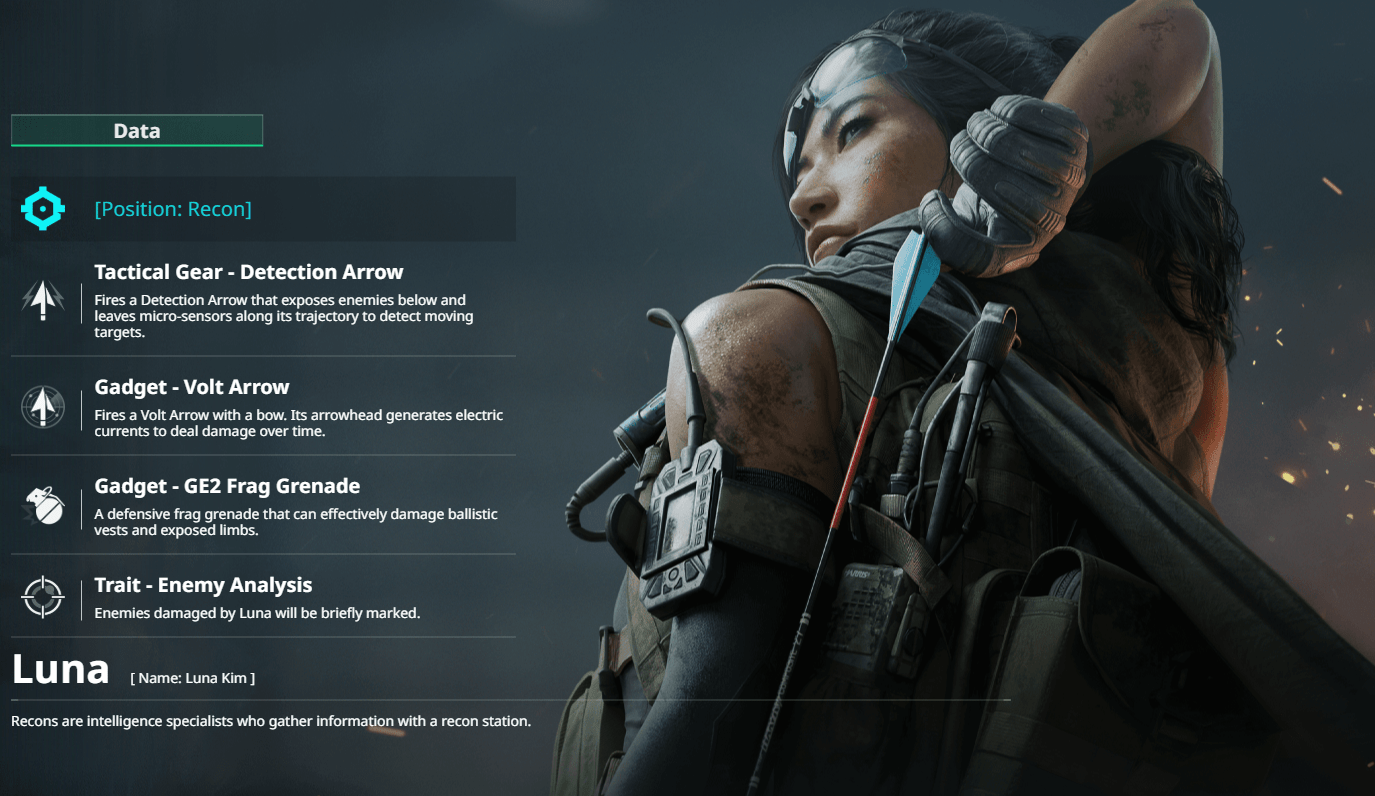
Luna is one of the best recon picks in Delta Force Season 10. She gives your team constant intel, punishes careless movement, and turns small openings into free kills. If you want a Delta Force operator who can scout, pressure, and support the squad at the same time, Luna is still one of the safest choices.
Luna strong operator, and you can easily convert her kit into real value. Detection Arrow helps your team read enemy movement before the fight starts, while Volt Arrow forces players out of cover and makes tight spaces much harder to hold. On top of that, Luna stays dangerous even after the scan, since damaged enemies remain easier to track and finish.
| Gear | Description |
|---|---|
| Detection Arrow | Fires a scanning arrow that reveals moving enemies along its path, making it a strong tool for checking routes, chokepoints, and hidden positions. |
| Volt Arrow | Launches an electric arrow that shocks enemies near the impact point. It is great for forcing players out of cover and disrupting defensive setups. |
| GE2 Frag Grenade | A simple but effective grenade for finishing tagged enemies, clearing corners, or adding pressure after a scan. |
| Trait | Luna’s passive helps reveal enemies she damages, which gives your team better follow-up and makes her even stronger in coordinated fights. |
Luna Tips
- Fire Detection Arrow over enemy routes, not straight at the ground. That usually gives you better scan value.
- Use Volt Arrow to break stubborn angles and push enemies out before your squad swings.
- Do not waste scans at random. Save them for rotations, contested zones, and risky pushes.
- If you tag someone and they fall back, keep pressure on them. Luna gets a lot from damaged targets.
- On larger maps, play a bit wider than your team so your scans cover more space.
- Hide Respawn Beacons behind wreckage, rocks, or foliage if you run them in Operations.
Raptor

Raptor is a pure Intel-focused recon operator in Delta Force. He does not need flashy mechanics to stay useful, because his value comes from finding enemies early, tracking rotations, and helping the squad take cleaner fights. If you want a Delta Force operator built around scouting, map control, and constant pressure through information, Raptor is one of the best picks for that job.
What makes Raptor so strong is how much his kit reveals without forcing risky plays. Trace Tracker helps you read enemy movement, Wing Cam keeps important targets marked, and Silver Wing gives you a strong scouting tool before your team commits. Add EMP utility on top, and Raptor becomes a great pick for breaking setups and making enemy positions much easier to punish.
| Gear | Description |
|---|---|
| Wing Cam | A spy camera that attaches to enemies and keeps pinging their position. It is great for tracking dangerous targets, watching rotations, and keeping pressure on players who try to fall back. |
| Silver Wing | A manually controlled drone that scouts a large area, marks enemies, and can help apply even more tracking pressure during a push or rotation. |
| EMP Grenade | A disruption grenade that disables enemy electronics and interferes with some attachments and sights. It is very useful for breaking gadgets and weakening defensive setups before your team moves in. |
| Trait | Trace Tracker lets Raptor gather intel from enemy footprints and opened containers in Operations, while in Warfare it warns him about incoming threats and helps him react faster. |
Raptor Tips
- Use Silver Wing before your team pushes, not after the fight already starts.
- Tag high-value enemies with Wing Cam so your squad can track them through repositioning.
- Scan footprints and opened containers in Operations to read where enemies moved and what they may be carrying.
- Throw EMP Grenade before a push when you expect traps, cameras, or defensive gadgets.
- Raptor works best when you stay alive and keep feeding intel instead of forcing every duel yourself.
- Call out marked enemies quickly. His kit gets much stronger when your team reacts fast.
Stinger
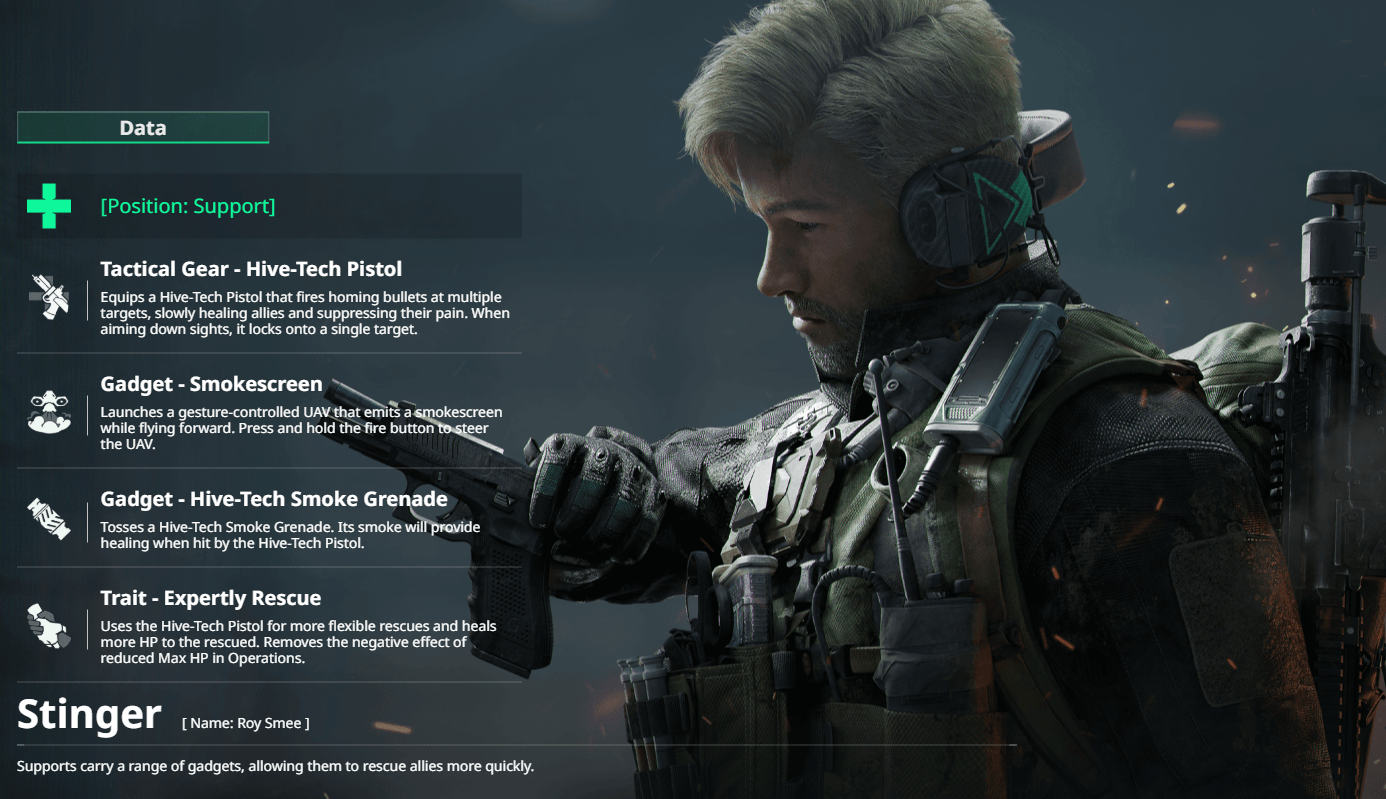
Stinger is still one of the best support picks in Delta Force, especially if your team plays fast and takes constant damage. His kit gives you reliable healing, safer revives, and enough smoke cover to keep pushes alive instead of watching them fall apart. In Delta Force Warfare, that value shows up all match long, but Stinger also feels great in Operations when your squad wants more sustain and cleaner resets.
The Hive-Tech Pistol keeps teammates topped up without forcing you to stand on them, while its smoke tools help your squad cross open ground, recover bodies, or stall a bad angle before it gets worse. He does not need flashy plays to carry value.
| Gear | Description |
|---|---|
| Hive-Tech Pistol | A healing pistol that fires tracking shots at allies, letting you restore health quickly without breaking your team’s pace. |
| Smokescreen Drone | A controllable drone that leaves a smoke trail as it moves. It is great for crossing open space, covering revives, or cutting enemy sightlines before a push. |
| Hive-Tech Smoke Grenade | A healing smoke grenade that creates cover and helps restore nearby allies inside the cloud, giving your team extra staying power during messy fights. |
| Trait | Stinger is built around a stronger revive value, making him even better when teammates go down in risky spots and need to get back into the fight fast. |
Stinger Tips
- Keep scanning your squad’s health bars. Small heals early are better than panic heals after two teammates drop.
- Use the Hive-Tech Pistol from safer angles so you can heal without exposing yourself for free.
- Send the Smokescreen Drone first when your team needs to cross a dangerous lane or recover a body in the open.
- Drop Hive-Tech Smoke Grenades where your team actually wants to hold, not just where the fight started.
- Play close enough to support the push, but not so close that you die with the front line.
- When a fight turns messy, focus on keeping one or two teammates alive instead of trying to save everyone at once.
D-Wolf
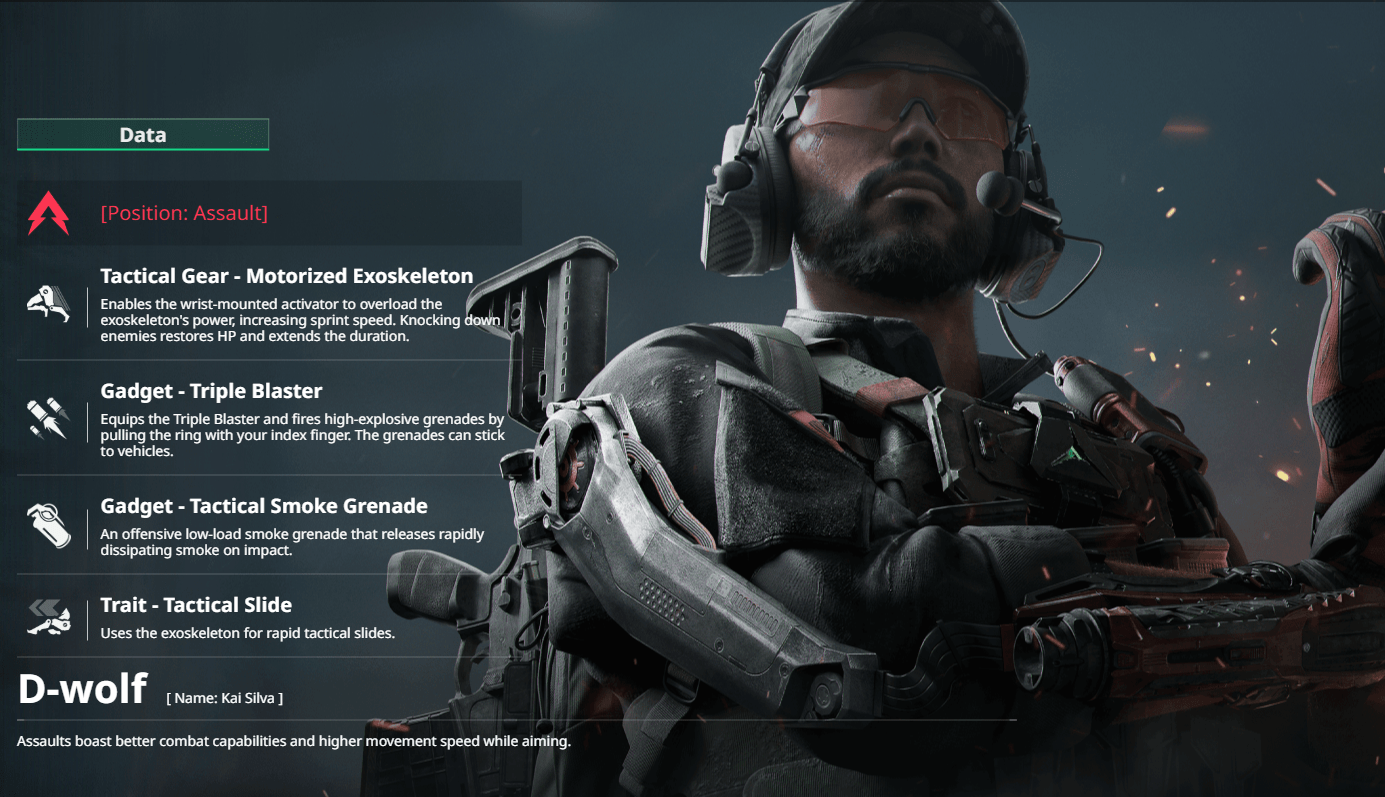
D-Wolf is still one of the strongest assault picks in Delta Force if you like fast entries and constant pressure. He fits the current Delta Force meta very well because his kit rewards aggressive movement, quick follow-up, and clean momentum during team fights. If you want an operator who can break angles, push through chaos, and keep the tempo high, D-Wolf remains a very strong choice.
Motorized Exoskeleton boosts his movement and fire rate, while Tactical Slide makes his repositioning much harder to read. Add the Triple Blaster and short smoke utility on top, and you get a Delta Force operator who can force openings instead of waiting for them.
| Gear | Description |
|---|---|
| Motorized Exoskeleton | Temporarily boosts movement speed and fire rate. Knocking enemies also restores HP and energy, which helps D-Wolf stay aggressive during longer fights. |
| Triple Blaster | A three-round grenade launcher that adds burst pressure in close and mid-range fights. It can also stick anti-vehicle grenades onto vehicles. |
| Smoke Grenade | A shorter-duration smoke that blocks vision just long enough to cross a lane, break sightlines, or start a fast push without giving up too much visibility. |
| Trait | Tactical Slide improves D-Wolf’s mobility and lets him reposition quickly, dodge fire, and enter fights from harder angles. |
D-Wolf Tips
- Use Motorized Exoskeleton right before you commit, not after the fight has already slowed down.
- Slide into off-angles and short cover positions to make your entry harder to track.
- Throw smoke to cut one sightline, then push the weaker side before the enemies reset.
- Use Triple Blaster to soften stacked enemies or punish players hiding behind cover.
- D-Wolf works best when you keep moving. Long, static duels waste a lot of his value.
- Pair him with recon intel so your aggressive pushes land before the enemy can react.
Nox

Nox is one of the most dangerous assault picks in Delta Force when you want speed, pressure, and clean flanks. His kit is built for breaking backlines, punishing weak positioning, and stopping enemies from resetting after they barely survive a fight. In the current Delta Force meta, that mix of stealth and disruption gives Nox real carry value in both Warfare and Operations.
Silent Assault lowers his audio presence, boosts his movement, and makes his entry much harder to track, while Tactical Flashbang and Whirlwind Disc give him strong tools for starting fights on his own. Add Deep Trauma on top, and Nox becomes the kind of Delta Force operator who keeps pressure on enemies even after the first burst of damage lands.
| Gear | Description |
|---|---|
| Silent Assault | Activates a disruptor that reduces Nox’s sound emissions, boosts movement speed, and interferes with nearby enemies. In Warfare, it makes him undetectable, while in Operations recon tools only detect the starting point. |
| Tactical Flashbang | A flashbang that detonates on contact, blinding and stunning enemies in the area. It is great for room clears, fast entries, and forcing defenders to lose the first shot. |
| Whirlwind Disc | Throws a tracking device that locks onto nearby targets, explodes, deals damage, inflicts wounds, and slows enemies. It locks faster when attacking from behind, which fits Nox’s flank-heavy playstyle. |
| Trait | Deep Trauma makes enemies recover more slowly after taking damage from Nox. In Operations, they take longer to heal and revive, while in Warfare their health regen starts later after combat. |
Nox Tips
- Use Silent Assault before you enter the fight, not after enemies already know where you are.
- Flash tight rooms and short corridors first, then swing while enemies are still disoriented.
- Throw Whirlwind Disc at players trying to retreat, heal, or hide behind cover.
- Nox gets more value from side angles and backline pressure than from long front-to-front duels.
- Push wounded enemies hard. Deep Trauma makes bad situations even worse for them.
- Pair Nox with recon scans so your flanks land faster and cleaner.
N-Two
N-Two is the new Engineer operator in Delta Force Season 10 Meltdown, and he already feels like one of the strongest control picks. His kit is built around cryo pressure, slows, and freezing effects, which makes him nasty around doors, corridors, vehicles, and objective pushes. If your team needs to stop a rush instead of chasing it, N-Two fits perfectly.
He is not just another defensive Engineer. Frost Launcher can pressure a whole area, Cryo-Flask creates a cold zone, and Homing Stun Grenade helps punish players trying to escape or swing back. In Operations, his cold effects reduce enemy fracture resistance, while in Warfare they can weaken vehicle handling.
| Gear | Description |
|---|---|
| Frost Launcher | Equips a launcher that fires up to six cryogenic grenades. Explosions deal damage and apply cryo effects. |
| Cryo-Flask | Throws a flask that creates a low-temperature zone on impact. Enemies inside suffer cold effects and cough. |
| Homing Stun Grenade | Throws an auto-tracking stun grenade that disrupts enemy vision and deals damage. |
| Trait | Frostbite slows and can freeze enemies in Operations, while Permafrost also reduces vehicle handling in Warfare. |
N-Two Tips
- Use Frost Launcher to stop pushes before enemies reach the objective.
- Throw Cryo-Flask into doors, stairs, and narrow lanes where players cannot leave fast.
- Save Homing Stun Grenade for enemies trying to swing, escape, or revive.
- In Warfare, use cryo effects near vehicle routes to slow down enemy pressure.
- N-Two works best when your squad follows up before frozen targets recover.
- Do not waste the full kit on random poke. His value comes from timing.
Delta Force A-Tier Operators
Delta Force A-Tier Operators are strong and reliable picks that can do a lot in the right hands. In Delta Force, these operators work best when you pick them for the right map, team setup, or playstyle instead of treating them as blind picks every game.
- Gizmo
- Vlinder
- Tempest
- Sineva
- Shepherd
- Morse
If you already have a few strong Delta Force operators, extra stash space makes the whole account feel much better. A bigger Safe Box gives you more room for gear, cleaner loadout management, and less downtime between runs, which pairs especially well with solid all-around picks that you plan to play for a long time.
Gizmo

Gizmo is still one of the best Engineer picks in Delta Force, but Season 10 made him a little easier to fight. His Crawler Nest now gives enemies more room to react, so he is less oppressive than before. Still, his traps, smoke control, and Corrosion pressure remain very useful on tight objectives.
Crawler Nest starts the fight by forcing movement, Smoke Mine slows and reveals enemies, and T.I.M. cleans up players who panic or try to run. Once Corrosion is active, enemies become much easier to finish, so Gizmo gets a lot of value from tight maps, doorways, and contested objectives.
| Gear | Description |
|---|---|
| Crawler Nest | Deploys a nest with three mechanical crawlers. They track nearby enemies, explode on contact, and apply Corrosion, which increases bullet damage taken. |
| Smoke Mine | Places smart smoke on hard surfaces. It activates when enemies get close, slows anyone inside, and marks Corroded targets in the smoke. |
| T.I.M. | Throws a self-propelled interception module that patrols forward, hunts enemies, and fires a restraining net that limits movement, blocks ADS, and disables gadgets. |
| Trait | Firewall improves Gizmo’s weapon handling when he stays close to his deployables, which makes him much stronger while holding his own setup. |
Gizmo Tips
- Place Crawler Nest near doorways, corners, and objective routes where enemies have less room to dodge.
- Use Smoke Mine after Corrosion starts rolling to slow targets and keep them marked.
- Throw T.I.M. into routes where enemies want to escape, not only where they first appear.
- Fight near your gadgets when possible, because Firewall gives you better handling in those duels.
- Gizmo works best when you prepare the area before the push starts.
- Pair him with recon scans so trapped enemies have even fewer ways out.
Vlinder
Vlinder remains a strong support pick for safer revives and squad sustains. In Warfare, her remote rescue score value improved, but her role did not change much. She is still best in coordinated teams that can play around rescue UAVs, Med Drones, and shaped smoke.
Her rescue UAVs help stabilize downed teammates, her Med Drones keep the squad healthier during longer trades, and her smoke adds extra cover when the team needs to reset or cross a dangerous lane. She is not the fastest support in the game, though she can keep a push alive for much longer than most operators.
| Gear | Description |
|---|---|
| Flutter Rescue UAVs | Deploys rescue UAVs that automatically fly to nearby allies and inject them with plasma. After that, you can move in and finish the rescue with a defibrillator. |
| Med Drones | Deploys medical drones that lock onto squadmates, follow them for a short time, and heal nearby allies during the push. |
| Windmill Smoke Grenade | A steerable smoke grenade that lets you shape the cover more carefully than a normal throw. |
| Trait | Bio Scan improves team recovery value, extends squad survival in Operations, and gives Vlinder better awareness of squad health while supporting. |
Vlinder Tips
- Use rescue UAVs early when teammates fall in dangerous spots, not after the whole fight collapses.
- Send Med Drones with the group that is actually pushing, not the squadmate staying far behind.
- Guide Windmill Smoke toward open lanes and body recovery spots where normal smoke angles feel awkward.
- Vlinder plays best a step behind the front line, where she can support without getting traded first.
- She gets much more value in coordinated squads than in random solo chaos.
Tempest

Tempest is still a dangerous assault operator in Delta Force, even if she no longer feels like a free S-Tier pick. Her whole kit rewards quick movement, sharp timing, and aggressive entries from angles that are hard to read. In the current Delta Force season, Tempest works best in the hands of players who like speed and can keep control during chaotic fights.
She can roll through pressure, punch enemies out of cover with Drill Charge, and set up a pullback point before taking a risky fight. That gives her a lot of room for flashy plays, but she still needs more clean execution than the most reliable top-tier operators.
| Gear | Description |
|---|---|
| Auxiliary Surge Spine | Boosts movement speed when Tempest is under fire and also improves her mobility in water. |
| Emergency Evasion Device | Places a safety anchor that Tempest can pull back to. If it is active, it can also give her a self-rescue after fatal damage. |
| Combat Roll | Lets Tempest roll in multiple directions and quickly change position while keeping her speed up. |
| Drill Charge | Throws a drill through cover, then releases an electric burst that shocks, paralyzes, and disarms enemies behind it. |
Tempest Tips
- Place Emergency Evasion Device before the fight starts, not when you are already losing the duel.
- Use Combat Roll to break enemy aim and swing from angles they do not expect.
- Drill Charge is strongest against stubborn cover players and tight choke points.
- Tempest gets less value from slow peeking and more from fast pressure chains.
- She works best when you keep momentum and avoid long front-to-front trades.
Sineva

Sineva remains one of the better frontline control operators in Delta Force. Sineva feels smoother in Season 10 after EOD Set handling changes. He is still an A-Tier frontline control pick, especially on tight routes and shield-friendly angles. Pick him when your team needs to take space slowly and make enemy pushes awkward.
EOD Set lets him take space and soak pressure, Grapple Gun gives him tricky utility around enemies and downed allies, and Razor Wire Grenade slows pushes before they really start. He shines most on tighter maps or any fight where your team wants to bully short lanes and hold ground.
| Gear | Description |
|---|---|
| EOD Set | A heavy shield setup built for frontlining, blocking pressure, and making close-range pushes much harder to stop. |
| Grapple Gun | Pulls enemies, downed allies, or gear crates, giving Sineva strong utility in tight fights and rescue situations. |
| Razor Wire Grenade | Explodes into razor wire that slows enemies, deals damage, and creates sound cues when players move through it. |
| Trait | Rear Protection gives Sineva extra protection from behind when the shield is not actively deployed, making his front-to-back control even stronger. |
Sineva Tips
- Push short lanes where your shield and wire can control the whole fight.
- Use Grapple Gun to punish isolated enemies or drag downed teammates back to safety.
- Throw Razor Wire where enemies want to rush, not where they already stopped moving.
- Do not overchase in open ground. Sineva is strongest when the fight stays close and awkward.
- He gets more value from space control than from raw fragging.
Shepherd
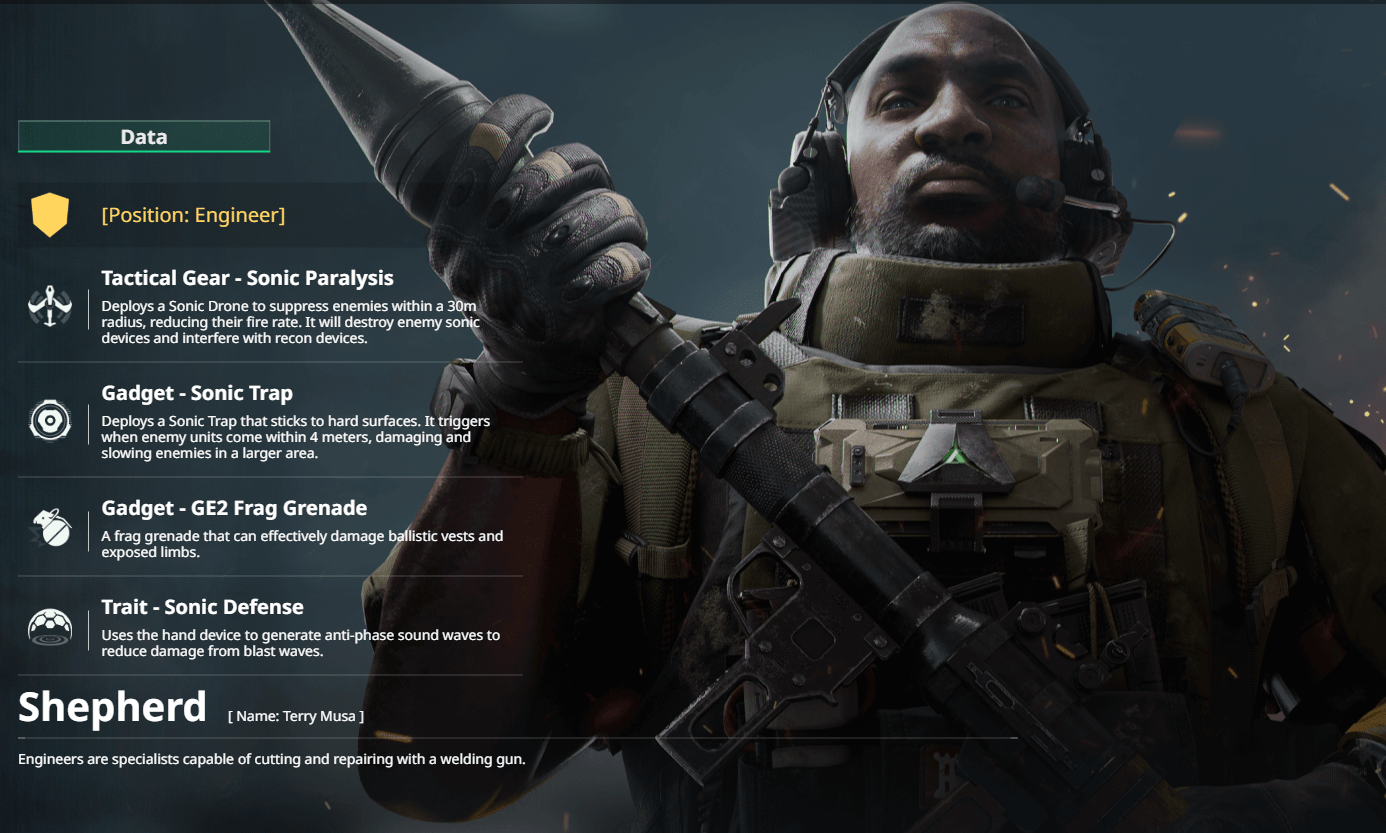
Shepherd feels slightly better in Season 10 because his Sonic Paralysis now gives more useful information. He is still not a flashy pick, but he can help squads hold routes and punish rushed entries. He works best on defense, short objective paths, and areas where enemies must push through sound pressure.
What makes Shepherd strong is how much control he brings to close and mid-range defense. His sonic tools suppress enemy movement, chip away at their confidence, and make rushed entries much less comfortable. He does not carry fights the same way a top recon or assault pick does, but he is very good at turning one section of the map into a bad place to push.
| Gear | Description |
|---|---|
| Sonic Paralysis | Deploys a Sonic Drone ahead to suppress enemies and reduce their fire rate through acoustic pressure. |
| Sonic Trap | A compact sonic trap that punishes enemy pushes and helps lock down tight routes and corners. |
| Frag Grenade | Adds direct pressure when enemies get stuck in a trap or hesitate during a push. |
| Trait | Shepherd’s sonic setup also helps reduce nearby explosive pressure, making his defensive holds harder to break. |
Shepherd Tips
- Set traps in routes enemies must cross, not in random space.
- Use Sonic Paralysis before the enemy fully swings so their push loses speed right away.
- Pair traps with your team’s crossfire instead of relying on gadget damage alone.
- Shepherd is strongest on defense, anchor play, and short objective routes.
- He gets less value when you keep rotating without setting up first.
Morse
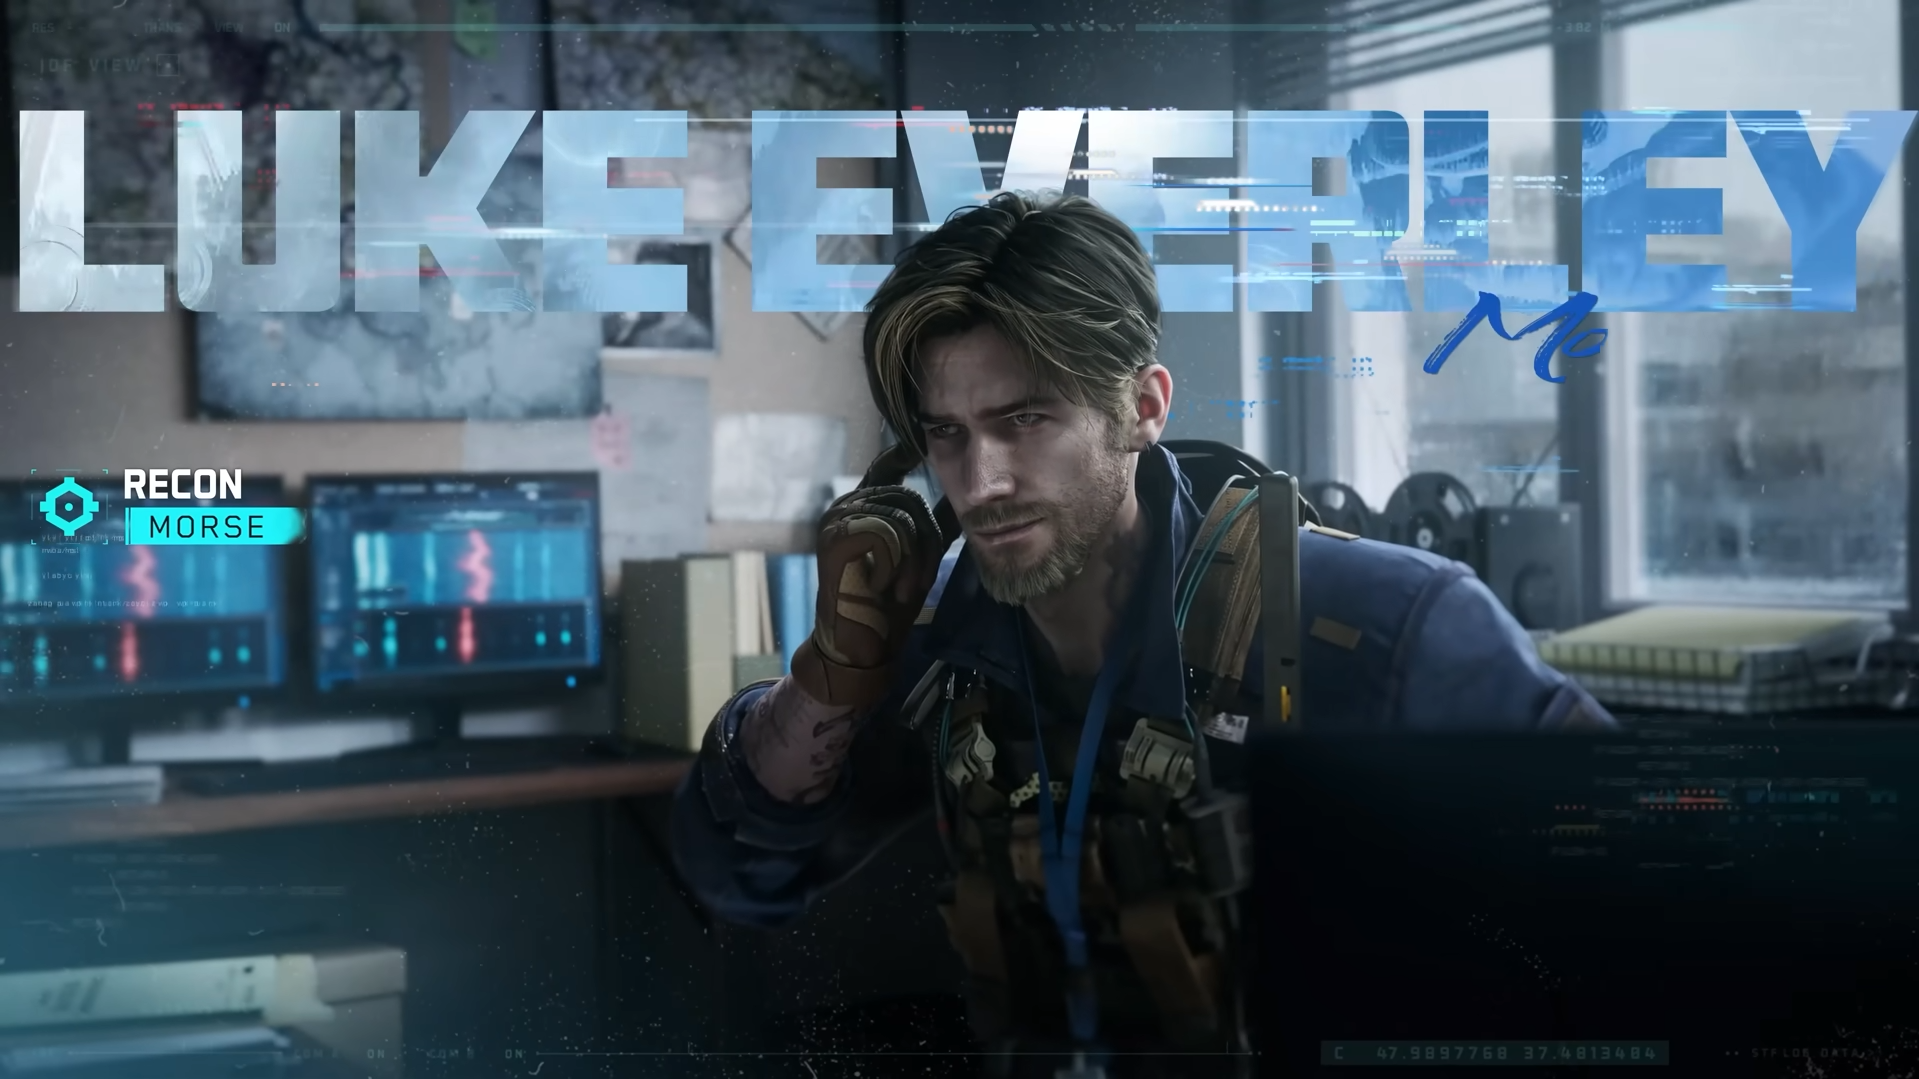
Morse is no longer the fresh Season 9 operator, but he remains a useful recon pick in Season 10. His jammer now gives enemies more warning and less harsh camera restriction, so he needs cleaner timing. Use him for sound-based intel, controlled pushes, and setup disruption instead of random solo swings.
Advanced Sonar Device checks contested areas, Throwable Jammer ruins enemy comfort, and Delayed Flashbang gives him a clean way to break timing. He feels strongest when you use him to force awkward reactions rather than just chasing raw damage.
| Gear | Description |
|---|---|
| Advanced Sonar Device | Deploys a detector that scans an area, counts enemies inside it, and precisely marks targets that make sound. |
| Throwable Jammer | A resonant disruptor that slows enemies, blurs vision, weakens turning, reduces hearing, and fills the area with sound interference. |
| Delayed Flashbang | A flashbang with a delayed detonation that blinds enemies facing the blast. |
| Trait | In Operations, Morse gains stronger hearing awareness through Sonic Sense. In Warfare, Sonic Sitrep helps him scout nearby enemy devices for personal intel. |
Morse Tips
- Drop Advanced Sonar Device before entering contested buildings or noisy choke points.
- Use Throwable Jammer to ruin enemy comfort before your team swings the angle.
- Delayed Flashbang works best when you throw it a beat earlier than players expect.
- Morse gets more value from controlled pushes than from random solo peeks.
- He is strongest when sound and timing decide the fight.
Delta Force B-Tier Operators
Delta Force B-Tier Operators can still work, but they usually need better timing, stronger team support, or a more specific map to shine. In Delta Force Season 10 Meltdown, these picks feel more situational because the current meta rewards faster intel, cleaner utility, and operators who bring steady value in almost every fight. They are still playable, though you often need more effort to get the same impact as higher-tier choices.
- Hackclaw
- Toxik
- Vyron
- Uluru
B-tier characters might not be the most effective in combat, which can make ranking up with your favorite operator a challenge. However, with a solid team, this can be easily overcome. Order our Delta Force Rank service and achieve your desired rank with the help of our pro players.
Hackclaw
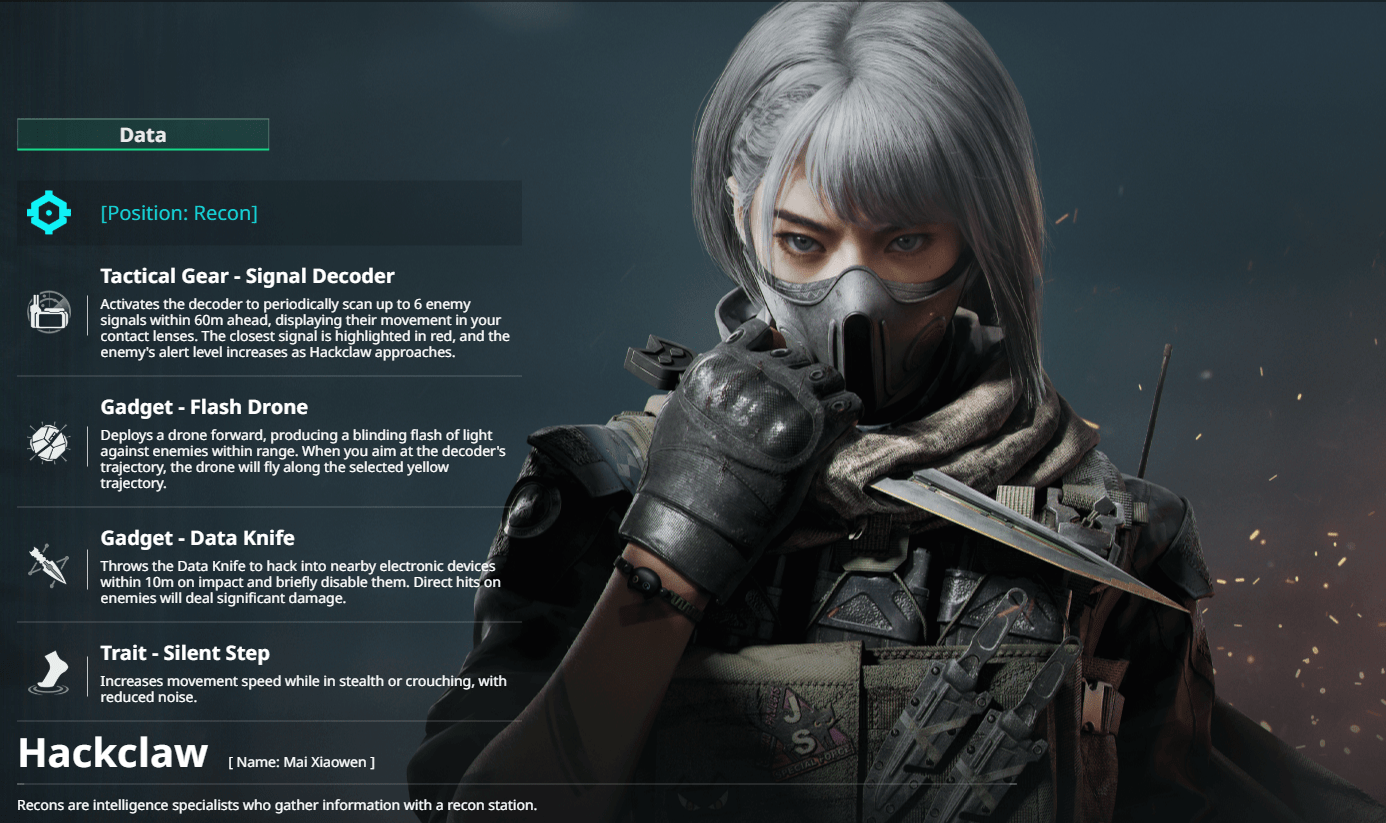
Hackclaw is still a tricky recon operator in Delta Force, but she feels more situational in the current season. Her kit is built around stealth, close intel, and gadget disruption, which gives her some strong moments on tighter maps and slower flanks. Still, Delta Force now rewards faster team-wide recon and more direct utility, so Hackclaw does not feel as reliable as the higher-tier recon picks.
What keeps Hackclaw useful is her mix of scouting and sabotage. Signal Decoder helps her read nearby threats, Flash Drone can disrupt enemies before a swing, and Data Knife punishes teams that lean too hard on gadgets. The problem is that her value often depends on timing and map flow, so she needs more setup than operators like Luna or Raptor.
| Gear | Description |
|---|---|
| Signal Decoder | Scans nearby enemies and helps Hackclaw gather close-range intel before taking a fight or pushing into a risky area. |
| Flash Drone | A drone that flies forward and blinds enemies, giving Hackclaw a clean way to start fights or force players off an angle. |
| Data Knife | A throwable knife that disables nearby electronic devices on impact and deals heavy damage on a direct hit, making it useful for both sabotage and picks. |
| Trait | Silent Step reduces footstep noise and improves movement while crouching or moving in stealth, helping Hackclaw take quieter routes and set up flanks. |
Hackclaw Tips
- Use Signal Decoder before entering tight buildings, corners, or contested rooms.
- Send Flash Drone in first when you expect enemies to hold a close angle.
- Throw Data Knife near beacons, traps, drones, and other gadgets instead of wasting it on empty space.
- Hackclaw works best on side routes and short flanks, not in straight front-line fights.
- Do not overforce stealth plays. Her value drops fast if the enemy already knows where you are.
- Play around timing and confusion, because Hackclaw is strongest when the fight starts on your terms.
Toxik
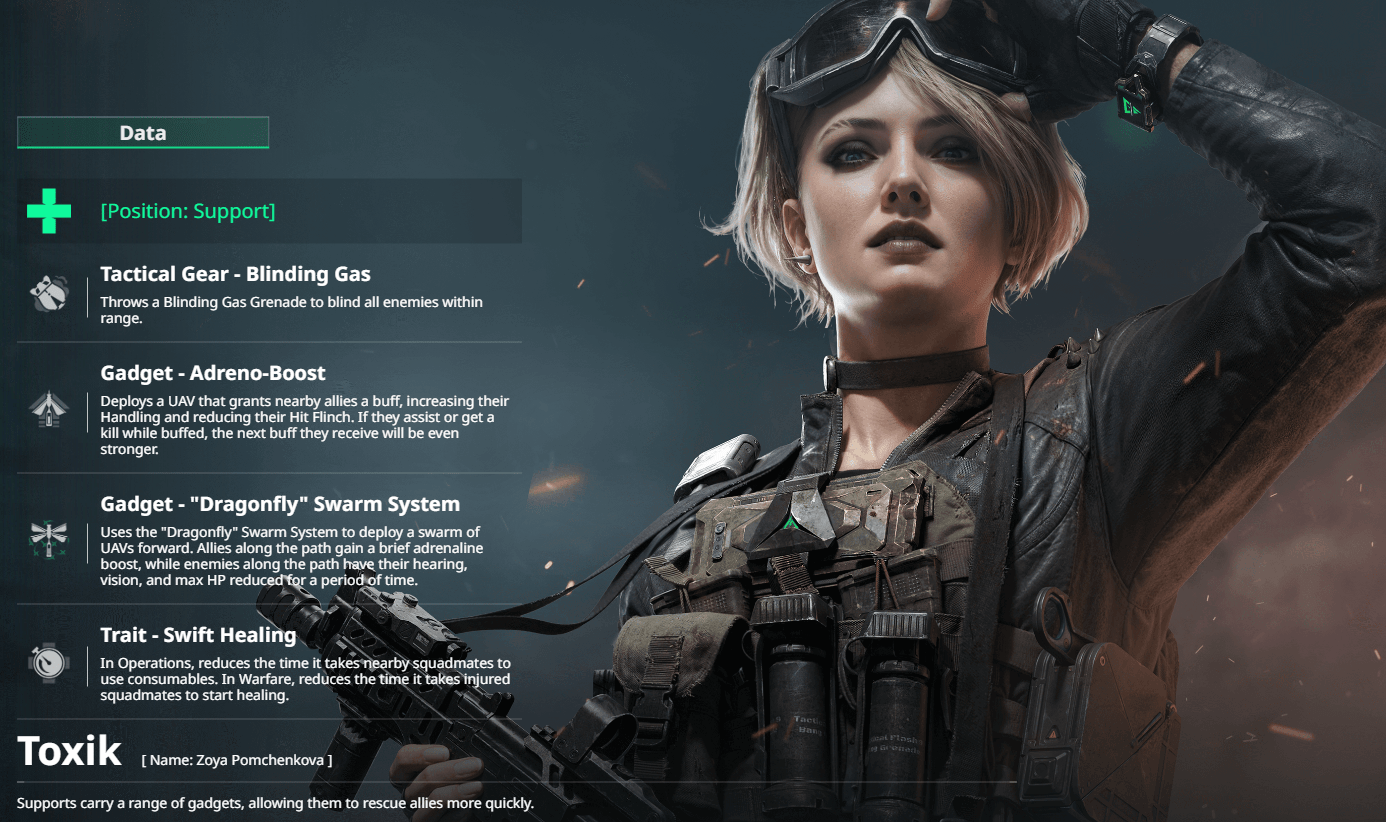
Toxik is a support operator in Delta Force who works best with an active, coordinated squad. She does not carry fights as easily as Stinger, but she can still bring strong value when your team stays close, takes fast trades, and pushes together. In the current Delta Force meta, that makes Toxik a decent B-Tier pick rather than a must-play support.
Dragonfly Swarm System can weaken enemies while helping allies push harder, Adreno-Boost improves weapon handling during key fights, and Blinding Gas makes short lanes and cover fights much more awkward for the enemy team. The issue is simple: if your squad does not follow up, a lot of her value just fades out.
| Gear | Description |
|---|---|
| Dragonfly Swarm System | Launches a drone swarm that disrupts enemies and helps create pressure during close team fights and aggressive pushes. |
| Adreno-Boost | Applies an adrenaline buff to nearby allies, improving handling and reducing flinch so your team can take cleaner fights. |
| Blinding Gas | Throws a gas grenade that blinds enemies inside the cloud, making it useful for breaking angles, forcing movement, or covering a push. |
| Trait | Swift Healing helps nearby teammates recover faster. In Warfare, it shortens health recovery delay, while in Operations it reduces consumable use time. |
Toxik Tips
- Stay near your squad. Toxik gets much more value when teammates can actually use her buffs.
- Use Adreno-Boost right before a push or trade, not after the fight already breaks apart.
- Throw Blinding Gas into tight lanes, stairways, and door fights where enemies have less room to leave the cloud.
- Use Dragonfly Swarm System when your team is ready to follow up, not as random poke.
- Toxik works better in coordinated groups than in scattered solo queue chaos.
- Play around team tempo. She is strongest when your squad keeps moving and fights together.
Vyron
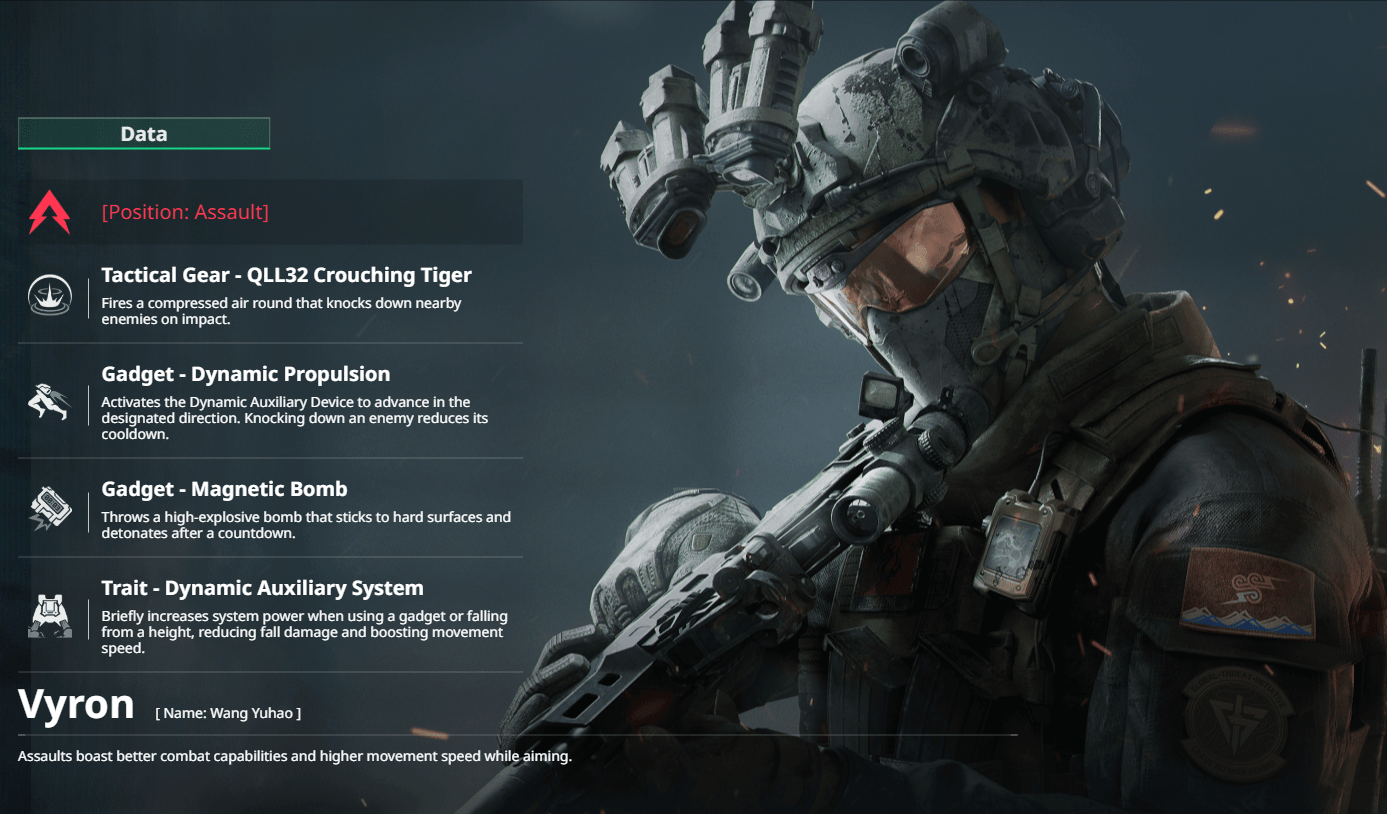
Vyron is a mobile assault operator in Delta Force who works best when you want to force close fights and keep moving. His kit is built around disruption, fast repositioning, and explosive pressure, which makes him dangerous in the right hands. Still, compared to more reliable top-tier picks, Vyron feels more situational and asks for cleaner timing to get full value.
QLL32 Crouching Tiger can knock enemies down in its area, Dynamic Auxiliary Device helps him reposition fast and cushion falls, and Magnetic Bomb gives him a sticky explosive tool for tight pushes and vehicle pressure. He can absolutely take over short-range fights, but he needs momentum and map knowledge more than most assault operators.
| Gear | Description |
|---|---|
| QLL32 Crouching Tiger | A shoulder-mounted launcher that fires a compressed air projectile and can instantly bring down enemies in its area of effect. |
| Dynamic Propulsion | Vyron’s mobility tool, built around the Dynamic Auxiliary Device, helps him reposition quickly, soften falls, and keep his movement harder to predict. |
| Magnetic Bomb | A throwable explosive with a built-in electromagnet that can stick to metal surfaces and detonate after a delay, making it useful in several close-range situations. |
| Trait | Vyron’s passive package supports his movement-heavy playstyle and works best when you keep chaining repositioning, pressure, and short-range entries. |
Vyron Tips
- Use Dynamic Propulsion to enter from odd angles, not only to run away after a bad push.
- QLL32 Crouching Tiger is strongest in tight lanes, short rooms, and clustered fights.
- Throw Magnetic Bomb where enemies must commit, not where they can just sidestep early.
- Vyron gets much more value when you keep tempo and avoid long, static duels.
- Play around cover and vertical movement so his mobility actually creates pressure.
- He works best on maps and routes where fast close-range entries matter more than long-range control.
Uluru
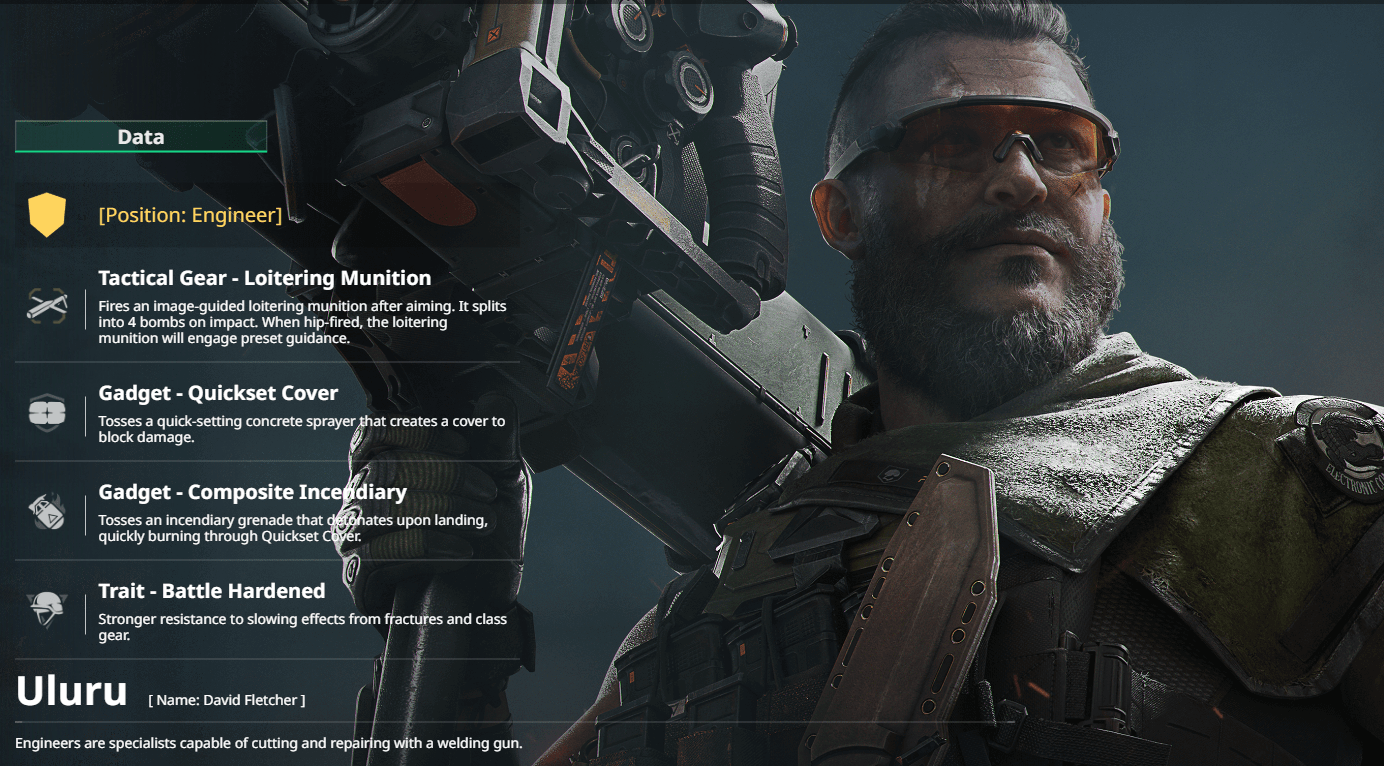
Uluru is an Engineer operator in Delta Force who plays much more aggressively than most defensive picks in his class. He is built around pressure, temporary cover, and explosive area denial, which makes him useful when your team wants to force space instead of just holding it. In the current Delta Force meta, that gives Uluru some real value, but he still feels more situational than the higher-tier operators.
His Loitering Munition helps pressure enemies from safer angles, Quickset Cover gives your team instant temporary protection during a push, and Composite Incendiary makes it harder for opponents to sit comfortably behind cover. He can absolutely swing short fights and awkward pushes, but he needs good timing and smart placement to get the most out of his kit.
| Gear | Description |
|---|---|
| Loitering Munition | A guided explosive strike tool that puts pressure on enemies at close, medium, or longer ranges and works best when you want to break formations or force movement. |
| Quickset Cover | Deploys a fast-forming concrete barrier that gives instant temporary cover, helping Uluru and his teammates push, reset, or hold a dangerous angle. |
| Composite Incendiary | An incendiary grenade that creates a dangerous burn zone, punishes enemy cover, and helps deny space during pushes or defensive stands. |
| Trait | Battle Hardened gives Uluru better resistance to slowing effects, which helps him keep pressure up when fights get messy. |
Uluru Tips
- Use Quickset Cover to create a new angle for your team, not just to hide after taking damage.
- Throw Composite Incendiary where enemies want to stay, not where they can leave for free.
- Use Loitering Munition to break clusters, corners, and stalled enemy positions before your team swings.
- Uluru gets more value from controlled pushes than from random solo peeks.
- Play him on tighter routes and objective fights where his cover and burn pressure matter more.
- He works best when your squad follows up on the space he creates.
Delta Force Season 10 Operator Meta Changes
Delta Force Season 10 Meltdown shifted the operator meta toward stronger area control and safer objective play. The biggest change is N-Two, a new Engineer operator built around cryo effects, slows, and freeze pressure.
N-Two fits the Season 10 meta well because AZ3 Nuclear Power Plant and Coliseum both reward teams that can block pushes and control tight routes. Luna, Raptor, Stinger, D-Wolf, and Nox still stay near the top because their kits bring steady value in most fights.
Gizmo is still strong, but he feels less oppressive after Crawler Nest changes. Morse also needs cleaner timing now, since his jammer gives enemies more room to react. Because of that, both operators fit better in A-Tier this season.
Delta Force Best Operators FAQ
This Delta Force Best Operators FAQ covers the most common questions about the current operator meta in Season 10 Meltdown.
Who Are The Best Operators In Delta Force Right Now?
The best operators in Delta Force Season 10 are Luna, Raptor, Stinger, D-Wolf, Nox, and N-Two. They bring the most reliable value across recon, support, pressure, and control.
Which Delta Force Operator Is Best For Beginners?
Stinger is the best beginner operator in Delta Force. His healing, smoke, and revive value help the team without forcing difficult mechanics.
Which Delta Force Operator Is Best For Warfare?
For Warfare, Stinger, Luna, Raptor, D-Wolf, and N-Two are very safe picks. They help with healing, intel, pushes, and objective control.
Which Delta Force Operator Is Best For Operations?
For Operations, Luna, Raptor, Stinger, Nox, and N-Two stand out the most. Intel, sustain, and control matter a lot when every mistake costs gear.
Is N-Two Good In Delta Force Season 10?
Yes, N-Two is one of the strongest new operators in Delta Force Season 10. His cryo kit slows enemies, blocks pushes, and adds strong control around objectives.
Is Gizmo Still Good In Delta Force Season 10?
Yes, Gizmo is still good, but he is less oppressive after Crawler Nest changes. He remains strong on tight maps and defensive setups.
Is Morse Still Worth Playing In Delta Force?
Yes, Morse is still worth playing if you like sound-based recon and disruption. His jammer is weaker now, so timing matters more.
Is Stinger Still Worth Playing In Delta Force?
Yes, Stinger is still one of the safest support picks in Delta Force. Healing, smoke, and revive value stay useful in almost every match.
Are B-Tier Operators Bad In Delta Force?
No, B-Tier operators are still playable. Hackclaw, Toxik, Vyron, and Uluru can work, but they need better timing or stronger team support.
Which Delta Force Operator Should You Unlock First?
Pick Stinger for support, Luna for recon, D-Wolf for aggressive Assault, or N-Two for Engineer control. These operators stay useful in many matches.
4.9We hope our Delta Force Best Operators guide has helped you choose the operator you’ll play in Delta Force Season 10. Good luck in your Delta Force combat operations!