This Blackwing Descent raid guide for World of Warcraft Cataclysm Classic will provide you with all the information you require to succeed. We will explore the raid’s location, layout, and loot table. You will also learn about the six bosses that you are going to encounter and how to defeat them. We also recommend that you read our How to Level Up Fast in Cataclysm Classic guide.
What is Blackwing Descent?
Blackwing Descent is a 6-boss raid instance in the Cataclysm expansion of World of Warcraft. It provides players with Tier 11 raid gear for killing the bosses on Normal or Heroic modes. It can be a 10-player raid or a 25-player raid, and the loot table will be slightly different depending on the chosen option. Just a reminder, Heroic mode will be more difficult but comes with greater rewards.
Blackwing Descent Location
Cataclysm Classic Blackwing Descent entrance is in the Blackrock Spire instance which is in the Eastern Kingdoms, southwest of Blackrock Mountain.

How to Get to Blackwing Descent?
To access the Cataclysm BWD raid entrance:
- Go to the eastern side of Blackrock Mountain.
- When you are in front of the mountain, go up the right side from the entrance.
- You will get to a balcony which was the last room of Blackwing Lair in a previous version of WoW Classic.
- The entrance to Blackwing Descent is at the back of this balcony. You can use the waypoint coordinates (/way 23. 2, 26. 3) to go straight to the right place.
What Level is Needed for Blackwing Descent?
Blackwing Descent in Cataclysm Classic is a raid that is available for max-level characters. This is available for players of level 85 and above to fight the bosses in the instance. You can achieve it quickly using our Leveling service. This level cap makes sure that the players have the right equipment and skills to handle the raid’s challenging mechanics.
Blackwing Descent Layout
Cataclysm Blackwing Descent is a massive two-floor raid instance. To go down to the lower floor and proceed through the Blackwing Spire, you will have to defeat two bosses you meet on your way. Deeper into the raid, there is the final boss Nefarian. Before you can challenge him, however, you’ll need to defeat all three bosses in the three chambers surrounding the central area.
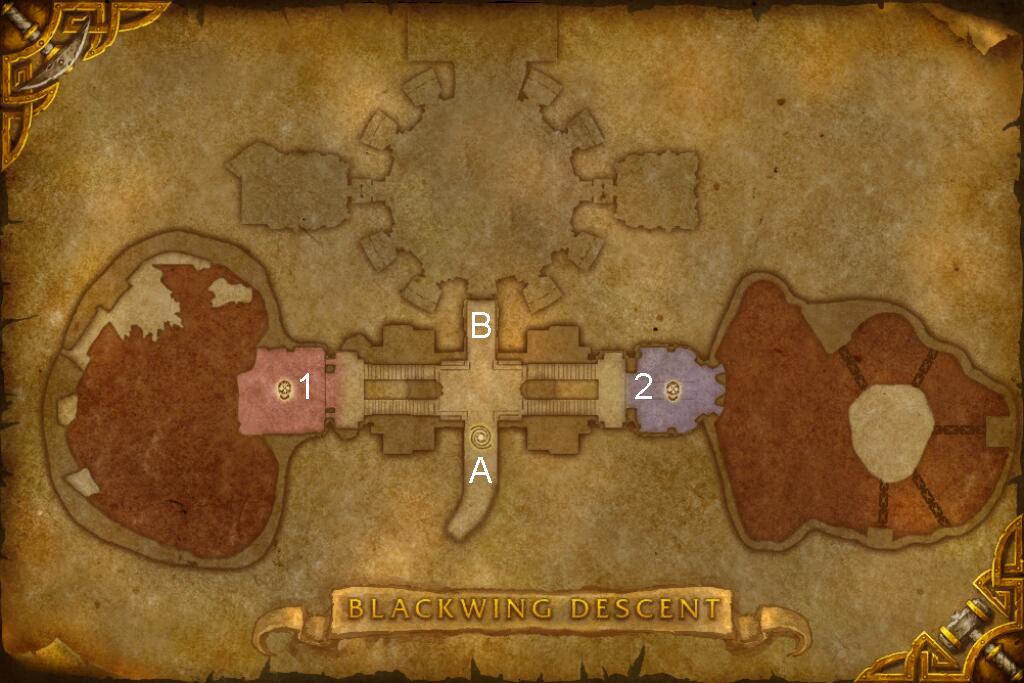
Top Floor
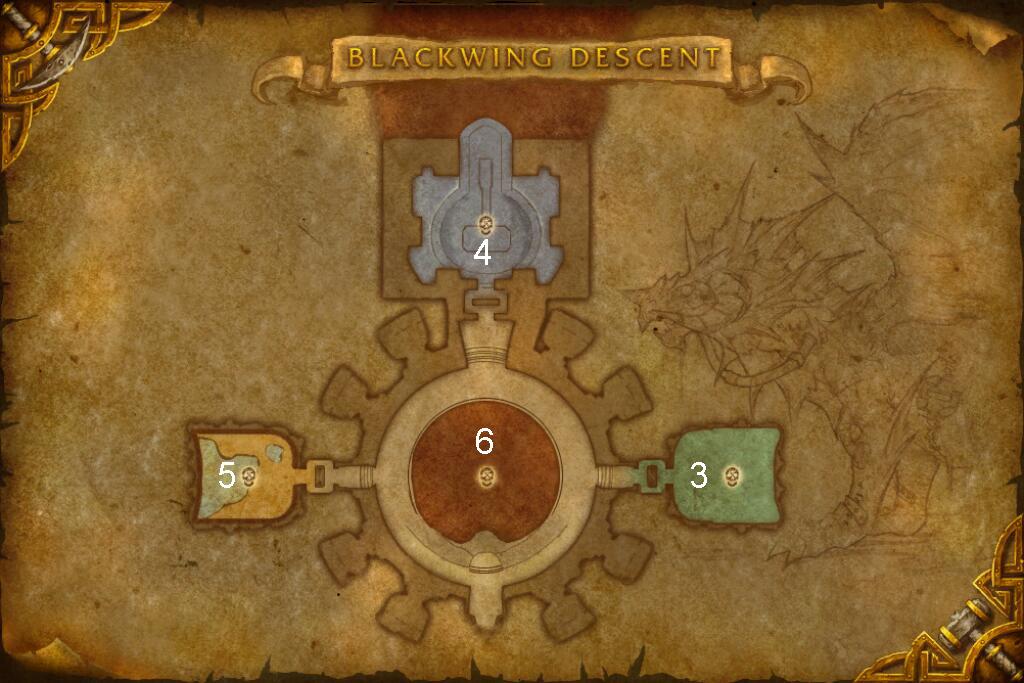
Ground Floor
Blackwing Descent Map Explained
A – Entrance, B – Stairs to the lower floor
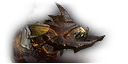
- Magmaw
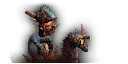
- Omnotron Defense System
- Maloriak
- Atramedes
- Chimaeron
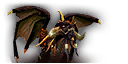
- Nefarian
Blackwing Descent Resets
BWD raid will be released on May 31 at 9 am CET and May 30 at 8 pm PST. WoW Cata BWD has a weekly lockout, hence you can clear it for loot once a week. Here is a Blackwing Descent reset timer to help you:
| Date | US Reset Time | EU Reset Time |
|---|---|---|
| June 4, 2024 | 8 p.m. PST | |
| June 5, 2024 | 9 a.m. CET | |
| June 11, 2024 | 8 p.m. PST | |
| June 12, 2024 | 9 a.m. CET | |
| June 18, 2024 | 8 p.m. PST | |
| June 19, 2024 | 9 a.m. CET | |
| June 25, 2024 | 8 p.m. PST | |
| June 26, 2024 | 9 a.m. CET |
Blackwing Descent Loot
The size of your raid group does not affect the item level of the gear dropped, but in a 25-player raid, you get more loot from one boss. However, Heroic difficulty offering better rewards for those who can conquer it:
| Mode | Item Level |
|---|---|
| Normal | 359 |
| Heroic | 372 |
Tier 11 gear in Blackwing Descent comes from tokens dropped by bosses. These tokens can be exchanged for specific pieces of gear or used with Essence of the Forlorn to purchase gear from NPCs:
| Faction | Vendor | Trades | Location | Coordinates |
|---|---|---|---|---|
| Alliance | Toren Landow | Tokens for gear | Hall of Champions, Stormwind City | 79.0, 70.1 |
| Alliance | Faldren Tillsdale | Essence of the Forlorn | Hall of Champions, Stormwind City | 79.1, 69.4 |
| Horde | Rugok | Tokens for gear | Valley of Strength, Orgrimmar | 48.2, 71.8 |
| Horde | Jamus’Vaz | Essence of the Forlorn | Valley of Strength, Orgrimmar | 48.7, 71.7 |
Tier tokens are dropped by the following bosses:
| Class | Maloriak (Heroic) | Atramedes (Heroic) | Nefarian (Normal) | Nefarian (Heroic) |
|---|---|---|---|---|
| Paladin Priest Warlock | Leggings of the Forlorn Conqueror | Gauntlets of the Forlorn Conqueror | Mantle of the Forlorn Conqueror | Shoulders of the Forlorn Conqueror |
| Warrior Hunter Shaman | Leggings of the Forlorn Protector | Gauntlets of the Forlorn Protector | Mantle of the Forlorn Protector | Shoulders of the Forlorn Protector |
| Rogue Death Knight Mage Druid | Leggings of the Forlorn Vanquisher | Gauntlets of the Forlorn Vanquisher | Mantle of the Forlorn Vanquisher | Shoulders of the Forlorn Vanquisher |
Now let’s look at all the loot drops from each boss in the BWD raid.
Magmaw Drops
10-Player Normal
| Slot | Item | Type |
|---|---|---|
| Head | Cloth Armor | |
| Legs | Cloth Armor | |
| Main Hand | Dagger | |
| Wrist | Leather Armor | |
| Chest | Leather Armor | |
| Legs | Mail Armor | |
| Waist | Mail Armor | |
| One-Hand | One-Handed Sword | |
| Chest | Plate Armor | |
| Feet | Plate Armor | |
| Trinket | Trinket | |
| Two-Hand | Two-Handed Mace |
10-Player Heroic
| Slot | Item | Type |
|---|---|---|
| Head | Cloth Armor | |
| Legs | Cloth Armor | |
| Main Hand | Dagger | |
| Wrist | Leather Armor | |
| Chest | Leather Armor | |
| Legs | Mail Armor | |
| Waist | Mail Armor | |
| One-Hand | One-Handed Sword | |
| Chest | Plate Armor | |
| Feet | Plate Armor | |
| Trinket | Trinket | |
| Two-Hand | Two-Handed Mace |
25-Player Normal
| Slot | Item | Type |
|---|---|---|
| Head | Cloth Armor | |
| Legs | Cloth Armor | |
| Main Hand | Dagger | |
| Wrist | Leather Armor | |
| Chest | Leather Armor | |
| Legs | Mail Armor | |
| Waist | Mail Armor | |
| One-Hand | One-Handed Sword | |
| Chest | Plate Armor | |
| Feet | Plate Armor | |
| Trinket | Trinket | |
| Two-Hand | Two-Handed Mace |
25-Player Heroic
| Slot | Item | Type |
|---|---|---|
| Head | Cloth Armor | |
| Legs | Cloth Armor | |
| Main Hand | Dagger | |
| Wrist | Leather Armor | |
| Chest | Leather Armor | |
| Legs | Mail Armor | |
| Waist | Mail Armor | |
| One-Hand | One-Handed Sword | |
| Chest | Plate Armor | |
| Feet | Plate Armor | |
| Trinket | Trinket | |
| Two-Hand | Two-Handed Mace |
Omnotron Defense System Drops
10-Player Normal
| Slot | Item | Type |
|---|---|---|
| Head | Cloth Armor | |
| Waist | Cloth Armor | |
| One-Hand | Dagger | |
| Shoulder | Leather Armor | |
| Shoulder | Leather Armor | |
| Chest | Mail Armor | |
| Chest | Mail Armor | |
| Wrist | Plate Armor | |
| Waist | Plate Armor | |
| Feet | Plate Armor | |
| Finger | Ring | |
| Finger | Ring |
10-Player Heroic
| Slot | Item | Type |
|---|---|---|
| Head | Cloth Armor | |
| Waist | Cloth Armor | |
| One-Hand | Dagger | |
| Shoulder | Leather Armor | |
| Shoulder | Leather Armor | |
| Chest | Mail Armor | |
| Chest | Mail Armor | |
| Wrist | Plate Armor | |
| Waist | Plate Armor | |
| Feet | Plate Armor | |
| Finger | Ring | |
| Finger | Ring |
25-Player Normal
| Slot | Item | Type |
|---|---|---|
| Head | Cloth Armor | |
| Waist | Cloth Armor | |
| One-Hand | Dagger | |
| Shoulder | Leather Armor | |
| Shoulder | Leather Armor | |
| Chest | Mail Armor | |
| Chest | Mail Armor | |
| Wrist | Plate Armor | |
| Waist | Plate Armor | |
| Feet | Plate Armor | |
| Finger | Ring | |
| Finger | Ring |
25-Player Heroic
| Slot | Item | Type |
|---|---|---|
| Head | Cloth Armor | |
| Waist | Cloth Armor | |
| One-Hand | Dagger | |
| Shoulder | Leather Armor | |
| Shoulder | Leather Armor | |
| Chest | Mail Armor | |
| Chest | Mail Armor | |
| Wrist | Plate Armor | |
| Waist | Plate Armor | |
| Feet | Plate Armor | |
| Finger | Ring | |
| Finger | Ring |
Maloriak Drops
10-Player Normal
| Slot | Item | Type |
|---|---|---|
| Back | Cloak | |
| Waist | Cloth Armor | |
| Legs | Cloth Armor | |
| Legs | Leather Armor | |
| Legs | Leather Armor | |
| Feet | Mail Armor | |
| Chest | Mail Armor | |
| One-Hand | One-Handed Mace | |
| Waist | Plate Armor | |
| Head | Plate Armor | |
| Hands | Plate Armor | |
| Trinket | Trinket |
10-Player Heroic
| Slot | Item | Type |
|---|---|---|
| Legs | Armor Token | |
| Legs | Armor Token | |
| Legs | Armor Token | |
| Back | Cloak | |
| Waist | Cloth Armor | |
| Legs | Cloth Armor | |
| Legs | Leather Armor | |
| Legs | Leather Armor | |
| Feet | Mail Armor | |
| Chest | Mail Armor | |
| One-Hand | One-Handed Mace | |
| Waist | Plate Armor | |
| Head | Plate Armor | |
| Hands | Plate Armor | |
| Trinket | Trinket |
25-Player Normal
| Slot | Item | Type |
|---|---|---|
| Back | Cloak | |
| Waist | Cloth Armor | |
| Legs | Cloth Armor | |
| Legs | Leather Armor | |
| Legs | Leather Armor | |
| Feet | Mail Armor | |
| Chest | Mail Armor | |
| One-Hand | One-Handed Mace | |
| Waist | Plate Armor | |
| Head | Plate Armor | |
| Hands | Plate Armor | |
| Trinket | Trinket |
25-Player Heroic
| Slot | Item | Type |
|---|---|---|
| Legs | Armor Token | |
| Legs | Armor Token | |
| Legs | Armor Token | |
| Back | Cloak | |
| Waist | Cloth Armor | |
| Legs | Cloth Armor | |
| Legs | Leather Armor | |
| Legs | Leather Armor | |
| Feet | Mail Armor | |
| Chest | Mail Armor | |
| One-Hand | One-Handed Mace | |
| Waist | Plate Armor | |
| Head | Plate Armor | |
| Hands | Plate Armor | |
| Trinket | Trinket |
Atramedes Drops
10-Player Normal
| Slot | Item | Type |
|---|---|---|
| Neck | Amulet | |
| Ranged | Bow | |
| Wrist | Cloth Armor | |
| Shoulder | Cloth Armor | |
| Head | Leather Armor | |
| Chest | Leather Armor | |
| Feet | Mail Armor | |
| Hands | Mail Armor | |
| Chest | Plate Armor | |
| Legs | Plate Armor | |
| Shield | Shield | |
| Trinket | Trinket |
10-Player Heroic
| Slot | Item | Type |
|---|---|---|
| Neck | Amulet | |
| Hands | Armor Token | |
| Hands | Armor Token | |
| Hands | Armor Token | |
| Ranged | Bow | |
| Wrist | Cloth Armor | |
| Shoulder | Cloth Armor | |
| Head | Leather Armor | |
| Chest | Leather Armor | |
| Feet | Mail Armor | |
| Hands | Mail Armor | |
| Chest | Plate Armor | |
| Legs | Plate Armor | |
| Shield | Shield | |
| Trinket | Trinket |
25-Player Normal
| Slot | Item | Type |
|---|---|---|
| Neck | Amulet | |
| Ranged | Bow | |
| Wrist | Cloth Armor | |
| Shoulder | Cloth Armor | |
| Head | Leather Armor | |
| Chest | Leather Armor | |
| Feet | Mail Armor | |
| Hands | Mail Armor | |
| Chest | Plate Armor | |
| Legs | Plate Armor | |
| Shield | Shield | |
| Trinket | Trinket |
25-Player Heroic
| Slot | Item | Type |
|---|---|---|
| Neck | Amulet | |
| Hands | Armor Token | |
| Hands | Armor Token | |
| Hands | Armor Token | |
| Ranged | Bow | |
| Wrist | Cloth Armor | |
| Shoulder | Cloth Armor | |
| Head | Leather Armor | |
| Chest | Leather Armor | |
| Feet | Mail Armor | |
| Hands | Mail Armor | |
| Chest | Plate Armor | |
| Legs | Plate Armor | |
| Shield | Shield | |
| Trinket | Trinket |
Chimaeron Drops
10-Player Normal
| Slot | Item | Type |
|---|---|---|
| Hands | Cloth Armor | |
| Feet | Cloth Armor | |
| Hands | Leather Armor | |
| Wrist | Leather Armor | |
| Wrist | Mail Armor | |
| Wrist | Mail Armor | |
| Shoulder | Plate Armor | |
| Feet | Plate Armor | |
| Hands | Plate Armor | |
| Finger | Ring | |
| Trinket | Trinket | |
| Ranged | Wand |
10-Player Heroic
| Slot | Item | Type |
|---|---|---|
| Hands | Cloth Armor | |
| Feet | Cloth Armor | |
| Hands | Leather Armor | |
| Wrist | Leather Armor | |
| Wrist | Mail Armor | |
| Wrist | Mail Armor | |
| Shoulder | Plate Armor | |
| Feet | Plate Armor | |
| Hands | Plate Armor | |
| Finger | Ring | |
| Trinket | Trinket | |
| Ranged | Wand |
25-Player Normal
| Slot | Item | Type |
|---|---|---|
| Hands | Cloth Armor | |
| Feet | Cloth Armor | |
| Hands | Leather Armor | |
| Wrist | Leather Armor | |
| Wrist | Mail Armor | |
| Wrist | Mail Armor | |
| Shoulder | Plate Armor | |
| Feet | Plate Armor | |
| Hands | Plate Armor | |
| Finger | Ring | |
| Trinket | Trinket | |
| Ranged | Wand |
25-Player Heroic
| Slot | Item | Type |
|---|---|---|
| Hands | Cloth Armor | |
| Feet | Cloth Armor | |
| Hands | Leather Armor | |
| Wrist | Leather Armor | |
| Wrist | Mail Armor | |
| Wrist | Mail Armor | |
| Shoulder | Plate Armor | |
| Feet | Plate Armor | |
| Hands | Plate Armor | |
| Finger | Ring | |
| Trinket | Trinket | |
| Ranged | Wand |
Nefarian Drops
10-Player Normal
| Slot | Item | Type |
|---|---|---|
| Neck | Amulet | |
| Head | Armor Token | |
| Head | Armor Token | |
| Head | Armor Token | |
| Back | Cloak | |
| Shoulder | Cloth Armor | |
| Chest | Cloth Armor | |
| Waist | Leather Armor | |
| Shoulder | Mail Armor | |
| One-Hand | One-Handed Axe | |
| Main Hand | One-Handed Mace | |
| Waist | Plate Armor | |
| Shoulder | Plate Armor | |
| Shield | Shield | |
| Trinket | Trinket | |
| Two-Hand | Two-Handed Sword |
10-Player Heroic
| Slot | Item | Type |
|---|---|---|
| Neck | Amulet | |
| Head | Armor Token | |
| Head | Armor Token | |
| Head | Armor Token | |
| Back | Cloak | |
| Shoulder | Cloth Armor | |
| Chest | Cloth Armor | |
| Waist | Leather Armor | |
| Shoulder | Mail Armor | |
| One-Hand | One-Handed Axe | |
| Main Hand | One-Handed Mace | |
| Waist | Plate Armor | |
| Shoulder | Plate Armor | |
| Shield | Shield | |
| Trinket | Trinket | |
| Two-Hand | Two-Handed Sword |
25-Player Normal
| Slot | Item | Type |
|---|---|---|
| Neck | Amulet | |
| Head | Armor Token | |
| Head | Armor Token | |
| Head | Armor Token | |
| Back | Cloak | |
| Shoulder | Cloth Armor | |
| Chest | Cloth Armor | |
| Waist | Leather Armor | |
| Shoulder | Mail Armor | |
| One-Hand | One-Handed Axe | |
| Main Hand | One-Handed Mace | |
| Waist | Plate Armor | |
| Shoulder | Plate Armor | |
| Shield | Shield | |
| Trinket | Trinket | |
| Two-Hand | Two-Handed Sword |
25-Player Heroic
| Slot | Item | Type |
|---|---|---|
| Neck | Amulet | |
| Head | Armor Token | |
| Head | Armor Token | |
| Head | Armor Token | |
| Back | Cloak | |
| Shoulder | Cloth Armor | |
| Chest | Cloth Armor | |
| Waist | Leather Armor | |
| Shoulder | Mail Armor | |
| One-Hand | One-Handed Axe | |
| Main Hand | One-Handed Mace | |
| Waist | Plate Armor | |
| Shoulder | Plate Armor | |
| Shield | Shield | |
| Trinket | Trinket | |
| Two-Hand | Two-Handed Sword |
Achievements
There are 16 achievements you can earn in Blackwing Descent, a raid instance from World of Warcraft: Cataclysm. Here’s a breakdown:
Personal Achievements
These are basic achievements awarded for defeating each boss in Blackwing Descent.
- Blackwing Descent
- Heroic: Magmaw
- Heroic: Omnotron Defense System
- Heroic: Maloriak
- Heroic: Atramedes
- Heroic: Chimaeron
- Heroic: Nefarian (rewards the Blackwing’s Bane title)
Guild Achievements
These require defeating bosses while in a guild group.
- Blackwing Descent Guild Run
- Heroic: Nefarian Guild Run
- Realm First! Nefarian (awarded to the first guild on the realm to achieve this)
Specific Achievements
These require completing specific tasks during boss encounters. All contribute to the Glory of the Cataclysm Raider meta-achievement.
- Parasite Evening (defeat Magmaw without parasite infection)
- Achieve-a-tron (defeat Omnotron Defense System while avoiding specific attacks)
- Silence is Golden (defeat Atramedes with sound bars below 50%)
- Full of Sound and Fury (defeat Chimaeron with no more than 2 deaths)
- Aberrant Behavior (kill 12 Aberrations and Maloriak within 10 seconds)
- Keeping it in the Family (damage Nefarian below 50% health before he lands in the final phase)
Rewards
Completing the Glory of the Cataclysm Raider meta-achievement grants you several rewards:
The Guild Glory of the Cataclysm Raider meta-achievement, earned by your guild, rewards the Reins of the Dark Phoenix mount.
Blackwing Descent Specific Rewards:
- Title: Blackwing’s Bane – Awarded for defeating Heroic: Nefarian.
- Temporary Title & Buff: Slayer of Stupid, Incompetent and Disappointing Minions and Master Adventurer Award – Earned by slaying Maloriak on Heroic difficulty. These effects disappear upon logging out or dying.
Blackwing Descent All Bosses Strategies
BWD in Cataclysm Classic is one of the most popular raids that contain bosses with unique mechanics. But with our All Raids Bundle, you can easily defeat them and complete all other raids, to get valuable rewards. Here’s a quick rundown of the encounters to help you defeat all the bosses in Blackwing Descent:
| Boss | Key Mechanics | Tactics | General Remarks |
|---|---|---|---|
 Magmaw | Magma Spit Pillar of Flame Lava Spew Molten Tantrum Mangle Massive Crash | Phase 1: Tank positions Magmaw for melee damage, handle parasites with AoE, manage rifts and fire attacks. Phase 2: React quickly to chain Magmaw, avoid hazardous areas, and coordinate tank rotation. | Maintain vigilance and coordination, adaptability to unexpected events, persistence. |
 Omnotron Defense System | Electron Magmatron Toxitron Arcanotron | Tank Management: Use two tanks for threat and positioning. Boss Rotation: Sync tank swaps and DPS transitions with energy levels. Shield Management: Avoid damaging bosses with active shields. | Optimize boss placement, assign interrupts, maintain environmental awareness, and ensure continuous healing. |
 Atramedes | Resonating Clash Sonar Pulse Modulation Sonic Breath Searing Flames Devastation Roaring Flame Breath Sonar Bomb Sonic Fireball | Ground Phase: Position tank in center, maneuver during Wave Breath, avoid disks, use gong for Searing Flame. Air Phase: Kite Atramedes, coordinate gong activation to redirect fire beam, focus on DPS and healing while avoiding bombs and fire. | Prioritize minimizing noise levels, ensure raid leader guides with strategic instructions, exercise caution during air phase, and maintain mobility. |
 Chimaeron | Caustic Slime Massacre Feud Break Double Attack Mortality | Phase 1: Manage tank Health, maintain raid members above 10k XP, position properly. Phase 2: Coordinate raid to withstand assault, use cooldowns and AoE heals. Final Phase: Distribute cooldowns, position strategically, maximize damage. | Remain vigilant for phase transitions, use resistances and cooldowns, maintain tactical insights and optimal class-specific ability usage. |
 Maloriak | Arcane Storm Remedy Consuming Flames Scorching Blast Biting Chill Flash Freeze Release Aberrations Debilitating Slime Magma Jets Absolute Zero Acid Nova | Red Phase: Share frontal breath damage, move debuffed players. Blue Phase: Spread out to avoid freezing effects. Green Phase: Release aberrations, manage OT’s tasks. Final Phase: Handle Fire Paths, Ice Bombs, Acid AoE, use Heroism/BL/Timewarp, focus DPS. | Employ cast deceleration effects, utilize Lokovian Felhunter, maintain control of aberrations, and ensure optimal raid management. |
 Nefarian | Electrocute Children of Deathwing Hail of Bones Shadowflame Breath Tail Lash Lightning Discharge Shadowflame Breath Tail Lash Electrical Overload Shadowflame Barrage Shadowblaze Spark | Phase 1: Position Onyxia and Nefarian, manage skeletons, time DPS on Onyxia. Phase 2: Handle Lava and Chromatic Prototypes, extend phase for DPS. Phase 3: Avoid pillar punishment, manage Shadowflame, prioritize healer Mana, use Heroism/BL/Timewarp for DPS. | Balance phase distribution, adapt to individual lava speeds, maintain readiness for random attacks, ensure coordination across all phases for successful navigation of Nefarian’s encounter. |
The Best Classes for Blackwing Descent
Here are some of the top classes for Blackwing Descent in World of Warcraft Cataclysm Classic, taking into account both raid utility and damage output.
Damage Dealers:
- Fire Mage: They are characterized by good single-target and area of effect damage. They do need good equipment to really excel, but even with the right equipment, the numbers are very high.
- Elemental Shaman: They are also capable of providing very high amounts of AoE damage and good single-target damage as well. They come with the Bloodlust raid cooldown which increases the cast rate of the entire raid for a few seconds.
- Beast Mastery Hunter: Ranged physical DPS specialization that focuses on maintaining consistent single-target damage. They are not very complex to master but can be quite challenging when it comes to optimizing them.
- Assassination Rogue: Assassination Rogues is another powerful specialization for single-target damage dealing. They have practical crowd control and can be quite mobile which may come in handy in some situations.
Healers:
- Holy Priest: One of the best healers for BWD raid. They have high single-target healing and a variety of utility spells to ensure the raid group’s survivability.
- Restoration Druid: Another good healing choice. They provide good AoE healing and HoTs which are important to keep the raid members’ Health high.
Tanks:
- Protection Warrior: The main tanking class for Blackwing Descent. They are great at generating threat and staying alive.
- Protection Paladin: Another viable tank option. They have high single-target threat generation and very good self sustain.
The Best Blackwing Descent Consumables
Consumables are a tool that every Cataclysm Classic raider should have as they grant temporary bonuses to stats, Health, Mana, or other bonuses. Here are some of the best consumables for Blackwing Descent.
- Greater Fire Protection Potion: A no-brainer against all those fire-breathing dragons!
- Greater Shadow Protection Potion: Especially useful against Nefarian and some trash mobs.
- Limited Invulnerability Potion: For those oh-crap moments when you pull aggro.
- Mongoose for Melee, Mighty Agility for Hunters, Mageblood for Mages: Enhance your stats for maximum damage.
- Buff foods like Spicy Crawdad and Spiced Wolf Meat: Keep your stats buffed throughout the raid.
- Mana Potion / Super Mana Potion (Casters): Keep your Mana pool topped for those long fights.
- Healing Potion / Super Healing Potion: For emergencies and to help out healers.
- Free Action Potion (Tanks): A must-have to cleanse crowd control effects.
- Heavy Runecloth Bandage: The best bandages available for Health regeneration.
With the help of the detailed boss guides, loot tables, and consumable suggestions provided in this guide, you should be able to secure the rewards of Blackwing Descent. Get ready, plan with your raid team, and prepare to conquer the fiery lair of Nefarian. This raid instance is quite a challenge, but it is well worth it for the glory, powerful loot, and satisfaction!
